


To enhance productivity, you may want to add a second monitor to your Windows 7 computer. And this article tells you all you need to know about Windows 7 dual monitor setup.
Follow these steps
- Connect your external monitor to your computer
- Set up dual monitors in Windows 7
- Troubleshoot dual monitor issues in Windows 7
Step 1: Connect your external monitor to your computer
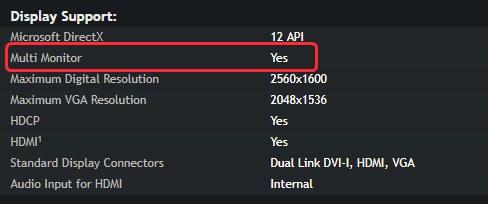
1) Check your graphics card
Most desktop PC graphics or video cards can support two or more monitors, depending on the graphics card and PC specifications. But laptop PCs can support up to two monitors depending on the PC specifications.
You can check the information of your graphics card by going to the hardware manufacturer’s website, and searching for your graphics card. An example:
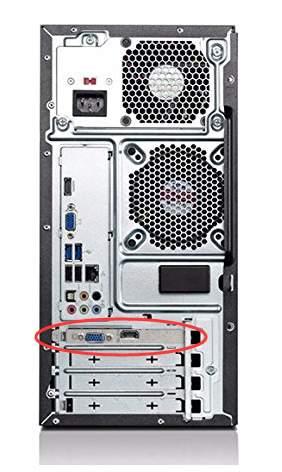
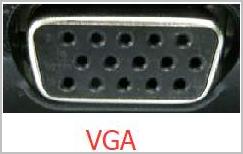
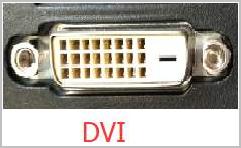
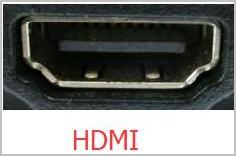
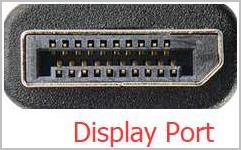
2) Compare the physical connections
Compare the available video ports on your computer with those on your monitor to find which one(s) they have in common.
- On a desktop computer: The video ports are located on the back of the computer.
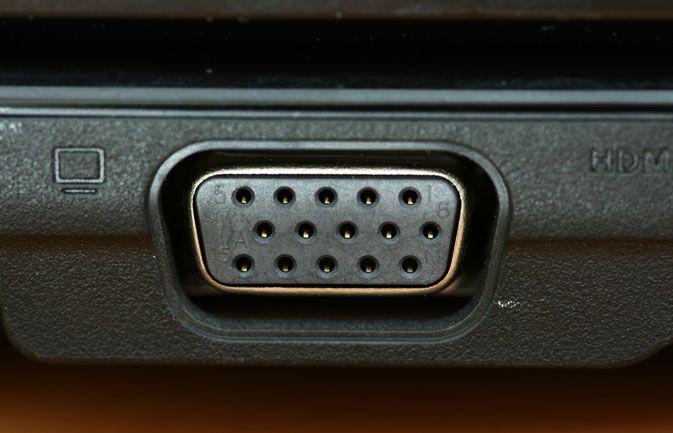
- On a laptop computer: The video ports may be on the back, left or right-hand side of the computer.
- On a monitor: The video ports may be on the back of the monitor or on a overhang parallel to the stand.

- Video Graphics Array (VGA) is normally color-coded with blue plastic and labels.
- Digital Video Interface (DVI) is usually color-coded with white plastic and labels.
- High-Definition Multimedia Interface (HDMI) can connect all kinds of video devices and provide sounds through the cable.
- Display Port (DP) can provide an interface with an optional audio high-definition content protection.
3) Connect the video and power cables
- Plug in the power cord to your monitor and the power outlet.
- Make sure your computer is turned on.
- Connect your monitor to your computer using a compatible cable. This cable should already be provided by the monitor manufacturer.
- Once the cables are connected securely, your Windows 7 computer should automatically detect and display the desktop screen on the connected monitors. By default, Windows 7 will duplicate the displays on all monitors.
Step 2: Set up dual monitors
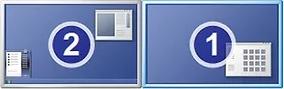
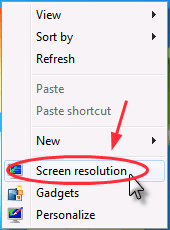
- Right-click on any empty area of your Windows desktop, and select Screen resoltution.
- You’ll see your two displays are labelled as 1 and 2. Usually, display 1 is your original monitor, and display 2 is the second external monitor. Click display 2.
- From the drop-down menu next to Multiple displays, select either Duplicate these displays or Extend these displays.
The “duplicate” option will display the same screen on both monitors, and the “extend” option will allow you to navigate a full screen on both monitors.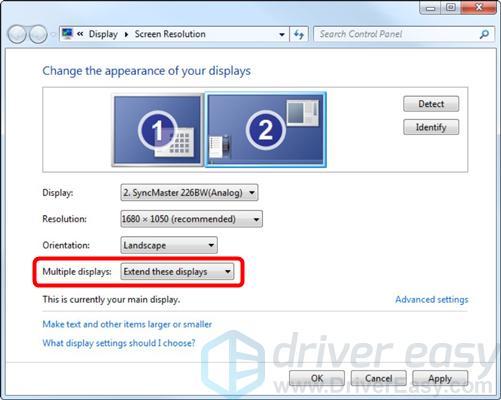
- Click OK. And you’re now able to use dual monitors in Windows 7. Congrats!
Step 3: Troubleshoot dual monitor issues in Windows 7
If your computer can’t detect the external monitors, make sure all the cables are properly connected, and do some tests with an alternative monitor and another cable.
If you still can’t set up the external monitors in Windows 7, it may be caused by a graphics card driver problem. You can update your graphics card driver to better troubleshoot the problem.
There’re two ways to update your graphics card driver: manually and automatically.
Update your graphics card driver manually — You can update your driver manually by going to the hardware manufacturer’s website, and searching for the latest driver for your graphics card. But if you take this approach, be sure to choose the driver that’s compatible with the exact model number of your hardware, and your version of Windows.
OR
Update your graphics card driver automatically — If you don’t have the time, patience or computer skills to update your driver manually, you can, instead, do it automatically with Driver Easy. You don’t need to know exactly what system your computer is running, you don’t need to risk downloading and installing the wrong driver, and you don’t need to worry about making a mistake when installing. Driver Easy handles it all.
- Download and install Driver Easy.
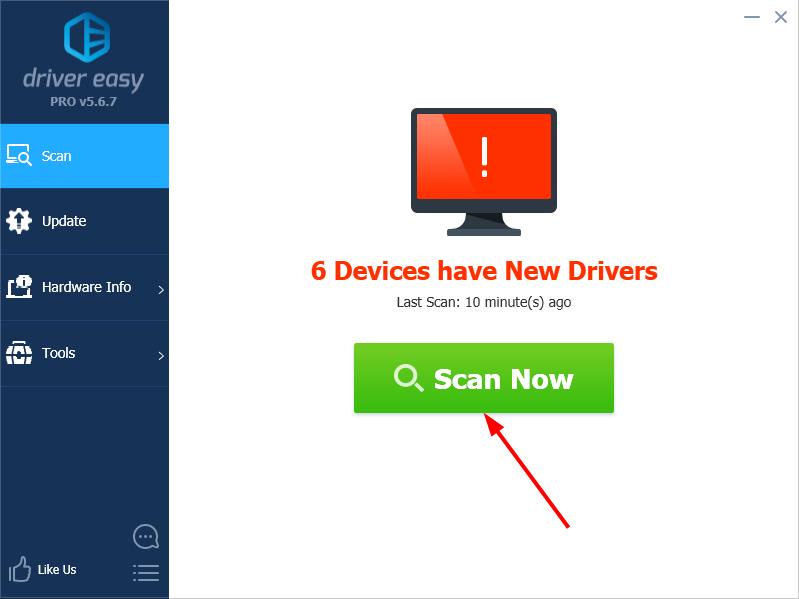
- Run Driver Easy and click Scan Now. Driver Easy will then scan your computer and detect any problem drivers.
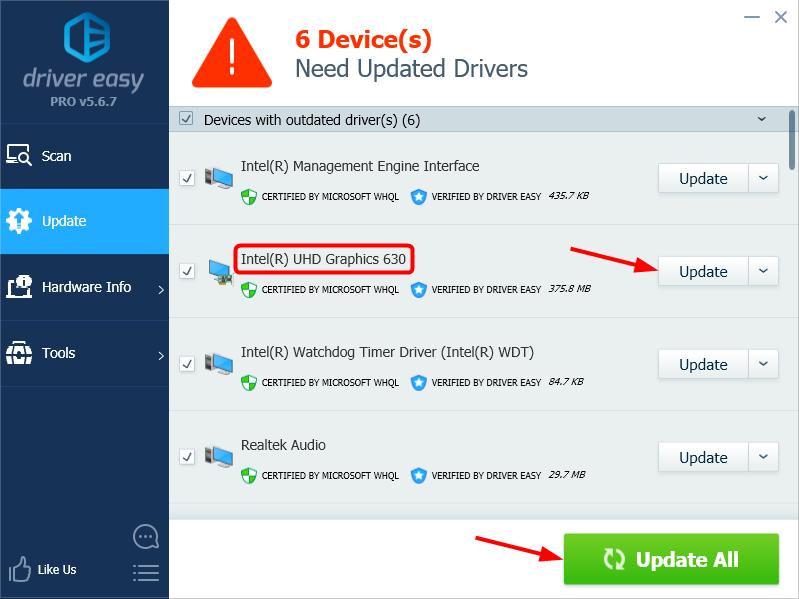
- Click Update next to any flagged devices to automatically download the correct version of their drivers, then you can install them manually. Or click Update All to automatically download and install them all automatically. (This requires the Pro version – you’ll be prompted to upgrade when you click Update All. You get full support and a 30-day money back guarantee.)
- Restart your computer and check if your problem is now resolved. If not, contact Driver Easy’s support team at support@drivereasy.com for further assistance.
Hopefully this can help you out.
If you have any question or suggestion, please feel free to leave a comment below.