


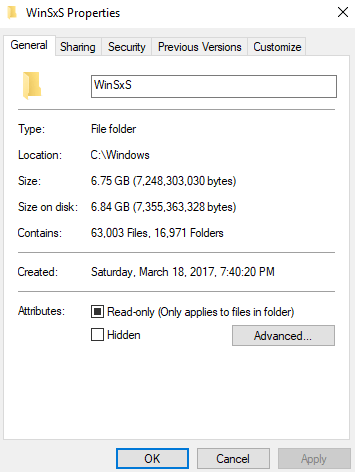
This is among the usually asked questions: can I delete WinSxS folder to free up some disk space?
The answer is, no.
Nor can you delete everything in the WinSxS folder, because some of the files are important for Windows to run and update. Basically, WinSxS folder is where the files needed for your Windows are, as well as backups and/or updates of those files.
But there are many ways you can use to reduce the size for your WinSxS folder on Windows 10. In this post, we will be introducing two of them. So you will at least have one option that works.
WARNING: It is never suggested that you use a third-party tool to cleanup your WinSxS file, since faulty deleting the whole folder or some files in the folder might end up breaking your computer, making it impossible to boot or update.
1. Use Disk Cleanup
Disk cleanup is a built-in tool that helps you delete temporary files. To run it, just follow:
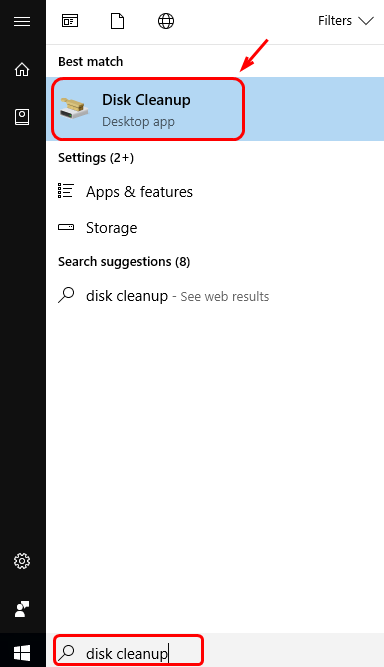
1) On your keyboard, press Windows logo button, then type in disk cleanup. Then choose Disk Cleanup from the list.
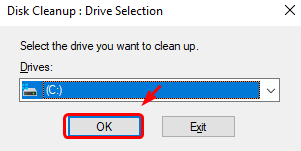
2) If you haven’t changed the location where you placed your system file, choose (C:) and click OK. If you have changed the file location before, choose the correct file directory accordingly.
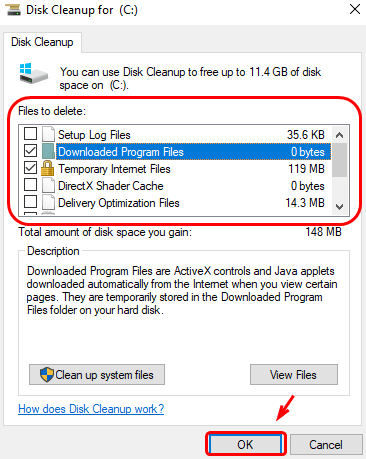
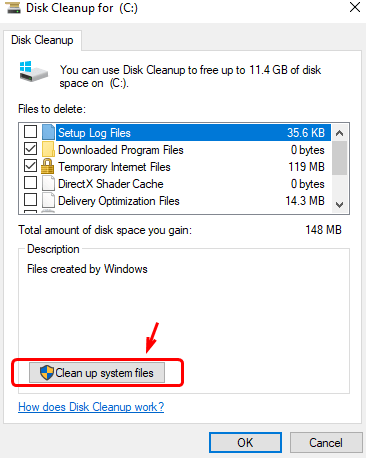
3) Under Files to delete sector, tick the boxes before the files you don’t need anymore and then hit OK to delete them. Select to highlight the file name to see more detailed information if you want.
4) If you need to free more space, you can also choose Clean up system files.
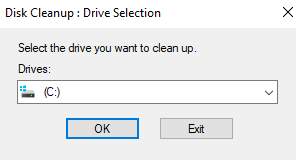
Then you will be prompted to choose which system drive you want to clean up. Choose accordingly and the clean process will start right away.
2. Use DISM Tool
DISM stands for Deployment Image & Servicing Management. It is a tool that allows you to make changes to Windows features, packages, drivers, and international settings. In this case, we will use it to help us clean up our WinSxS folder.
1) On your keyboard, press Windows logo key and X at the same time, then choose Command Prompt (Admin).
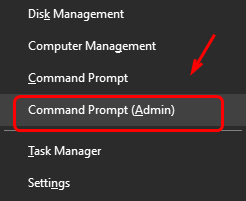
When prompted with the UAC, hit Yes to continue.
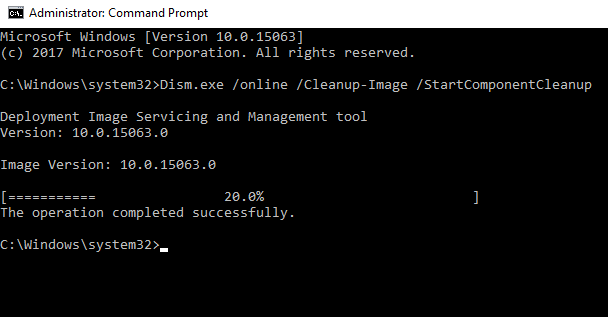
2) In DISM window, type in or copy and paste in the following command:
Dism.exe /online /Cleanup-Image /StartComponentCleanup
This command helps you clean up files when your system is not in use.

3) Check for possible typo. Then hit Enter.
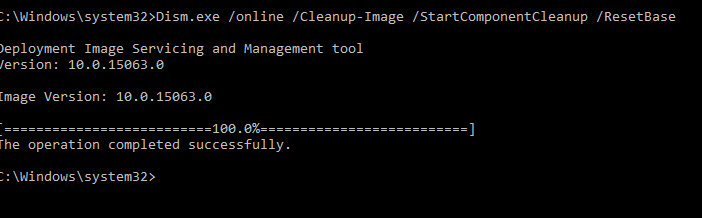
4) In the same DISM window, type in or copy and paste in the following command:
Dism.exe /online /Cleanup-Image /StartComponentCleanup /ResetBase
This command helps you remove all superseded versions of every component in the component store.

5) Make sure you have made no typo and hit Enter. Wait for it to finish.
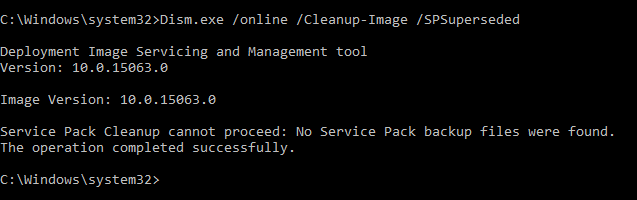
6) Still in the same window, type in or copy and paste in the following command:
Dism.exe /online /Cleanup-Image /SPSuperseded
This command helps you reduce the amount of space used by a Service Pack.

7) Make sure that you have made no typo and hit Enter.
If you need more assistance, feel free to leave us comment and we will see what else we can do to help.
Hope your problem solved!