


To make sure your Yamaha Steinberg audio interface works to its best performance, you should always keep the Yamaha Steinberg USB driver. In this article, we provide a step-to-step guide about how to update it to the latest version.
About Yamaha Steinberg Series
With the Steinberg series, you can record studio-grade sound, right on your laptop or iPad. When connected to a Windows PC, it’s also a perfect fit for pro-level recording.
For the most time, it works just great. But sometimes it may bump into issues, such as the sound would drop out on playback. The main cause of that is outdated USB 2.0 and Bluetooth 4.0 drivers.
It’s always recommended to keep the drivers up to date so that you can complete your project at full ease.
How to update Yamaha Steinberg USB drivers
You’ll need some computer skills and patience to update your drivers this way because you need to find exactly the right driver online, download it and install it step by step.
This is the quickest and easiest option. It’s all done with just a couple of mouse clicks – easy even if you’re a computer newbie.
Method 1: Manually
To manually update your Yamaha Steinberg USB, you need to download the latest and correct version of the USB driver and install it step by step.
- Unplug your Yamaha Steinberg product.
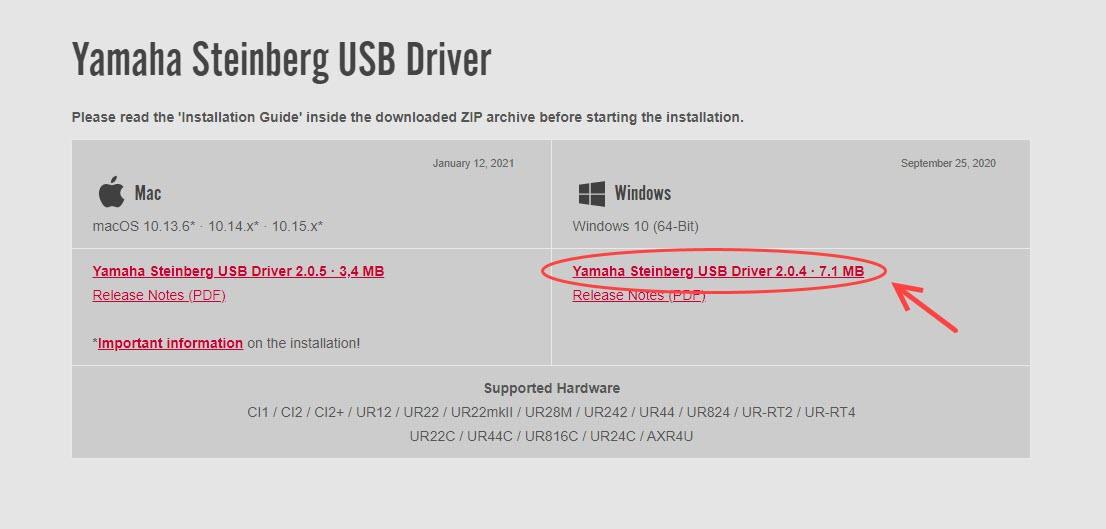
- Go to Yamaha Steinberg USB Driver download center.
- Download the driver zip file. (If you are on a Windows 8 or earlier OS, scroll down to download a previous one.)
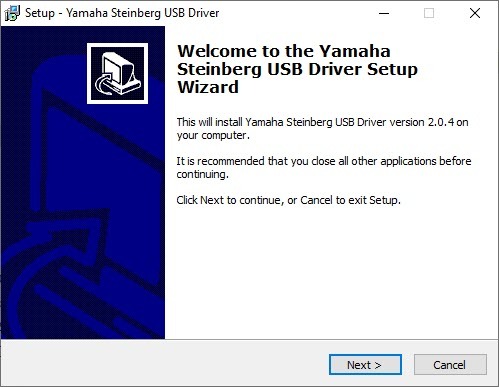
- Unzip the driver file and run the setup application.
- Follow the on-screen instructions to complete the installation.
- Once you have finished installing the driver, you can restart your laptop.
- Connect the device directly to the computer by using a USB cable.
Method 2: Automatically
If you don’t have the time, patience, or computer skills to update the driver manually, you can do it automatically with Driver Easy.
Driver Easy will automatically recognize your system and find the correct drivers for it. You don’t need to know exactly what system your computer is running, you don’t need to risk downloading and installing the wrong driver, and you don’t need to worry about making a mistake when installing.
You can update your drivers automatically with either the FREE or the Pro version of Driver Easy. But with the Pro version it takes just 2 clicks (and you get full support and a 30-day money back guarantee):
- Download and install Driver Easy.
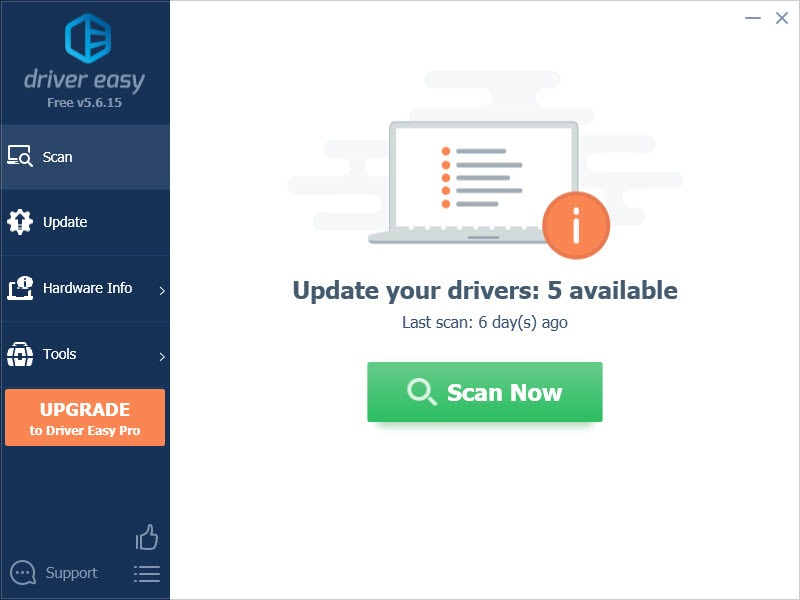
- Run Driver Easy and click Scan Now. Driver Easy will then scan your computer and detect any problem drivers.
- Click the Update button next to a flagged USB driver to automatically download the correct version of this driver, then you can manually install the driver (you can do this with the FREE version).
Or click Update All to automatically download and install the correct version of all the drivers that are missing or out of date on your system (this requires the Pro version – you’ll be prompted to upgrade when you click Update All).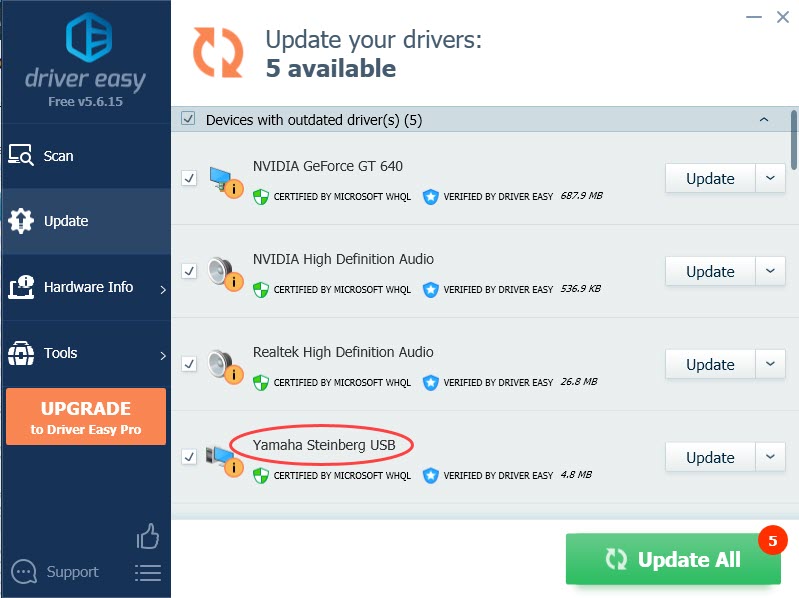
- Restart your laptop or computer for the changes to take full effect.
Hope the tips help you update the Yamaha Steinberg USB driver on Windows 10 easily. If you have any questions, please leave your comments below. We’d love to hear of any ideas and suggestions.