


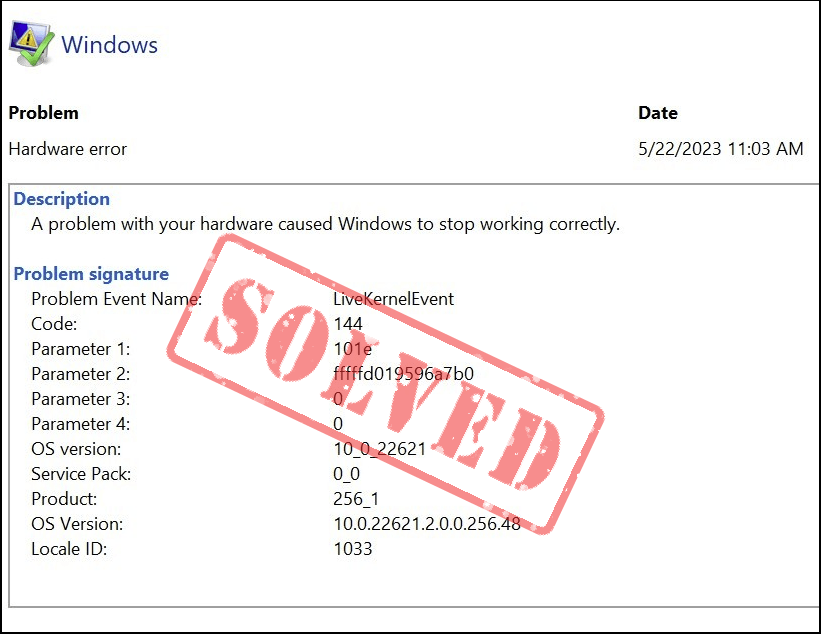
LiveKernelEvent with Code 144 error, found in Event Viewer or Reliability Monitor, is a rather vague description of a series of computer problems, which include blue screen of death errors, a sudden shut-down with your computer, freezes with your computer, games crashing, and/or some other programs crashing. Nothing could be more annoying and distracting than having any of the mentioned problems.
But don’t worry, we have gathered here some proven fixes that have helped many other users with the LiveKernelEvent with Code 144 error on their computers, and you should give them a try as well.
Try these fixes for LiveKernelEvent with Code 144 error
You don’t have to try all the following methods: simply work your way down the list until you find the one that does the trick to fix the LiveKernelEvent 144 error for you.
- Update graphics card driver
- Check USB peripherals
- Make sure the PSU works well for your machine
- Update your computer BIOS and system firmware
- Repair damaged system files
- Consider a system reinstall
- Seek help from a hardware technician
1. Update graphics card driver
The LiveKernelEvent 144 error is, in many cases, related to a faulty or missing graphics card driver. So making sure that you have the latest and the correct graphics card driver installed is one of the first things you should do.
To make sure that there’s no old bad graphics card driver files left in your system, here’s what you need to do first:
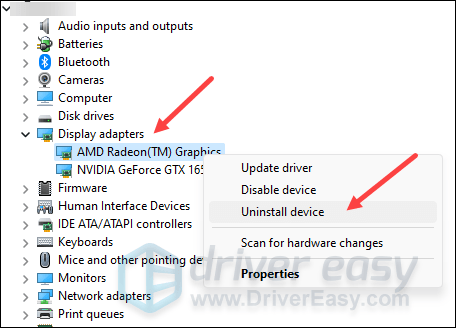
- On your keyboard, press the Windows key and the R key at the same time, then type devmgmt.msc and hit Enter.

- Double-click to expand the Display adapters category, then right-click your display card and select Uninstall device.
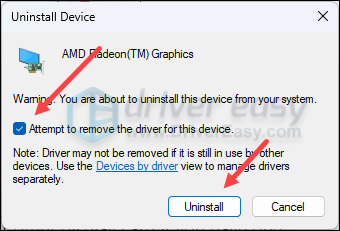
- Tick the box for Attempt to remove the driver for this device and click Uninstall.
- Repeat the same to remove the driver for your other display card if you have one.
- Then update your graphics card driver.
There are mainly 2 ways you can update your graphics driver: manually or automatically.
Option 1: Update your graphics driver manually
If you’re a tech-savvy gamer, you can spend some time updating your GPU driver manually.
To do so, first visit the website of your GPU manufacturer:
Then search for your GPU model. Note that you should only download the latest driver installer that’s compatible with your operating system. Once downloaded, open the installer and follow the on-screen instructions to update.
Option 2: Update your graphics driver automatically (Recommended)
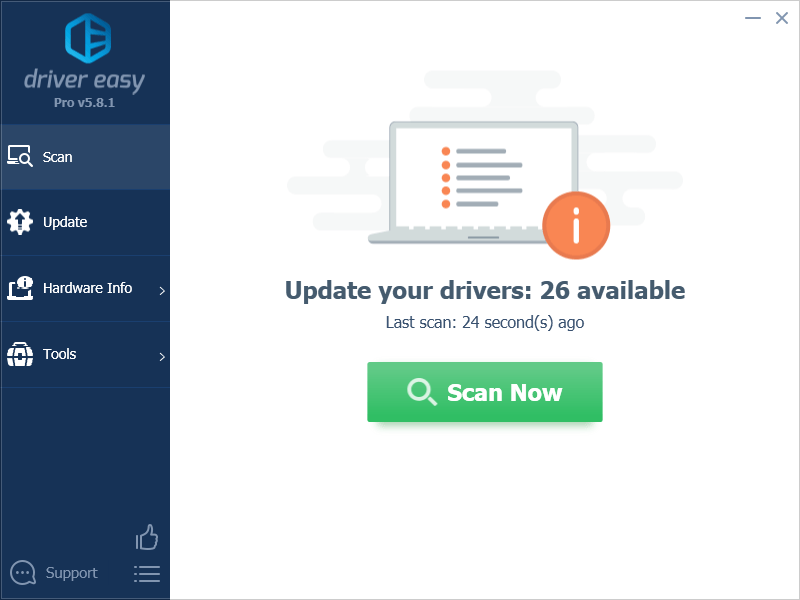
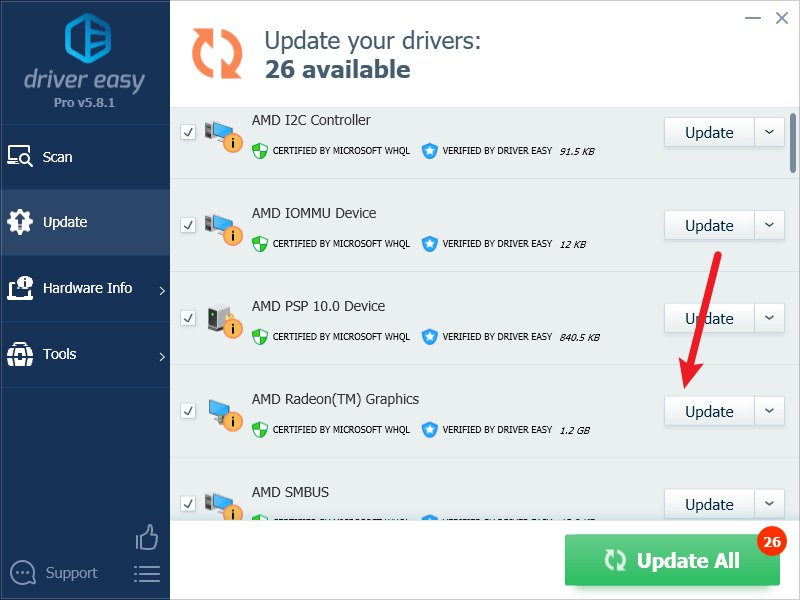
If you don’t have the time, patience or skills to update the driver manually, you can do it automatically with Driver Easy. Driver Easy will automatically recognize your system and find the correct drivers for it. You don’t need to know exactly what system your computer is running, you don’t need to be troubled by the wrong driver you would be downloading, and you don’t need to worry about making a mistake when installing. Driver Easy handles it all.
You can update your drivers automatically with either the FREE or the Pro version of Driver Easy. But with the Pro version it takes just 2 steps (and you get full support and a 30-day money back guarantee):
- Download and install Driver Easy.
- Run Driver Easy and click the Scan Now button. Driver Easy will then scan your computer and detect any problem drivers.
- Click Update All to automatically download and install the correct version of all the drivers that are missing or out of date on your system. (This requires the Pro version – you’ll be prompted to upgrade when you click Update All.)
Note: You can do it for free if you like, but it’s partly manual. - Restart your PC for the changes to take effect.
Then see if the LiveKernelEvent with code 144 error still remains. If the problem still persists, please move on to the next fix.
2. Check USB peripherals
If the LiveKernelEvent 144 error is seen with a blue screen of death error, then it should relate to your USB devices. To see if this is your case, you can do the following:
- Remove all external USB devices from your computer, except for your keyboard and your mouse.
- On your keyboard, press the Windows key and the R key at the same time, then type devmgmt.msc and hit Enter.
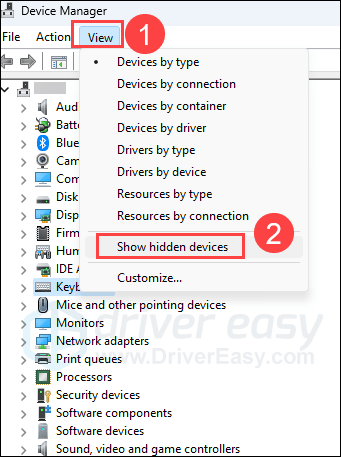
- On the menu bar, select View, then Show hidden devices.
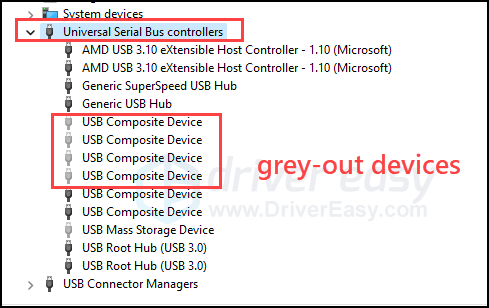
- Double-click the expand the category Universal Serial Bus controllers. There should be some grey-out devices there.
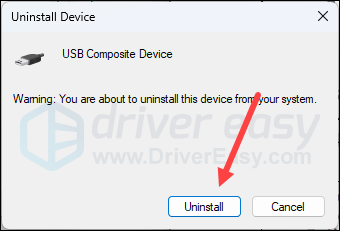
- Right-click one of the grey-out devices you see here and select Uninstall.
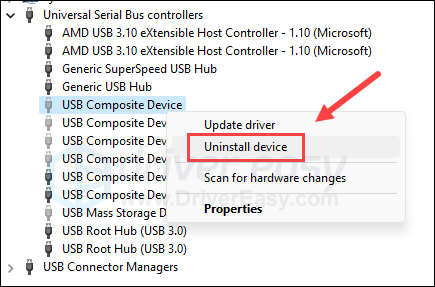
- Click Uninstall to confirm.
- Repeat the same to remove all the other grey-out devices you see here.
- Restart your computer afterward.
- Then plug the USB devices back into your computer one by one, preferably into the USB outputs on your computer rather than USB hubs or docks.
- Pay extra attention to any computer glitches you notice with your computer after plugging each USB device back in.
If the LiveKernelEvent 144 error happens again after a certain USB device, then it should be the culprit. You should then see if this USB device causes the same problem on other computers. If so, then this device needs to be replaced or repaired.
If the above USB test doesn’t show any problem, but the LiveKernelEvent 144 error still persists, please move on to the other methods below.
3. Make sure the PSU works well for your machine
The LiveKernelEvent with code 144 error can sometimes relate to your insufficient power supply for all your hardware components, especially when the LiveKernelEvent 144 is seen after your computer shuts down unexpectedly or freezes whenever you’re running resource-hungry programs.
Here’s a post from Dell with more information about the power supply if you’re interested in knowing more and seeing how you can test your PSU.
4. Update your computer BIOS and system firmware
The LiveKernelEvent with code 144 error could also be caused by outdated BIOS and system firmware, so you should update them as well. Even though a BIOS and firmware update won’t usually boost your computer performance, it can, however, fix problems or bugs related to certain hardware, and thus stop problems like LiveKernelEvent 144.
You can refer to this post we have on how to update the BIOS and firmware.
5. Repair damaged system files
Corrupted or damaged system files could also relate to problems like LiveKernelEvent with code 144 error. By repairing the core Windows system files, it may resolve conflicts, missing DLL issues, registry errors, and other problems that contribute to the instability of your computer performance. Tools like Fortect can automate the repair process by scanning system files and replacing corrupted ones.
- Download and install Fortect.
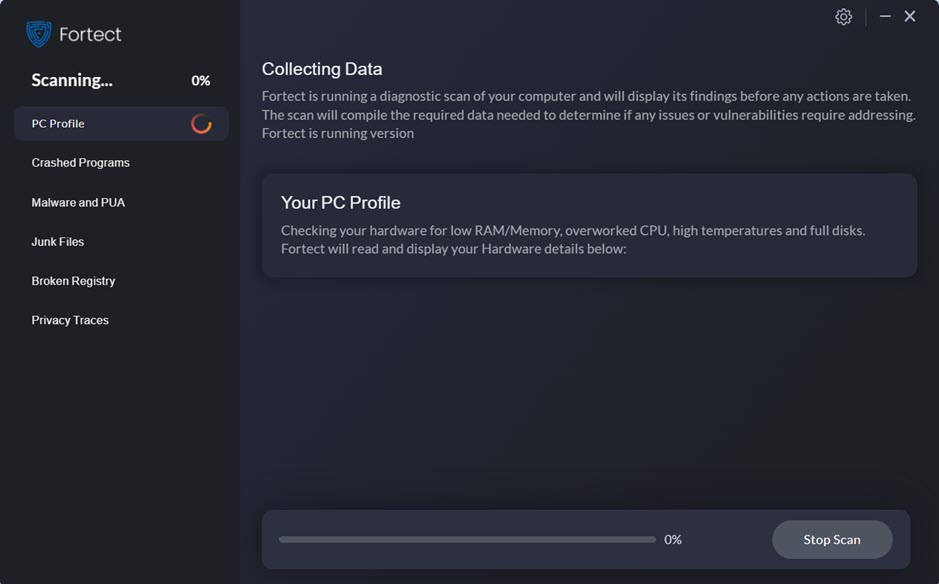
- Open Fortect. It will run a free scan of your PC and give you a detailed report of your PC status.
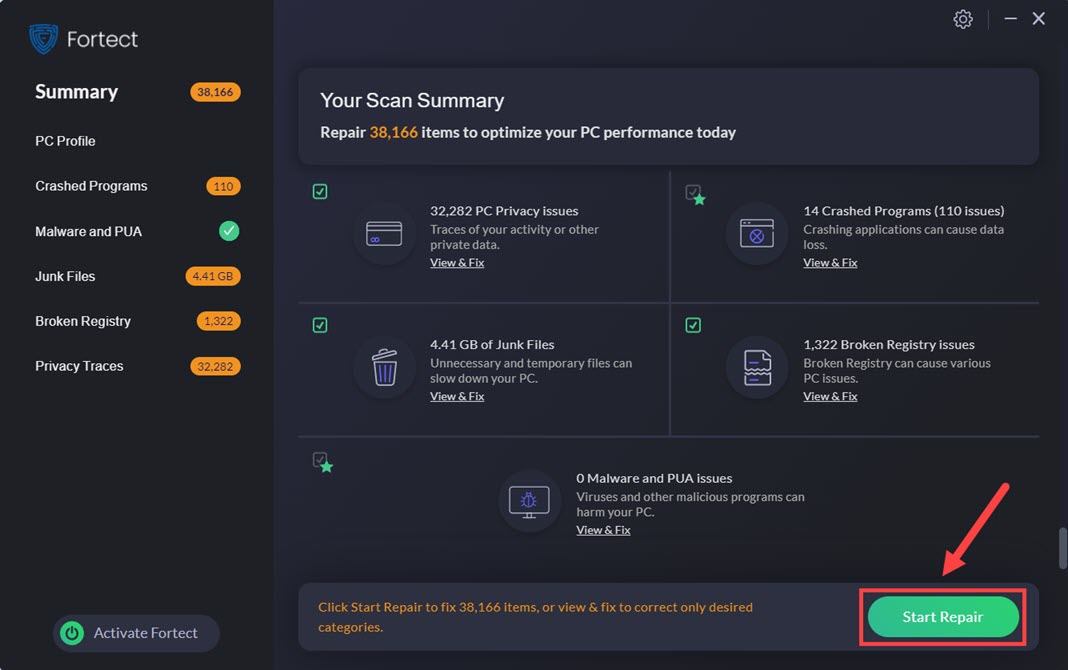
- Once finished, you’ll see a report showing all the issues. To fix all the issues automatically, click Start Repair (You’ll need to purchase the full version. It comes with a 60-day Money-Back Guarantee so you can refund anytime if Fortect doesn’t fix your problem).
(Tips: Still unsure if Fortect is what you need? Check this Fortec Review! )
Then see if the LiveKernelEvent 144 error happens again. If so, please move further.
6. Consider a system reinstall
If the LiveKernelEvent with code 144 error still remains after all the above, the next thing you should consider is a Windows reinstall, given the time and energy spent already.
Windows 10 and 11 have actually made it much easier to accept the system reinstallation process: you can choose to keep all your files and install them back after the system reinstall, without having to lose them over to the reinstallation.
To reinstall or reset your computer, here’s a post for your reference: Reinstall/Reset Windows 10 [Step By Step]
Then see if the LiveKernelEvent 144 error is still seen.
7. Seek help from a hardware technician
If the LiveKernelEvent with code 144 error remains even after a system reinstallation, it’s without a doubt that the problem is on the hardware front. This is what a system reset or reinstallation does: it wipes out all software incompatibilities and problems.
In this case, if your computer is still under warranty, just let your computer vendor know about this, and they should take care of it from there. If not, you may need to seek help from a hardware technician to see if a certain hardware component you own is at fault. This is because the hardware testing process usually requires some tools and professional knowledge to tell which part goes wrong. If you’re not tech-savvy enough on this front, it’s better done by the pros.
The above is what we have to offer on the LiveKernelEvent with code 144 error. If you have any other suggestions, please feel free to leave a comment below.