


Since coronavirus pandemic is spreading all over the world, people spend more time staying at home to prevent potential risks.
You may find you want to extend the screen for better user experience, no matter for working or entertaining. If you have two laptops or a PC and a laptop, you can use your laptop screen as a secondary screen.
Only 2 steps, you can use your laptop as a monitor in a super-easy way.
Use Windows built-in application
Miracast is a built-in application in the Windows operating system. This method could save you lots of effort from choosing and downloading a reliable third-party app. While you need to set it up before using it to connect the laptop as a monitor.
Step 1: set up your laptop
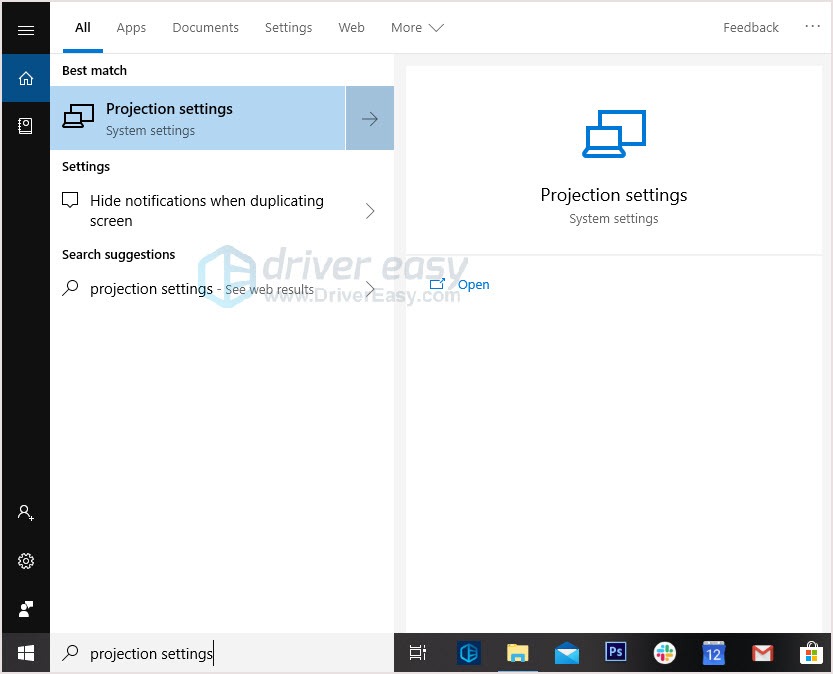
- In your laptop, click the Windows start button, type projection settings and press the Enter key.
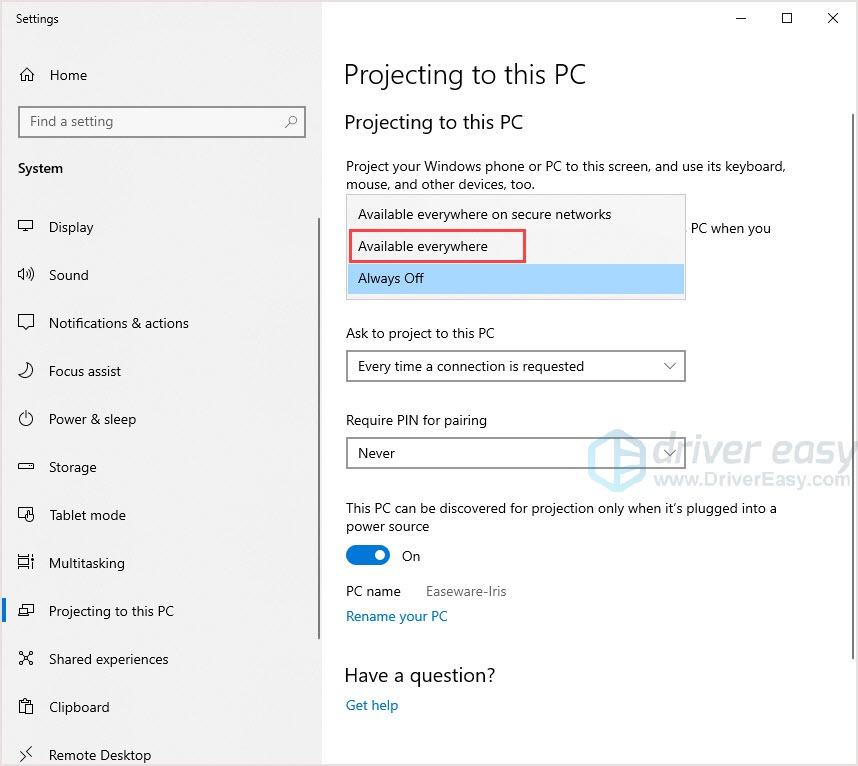
- In the open window, change the first drop-down menu to Available everywhere.
NOTE:
1. If you turn on the button below, your laptop will only be discovered when it’s plugged into a power source.
2. Remember the PC name, you’ll need it when you move to the main PC.
Now your laptop is compatible to use a secondary monitor.
Step 2: Set up your main PC
Let’s move to your Main PC — the one is used as the main monitor.
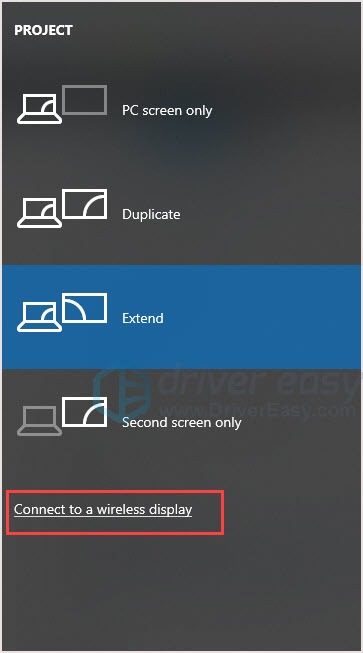
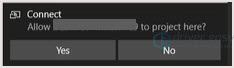
- In your main PC screen. Press the Windows key + P and select Connect to a Wireless Display. Wait for your laptop to appear.
- Select your laptop.
- Turn to your laptop and accept the request. Now you’re good to go.
Extra information:
Extend: If you want your second monitor to give you more space, choose this one.
Duplicate: If you want to see the same thing in your main monitor, choose the Duplicate.
Second screen only: If you only want to see the laptop screen instead of the original one, select the Second screen only.
Related posts:
How to Connect Two Monitors to Laptop [2020 Tips]
How to Connect A Monitor to Your Laptop
Bonus Tip: What if you can’t see the laptop monitor?
Sometimes the laptop cannot be correctly detected by your main PC. It could be a wireless connection issue. When this problem appears, a driver update is a good option to try.
There are two ways to update drivers: manually and automatically.
Option 1 – Download and install the driver manually
You can download graphics drivers from the manufacturer official website. Search for the model you have and find the correct driver that suits your specific operating system. Then download the driver manually.
Option 2 – Automatically update drivers
If you don’t have time or patience to manually update your graphics drivers, you can do it automatically with Driver Easy.
Driver Easy will automatically recognize your system and find the correct drivers for it. You don’t need to know exactly what system your computer is running, you don’t need to risk downloading and installing the wrong driver, and you don’t need to worry about making a mistake when installing.
You can update your drivers automatically with either the FREE or the Pro version of Driver Easy. But with the Pro version it takes just 2 clicks (and you get full support and a 30-day money back guarantee):
- Download and install Driver Easy.
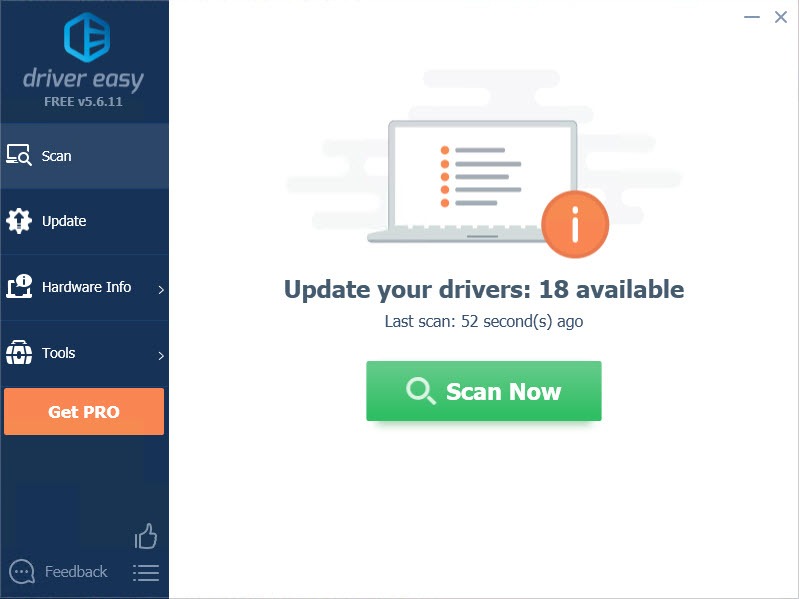
- Run Driver Easy and click the Scan Now button. Driver Easy will then scan your computer and detect any problem drivers.
- Click the Update button next to the flagged driver to automatically download the correct version of that driver, then you can manually install it (you can do this with the FREE version).
Or click Update All to automatically download and install the correct version of all the drivers that are missing or out of date on your system. (This requires the Pro version which comes with full support and a 30-day money back guarantee. You’ll be prompted to upgrade when you click Update All.)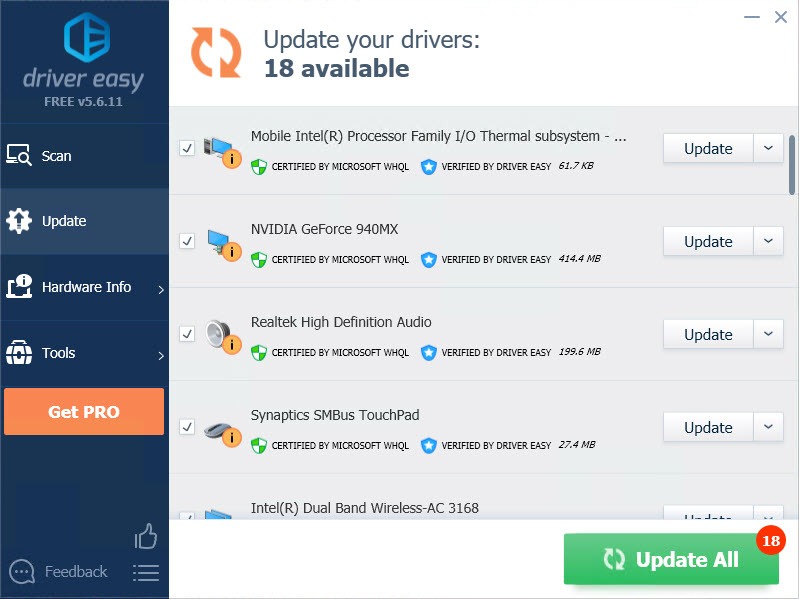
That’s it! You can easily use your laptop as a monitor. Comment below if you have any questions, and we will see what more we can do to further help.