


It’s very fascinating that you can play over two million mobile games on your PC with this FREE Android emulator. However, many of us may have experienced game crashes in Bluestacks. If you’re getting random BlueStacks crashes and don’t know how to deal with it, don’t worry. In this post, you will learn how to fix it easily and quickly.
Try these fixes
- Adjust the game settings
- Update your graphics driver
- Close other unnecessary programs
- Turn off antivirus
- Enable Virtualization for BlueStacks
Fix 1: Adjust the game settings
First, you need to make sure that you have allocated enough RAM and CPU cores in BlueStacks Settings. This will increase performance and avoid game crashing/lagging. Here’s how to do it:
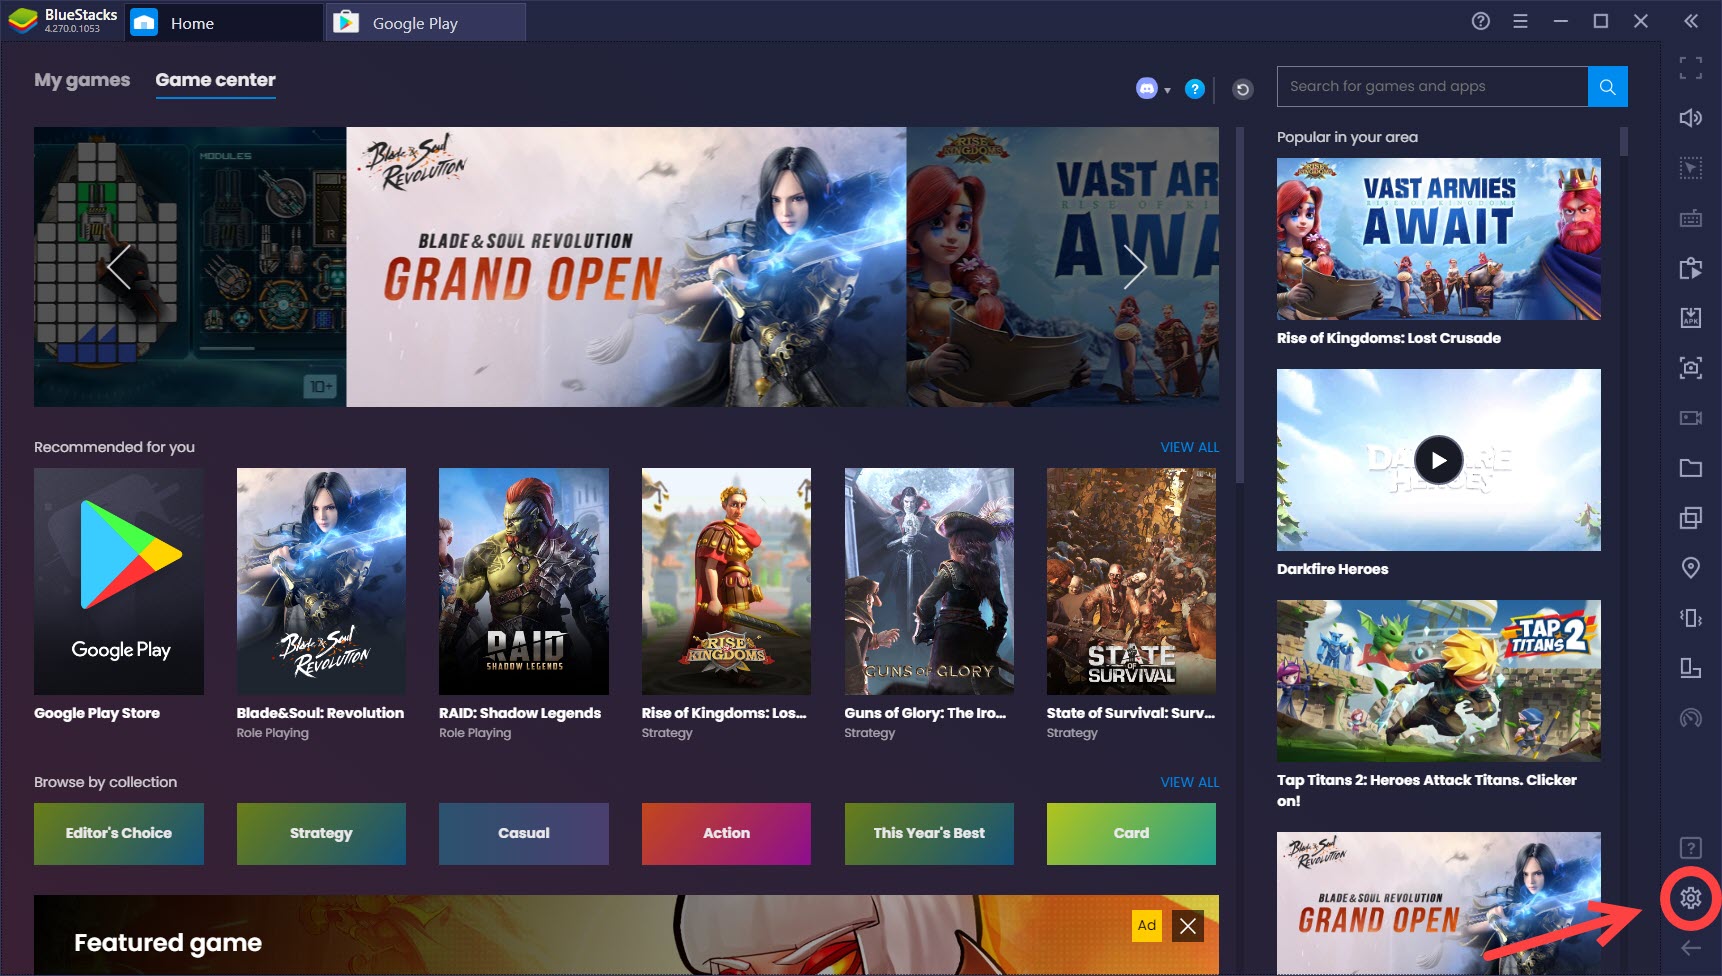
- Click the gear button on the lower right corner to open the Settings menu.
- The Settings page will appear with the Engine tab highlighted, as shown below.
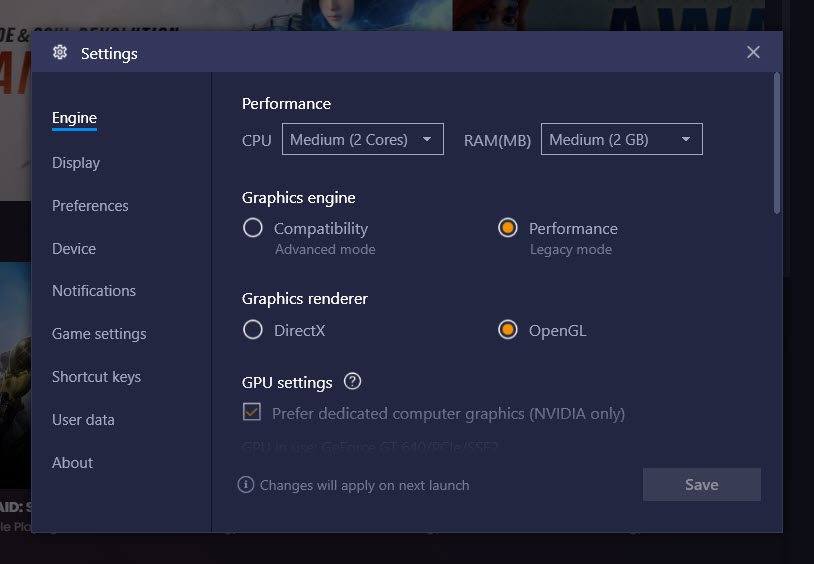
- Please match the following settings to see if this works for you.
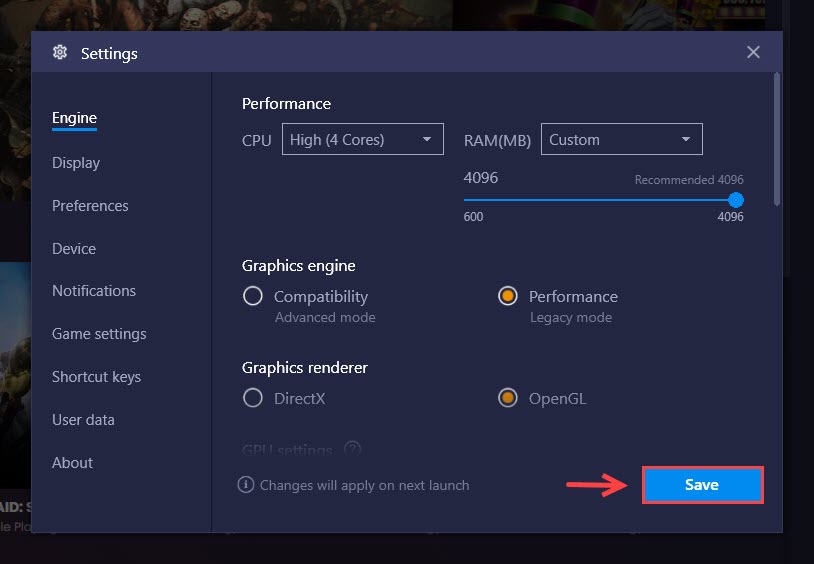
- CPU: 4 Cores
- RAM: 4 GB (this will require a restart, so you can leave it to the last step)
- Graphics Engine: Performance
- Graphics Renderer: OpenGL
- GPU Settings: Prefer dedicated graphics (NVIDIA only)
- ASTC: Hardware decoding
- Click the Save button to preserve all changes made.
Your Bluestacks will be restarted, and your game won’t be crashing again now. But if it does, please try the next fix below.
Fix 2: Update your graphics driver
As BlueStacks Support suggests, you should always keep your driver updated. This is especially important if you haven’t done so for a long time. Graphics driver matters a lot to your gaming performance, so we recommend you keep your drivers up-to-date (at least your graphics driver).
There are mainly two ways for you to update the graphics driver:
Option 1: Update your graphics driver manually
If you choose to update your GPU driver manually, you’ll need to find the latest driver from the GPU manufacturer, and then install it manually.
Windows Device Manager won’t deliver the latest graphics driver, so be sure to download the latest driver directly from the manufacturer. In addition, you can use GeForce Experience or AMD Radeon software to update your driver manually.
Option 2: Update your graphics driver automatically (Recommended)
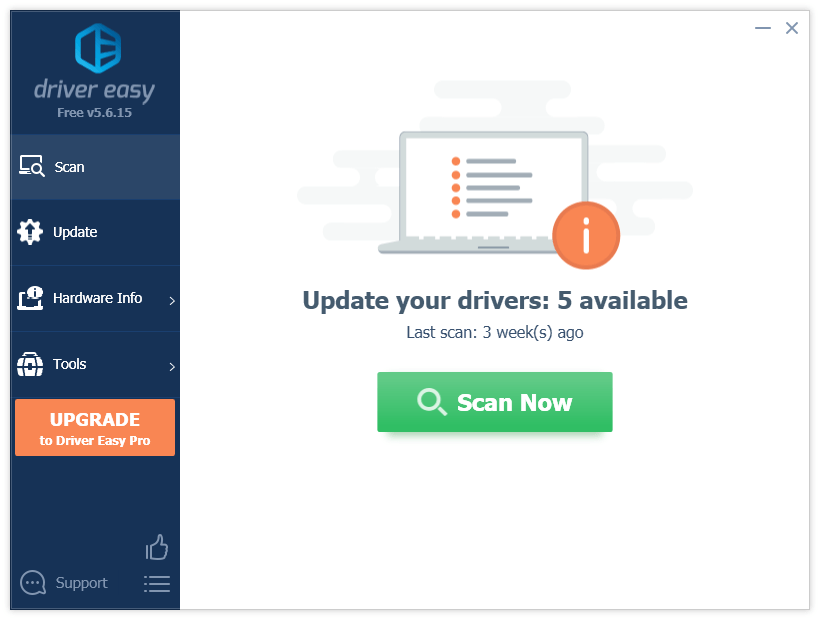
If you don’t have the time, patience or computer skills to update your video drivers manually, you can, instead, do it automatically with Driver Easy. Driver Easy will automatically recognize your system and find the correct drivers for your exact graphics card, and your Windows version, and it will download and install them correctly:
- Download and install Driver Easy.
- Run Driver Easy and click the Scan Now button. Driver Easy will then scan your computer and detect any problem drivers.
- Click Update next to your graphics card to download the latest driver, and then install it manually (you can do this in the Free version).
Or click Update All to automatically download and install the correct version of all the drivers that are missing or out of date on your system. (This requires the Pro version – you get 30-day money back guarantee and full technical support.)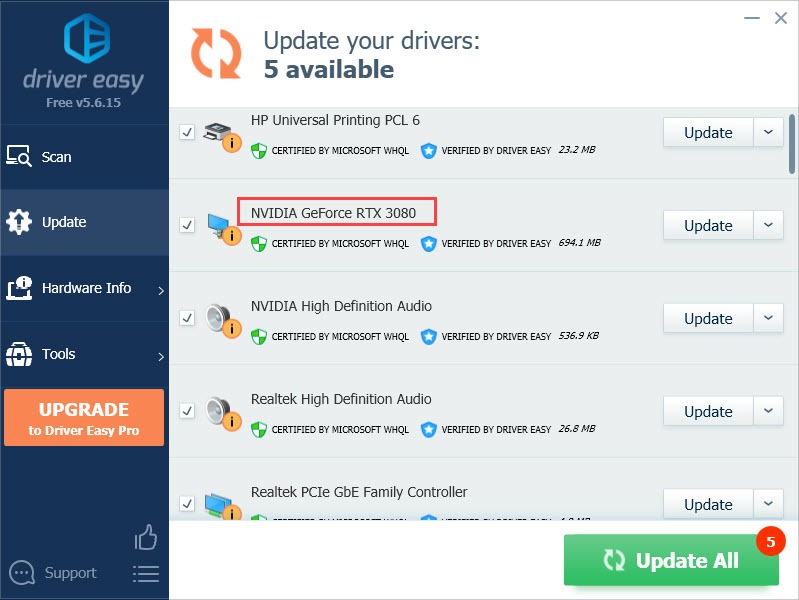
Once the graphics driver is updated, you can restart your PC and launch your BlueStacks to check if the crashing issue has been resolved successfully.
Fix 3: Close other unnecessary programs
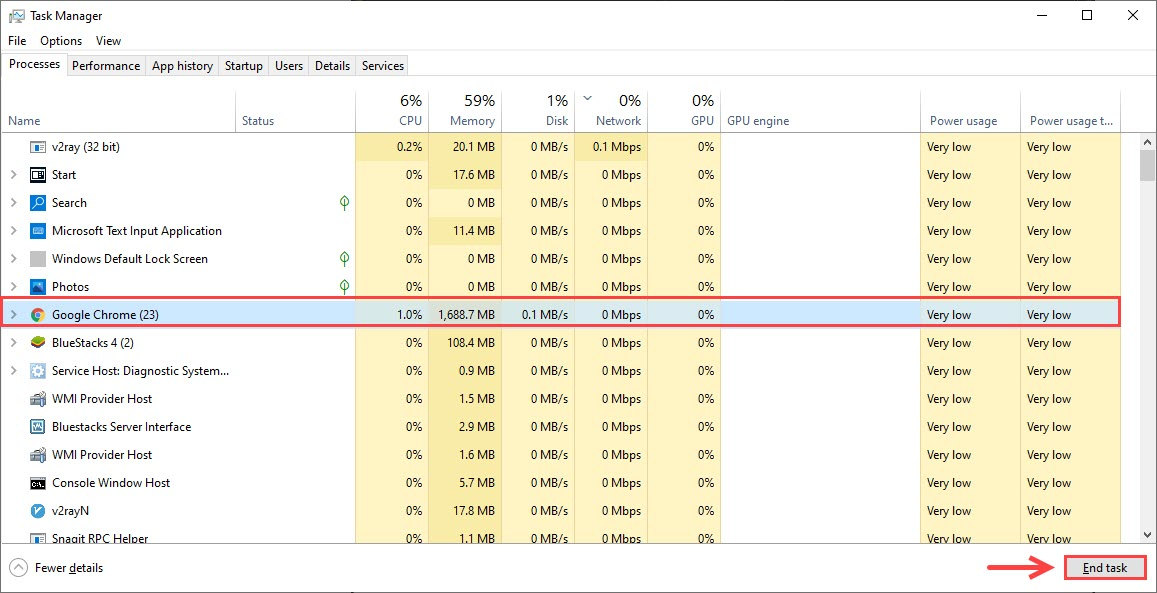
Running a lot of programs can make your BlueStacks slow, lag, or even crash a lot, especially when you have allocated more RAM and CPU cores to BlueStacks. Therefore, you can close unwanted programs from Task Manager:
- On your keyboard, press the Ctrl + Shift + Esc to open Task Manager.
- Select the program you want to close and click End Task. Also, force close BlueStacks 5 and relaunch the program. Check to see if it’s working now.
Now other programs stop consuming a high amount of RAM, you can launch BlueStacks again to check if the crashing problem is fixed.
Fix 4: Turn off antivirus
It’s possible that your antivirus program will interfere with the BlueStacks. To check if this is causing your BlueStacks crashing issue, you can disable it or uninstall it temporarily because sometimes disabling it won’t work.
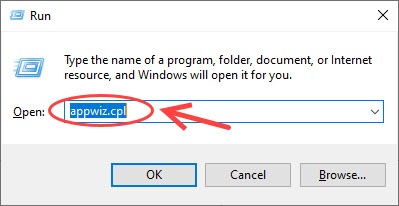
- On your keyboard, press the Windows logo key and R key at the same time to open the Run box.
- Type appwiz.cpl and hit Enter.
- Right-click your antivirus and choose Uninstall, and follow the on-screen instructions.
- Reboot your computer and launch BlueStacks to check if the issue persists.
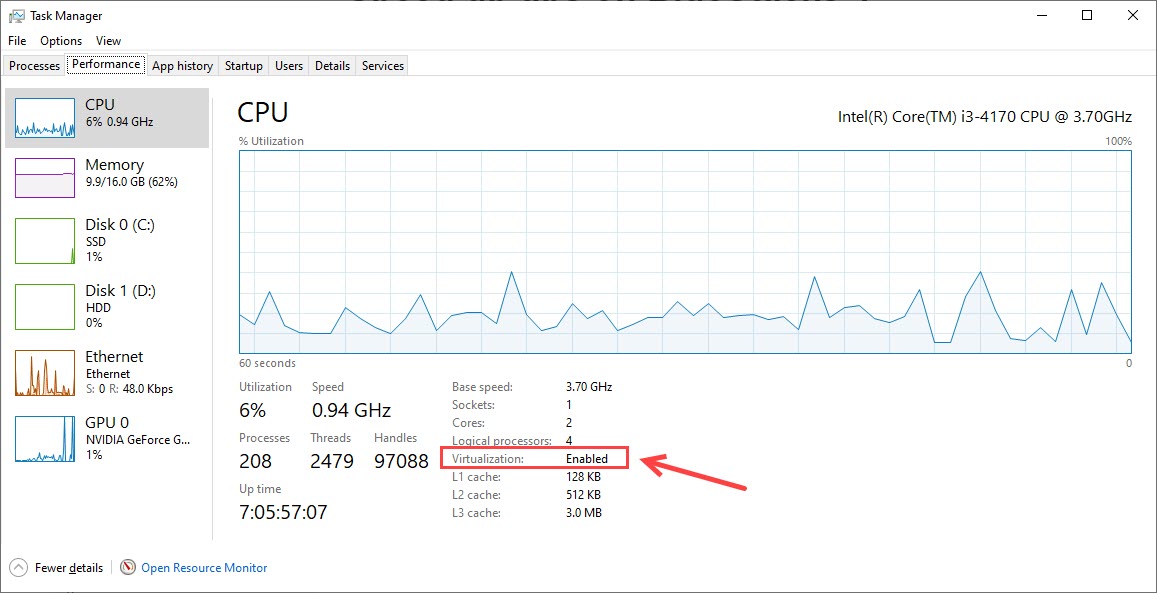
Fix 5: Enable Virtualization for BlueStacks
If the methods above didn’t do the trick, you can run a quick check before reinstalling the whole software. If this feature is turned off, your BlueStacks would become very laggy and even start crashing a lot.
- Press the Ctrl + Shift + Esc to open the Task Manager.
- Go to the Performance tab.
- You can view the Virtualization status under the CPU tab.
If this feature is disabled, you should follow this guide to turn it on in the BIOS settings. However, if everything seems alright but you still get the crashing issues, you can reinstall BlueStacks (be sure to remove all its files and then reinstall it again).