


Want to keep your Canon scanner in good condition and get the best possible experience? You should consider downloading and installing the latest version for your Canon scanner driver.
In addition, if you’re having issues like scanner not working, or scanner not detected in your Windows computer, you can also try updating your scanner driver to fix the issues.
How to download or update Canon scanner driver?
- Download Canon scanner driver manually
- Update Canon scanner driver automatically
- Update Canon scanner driver via Device Manager
Method 1: Download Canon scanner driver manually
You can manually download the driver for your Canon scanner from the Canon support center.
Before getting started, you should know clearly your scanner model, and your computer operating system (whether you’re using Windows 11 or Windows 10, and running 64-bit or 32-bit).
- Go to Canon Support.
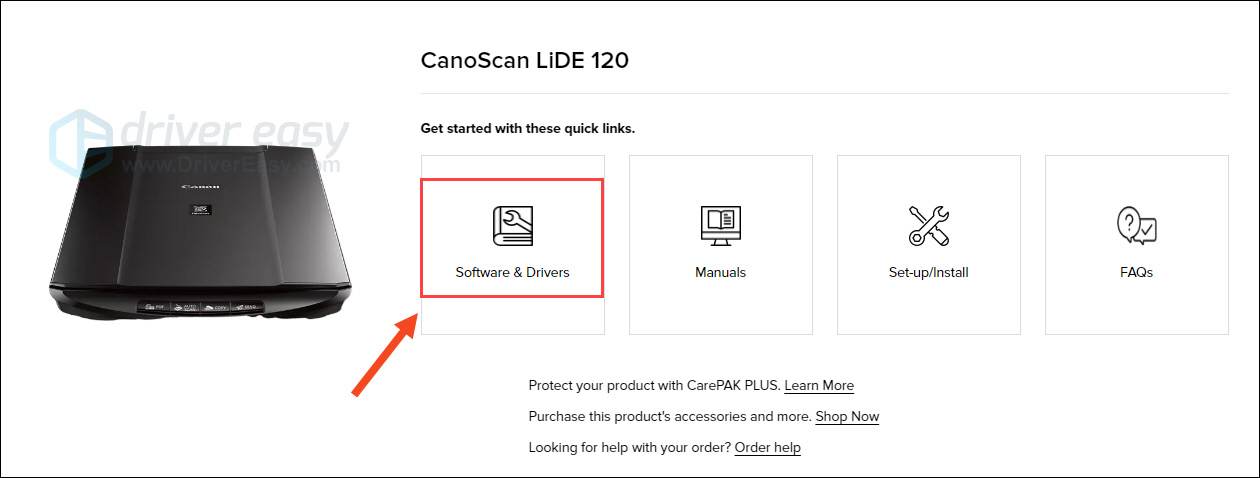
- Search for your scanner model from the search bar. (In my case I search for CanoScan LiDE 120.)

- On your scanner result page, click Software & Drivers.
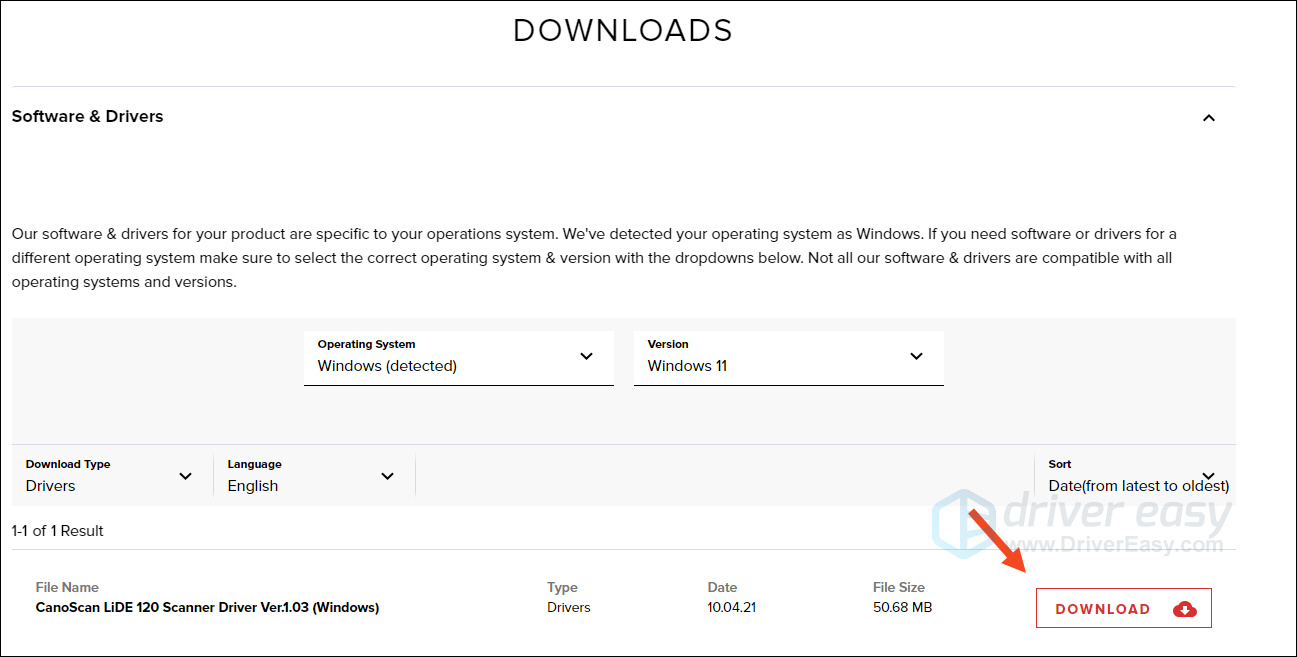
- Select the OS and version that match with your computer. Then click DOWNLOAD there is a driver available for you to download.
- Install the driver on your computer.
This requires time or computer skills. If you don’t have time or patience, you can try the solutions below.
Method 2: Update Canon scanner driver automatically
If you don’t have time or patience to manually download and install the Canon scanner driver in your computer, you can do it automatically with Driver Easy.
Driver Easy will automatically recognize your system and find the correct drivers for it. You don’t need to know exactly what system your computer is running, you don’t need to be troubled by the wrong driver you would be downloading, and you don’t need to worry about making a mistake when installing.
- Download and install Driver Easy.
- Run Driver Easy and click the Scan Now button. Driver Easy will then scan your computer and detect any problem drivers.

- Click Update All to automatically download and install the correct version of all the drivers that are missing or out of date on your system.
(This requires the Pro version which comes with full support and a 30-day money-back guarantee. You’ll be prompted to upgrade when you click Update All. If you’re not ready to buy the Pro version, Driver Easy offers a 7-day free trial which includes access to all the Pro features such as high-speed download and one-click install. You won’t be charged anything until your 7-day trial has ended.)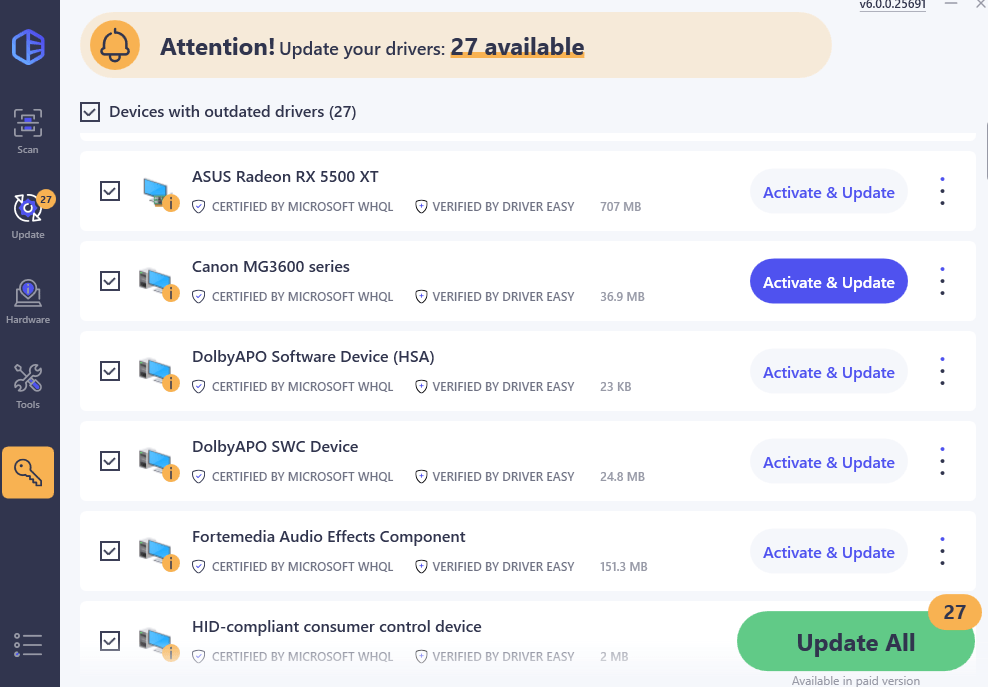
- Restart your computer for the changes to take effect.
Method 3: Update Canon scanner driver via Device Manager
You can also update the driver for your Canon scanner from Device Manager, where you can view and manage the hardware device and its driver software on your computer.
- Make sure you’ve connected your Canon scanner to your Windows computer.
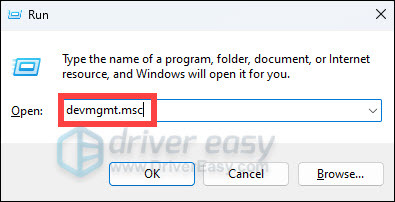
- On your keyboard, press the Windows logo key
 and R at the same time to invoke the Run box.
 - Type devmgmt.msc and click OK.
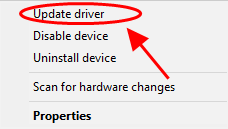
- In Device Manager, double-click Printers or Print queues to expand it. Right click on your printer (it may display as Unknown device), and select Update driver.
- Choose Search automatically for updated driver software.
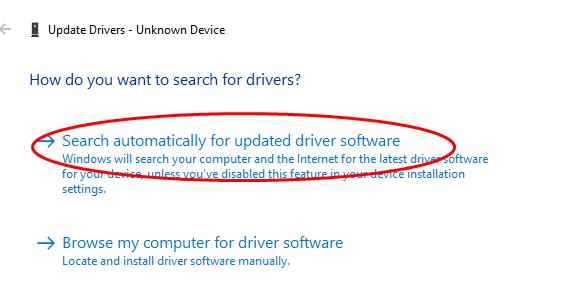
- Follow the on-screen instructions to finish updating the driver.
- Restart your computer afterward.
That’s it. You should now have installed the latest version of the driver for your Canon scanner.