


Windows Defender is the free antivirus software that are built in Windows 8.1 and 10 on every edition. Just as other antivirus software, it is meant to protect your computer from any possible viruses, spyware or other sorts of malicious code.
It usually disable itself when it detects another security software installed on your PC. But it is not permanently disabled, perhaps because Microsoft doesn’t want your Windows 10 to operate without any protection.
If you want to disable Windows Defender, for example, when you are installing a new program or connecting some peripherals, here are some ways that you can choose accordingly to disable your Windows Defender.
Option One: From Local Group Policy
Option Two: From Registry
Option Three: From Settings
Option One: From Local Group Policy
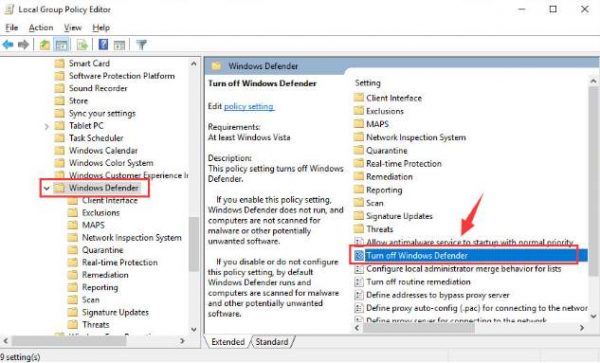
1) Press Windows key and R at the same time. Then type gpedit.msc in the search box and hit Enter.

2) Then follow the path: Computer Configuration > Administrative Templates > Windows Components > Windows Defender. Then on the right pane, locate Turn off Windows Defender option , then double click it.
3) Choose the Enabled option. Then hit Apply and OK to save and exit.
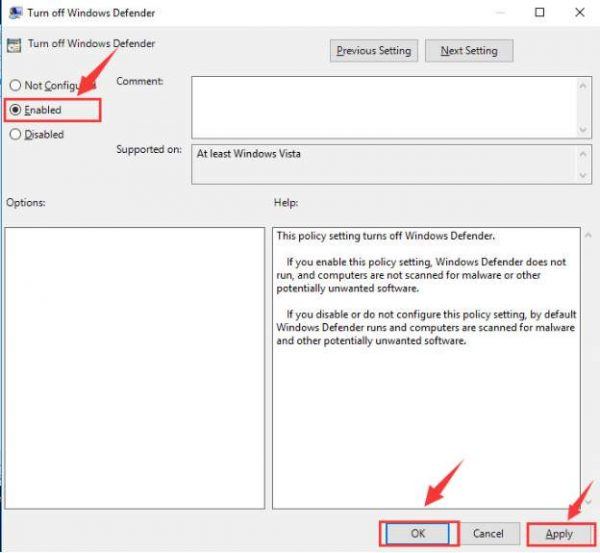
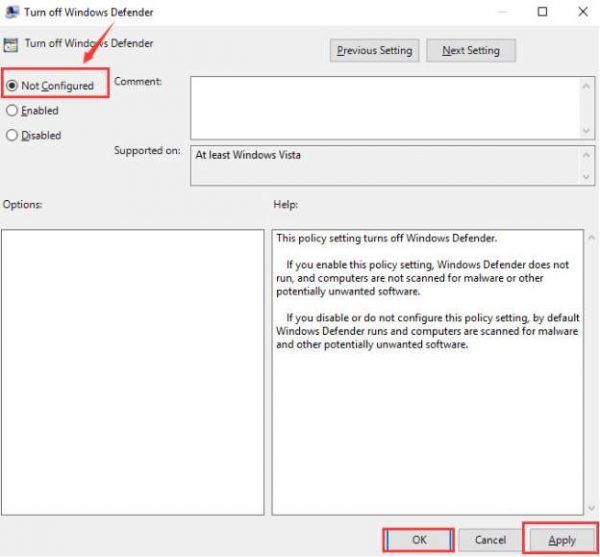
4) Restart your computer after the change. If you want to enable Widows Defender later, repeat step 1) and step 2), just choose Not Configured rather than Enabled. Then click Apply and OK to save the change.
Warning: Faulty changing the Registry could lead to unrecoverable damage to your computer. To avoid the occurrence of such problem, it is strongly suggested that you back up your registry first before you make any changes to the registry.
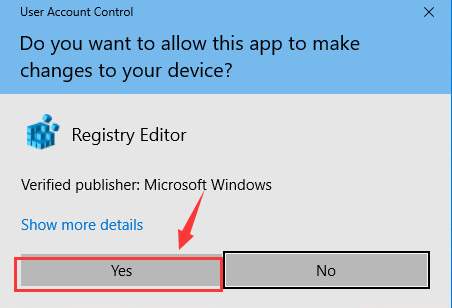
1) Press Windows key and R at the same time, then type in regedit and hit Enter.

When prompted for administrator permission, just click Yes to continue.
2) Then follow the path: HKEY_LOCAL_MACHINE\SOFTWARE\Policies\Microsoft\Windows Defender.
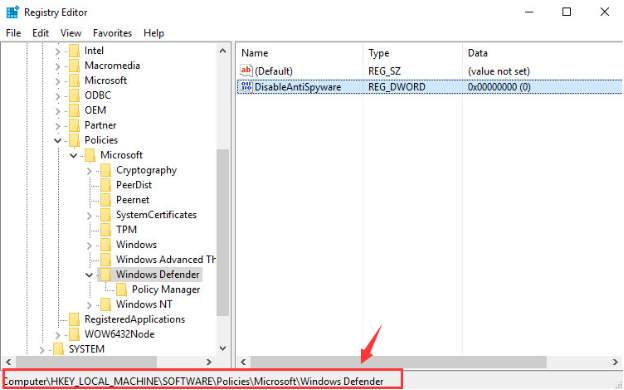
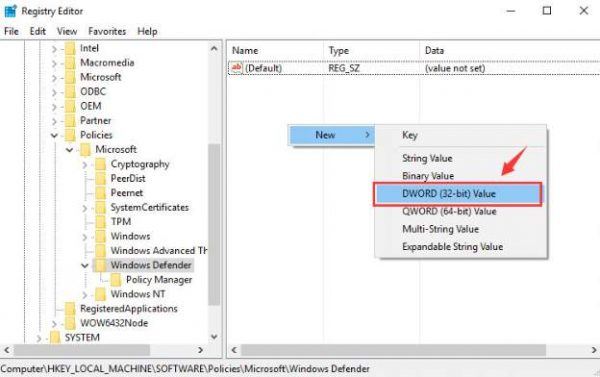
If you don’t see a file named DisableAntiSpyware on the right pane, right click on the empty space on the right pane, then choose DWORD (32-bit) Value from the list of choice. Rename the key as DisableAntiSpyware.
3) Double click the DisableAntiSpyware file that you have, then set the Value data to 1.
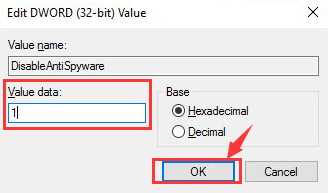
4) Then exit the registry editor. Restart your computer. If you want to re-enable Windows Defender, repeat step 1) and step 2). In step 3), change the Value data from 1 to 0. Then restart your computer for the changes to take effect.
Option Three: From Settings
1) Follow the path: press Start button > Settings > Update & security.
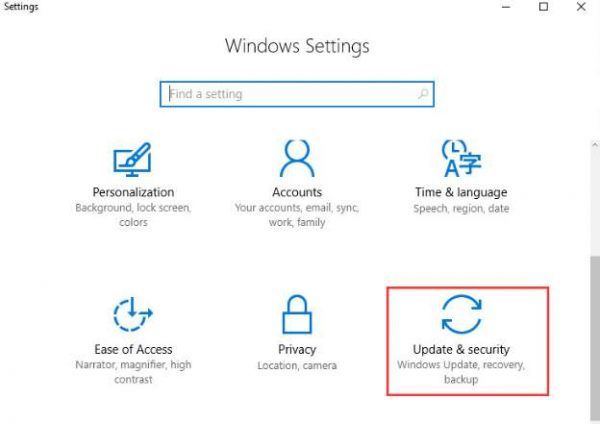
2) On the left side of the pane, choose Windows Defender. On the right side of the pane, turn off the toggle switch for Real-time protection.

3) This will only allow you to disable Windows Defender until the next time you restart your computer.