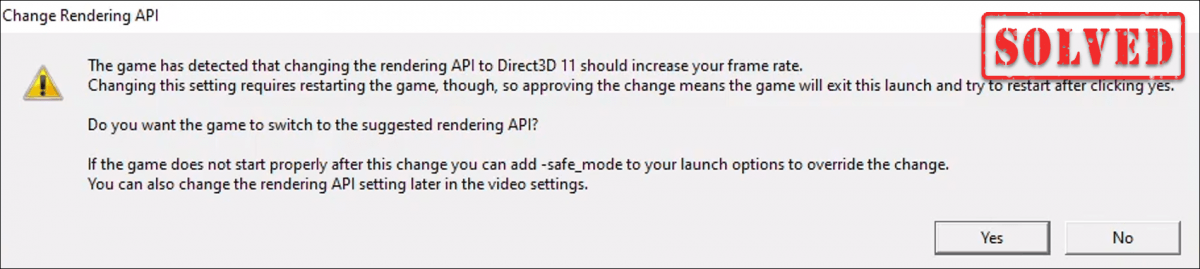
Players have reported an issue while trying to launch Dota 2: when they click PLAY, the message “Change Rendering API” suddenly pops up; when clicking Yes, it pops up again. If you encountered the same message, don’t worry. You can definitely fix it by setting game launch options on Steam.
How to fix Dota 2 Change Rendering API error
Before running the game, you can use the Game Launch Options feature on Steam to change game settings. Launch options allow the user to supersede the internal settings of the game. This is an effective means to recover from incompatible video settings and well as troubleshoot a wide range of issues. So in order to get rid of the error message, you should set a launch option specifically for Dota 2. Here’s how you can do this:
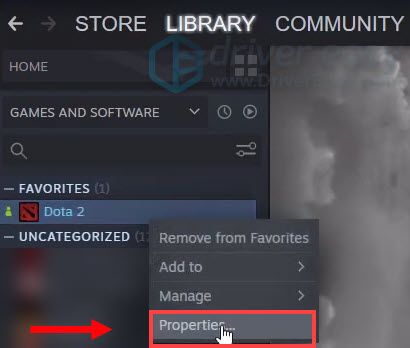
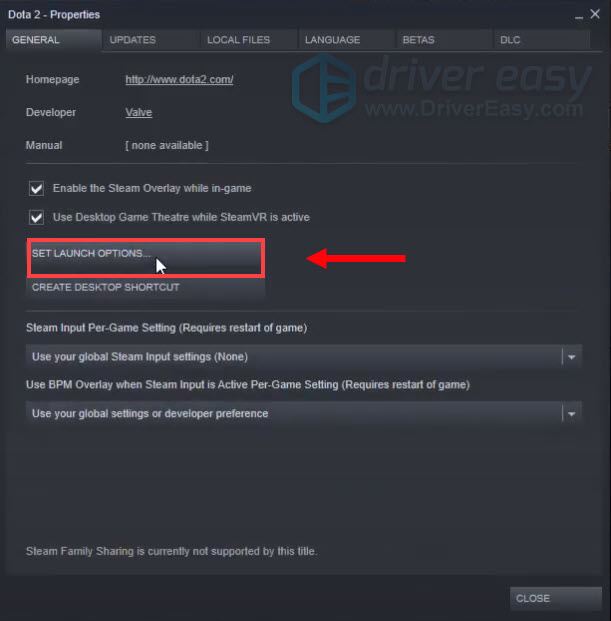
1) Under the Library in Steam, right-click on your game title Dota 2, and select Properties.
2) Under the General tab, click the SET LAUNCH OPTIONS… button.
3) Type -dx11 and then click OK.
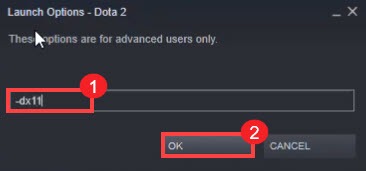
It’s recommended to run your game on dx11. But some older hardware doesn’t support dx11 so you would run it on dx9. You can simply type -dx9 instead of -dx11.
4) Close your game’s Properties window and your problem should be solved. Till then launch your game.
Bonus tip
Many computer problems are caused by outdated device drivers. Particularly in Windows 10.
So if your computer has slowed down, you should update your drivers. If it’s crashing or hanging, update your drivers. If you can’t connect to the internet, update your drivers. If your mouse, keyboard, monitor, or speakers are acting up, update your drivers. In fact, no matter what your problem is, there’s a good chance updating your drivers will fix it.
If you’re considering checking for driver updates, we recommend using Driver Easy. It’s a tool that automatically detects, downloads, and installs the latest drivers corresponding with your system. With Driver Easy, updating drivers becomes super easy and you don’t even need to risk downloading the wrong drivers for your system.
Here are the steps you can take to update your drivers with Driver Easy:
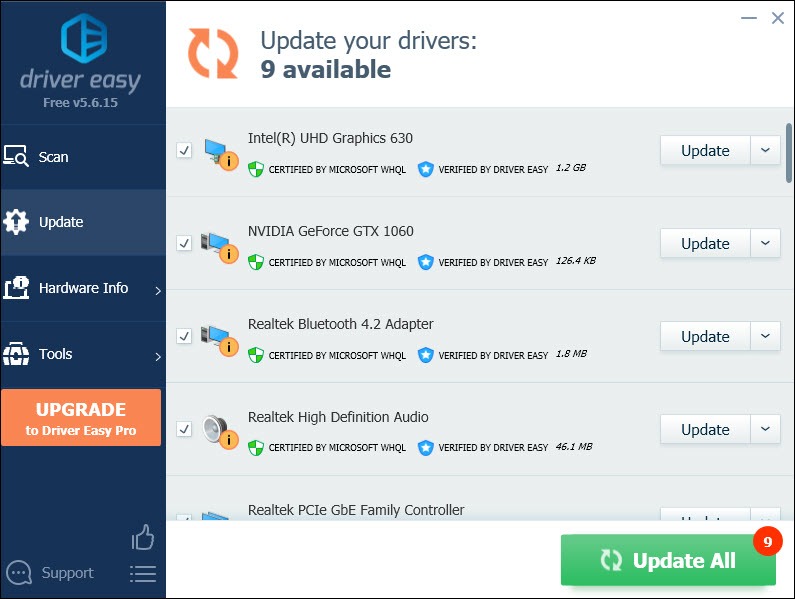
1) Download and install Driver Easy.
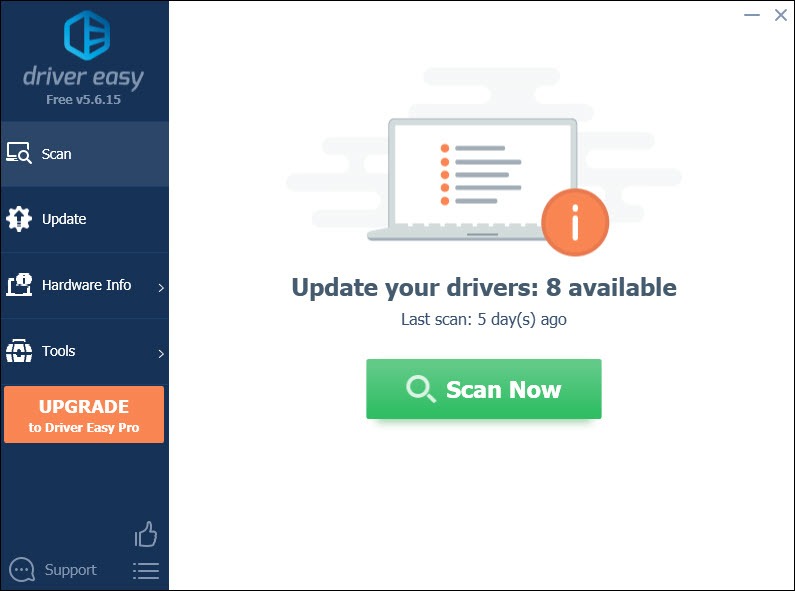
2) Run Driver Easy and click the Scan Now button. Driver Easy will then scan your computer and detect any problem drivers.
3) Click the Update button next to the flagged driver to automatically download the correct version of that driver, then you can manually install it (you can do this with the FREE version).
Or click Update All to automatically download and install the correct version of all the drivers that are missing or out of date on your system. (This requires the Pro version which comes with full support and a 30-day money-back guarantee. You’ll be prompted to upgrade when you click Update All.)