


If you’re looking to download and update the driver for your Intel RAID controller, you’re in the right spot. Updating the driver isn’t as difficult as it sounds. With our step-by-step guide, you’ll be able to update the driver easily and quickly.
How to update the Intel RAID driver
There are two ways for you to update the Intel RAID driver, and you can choose one you prefer.
Option 1 – Manually – You’ll need some computer skills and patience to update your driver this way, because you need to find the exactly right driver online, download it and install it step by step.
OR
Option 2 – Automatically (Recommended) – This is the quickest and easiest option. It’s all done with just a couple of mouse clicks – easy even if you’re a computer newbie.
Option 1 – Download and install the driver manually
Intel keeps updating drivers, so you should go straight to its support website if you want the latest RAID controller driver. You can follow the steps below to update the driver manually:
- Go to Intel download center.
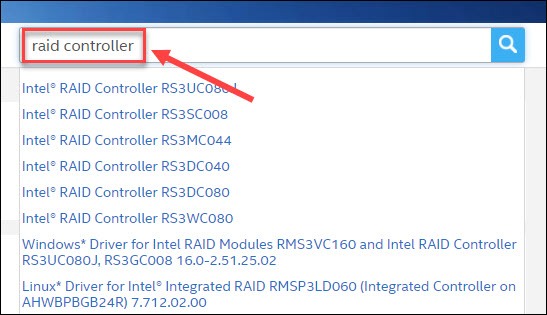
- Type raid controller in the search box, and press Enter.
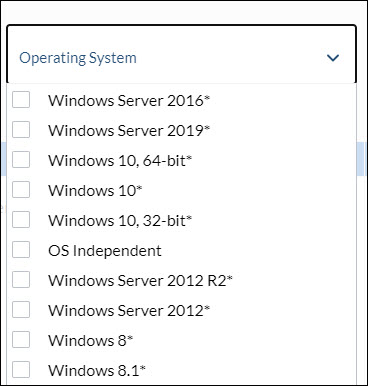
- On the left pane, select your operating system.
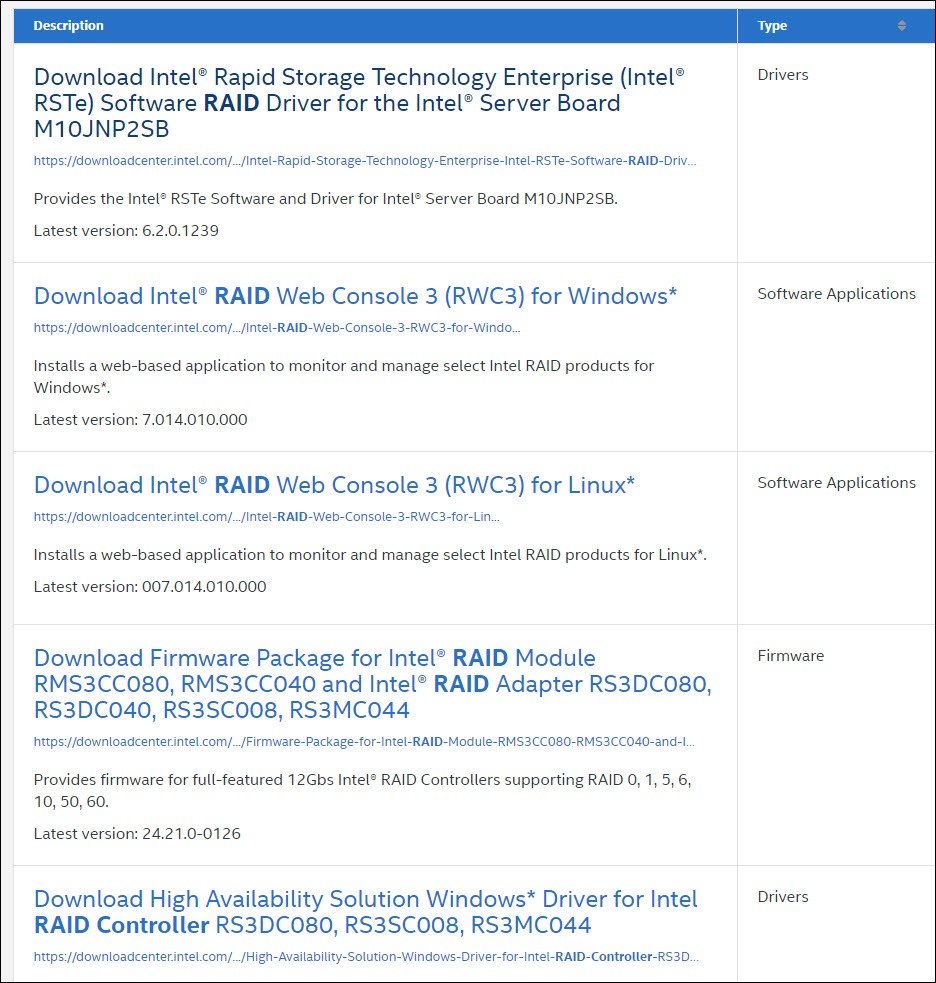
- Click the driver you need and download it.
Once you’ve downloaded the correct driver for your system, double-click the downloaded file and follow the on-screen instructions to install it.
This process is a bit technically inclined. So if you want a simpler method, check out the second option to update the driver automatically.
Option 2 – Automatically update the Intel RAID driver (Recommended)
If you don’t have the time, patience or computer skills to update the Intel RAID driver manually, you can do it automatically with Driver Easy.
Driver Easy will automatically recognize your system and find the correct drivers for it. You don’t need to know exactly what system your computer is running, you don’t need to risk downloading and installing the wrong driver, and you don’t need to worry about making a mistake when installing.
You can update your drivers automatically with either the 7 days free trial or the Pro version of Driver Easy. It takes just 2 clicks, and you get full support and a 30-day money-back guarantee with the Pro version:
- Download and install Driver Easy.
- Run Driver Easy and click the Scan Now button. Driver Easy will then scan your computer and detect any problem drivers.

- Click the Activate & Update button next to the flagged device to automatically download and install the correct version of this driver.
Or click Update All to automatically download and install the correct version of all the drivers that are missing or out of date on your system (You’ll need the Pro version for this – when you select Update All, you’ll get a prompt to upgrade. If you’re not prepared to purchase the Pro version yet, Driver Easy provides a 7-day trial at no cost, granting access to all Pro features like fast downloads and easy installation. No charges will occur until after your 7-day trial period ends.)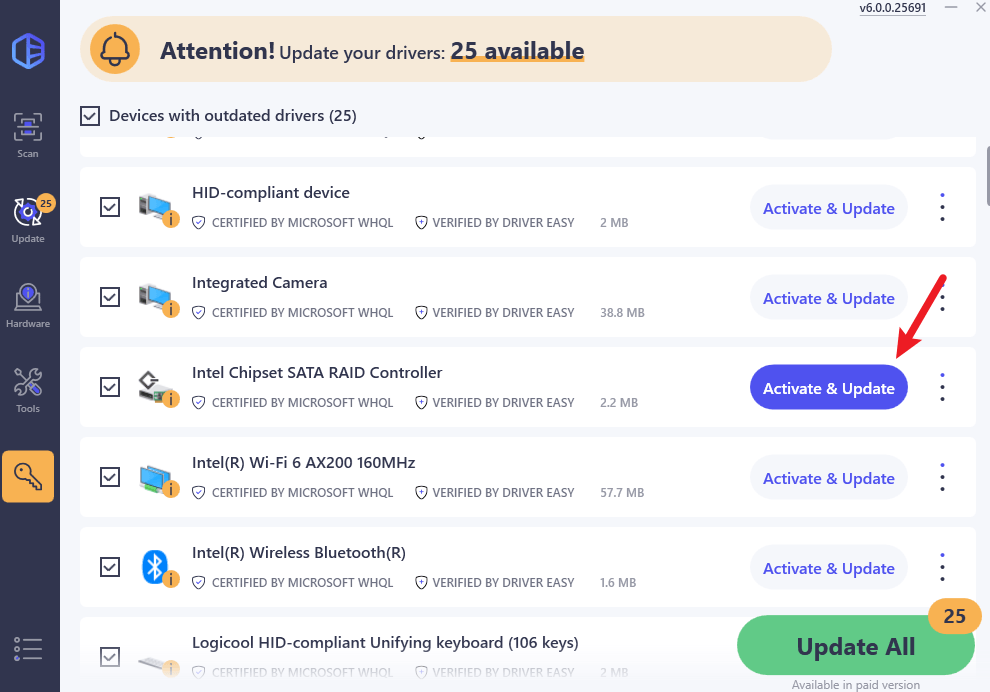
- After updating, restart your computer to take effect.
If you need assistance, please contact Driver Easy’s support team at support@drivereasy.com.
Why do you need to update the RAID driver
RAID stands for Redundant Array of Independent Disks, which allows individual drives to work together as a single larger drive. The RAID controller plays a role in managing the RAID array. If your RAID driver fails to work properly, you may encounter booting problems or other troubles that can even cause data loss. Therefore, it’s important to keep the RAID driver up to date.
Hopefully the methods above are helpful. If you have any questions or suggestions, you’re welcome to leave a comment below.