


Are you seeking to download the corresponding drivers with your wireless network adapter? If so, then you’ve come to the right place. As we all know, drivers are essential to your devices but the process of downloading and installing drivers can be quite fiddly sometimes. Don’t worry, here we’ll show you how to update your network adapter drivers step by step.
How to download and install your wireless network adapter drivers
Generally there are two ways you can update your wireless network adapter drivers:
Option 1 – Automatically (Recommended) – This is the quickest and easiest option. It’s all done with just a couple of mouse clicks – easy even if you’re a computer newbie.
Option 2 – Manually – You’ll need some computer skills and patience to update your driver this way, because you need to find exactly the right driver online, download it and install it step by step.
Option 1 – Automatically update your wireless network adapter driver
For some people, it’s really time-consuming and error-prone to find the exact driver online, download it and install it step by step. If you want to save your time and effort, we highly recommend updating your drivers with Driver Easy, a reliable driver updater tool.
Driver Easy will automatically recognize your system and find the correct drivers for it. You don’t need to know exactly what system your computer is running, you don’t need to risk downloading and installing the wrong driver, and you don’t need to worry about making a mistake when installing. Driver Easy takes care of it all.
You can update your drivers automatically with either the FREE or the Pro version of Driver Easy. But with the Pro version it takes just 2 clicks (and you get full support and a 30-day money back guarantee):
- Download and install Driver Easy.
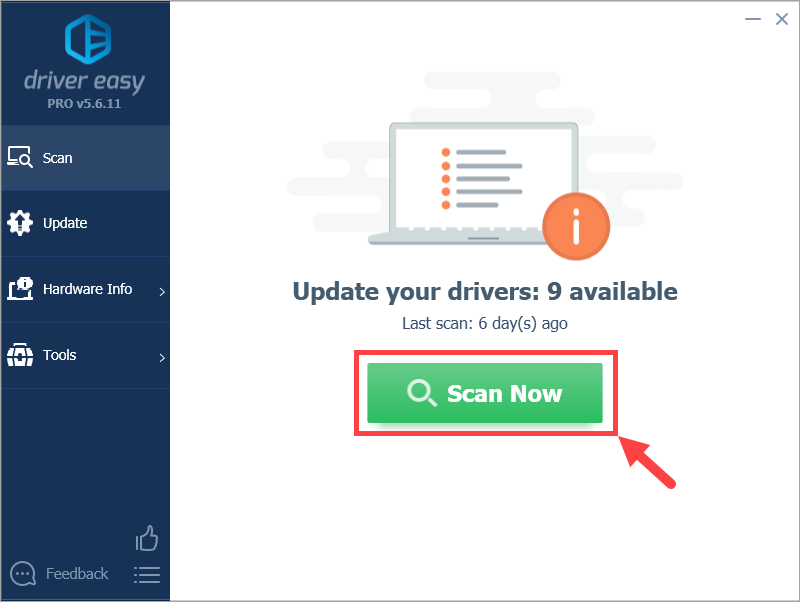
- Run Driver Easy and click the Scan Now button. Driver Easy will then scan your computer and detect any problem drivers.
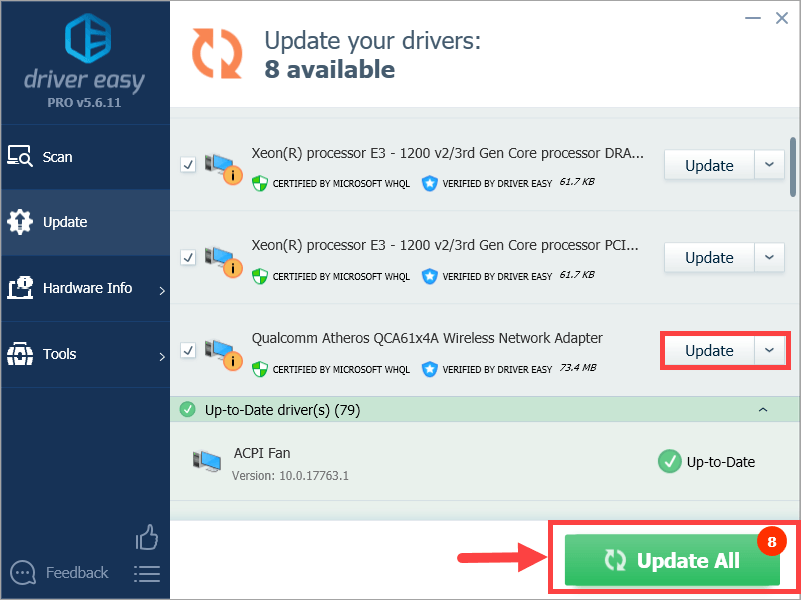
- Click Update All to automatically download and install the correct version of all the drivers that are missing or out of date on your system (this requires the Pro version – you’ll be prompted to upgrade when you click Update All). Or if you just want to update your wireless network adapter driver for now, simply click the Update button next to it.
Note: you can do it for free if you like, but it’s partly manual.
If you have any problems when using Driver Easy to update your drivers, please feel free to drop us an email at support@drivereasy.com. We are always here if we can help.
Option 2 – Update your wireless network adapter driver manually
If you feel like updating the wireless network adapter driver manually, here’s the simple and useful guide for you.
Update your driver via official websites
Manufacturers of wireless network adapters such as Qualcomm keep updating drivers. To get them, you need to visit their official websites, find the drivers corresponding with your specific flavor of Windows version (for example, Windows 10 of 64 bit) and download the drivers manually.
Once you’ve downloaded the correct drivers for your system, double-click on the downloaded file and follow the on-screen instructions to install the driver.
Update your driver via Device Manager
One of the most commonly used methods to update your driver is downloading and installing it via Device Manager. However, you should note that sometimes Windows may fail to detect the latest (and even necessary) driver for your device. In this case, you’ll have to search for the correct driver online or simply turn to Option 1.
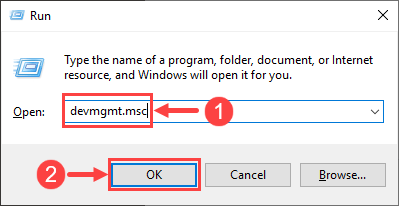
- Press the Windows Logo Key and R at the same time to invoke the Run dialog box. Then type devmgmt.msc and click OK.
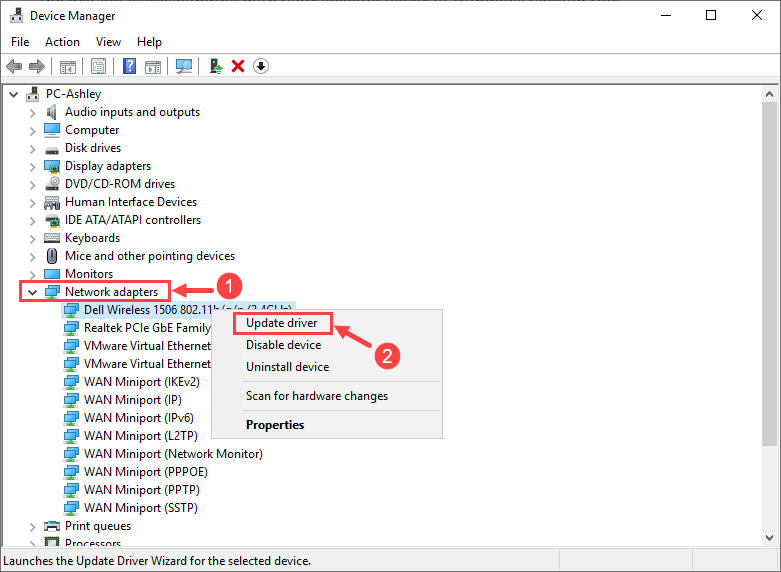
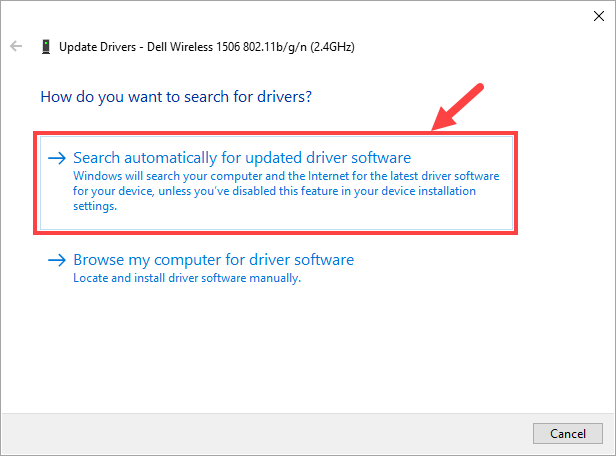
- Here comes the window of Device Manager. Double-click on the Network adapters node to expand its drop-down list. Then right-click on your wireless network adapter and select Update driver.
- Click Search automatically for updated driver software.
- Wait for the download and installation process to complete.
- Click Close when it’s all done.
- Now your driver has been updated by Windows successfully. Don’t forget to restart your computer for the changes to take effect even if you’re not asked to.
Hopefully you find this post useful. Please feel free to leave a comment below if you have any further questions or ideas. Thanks for reading!