


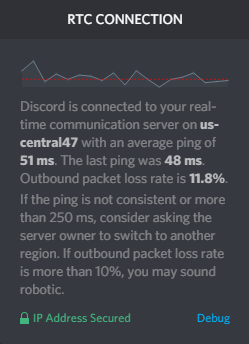
It’s annoying when you encounter high outbound packet loss in Discord – you might start lagging to everyone in the call, stuttering during streams, and getting a horrendous amount of lag while gaming.
If you’re experiencing packet loss when running Discord, don’t panic. Here’re 6 fixes to try. You may not need to try them all; just work your way down the list until you find the one that does the trick!
Fixes to try:
1. Restart your devices
Yes, a restart of your devices – as simple as it sounds. This almost always works when it comes to computer glitches or bugs. If your computer and router have been running for a while, now is the time to restart them.
2. Use a wired connection
Packets are more likely to get lost during transmission when you’re using a wireless network. So you may want to switch to an Ethernet connection (if it’s available), as a wired connection tends to be more stable than a wireless one.
If you’re already using a wired connection, you may want to switch to a different network to see if that helps. For example, you can connect to your Wi-Fi, or use your phone as a hotspot and see if Discord runs correctly on them without packet loss. If yes, that could be an issue with your network. In this case, it might be worth checking with your ISP to see if they are having issues on their end.
3. Configure Discord settings
Discord also offers you an option to circumvent the packet loss issue.
1) Launch Discord.
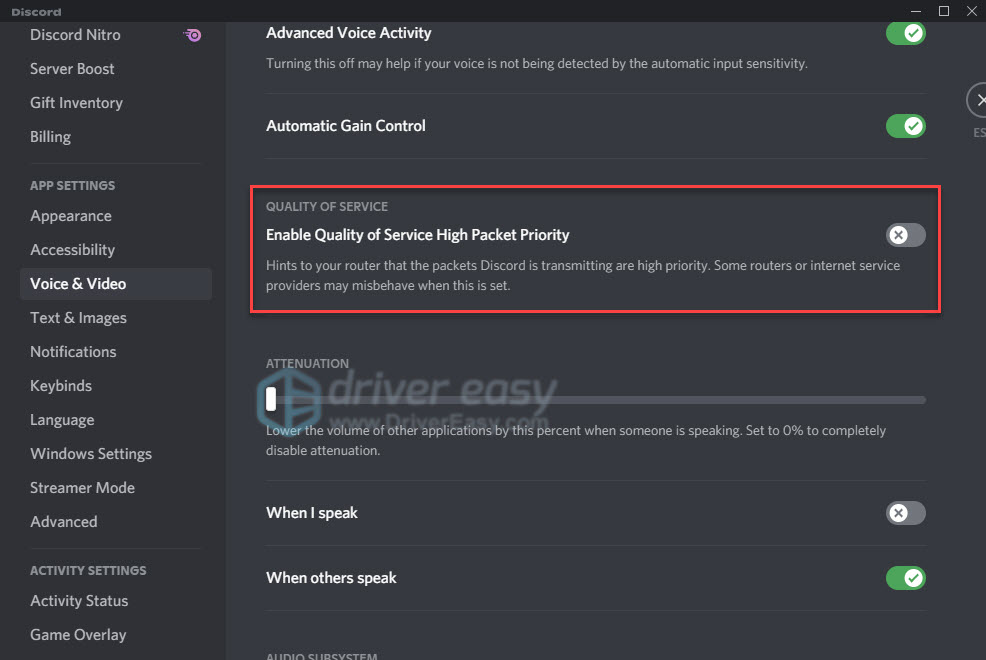
2) Go to Settings > Voice & Video > Advanced.
3) Under QUALITY OF SERVICE, Disable the Enable Quality of Service High Packet Priority option.
If changing the setting didn’t resolve the issue for you, try the next fix.
4. Use a VPN
A VPN, also known as a Virtual Private Network, can help improve your ping and thus fix packet loss issues, especially when your network is throttled by your ISP.
A good VPN encrypts your data and redirects it through a protected tunnel. In this way, your ISP won’t be able to tell what kind of traffic you’re sending or receiving, and thus can’t interfere with your network. Your packet loss issue will likely be fixed in this case.
There’re many VPN services available to choose from, but not every one of them is made equal. First, you may want to go for a paid VPN service instead of a free one as free VPNs come with hidden costs – ad tracking, slow connections, etc.
If you want a trustworthy service, we recommend NordVPN, but if you’re looking to save money, you may want to try Surfshark, which only costs less than $2.5 a month.
5. Try the web version
If you’re running into this issue when running the Discord web version, you can try the Discord web version instead.
1) Go to discord.com.
2) Select Open Discord in your browser.

If the packet loss issue persists in the web version, the problem could be with Discord itself. You may want to check Discord’s status to see if any of its servers is down.
6. Reinstall Discord
If you’re running into the packet loss problem when using the desktop version of Discord, it could be an issue with installation files. Try reinstalling Discord:
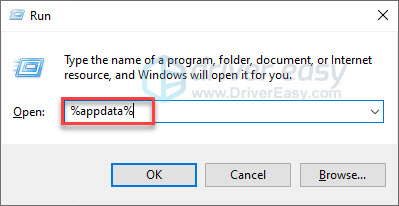
1) On your keyboard, press the Windows logo key and R at the same time to open the Run dialog.
2) Enter %appdata% and press Enter.
3) Delete the Discord folder.

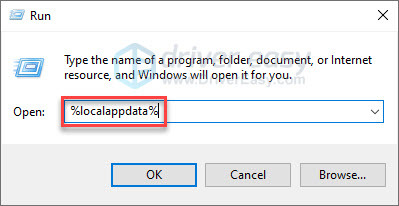
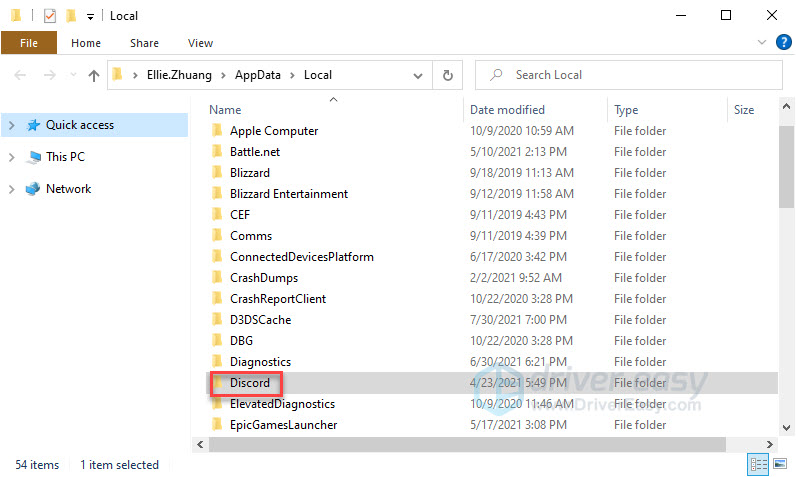
4) On your keyboard, press the Windows logo key and R to open the Run dialog.
5) Enter %localappdata% and press Enter.
6) Delete the Discord folder.
7) On your keyboard, press the Windows logo key and R at the same time.
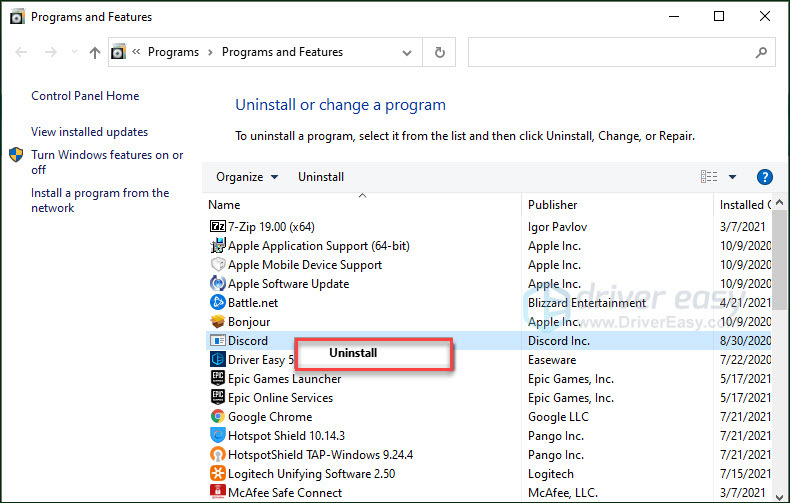
8) Enter appwiz.cpl and press Enter.
9) Right-click Discord and select Uninstall.
10) Download Discord and install it on your computer.
7. Update your network adapter driver
Although it’s rare, network issues could happen when your network adapter driver is outdated or corrupted. So you want to make sure that your network driver is updated.
You can manually check the driver for your network adapter by going to the manufacturer’s website and searching for the most recent correct driver. Be sure to choose only driver that is compatible with your Windows version.
If you’re not comfortable playing with device drivers, we recommend using Driver Easy. Driver Easy will automatically recognize your system and find the correct driver for you.
You don’t need to know exactly what system your computer is running, you don’t need to risk downloading and installing the wrong driver, and you don’t need to worry about making a mistake when installing.
1) Download and install Driver Easy.
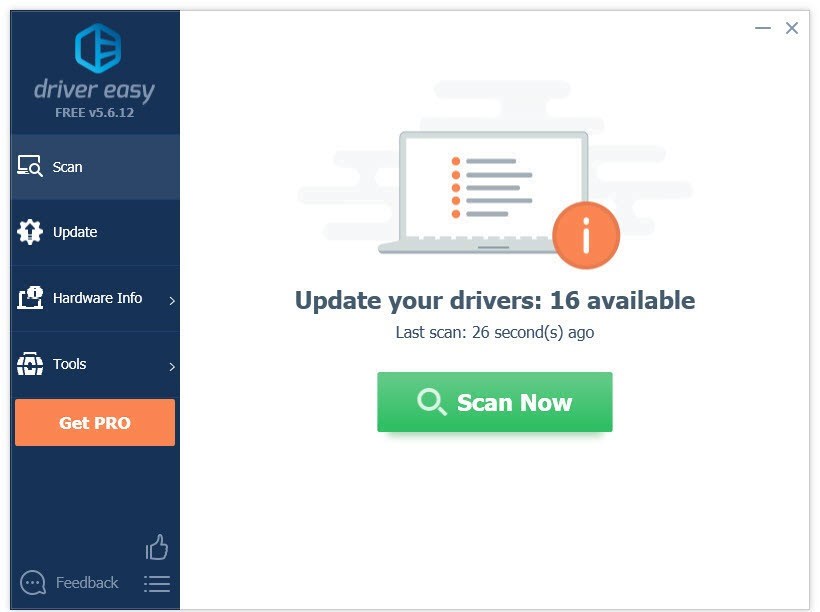
2) Run Driver Easy and click the Scan Now button. Driver Easy will then scan your computer and detect any problem drivers.
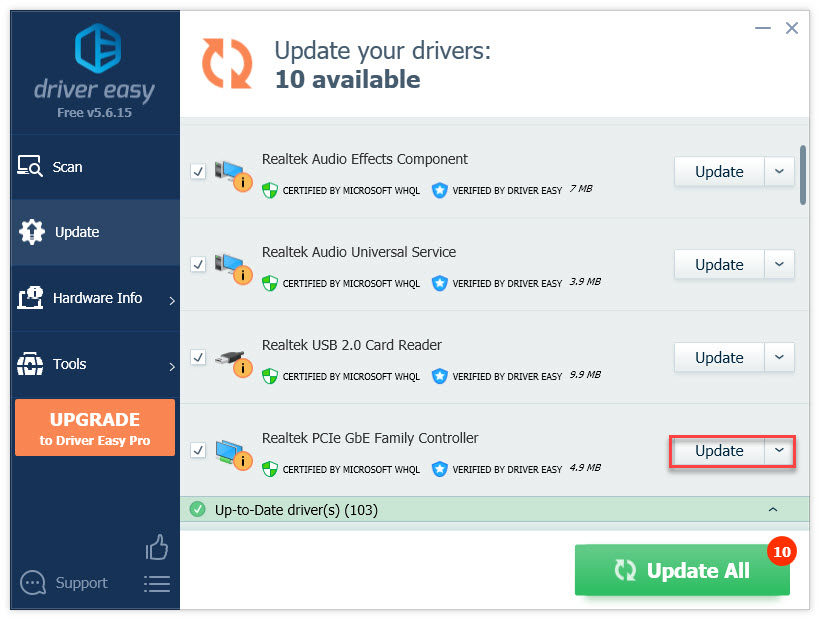
3) Click the Update button next to the network driver to automatically download the correct version of that driver, then you can manually install it.
Or click Update All to automatically download and install the correct version of all the drivers that are missing or out of date on your system. (This requires the Pro version which comes with full support and a 30-day money-back guarantee. You’ll be prompted to upgrade when you click Update All.)
Hopefully, this article has solved your problem! Please feel free to leave a comment if you have any questions or suggestions, or let us know if you manage to resolve this issue in some other way!