


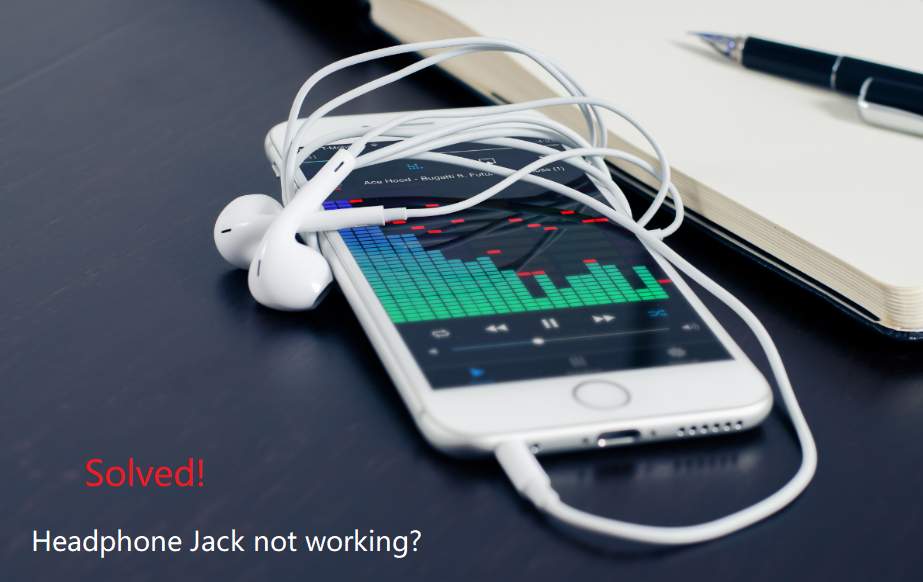
You are going to listen to music on your device, but you just find your headphone jack not working when you plug your headphone into the device. Don’t worry! You can try the methods below to troubleshoot your issue and fix headphone jack not working fast and easily.
First of all, you may need to locate where the problem lies in. So you can check method 1 to troubleshoot. Once you are sure the cause of the problem is not in your headphone, it can be a problem in your device. You can check method 2 in Windows if your headphone jack not working in Windows PC/laptop; Or you can check method 3 if your headphone jack not working in iOS devices.
Method 1: Troubleshoot to locate the problem
Method 2: Check your Windows to fix headphone jack not working
Method 3: Check your iPhone to fix headphone jack not working
Method 1: Troubleshoot to locate the problem
The headphone jack not working issue occurs probably because of your headphone itself, or due to the incorrect configuration in your device. So, the first thing you need to do is to locate where the problem is.
The easiest way is to try your headphone in other devices to see if it works on those devices. You can try it on more than one device, and that may help you locate the problem more clearly.
If your headphone doesn’t work on other devices you tested on, it’s very likely to be the problem of your headphone itself. You can replace it with a new headphone to solve this problem.
If your headphone works on other devices you tested on, but is not working on your iPhone or Windows PC/laptop, then it can be a problem on your iPhone or Windows. You can check the specific steps in Windows by method 2, or check the specific steps on iPhone by method 3.
Additionally, it’s possible that your headphone is not compatible with your device. You can also try another headphone in your device to locate the problem.
Method 2: Check your Windows to fix headphone jack not working
If you have checked the troubleshooting steps in method 1, and you are sure that it’s a problem with your Windows PC/laptop, go on and check the following solutions:
Solution 1: Clean the Headphone Jack
Solution 2: Set your headphone as the default device
Solution 3: Update audio device driver
Solution 4: Uninstall IDT audio device
Solution 1: Clean the Headphone Jack
As we know, if there is any dust or lint in the headphone jack, the headphone will not be working when plugging into the device. So you can try to clean the headphone jack in your computer first.
1) Simply take a look at the headphone jack in your device to see if there is any obstacle that may stop the headphone from being connected.
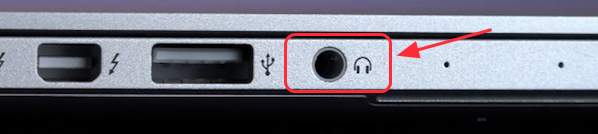
2) Clean the headphone jack with a cotton swab or soft brush. Push it into the jack and swirl it around a little bit to get the dust and lint out.
Note: In order not to damage the headphone jack, please don’t use anything sharp to clean the headphone jack.
3) After cleaning out the dust or lint, try your headphone again to see if it works now.
Solution 2: Set your headphone as the default device
After plugging the headphone into your computer, it should work normally. But if your headphone is not set as default device, it may fail to work. Follow these steps to set it up.
Note: The screenshots below are shown on Windows 10, but the fixes below are applied to Windows 7 & 8.
1) Plug your headphone into your computer.
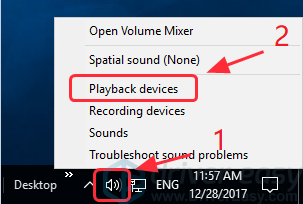
2) Right click the Speaker icon at the bottom right corner on your computer, and click Play devices.
3) Click Headphone, and click Set Default at the bottom.
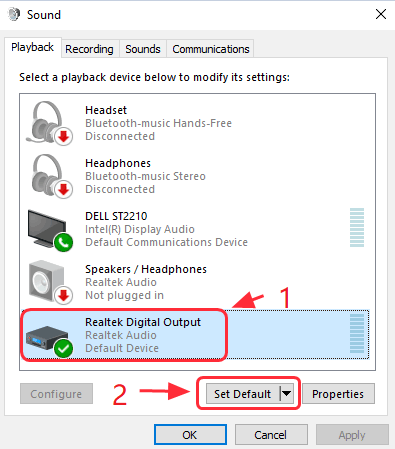
In some cases, there is no headphone option but Speakers/Headphones. If that’s your case, select Speakers/Headphones, and click Set Default.
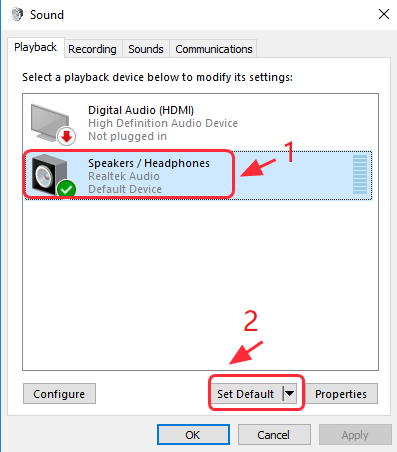
4) Click OK to save the settings.
5) Try your headphone in your Windows to see if it works now.
Solution 3: Update audio device driver
The headphone jack not working issue can be caused by the missing or outdated audio device driver. You can try to update the audio driver in your Windows. There are two options to update your driver:
Option 1: Manually
You can download the correct audio driver from the Internet, then install it in your computer. That may require time and computer skills.
Option 2: Automatically
If you don’t have time or skills to manually update the driver, you can do that with Driver Easy.
Driver Easy will automatically recognize your system and find the correct drivers for it. You don’t need to know exactly what system your computer is running, you don’t need to risk downloading and installing the wrong driver, and you don’t need to worry about making a mistake when installing.
You can update your drivers automatically with either the FREE or the Pro version of Driver Easy. But with the Pro version it takes just 2 clicks:
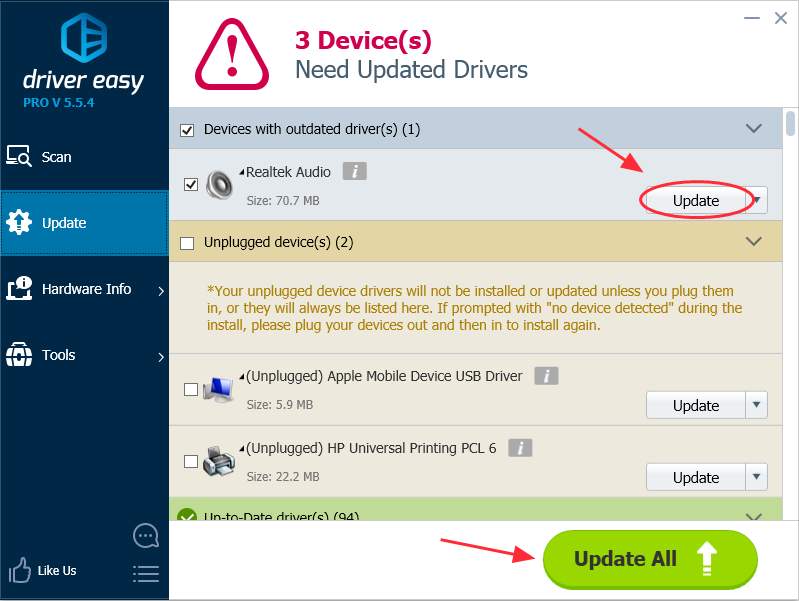
1) Download and install Driver Easy
2) Run Driver Easy and click Scan Now. Driver Easy will then scan your computer and detect any problem drivers.

3) Click the Update button next to the audio driver to automatically download and install the correct version of this driver (you can do this with the FREE version). Or click Update All to automatically download and install the correct version of all the drivers that are missing or out of date on your system (this requires the Pro version – you’ll be prompted to upgrade when you click Update All).
4) After updating driver, restart your PC/laptop and try your headphone again.
Solution 4: Uninstall IDT audio device
If you have installed IDT audio device in your Windows, this solution works for you.
1) On your keyboard, press the Windows logo key  + R at the same time.
2) Type appwiz.cpl in the Run box, and press Enter.

3) Right click IDT, click Uninstall, and click Yes to confirm the delete.
4) Restart your computer and try your headphone again.
Method 3: Check your iPhone to fix headphone jack not working
If you have checked the troubleshooting steps in method 1, and you are sure headphone jack not working is caused by the iPhone/iPad device, you can check the following solutions.
Note: while you are following the solutions below, make sure to unmute your device and increase the volume to medium or higher.
Solution 1: Clean the Headphone Jack
Solution 2: Restart your iOS device
Solution 3: Check Bluetooth Output
Solution 4: Check AirPlay output
Solution 1: Clean the Headphone Jack
First of all, you can check the headphone jack and the cables to make sure they are working properly.
1) Unplug the headphone cables from your iPhone/iPad
2) Clean the headphone jack with a cotton swab or soft brush. Push it into the jack and swirl it around a little bit to get the dust and lint out.
Note: In order not to damage the headphone jack, please don’t use anything sharp to clean the headphone jack.

3) After cleaning out the dust or lint, re-plug and try your headphone again to see if it works now.
Solution 2: Restart your iOS device
It may not be harmful to restart your iPhone/iPad, as many technical issues can be solved by restarting the device. So you can follow these instructions to restart your iPhone:
If you are using iPhone X
If you are using iPhone 8 or earlier, iPad or iPod Touch
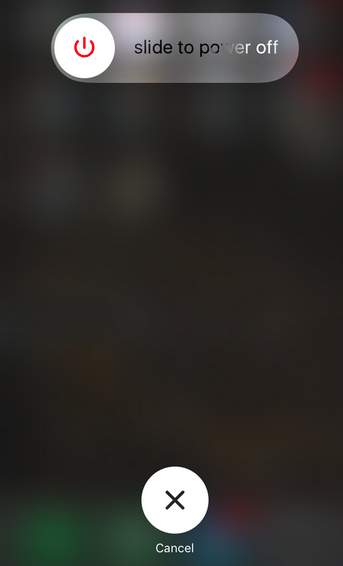
1) Press and hold the Side button and either volume button until the slider appears.
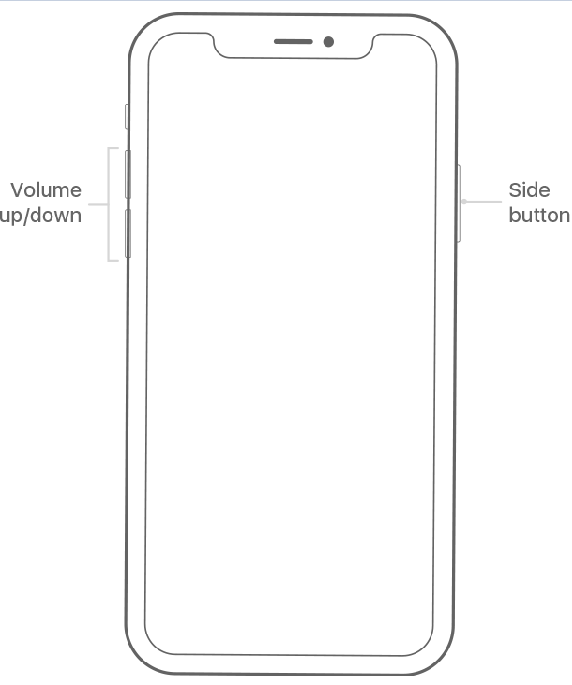
2) Drag the slider to turn your iPhone X completely off.

3) After your iPhone X turns off, press and hold the Side button again until you see the Apple logo.
4) Plug your headphone into the headphone jack to see if it works now.
If you are using iPhone 8 or earlier, iPad r iPod Touch:
1) Press and hold the Top (or Side) button until the slider appears.
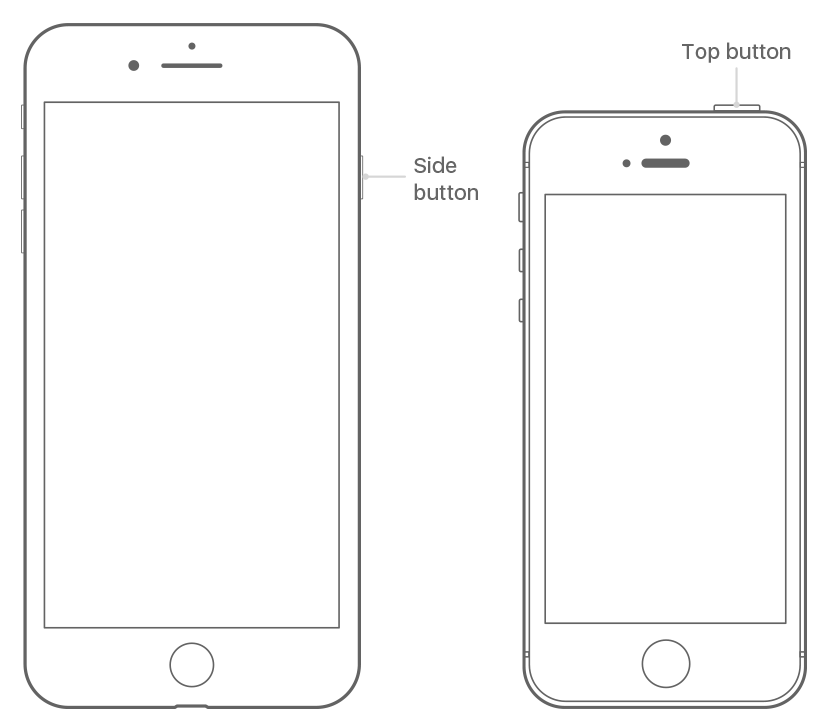
2) Drag the slider to turn your device completely off.
3) After the device turns off, press and hold the Top (or Side) button again until you see the Apple logo.
4) Plug your headphone into the headphone jack to see if it works now.
Solution 3: Check Bluetooth Output
It happens that your headphone jack is not working when your device is connected to a different device via Bluetooth. So you may need to check if your iPhone/iPad/iPod is paired with other speaker, or wireless headphone. If so, your headphone jack will be disabled and you won’t hear anything when plug in the headphone. Follow these steps to have a check:
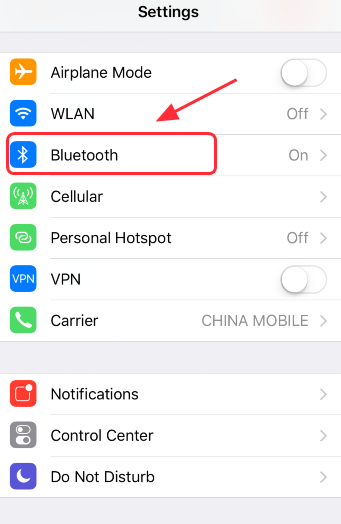
1) Go to Settings > Bluetooth.
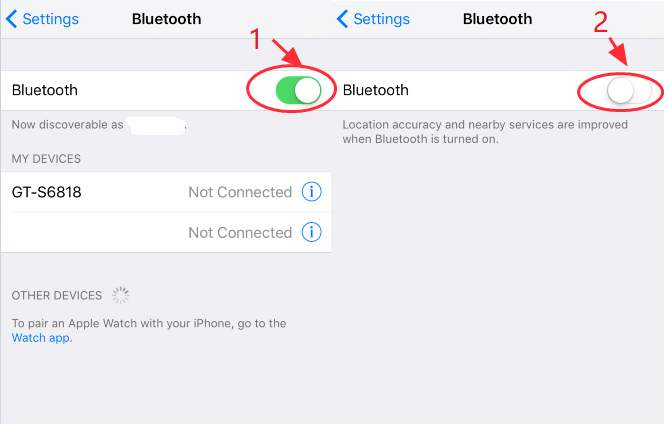
2) Tap the button to turn off Bluetooth.
3) Try your headphone again now.
Tips: If you don’t want to turn off Bluetooth, you may need to disconnected the paired device(s) with your iPhone/iPad to troubleshoot the problem.
1) Go to Settings > Bluetooth.
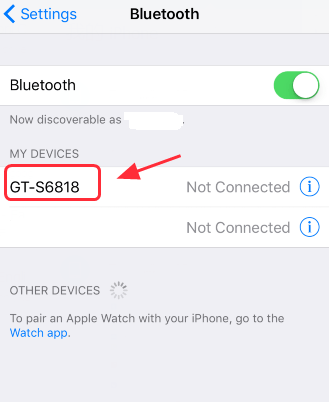
2) In the MY DEVICES section, tap any connected device to disconnect it.
3) Try your headphone again now to see if it works.
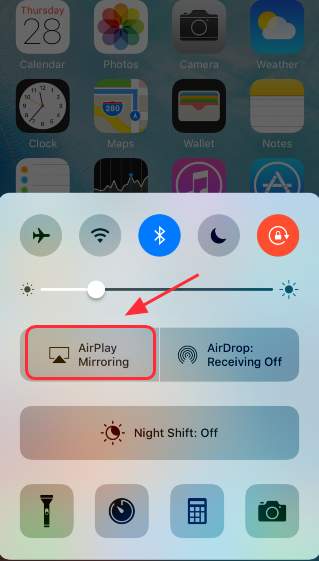
Solution 4: Check AirPlay output
If the audio doesn’t play through your headphone, one possible reason is that your iPhone is sending audio to another device, and that can be the AirPlay output.
AirPlay allows you to synchronize the photos, music, videos, and even the screen on your iOS device to your Apple TV wirelessly.
1) Swipe up from the bottom of your iPhone/iPad/iPod screen.
2) Check the AirPlay button.
If the button is lit up, AirPlay is turned on. Then tap AirPlay button to turn it off.
If the button is grey, it’s turned off.
3) Re-plug your headphone and try it again to see if it works.
That’s all about it. Which solution helps you out? Feel free to let us know if you have any questions.