


Whenever you feel it lagging or freezing on the Windows 11, problems could possibly come from anywhere from low system storage to outdated drivers or from too many running programs to 100% disk usage. If you would like some tips to solve these issues without too much effort, this tutorial is exactly what you need.
Below are 8 easy solutions to boost your computer performance on Windows 11 without having to play around too many critical settings.
Try these solutions:
You might not need to try them all, just walk your way down the list until you find the laggy problem getting better.
- Update Windows 11
- Update drivers
- Have a check on the Task Manager
- Adjust startup Apps
- Uninstall rarely-used apps
- Disable visual effects
- Delete temporary files
- Run Disk Cleanup
Method 1: Update Windows 11
Keeping the Windows 11 up-to-date can let you avoid some bugs and glitches existing in the older version that might cause your computer lag.
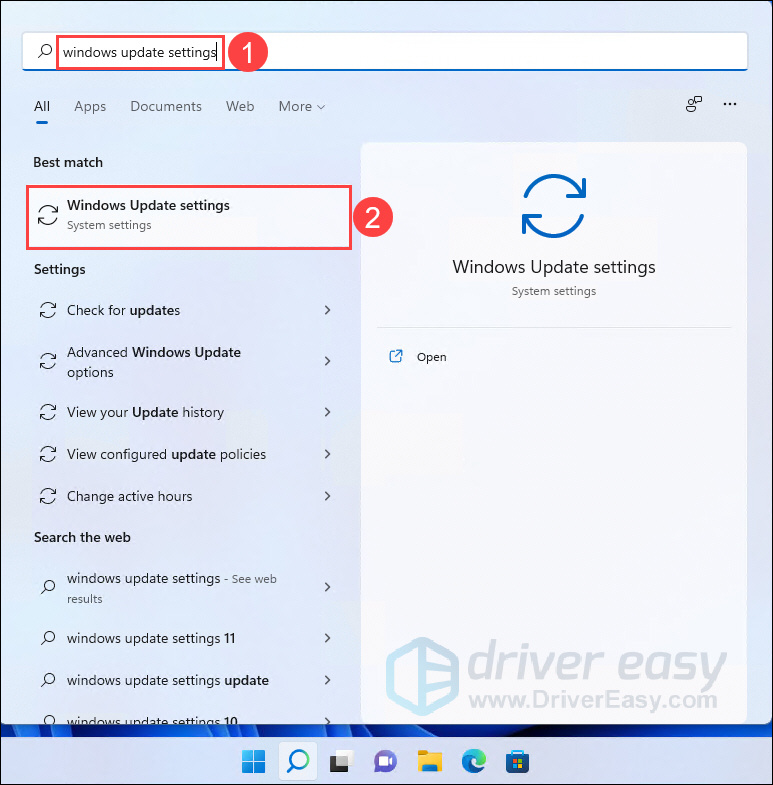
- Press the Windows key to open the Start menu, type Windows Update settings in the search box and select it from the result that appears.
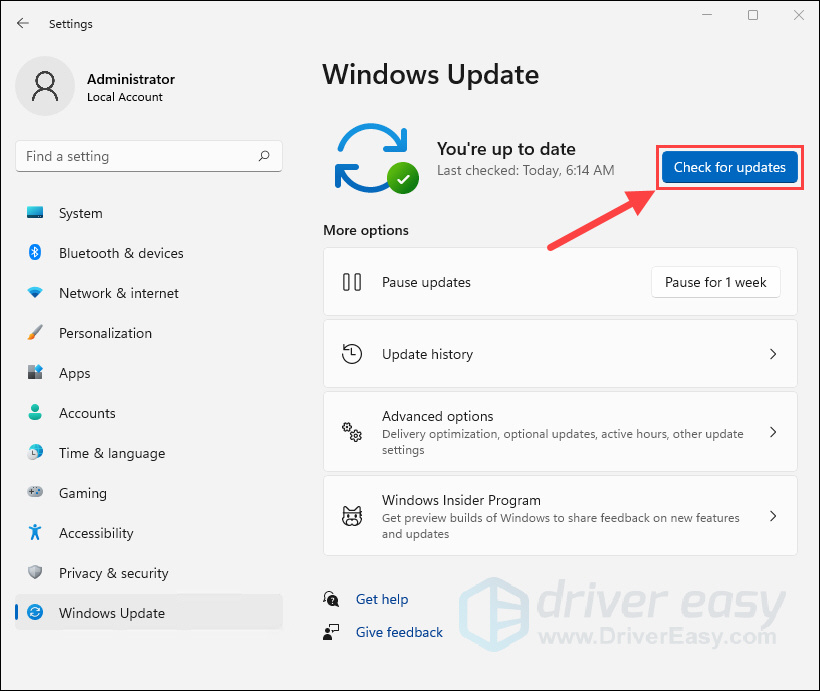
- Click Check for updates and wait for a while.
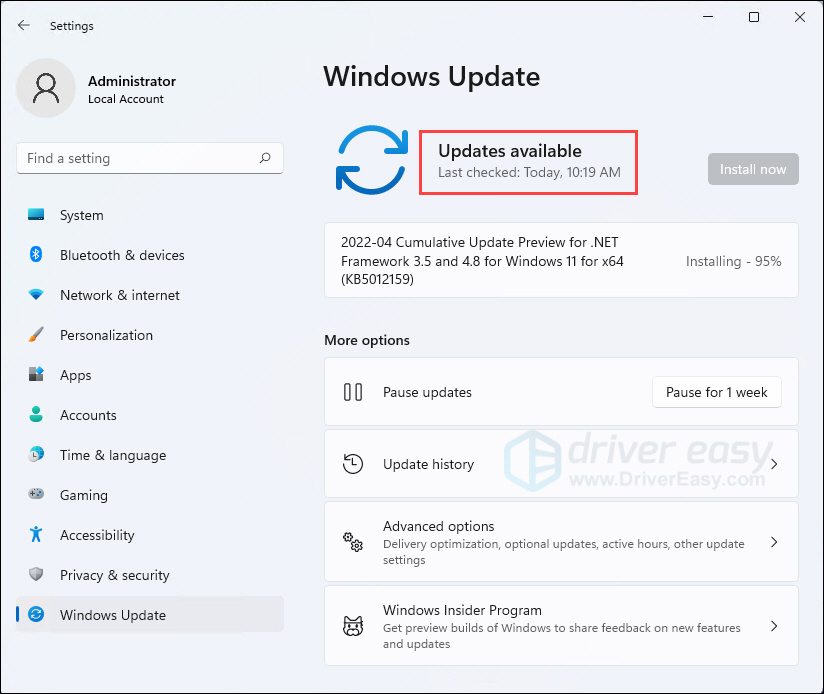
- If the checking result is updates available, the system will automatically download and install it for you.
Or if the checking result is You’re up to date, then you can just close the Setting windows.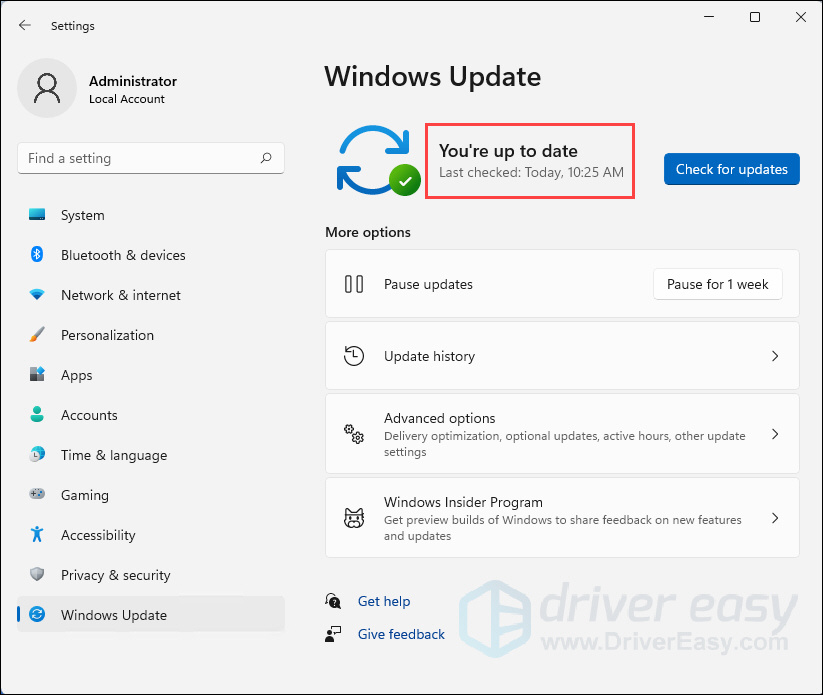
If this method doesn’t work for you, try the following below.
Method 2: Update drivers
Updating drivers should always be your go-to option when your computer or system doesn’t work as smoothly as you expected. Drivers are the interpreters between a computer and all its devices. With faulty and outdated drivers, your computer may bring you troubles. Therefore, it’s essential that you have the latest correct device drivers for your operating system at all times.
If you’re not comfortable playing with device drivers, we recommend using Driver Easy. It’s a tool that detects, downloads and installs any driver updates your computer needs. Here’s how to update drivers with Driver Easy:
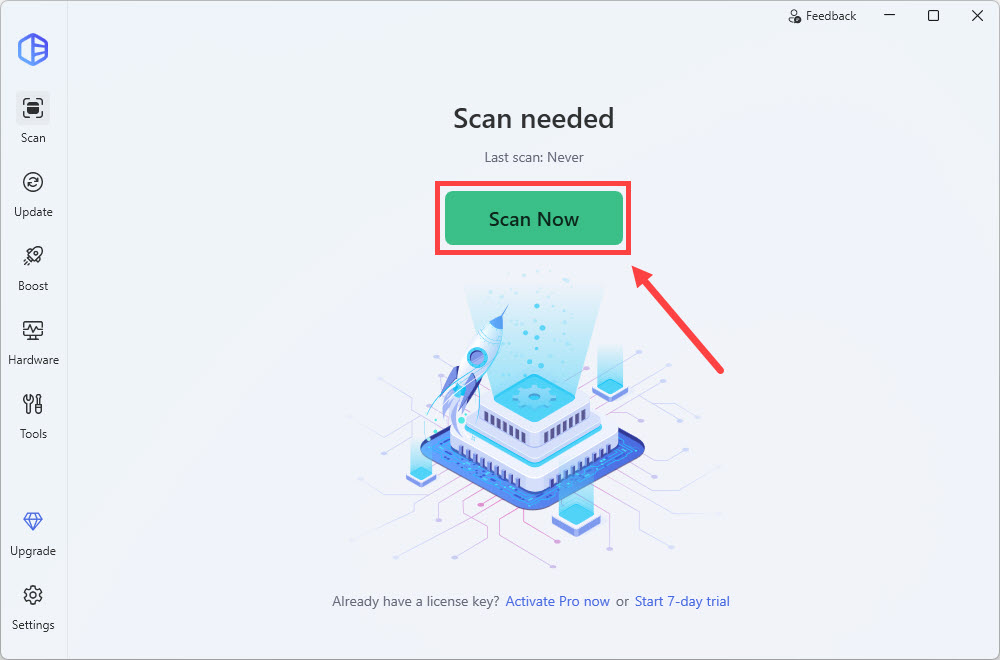
- Download and install Driver Easy.
- Run Driver Easy and click the Scan Now button. Driver Easy will then scan your computer and detect any problem drivers.
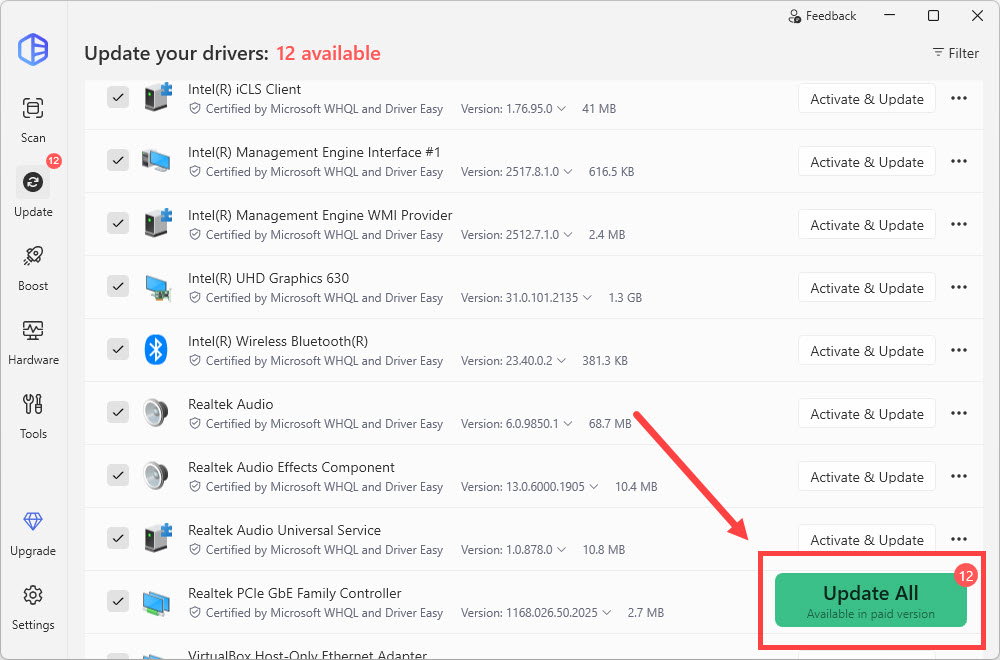
- Click Update All to automatically download and install the correct version of all the drivers that are missing or out of date on your system (this requires the Pro version, which comes with full support and a 30-day money-back guarantee. You’ll be prompted to upgrade when you click Update All).
- Restart your PC to see if your computer still stutters after updating the drivers. If the problem still persists, you should try other methods in this post.
Method 3: Have a check on the Task Manager
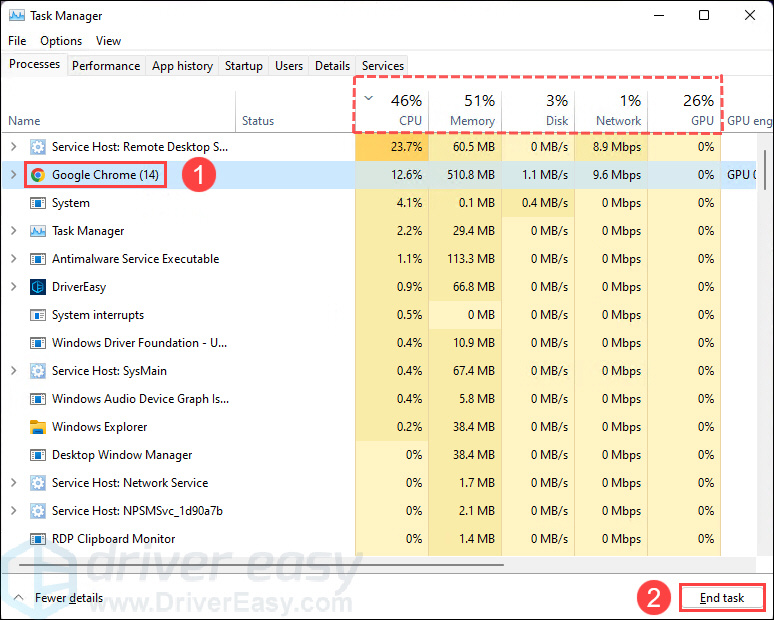
Task Manager is a tool in Windows system that enables you to monitor the CPU, Memory or Disk usage. If some of the processes are over-utilizing resources, that might make your OS run slow.
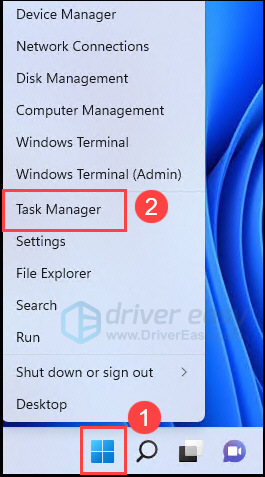
- Right-click the Windows icon on the task bar and select Task Manager from the pop-up list.
- Under the Processes tab, you will have detailed information on the right and the name of each process on the left. Select some processes using up most of the available resources and click End task.
If this method doesn’t work for you, try the following below.
Method 4: Adjust startup Apps
Usually Windows 11 would run faster when you start your computer with less startup Apps. Disable some of the unnecessary startup Apps is a way to help with the lagging problem in Windows 11.
- Press the Windows key to open the Start menu, type startup apps in the search box and select it from the result that appears.
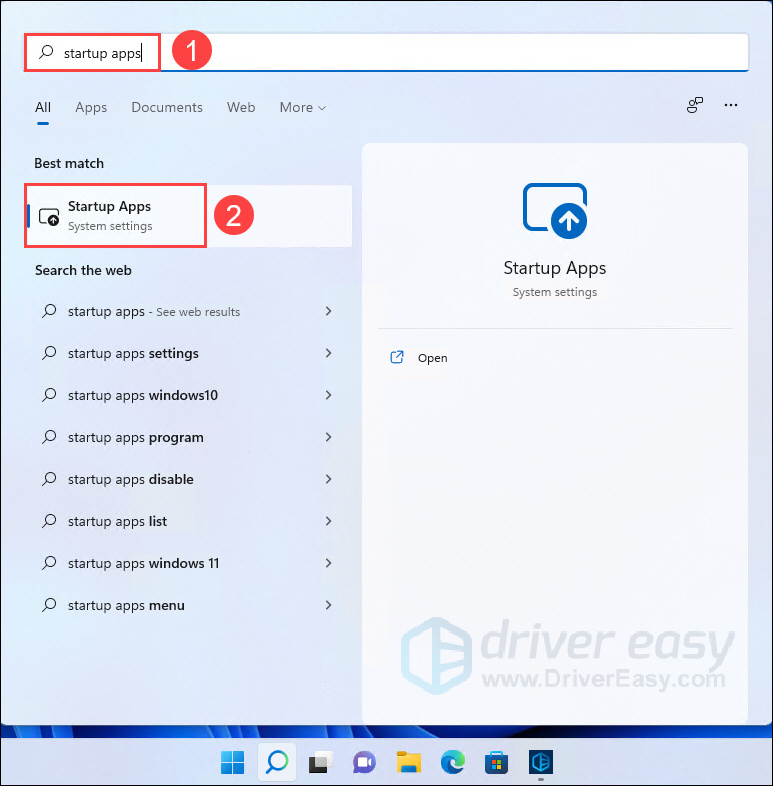
- Click the toggles to Off for those Apps you want to keep them from automatically opening (especially those with High impact).

After applying these settings, have a check to see if it works for you. If not, try next one below.
Method 5: Uninstall rarely-used apps
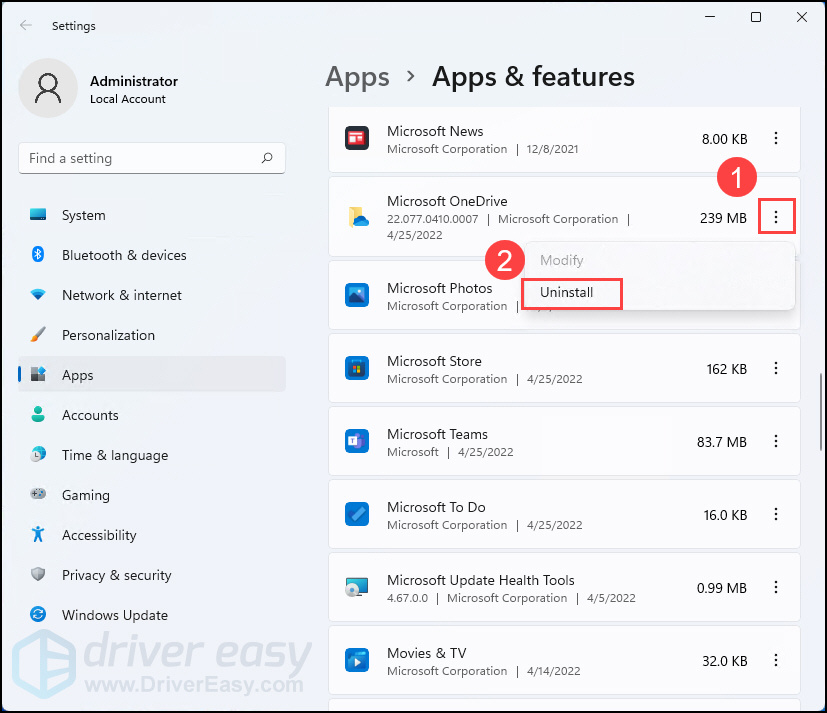
- Press the Windows key to open the Start menu, type apps & features in the search box and select it from the result.
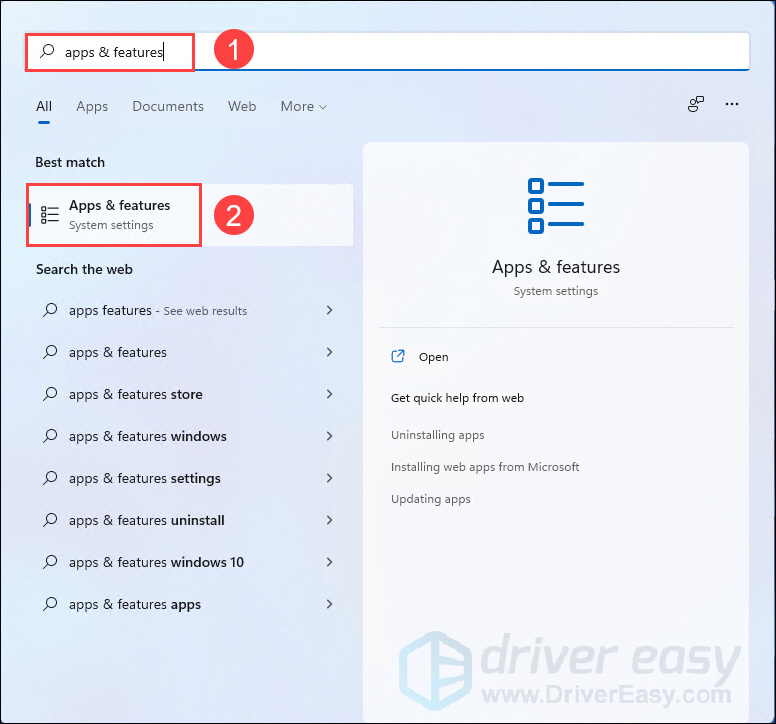
- Next, you will see a list of apps installed in your system. Click the 3-dots button on the apps you rarely use and then select Uninstall.
Method 6: Disable visual effects
Windows 11’s visual effects are new features in Microsoft OS. They perform flashy visuals to meet users’ aesthetic needs, but in some situations, they also make the OS sluggish.
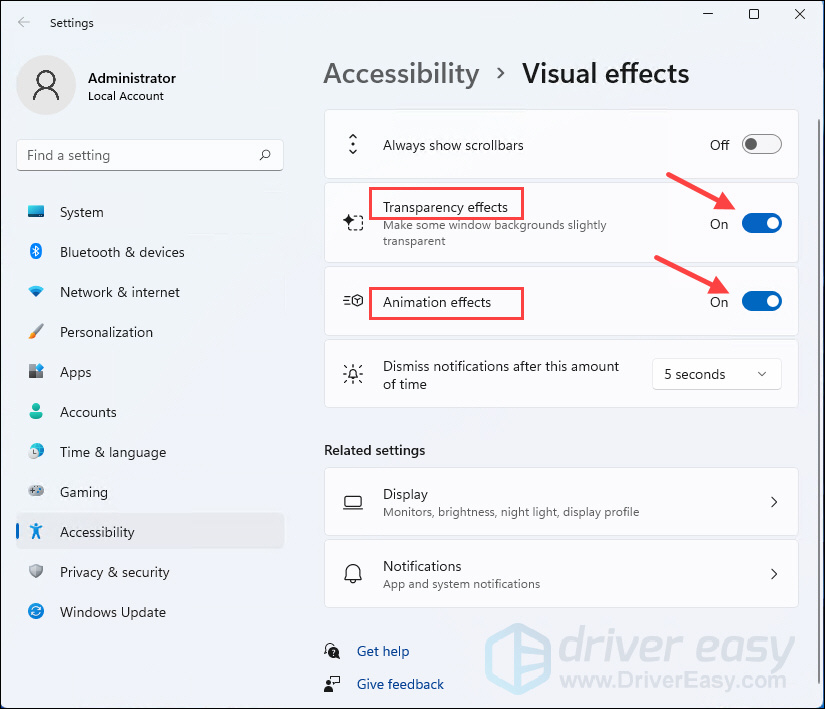
- Press the Windows key to open the Start menu, type visual effects in the search box and select it from the result.
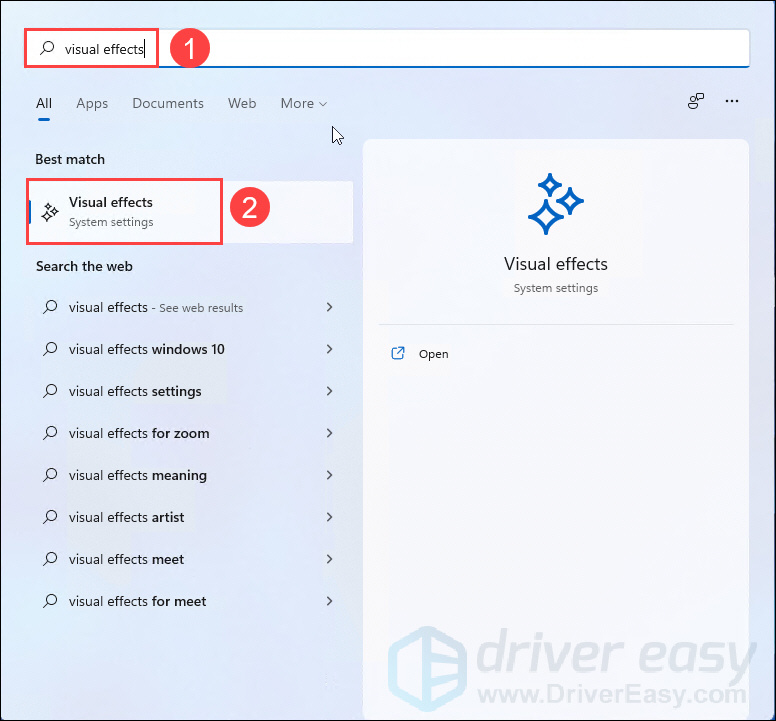
- If the Transparency effects and Animation effects are on in the list, click on the toggles to turn them off.
After applying these settings, have a check to see if it works for you. If not, try the following below.
Method 7: Delete temporary files
Temporary files are created by programs for temporary purposes. They can take up an amount of storage space over the time, so deleting temp files would be a wise choice to fix the lagging problem.
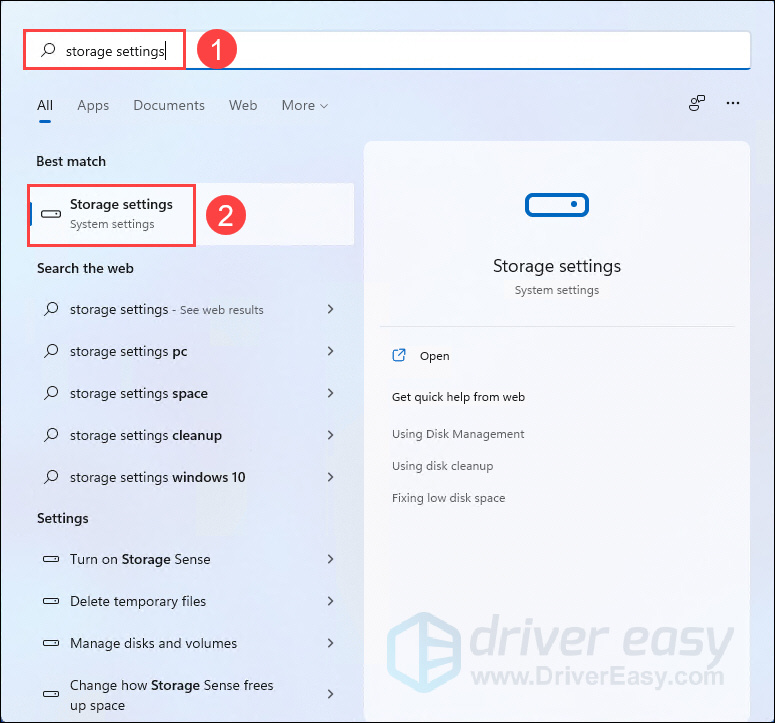
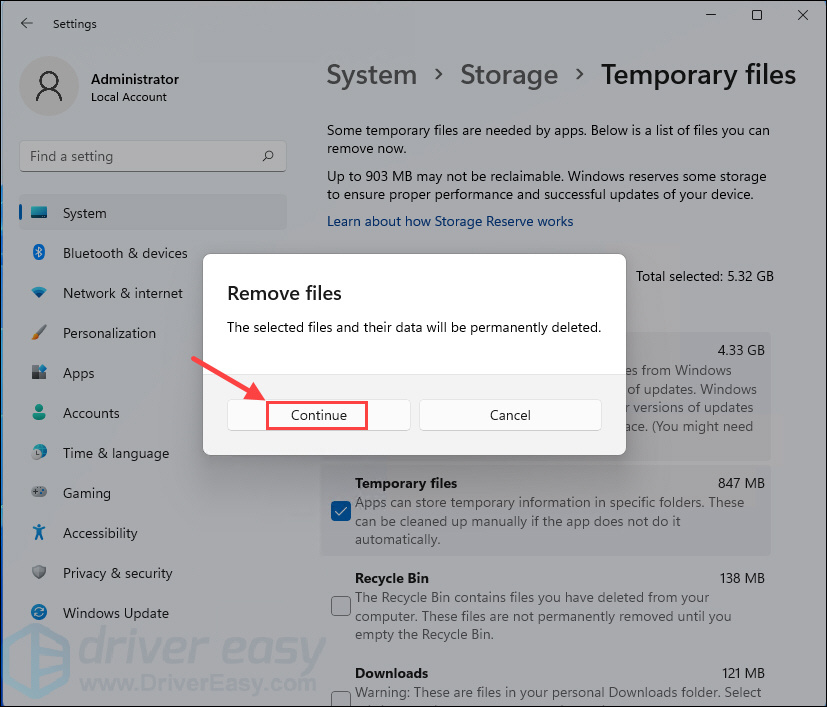
- Press the Windows key to open the Start menu, type storage settings in the search box and select it from the result.
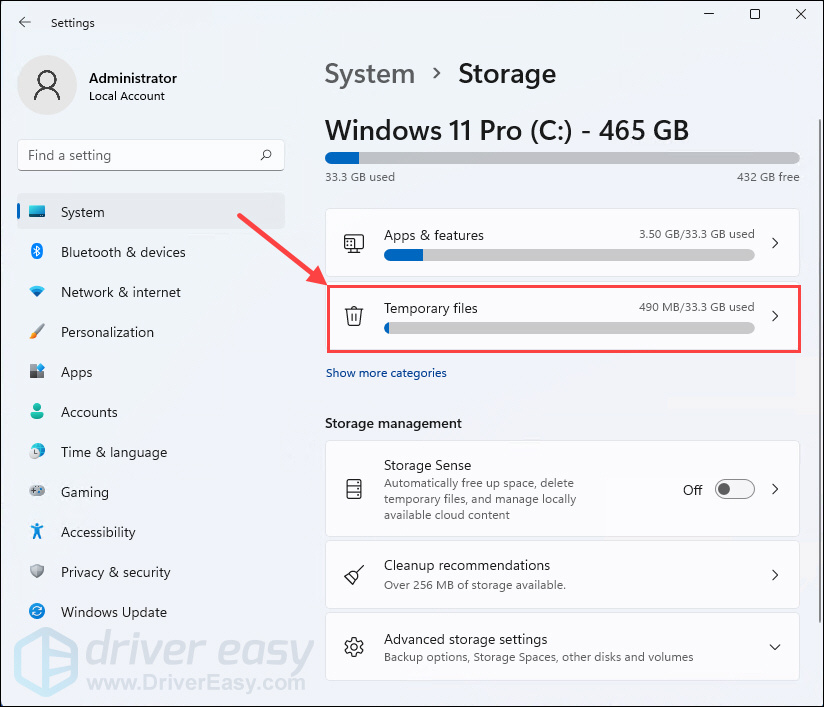
- Click Temporary files in the right section.
- Click Remove files.
Note: The system will autumnally select the files that can be safely deleted. If you also want to clear the Recycle bin which wouldn’t be autumnally selected, tick the check box before you make sure that there is nothing important in the Recycle bin.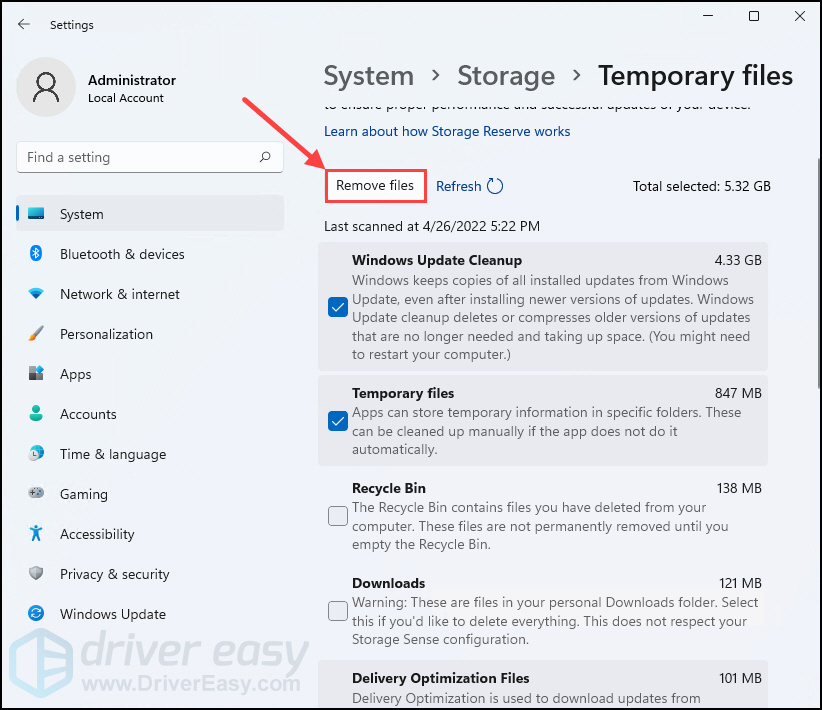
- Click Continue.
If this method doesn’t work for you, try the following below.
Method 8: Run Disk Cleanup
Disk Cleanup is a built-in tool in Windows to assist users remove useless files and free up disk space.
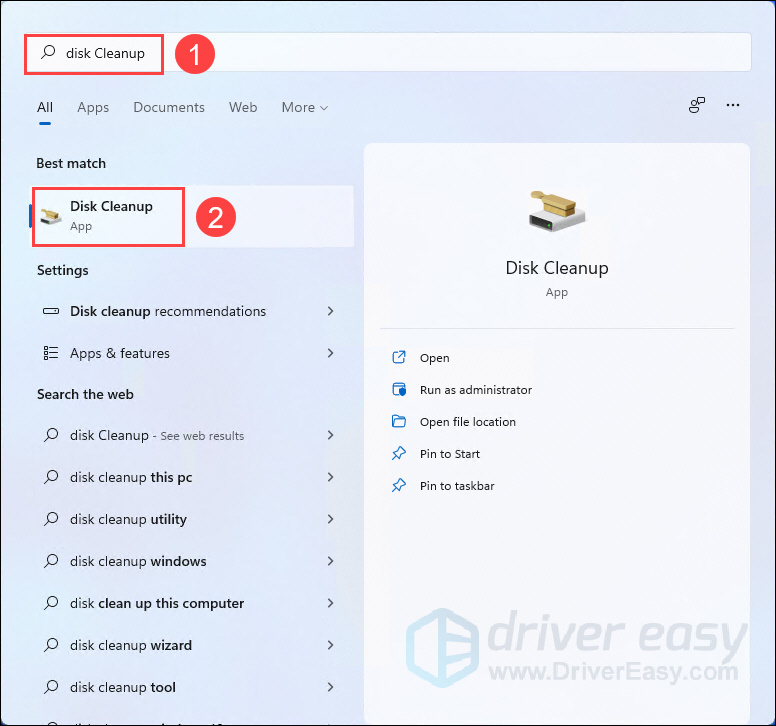
- Press the Windows key to open the Start menu, type disk cleanup in the search box and select it from the result.
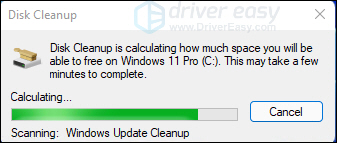
- Wait a while for the calculating.
- Under the Disk Cleanup tab, tick the check box from the list of Files to delete and click OK.
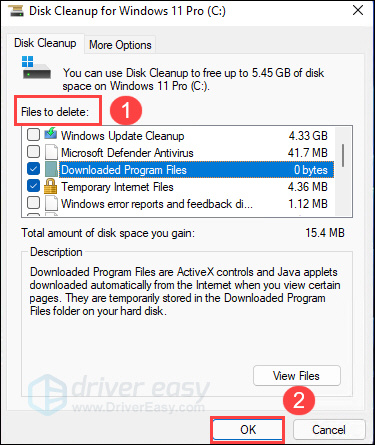
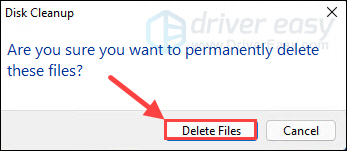
- Click Delete Files.
That’s it – 8 easy ways to deal with lagging Windows 11 and to refresh your computer at the same time! Don’t forget to restart your PC after trying the above tricks to see if they help.
If you have any idea, question or suggestion, please feel free to leave us a comment below.