


Error 0x8024402c, occurs when checking for Windows Updates. It could be caused by invalid network settings, update settings and LAN settings. Here in this post, 4 useful fixes to Error 0x8024402c will being shown to you.
Fix 1. Enable Automatic Detect Settings
If your computer is not sure how it should connect to the Internet, it would cause Windows Update Error 0x8024402c. In this case, enable Automatic Detect Settings could fix it.
1) Go with the steps below to enable it.
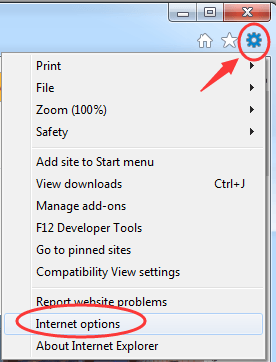
2) Launch Internet Explorer. Click the settings icon on the very top right. Then choose Internet options.
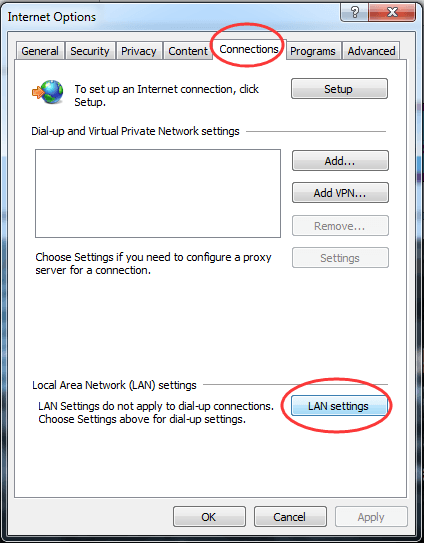
3) Click LAN settings under Connection pane.
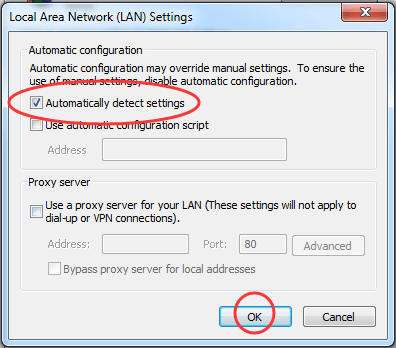
4) Check on Automatically detect settings
Now try to install Windows Updates now.
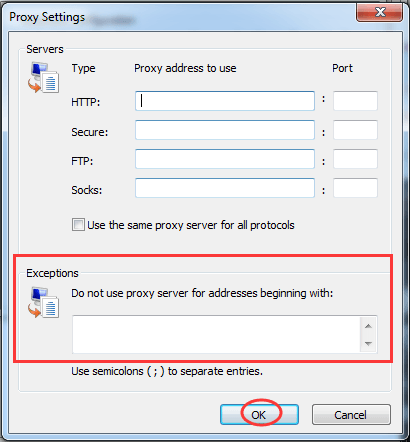
Fix 2. Remove Invalid Characters in Proxy Exception List
Keep your proxy settings clean can prevent your system from navigating to many different and unresourceful servers. Go with the steps below to clean your proxy settings.
1) ~ 3) Follow step 1-3 to open Local Area Network(LAN) settings in Internet Explorer.
4) Click Advanced while Use a proxy server for you LAN is ticked on.
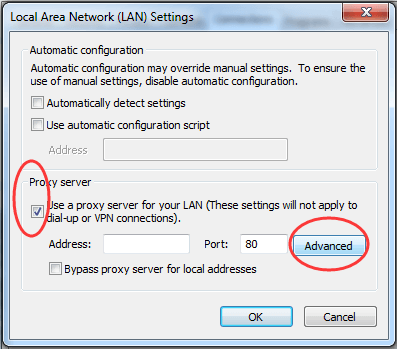
5) Clear Exceptions box if there were any content in it.
Then click OK.
6) Exit Internet Explorer and run Command Prompt.
Find and click to open Command Prompt from Start menu.
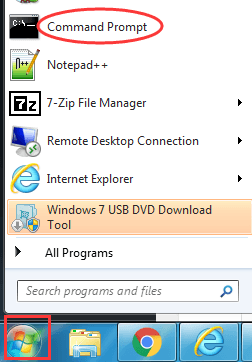
7) Run the commands below one by one.
a) Type netsh winhttp reset proxy and hit Enter.
b) Type net stop wuauserv and hit Enter.
c) Type net start wuauserv and hit Enter.
Now try to install Windows Updates now.
Fix 3. Change DNS Servers
If there were any issue of your ISP(Internet service provider), it could also lead to Error 0x8024402c. Change DNS Servers into public one can solve it.
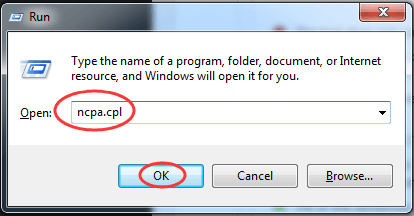
1) Open Run dialog box by pressing Windows logo key + R key together.
Then type ncpa.cpl in it and click OK.
2) Now Internet Connection window is open.
Double-click on your active Network Adapter.
Then click Properties and double-click on Internet Protocol Version 4 (TCP/IPv4).
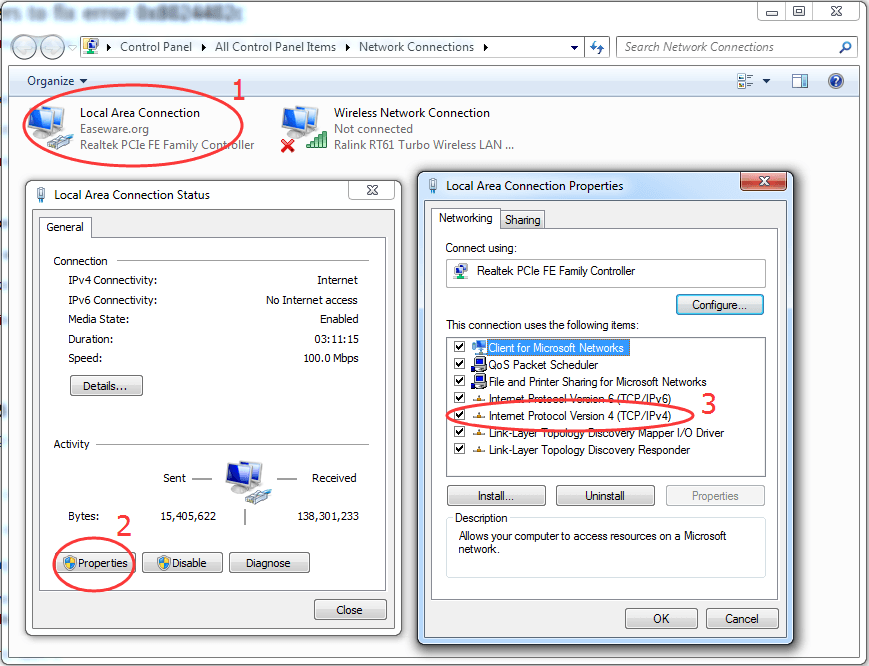
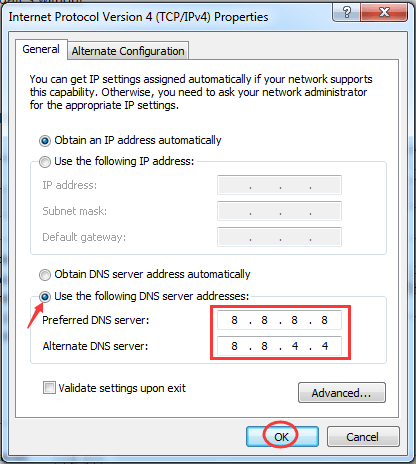
3) Locate Use the following DNS server addresses.
Set Preferred DNS server to be 8.8.8.8
Set Alternate DNS server to be 8.8.4.4
Note: That’s Google’s public DNS server addresses.
Now try to install Windows Updates now.
Fix 4. Configure Updates Client
If the fixes above didn’t serve you, try this one.
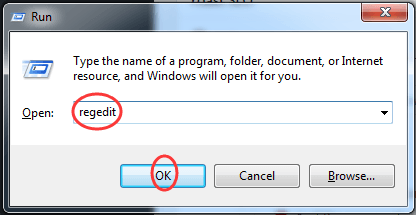
1) Open Run dialog box by pressing Windows logo key + R key together.
Then type regedit in it and click OK.
Click Yes when prompted by User Account Control.
2) On Regedit Editor window, head to HKEY_LOCAL_MACHINE > SOFTWARE > Policies >Microsoft > Windows > WindowsUpdate > AU

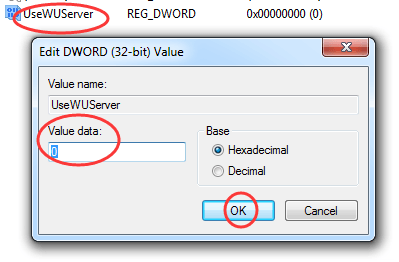
3) On the right pane of AU key, double -click on UseWUServer, change its value data into 0.
Then click OK.
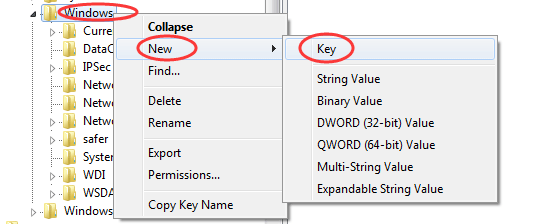
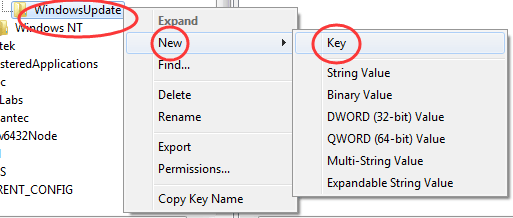
Note: If you can’t find WindowsUpdate, you should create one. Follow the steps below.
a) Right-click on Windows folder, then choose New > Key.
And name the new key WindowsUpdate.
b) Right-click on WindowUpdate folder, then choose New > Key.
And name the new key AU.
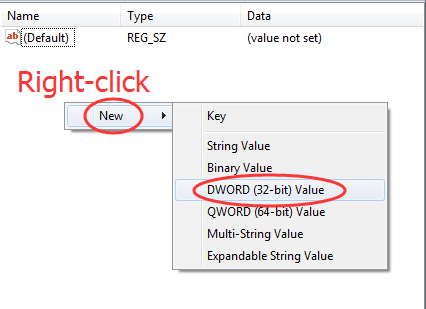
c) Right-click on the right pane of AU key, choose New > DWORD (32-bit) Value
Name the new value UseWUServer.
Now try to install Windows Updates now.
After the fixes above, Windows Update should be good to go now.