


Trying to update your PC to 20H2 but Windows failed to install the updates? It’s really annoying to have updates stuck at 61% forever. Don’t worry, you’re not alone and this post is going to help.
Try these fixes:
- Remove periphery devices
- Update your drivers (100% working for HP users)
- Disable antivirus
- Use Windows troubleshooter
- Repair system files
- Free up disk space
- Reset or reinstall Windows
Fix 1: Remove periphery devices
This should be the first thing to do when problems occur. This is the easiest way to check whether external devices conflict with Windows Updating Process. By removing all periphery hardware components except for the mouse and keyboard, we’ll know whether it’s a hardware issue.
If this does sort out the issue, try plugging back each device one by one. In this way, you can recognize which device causes the problem.
If it’s not sorting out the issue, let’s head to the next fix.
Fix 2: Update your drivers
If you’re an HP user, you need to update your Conexant drivers. But the newer version can’t be found on the HP drivers page neither in Device Manager. So follow the steps below and you can update to 20H2 successfully.
- Download and install Driver Easy. Driver Easy will automatically recognize your system and find the correct and the latest drivers for it.
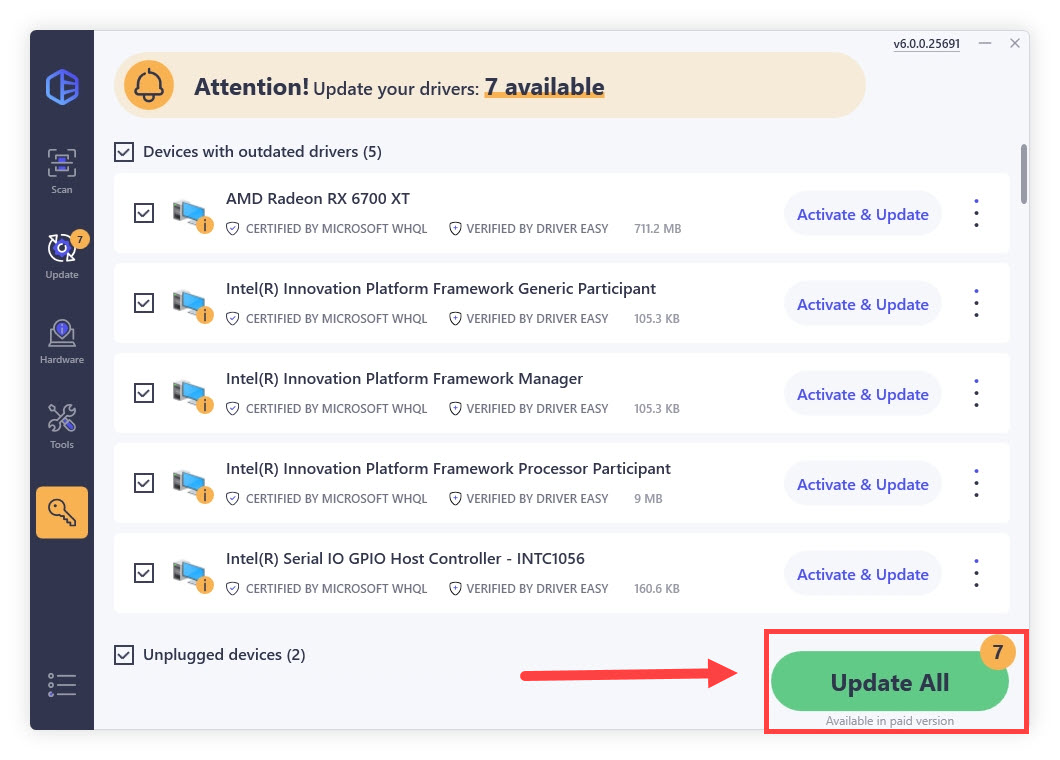
- Run Driver Easy and click the Scan Now button. Driver Easy will then scan your computer and detect any problem drivers.
- Click the Activate & Update button next to any flagged device or click Update All to update all the outdated drivers. You will be asked to upgrade to the Pro version. A 7-day free trial, including all Pro features like high-speed download and one-click install, is available if you’re not ready for the Pro version yet. Rest assured, you won’t incur any charges until after the 7-day trial.
- Reboot your PC and run the Windows Update again. You should be able to finish the feature upgrade to 20H2.
If you don’t want to download Driver Easy, you can uninstall Conexant audio driver instead. By the way, if you have HP Dock Audio, uninstall it as well.
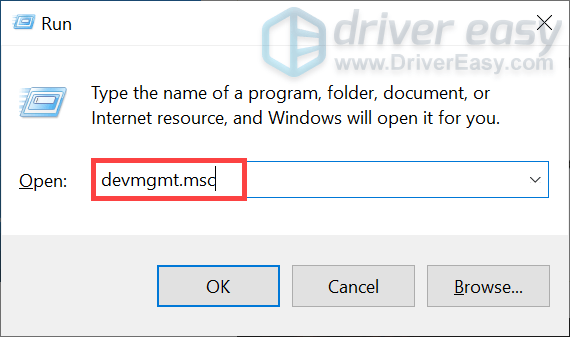
- Press the Windows logo key + R together to open the Run box.
- Type devmgmt.msc and press Enter.
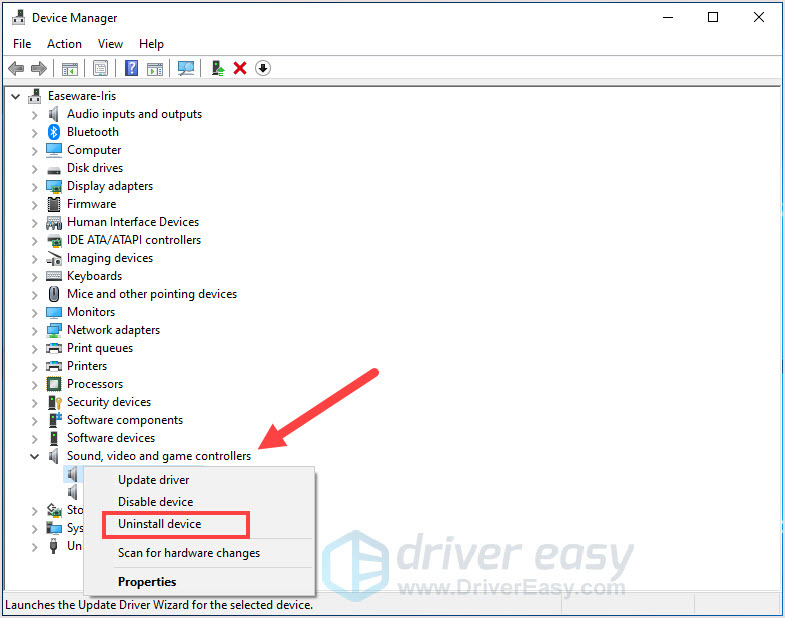
- Click Sound, video and game controllers.
- Right-click on Conexant and click Uninstall device.
- Follow the on-screen instructions to finish the process.
- Reboot your PC and run Windows Update again. You should be able to finish the feature upgrade to 20H2.
Fix 3: Disable antivirus
The third-party antivirus software is installed to protect our PC from malware attacks, but sometimes they could be the culprit for PC errors.
During the Windows updating process, the third-party antivirus could interfere and block the new files which can cause the Windows Update error code 0xc19001e1.
Therefore, disable the antivirus software then restart your PC to apply the change. Update your Windows system and see if it fixes the issue.
Don’t forget to enable the software afterward.
If the error persists, move to the next fix.
Fix 4: Use Windows troubleshooter
The Windows update troubleshooter is a built-in app that comes up with Windows 10. You can use it to detect what’s causing the error 0xc19001e1 and fix it automatically to get rid of the problem. And it’s easy and safe to use. Follow the steps below to run the troubleshooter.
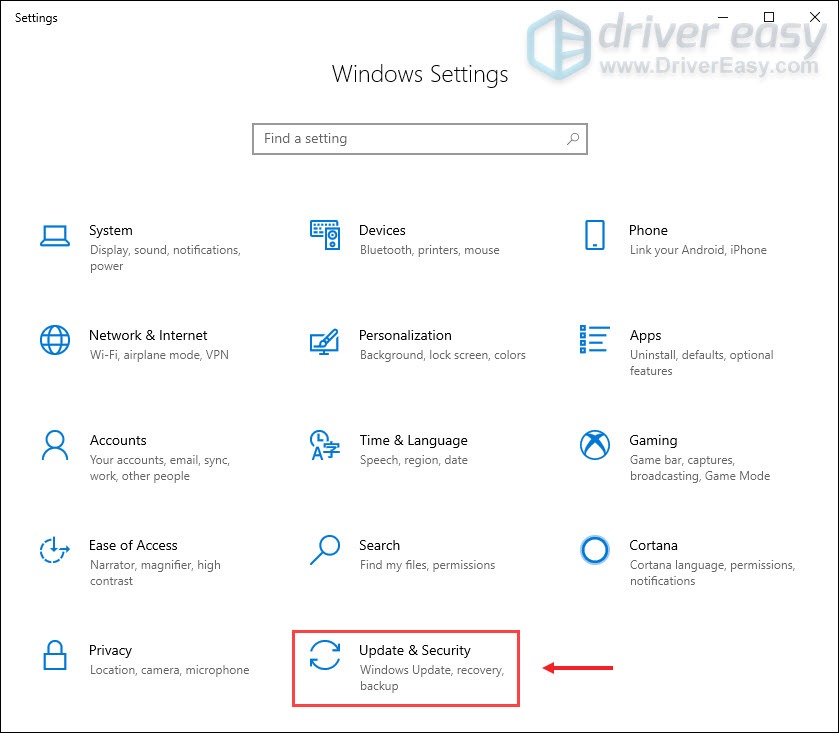
- Press the Windows logo key + I together on your keyboard. Then click Update and Security.
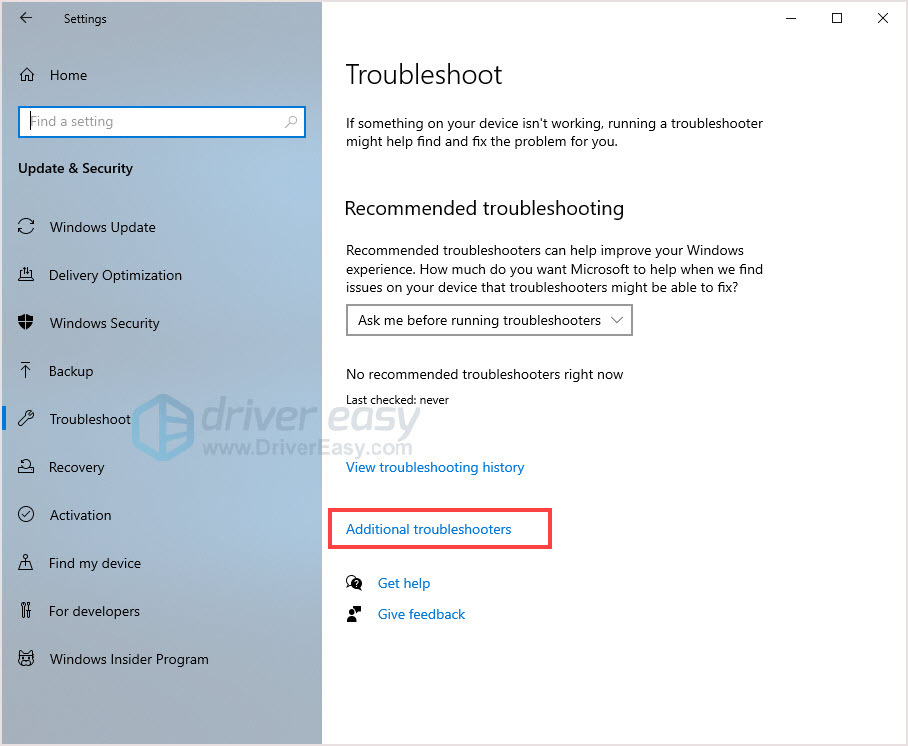
- Click Troubleshoot tab on the left panel and click Additional troubleshooter.
- Click Windows Update.
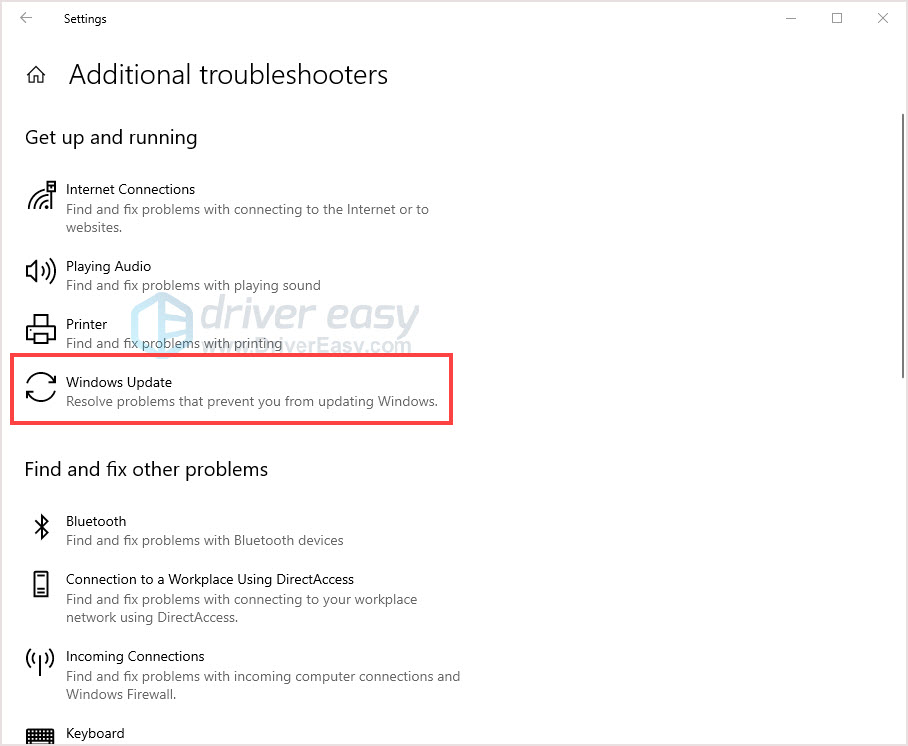
- Once the process is finished, reboot your PC and update Windows again.
If the error persists, move to the next fix.
Fix 5: Repair system files
When critical Windows system files are missing or corrupted, you may receive various error codes or some Windows features may stop working correctly. In this situation, you can use the System File Checker (SFC) to scan your system files and restore any corrupted or missing files.
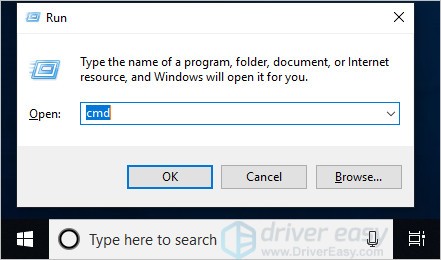
- On your keyboard, press the Windows logo key and R key at the same time to invoke the Run box.
- Type cmd and press Shift+Ctrl+Enter together on your keyboard to open Command Prompt in the administrator mode.
Note: Do NOT click OK or just press the Enter key as that won’t allow you to open Command Prompt in the administrator mode. - Type sfc /scannow (or copy-paste) and press Enter. Then wait for the verification is 100% complete.
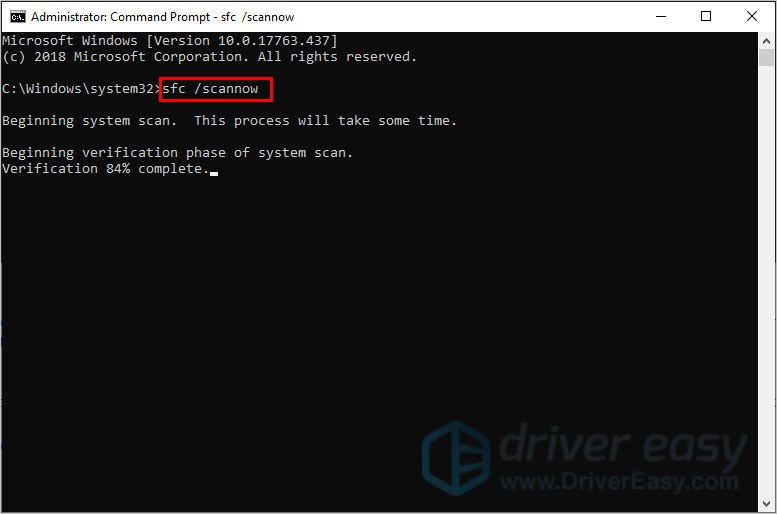
- Restart your computer to check the blue screen issue is fixed or not.
If the result indicates there are broken files but SFC can’t fix them, you can turn to Deployment Image Servicing and Management (DISM) Tool for deeper examination and repair.
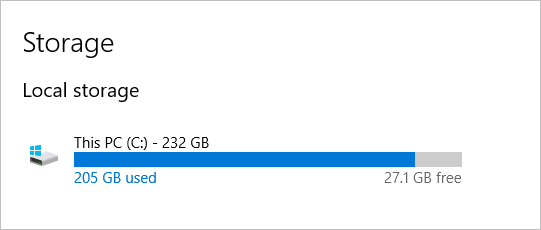
Fix 6: Free up disk space
When there’s no enough space on your disc for the installation of the update, you might receive error code 0xc19001e1. So you need to ensure you have enough space. If you don’t have, deleting junk and duplicate files to free up some space.
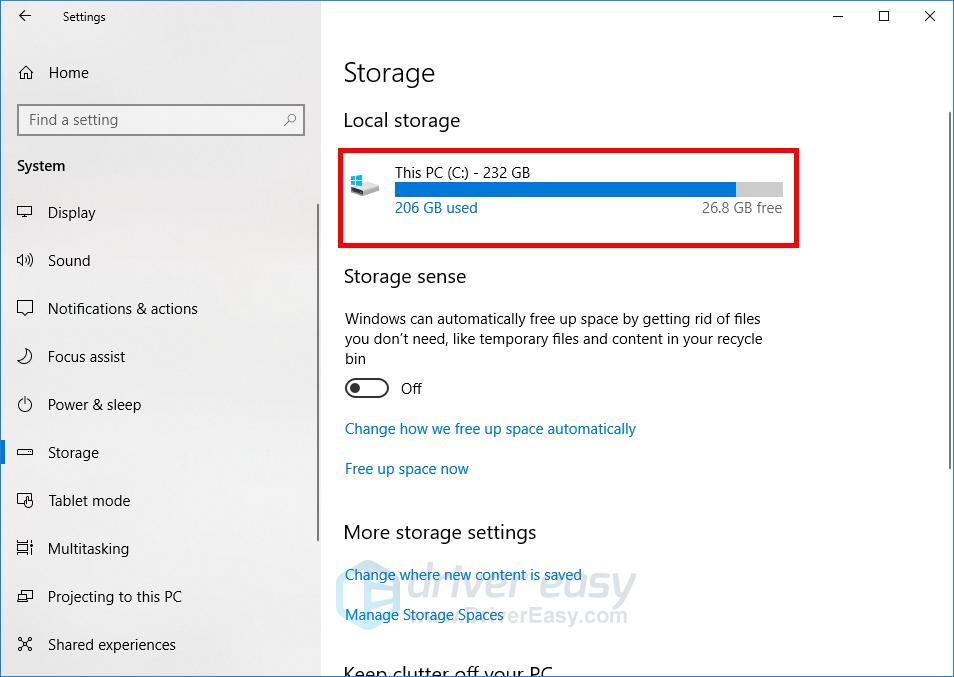
- Press Windows logo key + I together on your keyboard. Then click System.
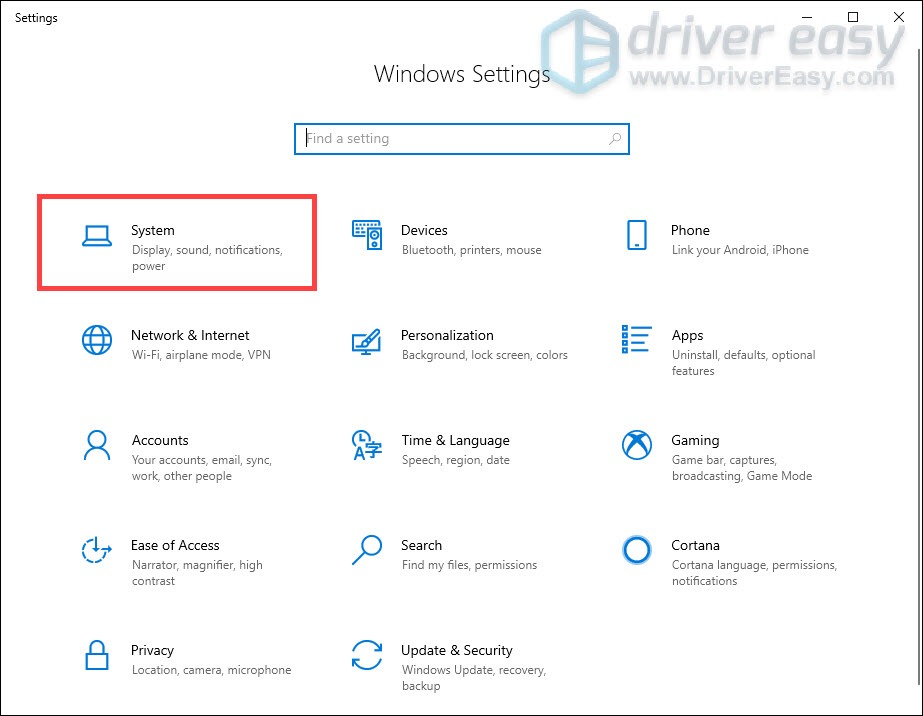
- Click Storage on the left panel and you can view the storage usage of your computer.
If you want to reduce the amount of space being used:
- Click Free up space now.
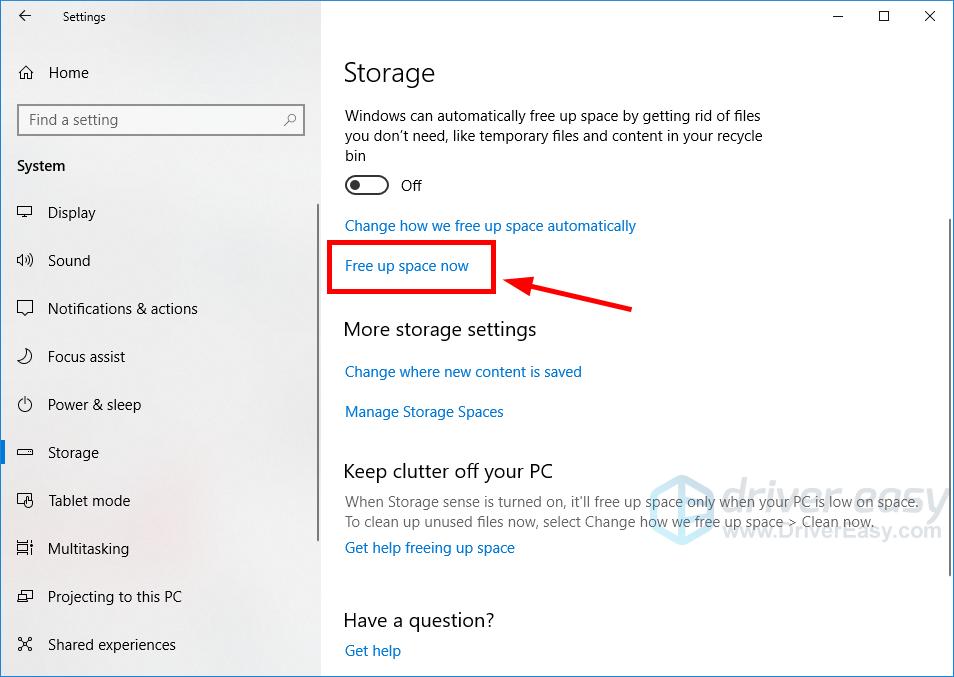
- Wait for the scanning process to be complete.
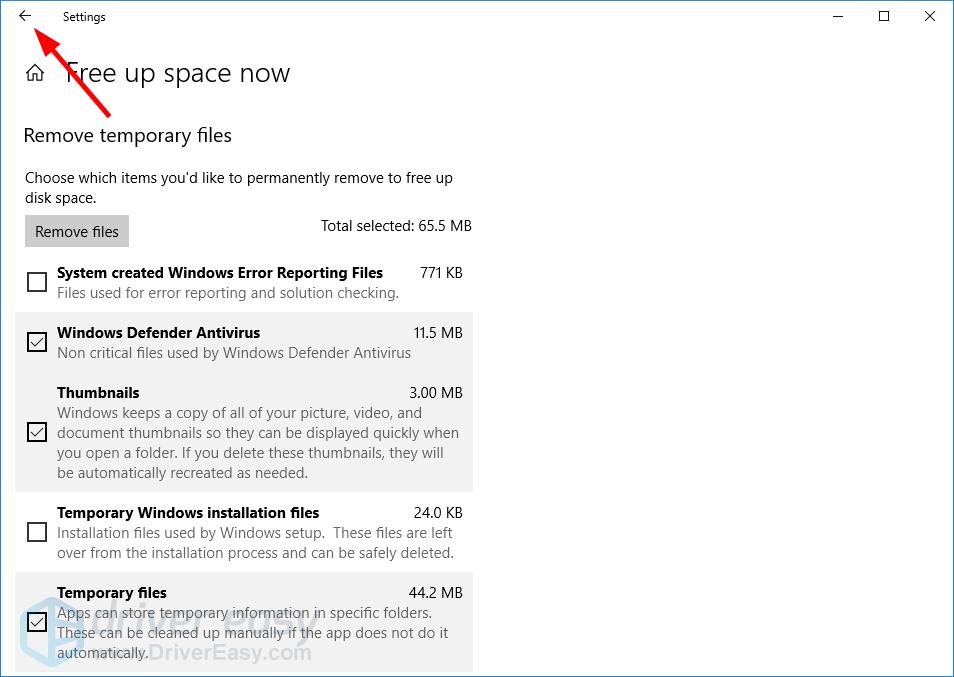
- Select the files you want to remove, then click Remove files. Before you select an option, read carefully its description to learn what you’ll remove if doing so.
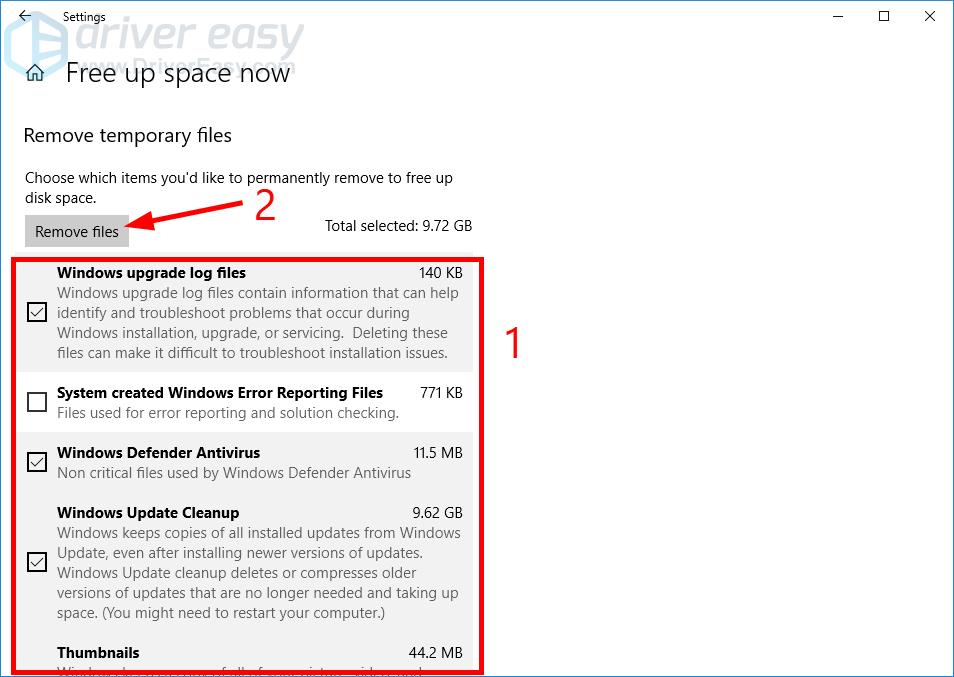
- Wait for the cleaning process to be complete.
This should free up an amount of space for you. But if that isn’t enough for you, then you should check if there are other files or programs you may want to remove:
- Click the left arrow in the upper left corner of the window to go back to the storage settings.
- Click the disk you’re going to clean up.
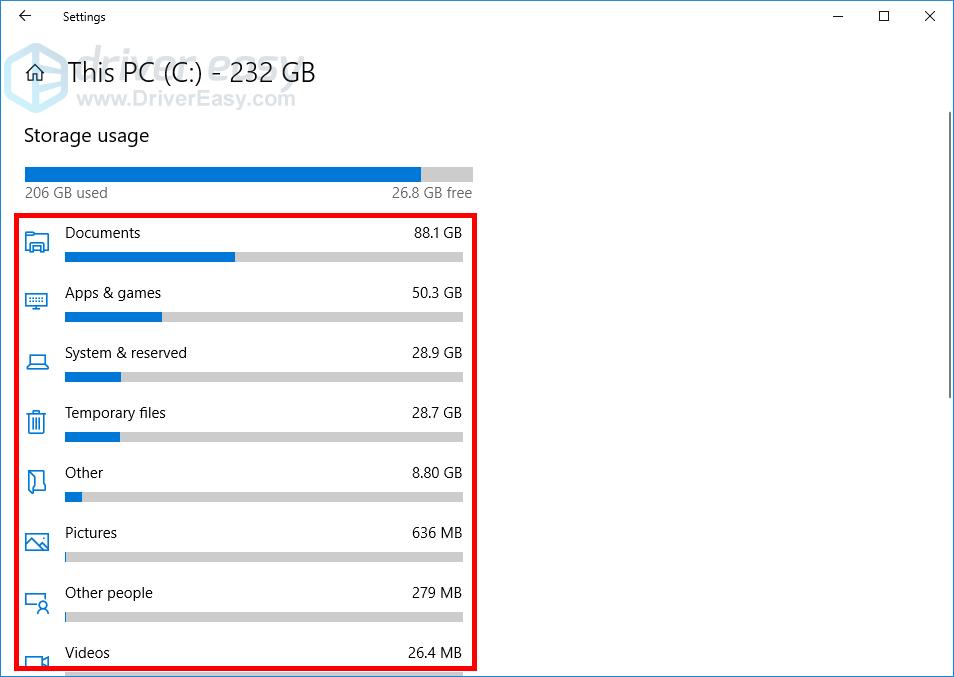
- Check the space usage of each data type. If you want to manage the usage of a type, click it to view more details.
* The following are a few things we recommend you take a look at:
- The data type that uses the most amount of space
- Apps & Games to see if there are any program installed you don’t need
- Temporary files
- Desktop
- …
This should free up a lot of space for your Windows 10 computer. Reboot your PC and update your system.
Fix 7: Reset or reinstall Windows
If all else fails, you may have to reset Windows, or maybe even reinstall it together. We all know reinstalling will delete all the data on your hard drive, you have to back up all your important files before doing it.
But treat these options as a last resort, because they both take quite a long time.
As you can see, there can be multiple reasons that can cause the Windows Update error 0xc19001e1 on your system. Hopefully, the methods above helped you solve the Windows Update Error 0xc19001e1 and update to the 20H2 as you wish.
If you have any questions or suggestions, you’re more than welcome to leave us a comment below.