


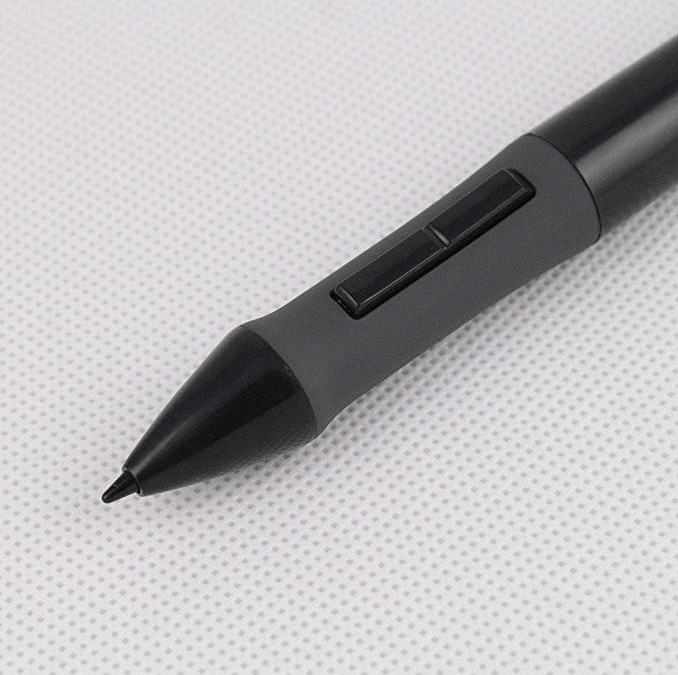
If you’ve found your Huion pen not working properly, don’t panic – you’re not alone. This is a fairly common issue, and it’s usually not very hard to solve.
Before you get down to fixing the issue, you should do some basic checks first:
- Did you follow the instructions in your user manual to install the tablet drivers correctly?
- Did you connect the graphics tablet to your PC correctly (either via wired mode or wireless mode)?
- Have you tried to insert the USB cable or wireless receiver to another USB port?
- Is your graphics tablet working properly?
- Did you put the battery of your digital pen in the right position?
- Is your pen compatible with the tablet you’re using?
The above questions walked you through a few simple steps for troubleshooting. However, they may not have covered all possible aspects, so we strongly suggest you look into the user manual of the Huion pen (or tablet) for more essential details.
5 fixes for the Huion pen not working issue
Now let’s cut to the chase. Here you’ll have 5 fixes that have proved useful for the Huion pen not working issue. You don’t need to try them all; just work your way down the list until you find the one that works for you.
Fix 3: Tick the “Support TabletPC” option
Fix 4: Update your tablet driver
Fix 5: Uncheck “Enable Windows Ink”
Fix 1: Restart your computer
So this is the quick fix for you. Sometimes it’s just your device driver running into glitches that caused the pen to stop working. In this case, simply shut down your computer and then restart it. The next time you use your pen on a PC, it should work as normal.
Fix 2: Disable Sleep Mode
If you have this problem right after waking up your PC from Sleep Mode, you should consider disabling the mode. The reason is similar to that of Fix 1 – your device driver may temporarily stop working when the computer swaps from Sleep Mode to the normal working state.
To disable Sleep Mode on your computer, you should perform the following steps:
on Windows 10
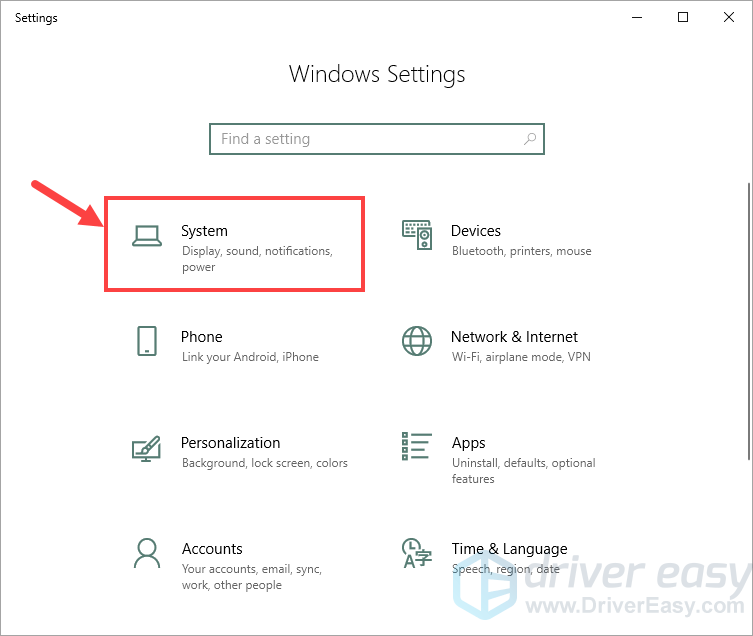
1) On your keyboard, press the Windows logo key and I at the same time to invoke the Settings window. Then click System.
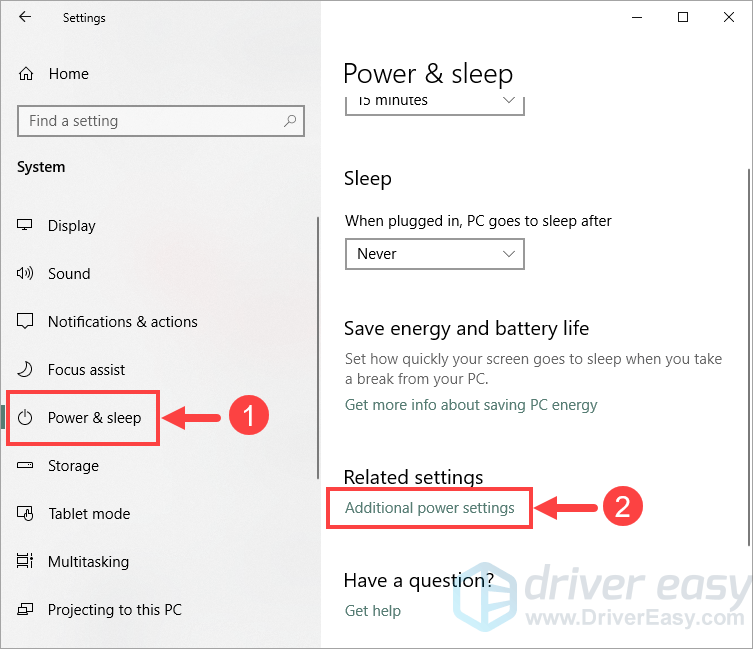
2) On the Power & sleep tab, in the results pane, under Related settings, click Additional power settings.
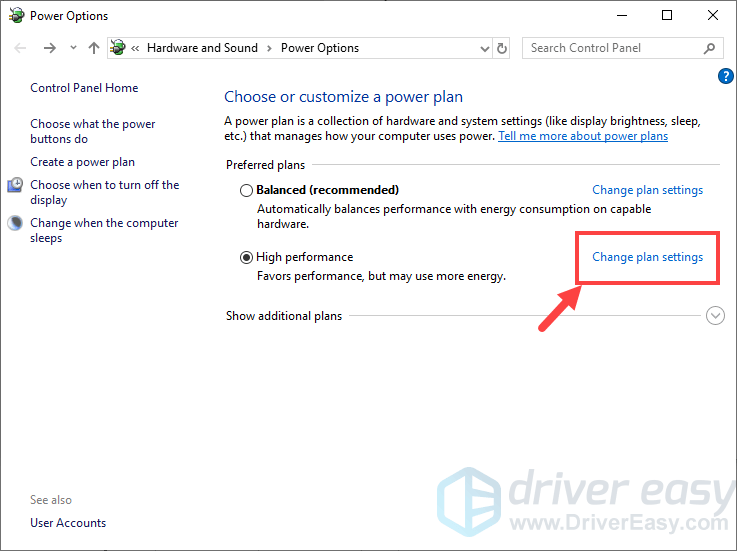
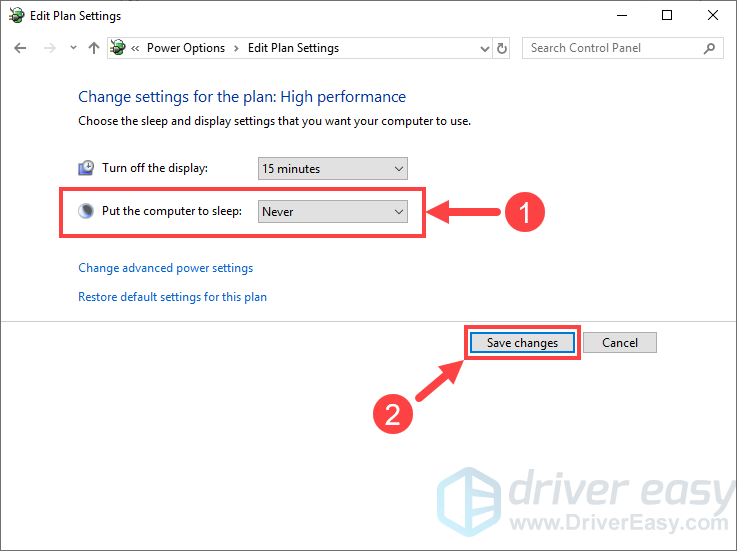
3) In the next window, click Change plan settings next to your preferred plan.
4) Expand Put the computer to sleep: and select Never. Then click Save changes.
Now that you’ve disabled Sleep Mode, restart your computer and check to see if the Huion pen works properly. If not, please move on to the next fix.
on Windows 11
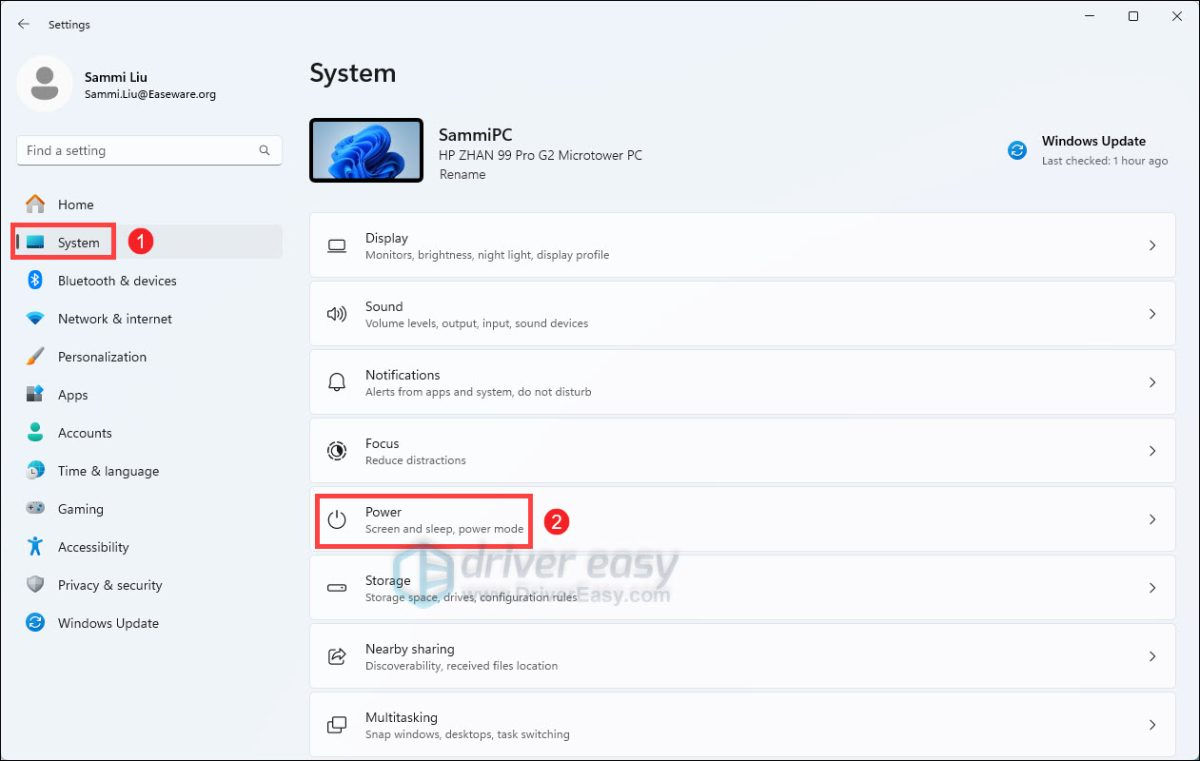
1) On your keyboard, press the Windows logo + I keys simultaneously to open Settings.
2) From the left navigation panel, click System. Find
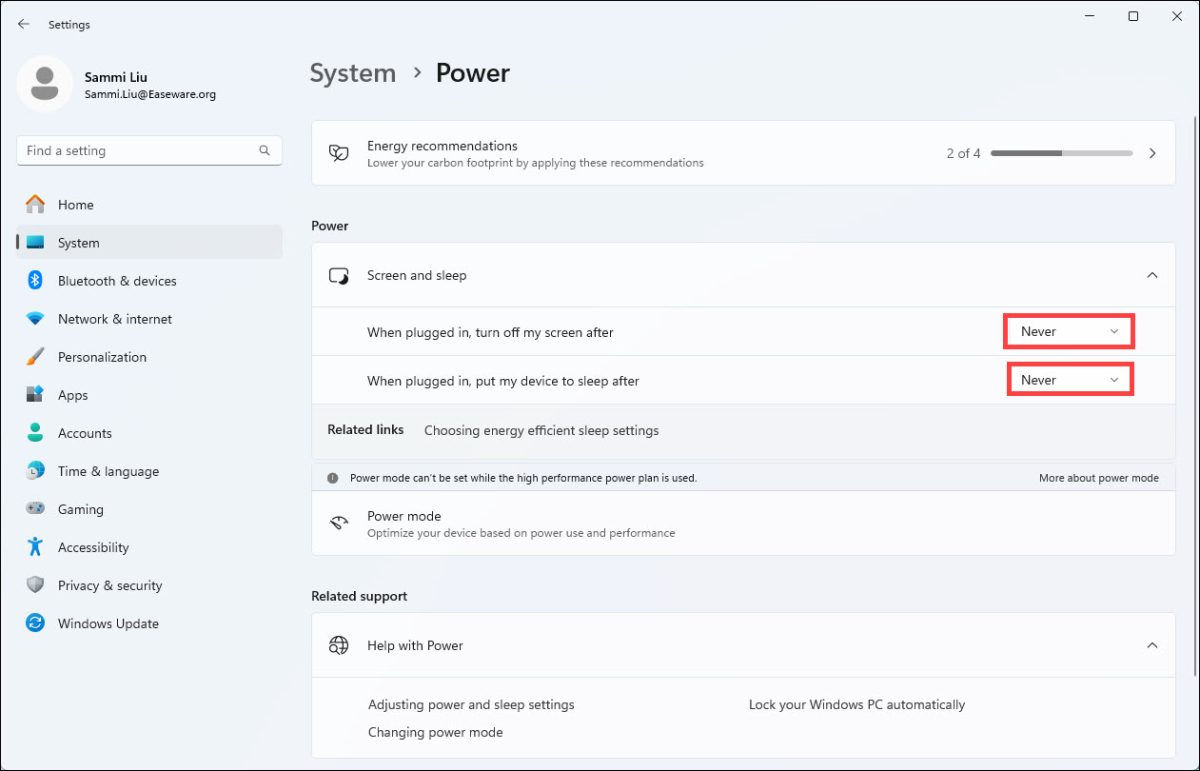
3) Select Never from the drop-down for both When plugged in, turn off my screen after and When plugged in, put my device to sleep after.
Restart your computer and check to see if the Huion pen works properly. If not, please move on to the next fix.
Fix 3: Tick the “Support TabletPC” option
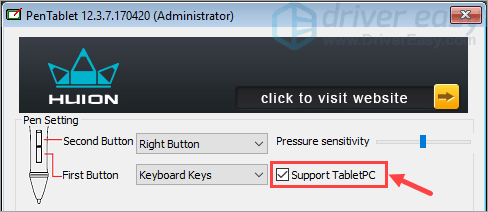
As mentioned in the user manual of the Huion pen, you should check the Support TabletPC box to enable the pressure sensitivity function in a variety of drawing programs. Here’s how:
1) Double-click the driver tablet icon ![]() on your system tray (an area on the right side of your Taskbar) to open the PenTablet control interface.
on your system tray (an area on the right side of your Taskbar) to open the PenTablet control interface.
2) Check the Support TabletPC box, as shown below.
Now go on to check whether your pen works properly. If it doesn’t, please proceed to Fix 4.
Fix 4: Update your tablet driver
Another culprit for the Huion pen not working issue is an outdated or corrupt tablet driver. So literally it’s not your pen but rather the tablet that is dysfunctional due to driver failures.
Usually, a driver CD that comes with your tablet will help you install the driver on your PC, and once the driver is installed, you should be able to use the digital pen normally. However, the driver you get in this way may be outdated if Huion hasn’t updated the driver in that CD, hence incompatible with either your hardware devices or drawing software.
To resolve the outdated driver problem, you should update your tablet driver to the latest version. There are two ways you can do this:
Option 1 – Automatically (Recommended) – This is the quickest and easiest option. It’s all done with just a couple of mouse clicks – easy even if you’re a computer newbie.
OR
Option 2 – Manually – You’ll need some computer skills and patience to update your driver this way because you need to find exactly the right driver online, download it, and install it step by step.
Option 1 – Automatically update the driver
Some people may find it hard to do the driver updating stuff. So if you don’t have the time, patience or computer skills to update your Huion tablet driver manually, you can do it automatically with Driver Easy.
Driver Easy will automatically recognize your system and find the correct drivers for it. You don’t need to know exactly what system your computer is running, you don’t need to risk downloading and installing the wrong driver, and you don’t need to worry about making a mistake when installing. Driver Easy takes care of everything.
You can update your drivers automatically with either the FREE or the Pro version of Driver Easy. But with the Pro version, it takes just 2 clicks (and you get full support and a 30-day money-back guarantee):
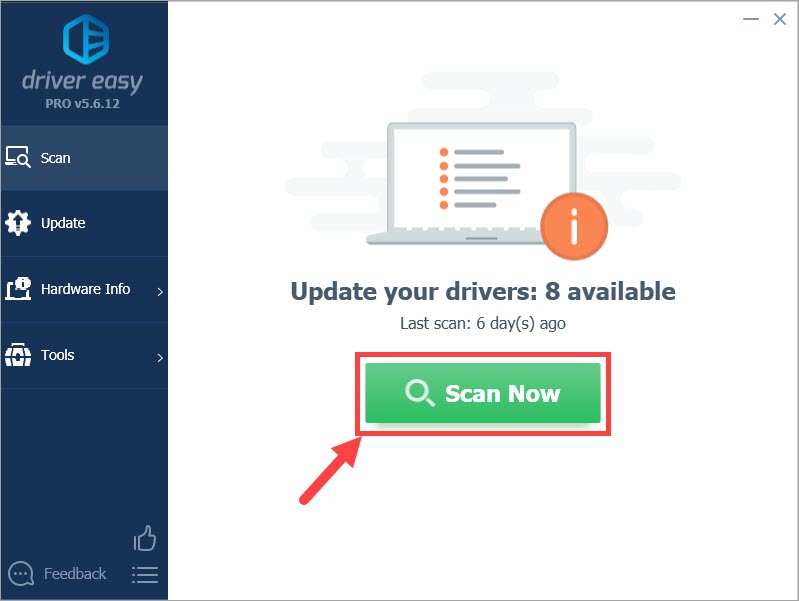
1) Download and install Driver Easy.
2) Run Driver Easy and click the Scan Now button. Driver Easy will then scan your computer and detect any problem drivers.
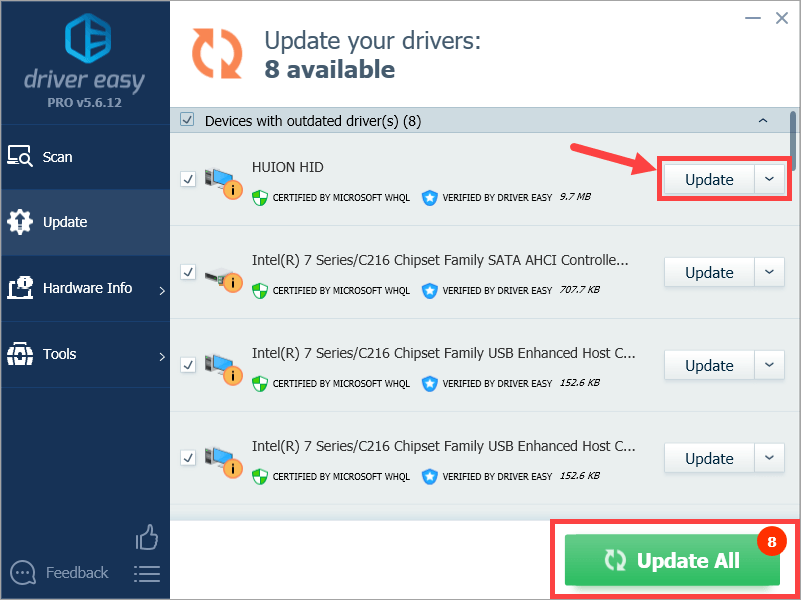
3) Click Update All to automatically download and install the correct version of all the drivers that are missing or out of date on your system (this requires the Pro version – you’ll be prompted to upgrade when you click Update All). Or if you just want to update the Huion tablet driver for now, simply click the Update button next to it.
Note: you can do it for free if you like, but it’s partly manual.
Option 2 – Update the driver manually
Huion keeps updating the tablet drivers. To get the one you need, you should visit the Huion support website, find the driver corresponding with your specific flavor of Windows version (for example, Windows 10, 64-bit), and download the driver by yourself. Here are the steps:
1) Click here to visit the support site of Huion.
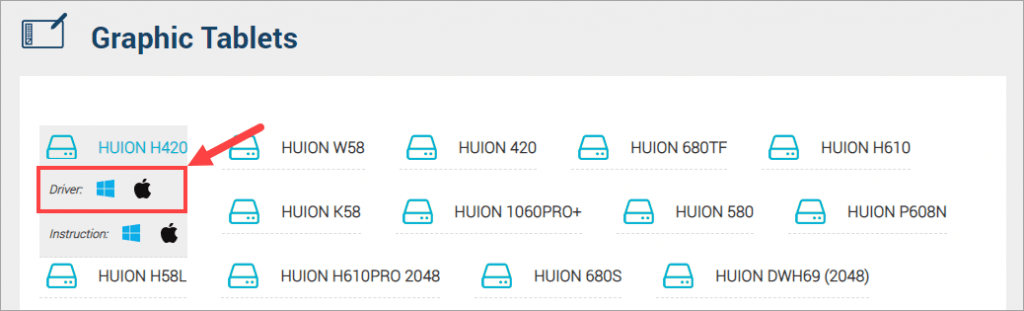
2) Find your tablet model in the list. When you hover your mouse over the tablet model, you’ll see two clickable icons next to Driver:. If you’re a Windows user, select the left icon; if you’re a Mac user, choose the right icon.
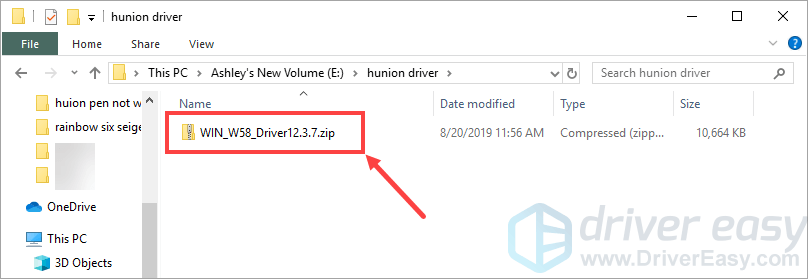
3) After downloading the driver, open the folder in which the driver is downloaded. Usually, you’ll see a compressed folder (with .zip extension) there. Go on to extract the folder.
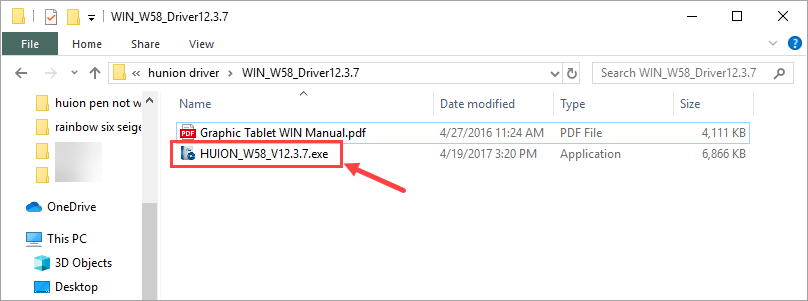
4) Double-click the extracted folder you get and then double-click the .exe file in that folder.
5) Follow the on-screen wizard to install the driver.
6) When everything’s done, reboot your computer for the changes to take effect.
After updating your tablet driver, check to see if the digital pen works properly. In case the problem persists, you should try out the next fix below.
Fix 5: Uncheck “Enable Windows Ink”
This fix should work if you’re experiencing brush lags or other similar issues in Photoshop, with a Huion pen/tablet. Here’s how to do it:
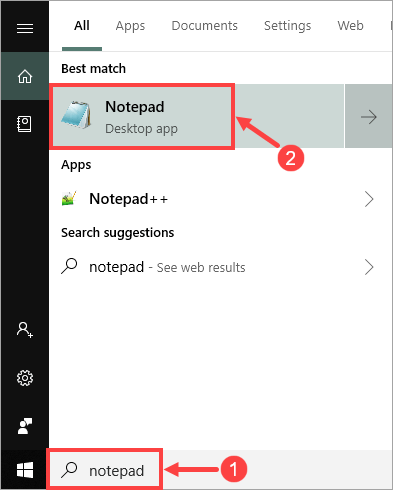
1) On your keyboard, press the Windows logo key and S at the same to invoke the search box. Then, type notepad and click the Notepad application.
2) When Notepad is opened, type in UseSystemStylus 0.
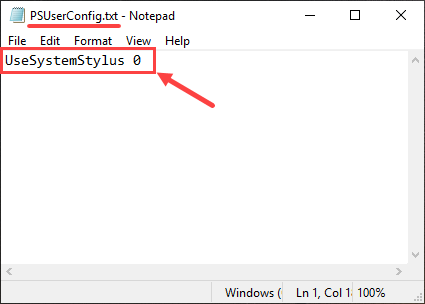
Then save the file as PSUserConfig.txt to the following location:
C:\Users\<username>\AppData\Roaming\Adobe\Adobe Photoshop CC 2018\Adobe Photoshop CC 2018 Settings
3) Open the Huion tablet driver interface. Then go to the Stylus Pen tab and uncheck Enable Windows Ink. On completion, click Apply > OK.
Note that some of the functions in your drawing software may be unusable if you disable Windows Ink. In that situation, you’ll need to enable Windows Ink again.

4) Restart Photoshop and test whether your pen works properly or not.
Hopefully, this article has resolved your Huion pen not working issue. If you have any follow-up questions or ideas, please feel free to leave a comment below. Thanks for reading!