


The keyboard backlight feature is preinstalled on most Lenovo products. If your Lenovo keyboard backlight isn’t on, you should verify if your keyboard comes with the backlight feature. If yours just doesn’t work as it’s supposed to, try the following fixes.
Try these fixes…
You don’t have to try them all; just work your way down the list until you find the one that does the trick!
1: Use hotkeys to enable backlight
3: Set up your keyboard backlight via Lenovo Vantage
5: Check if backlight works in BIOS
Bonus: Keep your PC in top condition
Does my keyboard has the backlight feature?
All Lenovo keyboards with the backlight feature will have a little light-bulb icon on Esc key, Space key or Fn key. If you don’t see any, it means your keyboard doesn’t come with the backlight feature.
Fix 1: Use hotkeys to enable backlight
To enable backlight: press Fn key and Space key/Esc key.
You can also hold down Fn key and tap Space key to adjust the brightness level. The three levels are off, low (dim), and high (bright).
Fix 2: Restart your PC/laptop
Another simple fix you should try is to a restart of your PC/laptop. If the keyboard backlit works after you restart your PC, then it means the issue was a random glitch, nothing hardware-related. It’s also possible that something was interfering with your keyboard’s function. But a reboot resets your desktop environment, so the issue is fixed.
If this fix doesn’t give you luck, try the next one.
Fix 3: Set up your keyboard backlight via Lenovo Vantage
Lenovo Vantage is a tool that allows users to customize their PC or any Lenovo product. You can set up your keyboard backlight via this app:
- Download Lenovo Vantage.
- Install and run the program.
- Under Device > Input & accessories, you’ll be able to find your keyboard information and adjust backlight.
If this doesn’t solve your problem, try the next fix.
Fix 4: Perform a power drain
Doing a power drain may help solve keyboard backlight issues when the system is interfering with your keyboard’s function. The ways of performing a power drain depends on your battery type:
If your battery is built in your PC:
- Unplug the AC adapter, and hold down the power button for at least 10 seconds.
- Plug the AC adapter back into your PC, then turn on your PC.
If you battery is removable from your PC:
- Release the battery from your PC and unplug the AC adapter. If you’re not sure how to safely remove your battery, please refer to your manufacturer’s manual.
- Hold down the power button for at least 10 seconds.
- Put your battery back and plug in the AC adapter. Then try to turn on your PC.
After restarting your PC, test if the backlight on your keyboard works. If this doesn’t solve your problem, try the last fix.
Fix 5: Check if backlight works in BIOS
If your keyboard is faulty, the backlight won’t work. To determine if the backlight problem is related to hardware damage, you can test it in BIOS.
- Restart your PC. When the Lenovo logo appears on your screen, hold down F1 key or tap Enter key repeatedly on your keyboard.
- You should enter BIOS now. Below is how a BIOS menu screen would typically look like, but the screens could differ on different models.
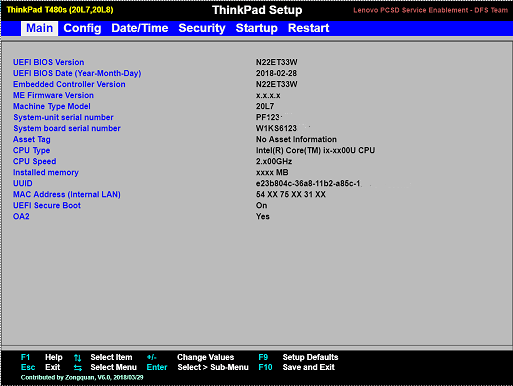
- Press Fn key and Esc key or Space key to test it your keyboard backlight works.
- If your backlight is on, then you would need to update your BIOS. Lenovo has provided a BIOS update package that directly tackles the keyboard backlight issue. Unfortunately, it’s only for a couple of Lenovo Legion products with Windows 10 64-bit, including:
Legion 5-15IMH05
Legion 5-15IMH05H
Legion 5P-15IMH05
Legion 5P-15IMH05H
Legion 5-17IMH05
Legion 5-17IMH05H
If you don’t see your model from the list above, contact Lenovo for support. - If your backlight doesn’t work in BIOS, then it means there could be something wrong with your keyboard. You may need to take your keyboard to Lenovo service center, or you can contact Lenovo online for support.
Bonus: Keep your PC in top condition
One of the easiest PC maintenance tips is to keep your drivers up-to-date. Updating your drivers regularly helps prevent many minor and random issues you may run into.
There are two ways to update your drivers: manually or automatically.
Manual driver update – You can update your drivers via Device Manager. Just note that Windows doesn’t always give you the latest version you might need, since its database isn’t updated very frequently.
Automatic driver update – If you don’t have the time, patience, or computer skills to update your drivers manually, you can, instead, do it automatically with Driver Easy. Driver Easy will automatically recognize your system and find the correct drivers for your PC and your Windows version, and it will download and install the drivers correctly:
1) Download and install Driver Easy.
2) Run Driver Easy and click the Scan Now button. Driver Easy will then scan your computer and detect any problem drivers.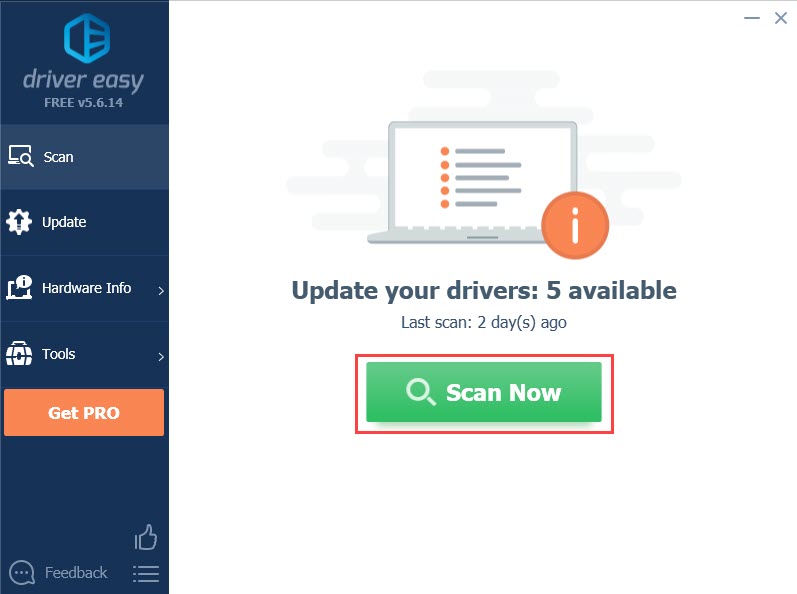
3) For example, I want to update my graphics and network adapter driver here. Click the Update button next to the flagged drivers to automatically download the correct version of them. Then you can manually install them (you can do this with the FREE version).
Or click Update All to automatically download and install the correct version of all the drivers that are missing or out of date on your system. (This requires the Pro version which comes with full support and a 30-day money-back guarantee. You’ll be prompted to upgrade when you click Update All.)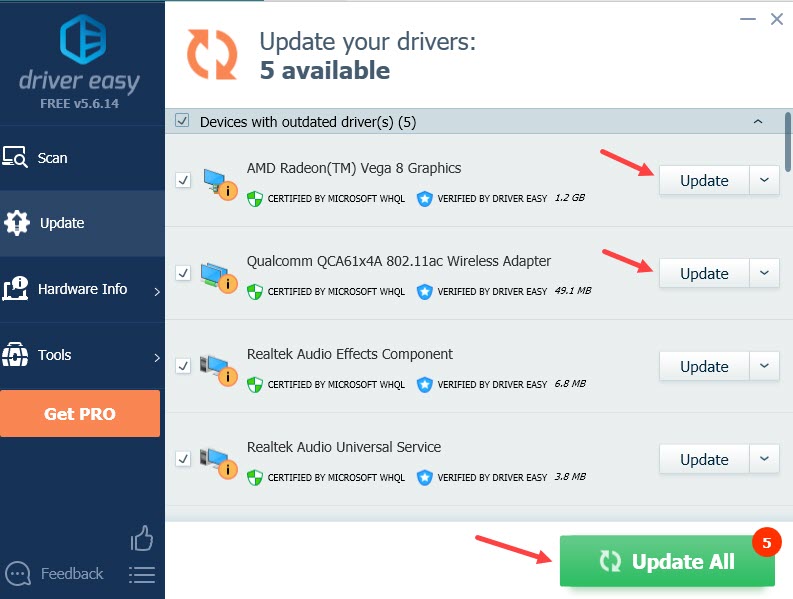
Hopefully this article helps! Please feel free to leave a comment if you have any questions or suggestions.