


“Hey, where’s my Windows 10 sleep option?” you ask, feeling rather confused when you find your sleep option missing from the Power menu. Luckily, this is not a difficult problem to solve – just follow the steps below and you’ll get your sleep option reappeared easily.
3 fixes for Windows 10 sleep option missing
Here’re 3 fixes that prove to be useful for solving the sleep option missing issue. You don’t need to try them all; just work your way down the list and find the one that works for you.
Fix 1: Enable sleep mode via Control Panel
Fix 2: Enable sleep mode via Local Group Policy Editor
Fix 3: Update your display adapters driver
Fix 1: Enable sleep mode via Control Panel
This is the simplest and most direct way to enable the sleep option:
- On your keyboard, press the Windows logo key and R at the same time to open the Run dialog box. Type in control panel and press Enter to open the Control Panel.

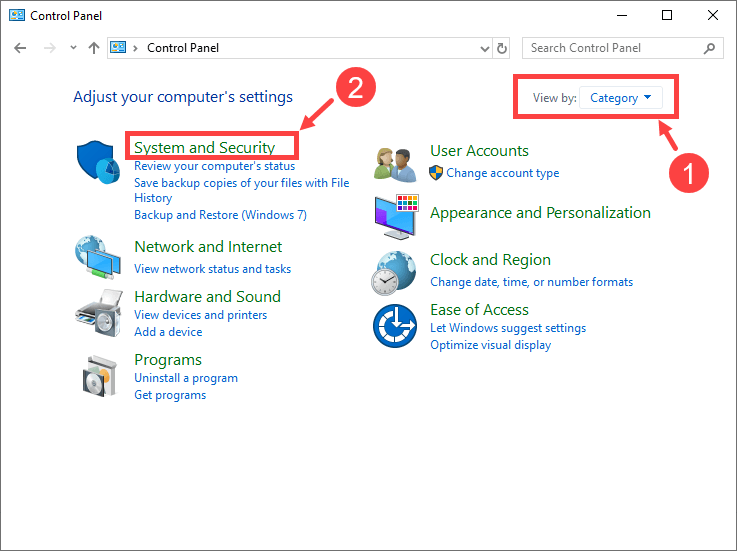
- Open the drop-down list next to View by: and select Category. Next, click System and Security.
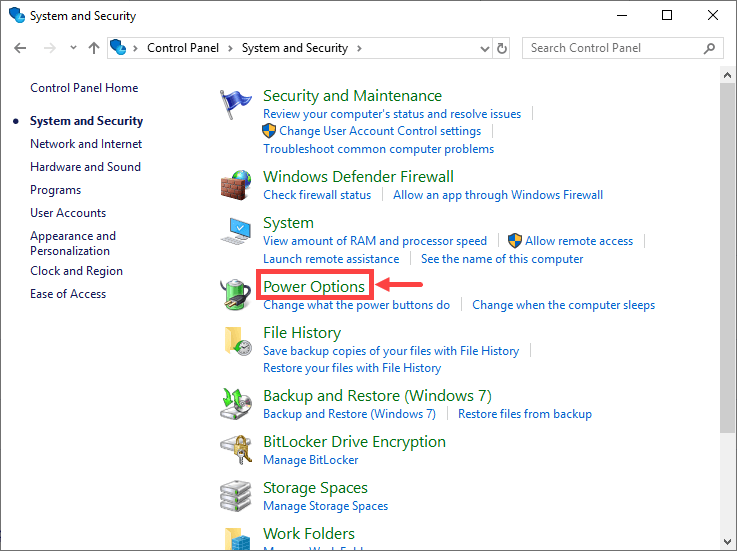
- In the next window, select Power Options.
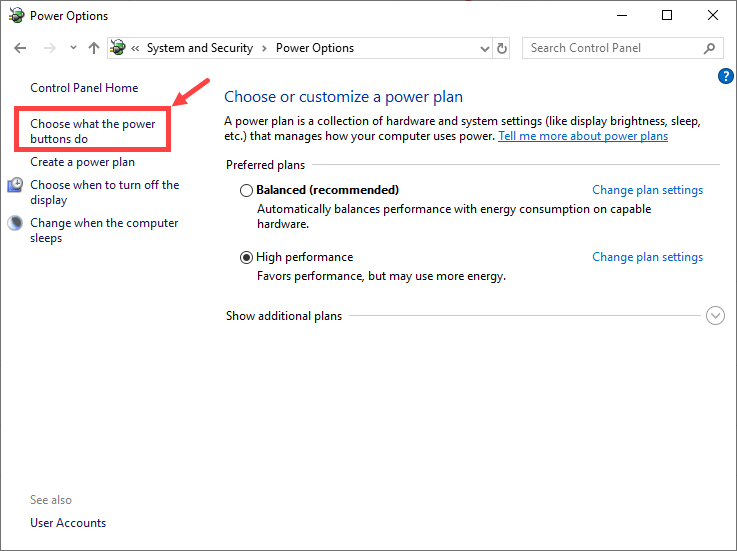
- Click Choose what the power buttons do in the left pane.
- Click Change settings that are currently unavailable.
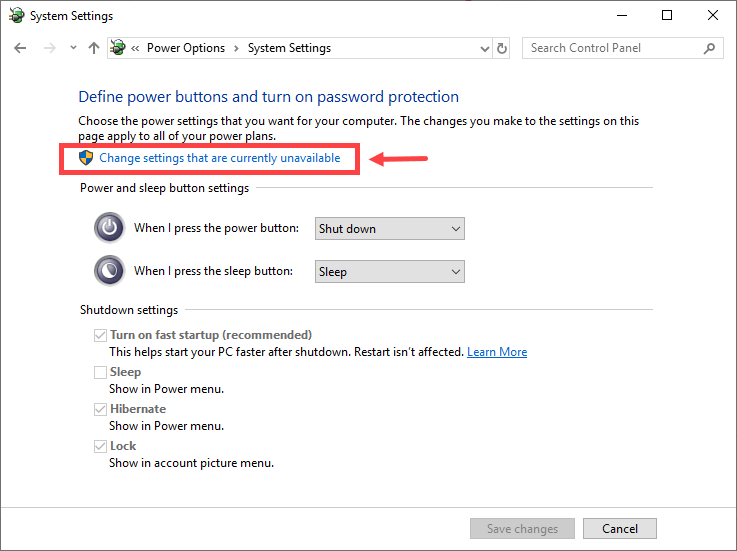
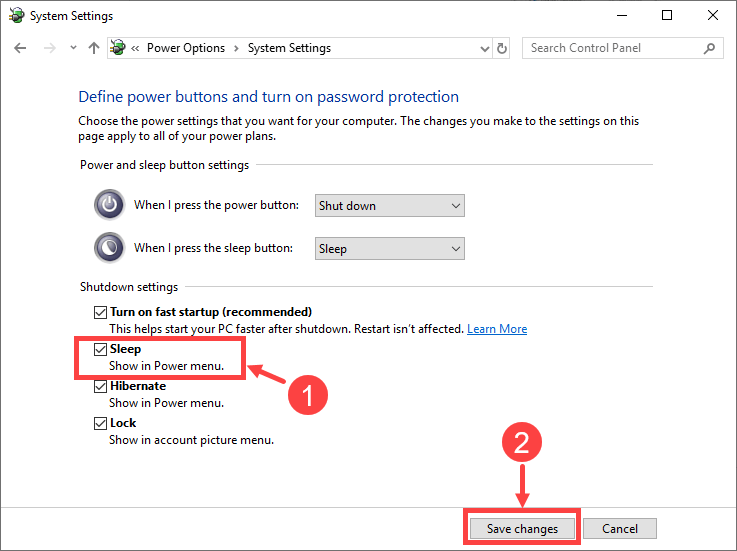
- Make sure you check the Sleep box. Then click Save changes to let the changes take effect.
- Open the Power menu and check if you can find the sleep option there.
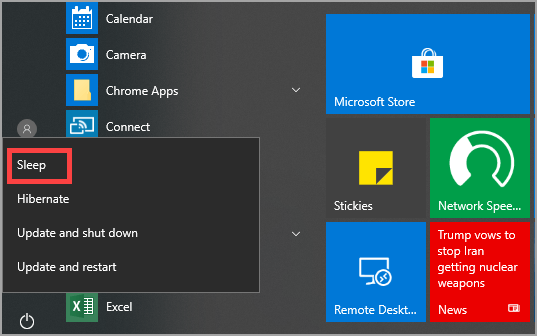
If you find the sleep option right there in the Power menu, then congrats – your problem has been solved! Otherwise, please move on to the next fix.
Fix 2: Enable sleep mode via Local Group Policy Editor
Note that this fix is only available for Windows 10 Pro and Windows 10 Enterprise. If you’re not using these two versions, you can’t open the Local Group Policy Editor on your PC. In this condition, you should apply Fix 1 or Fix 3.
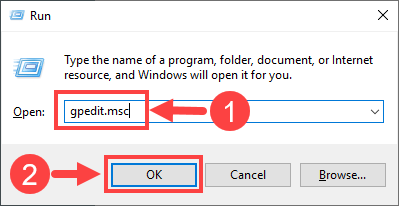
- On your keyboard, press the Windows logo key and R at the same time to open the Run dialog box. Type in gpedit.msc and click OK to open the Local Group Policy Editor.
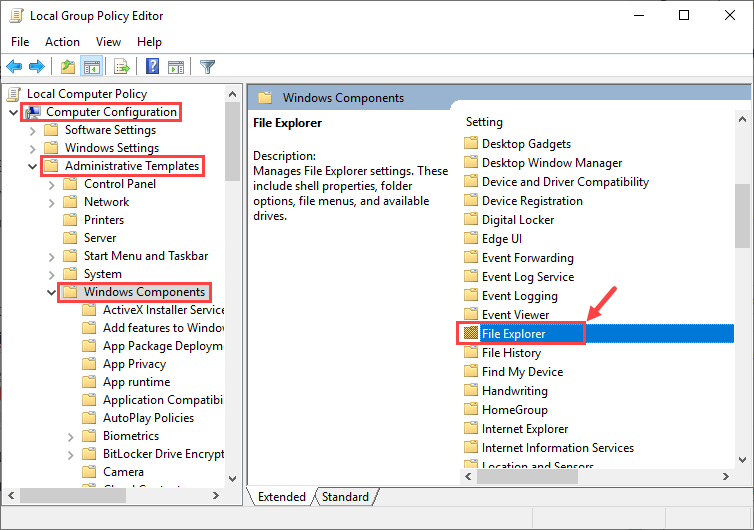
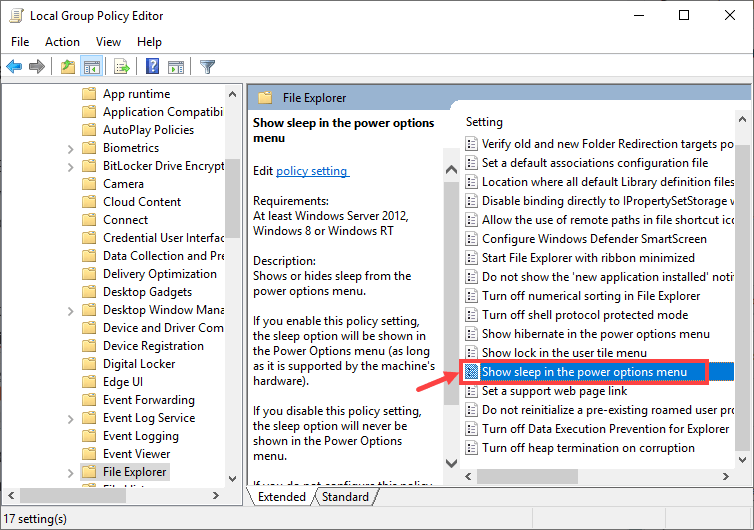
- In the pop-up window, navigate to Computer Configuration -> Administrative Templates -> Windows Components -> File Explorer.
- On the right panel of File Explorer, double-click Show sleep in the power options menu.
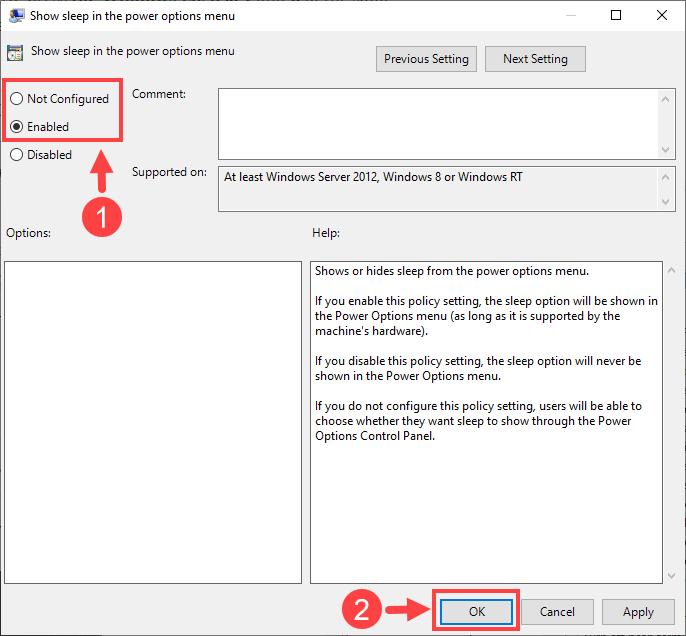
- Select either Enabled or Not Configured (either is acceptable). Then click OK to save the changes.
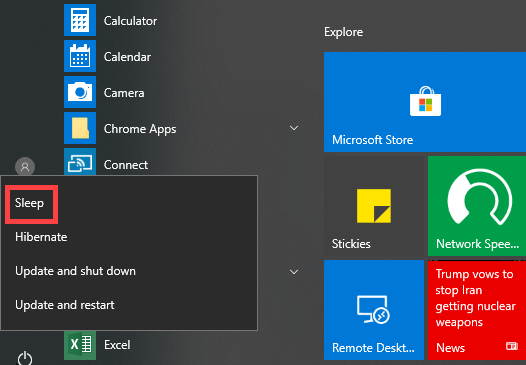
- Open the Power menu and check if you can find the sleep option there.
Don’t be upset if your issue hasn’t been solved yet. Try out the next fix and see whether it works for you.
Fix 3: Update your display adapters driver
If both of the methods above haven’t solved your problem, then you should try to update your display adapters driver. You can perform an update either automatically or manually:
Option 1 – Automatically (Recommended) – This is the quickest and easiest option. It’s all done with just a couple of mouse clicks – easy even if you’re a computer newbie.
Option 2 – Manually – You’ll need some computer skills and patience to update your drivers this way, because you need to find exactly the right the driver online, download it and install it step by step. Also, you may update your driver directly from the Device Manager. However, Windows may not always detect or provide the latest drivers for you.
Option 1 – Automatically update your display adapters driver (Recommended)
If you don’t have the time, patience or computer skills to update your drivers manually, you can do it automatically with Driver Easy.
Driver Easy will automatically recognize your system and find the correct drivers for it. You don’t need to know exactly what system your computer is running, you don’t need to risk downloading and installing the wrong driver, and you don’t need to worry about making a mistake when installing. Driver Easy takes care of everything.
You can update your drivers automatically with either the FREE or the Pro version of Driver Easy. But with the Pro version it takes just 2 clicks:
- Download and install Driver Easy.
- Run Driver Easy and click the Scan Now button. Driver Easy will then scan your computer and detect any problem drivers.

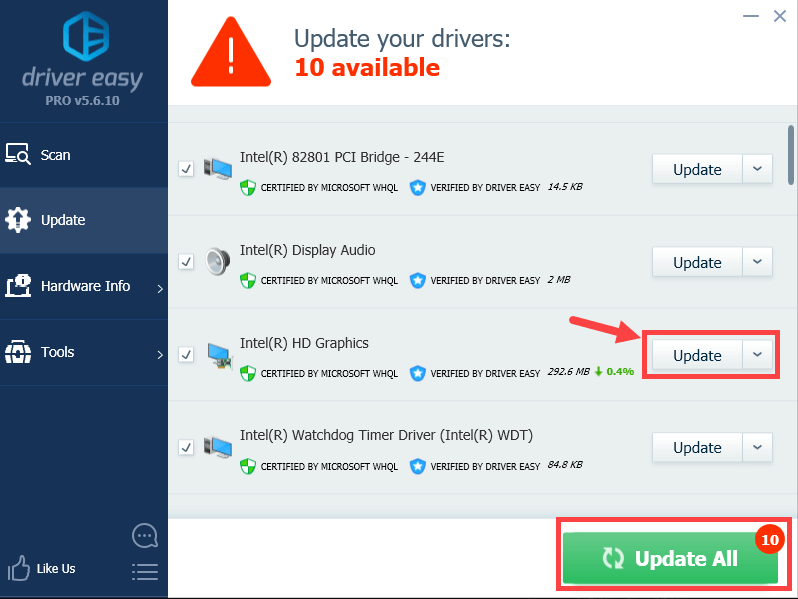
- Click Update All to automatically download and install the correct version of all the drivers that are missing or out of date on your system (this requires the Pro version – you’ll be prompted to upgrade when you click Update All). Or if you just want to update the display adapters driver for now, click the Update button next to it.
- Open the Power menu and check if you can find the sleep option there.
Note: You can do it for free if you like, but it’s partly manual.
Option 2 – Manually update your display adapters driver
Alternatively, you can find your display adapters driver online, download it and install it step by step. Considering that the process of searching out your driver differs from person to person, here we’ll simply teach you how to update your display adapters driver via Device Manager. Here’re the steps:
- Press the Windows logo key and R at the same time to invoke the Run dialog box. Then type devmgmt.msc and click OK.

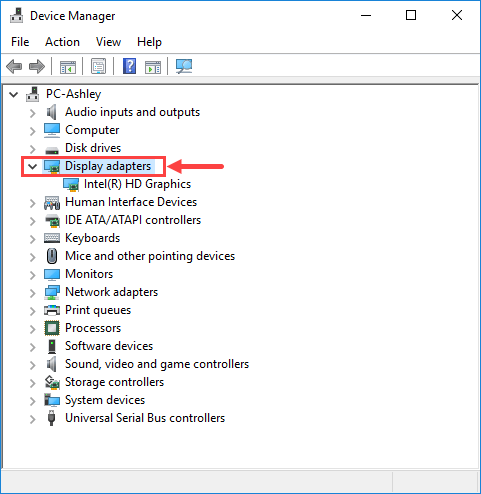
- Here comes the window of Device Manager. Double-click on the Display adapters category to expand its drop-down list.
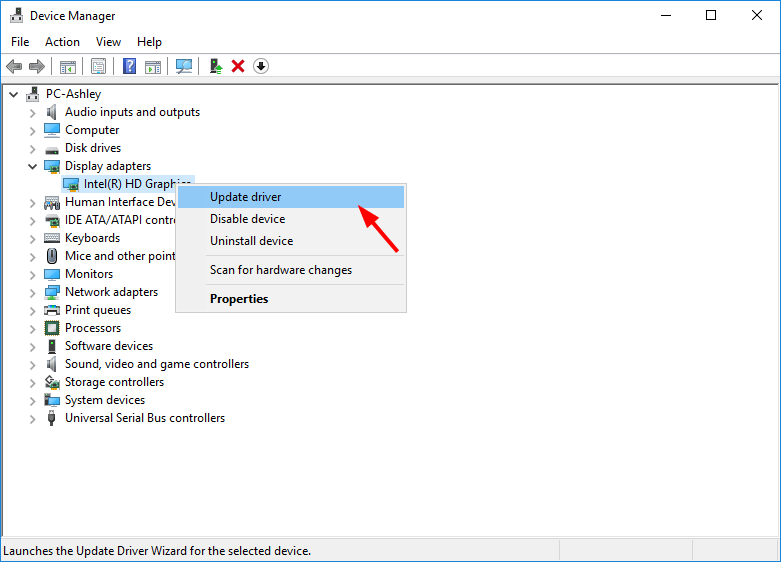
- Right-click on the graphics card you’re using. Then select Update driver.
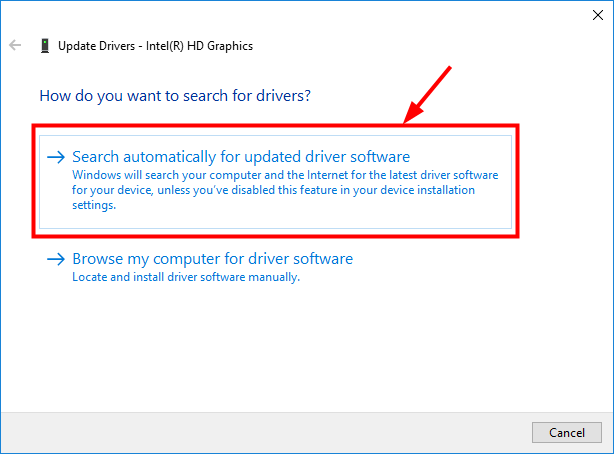
- Click Search automatically for updated driver software.
- Wait till the download and installation process finishes.
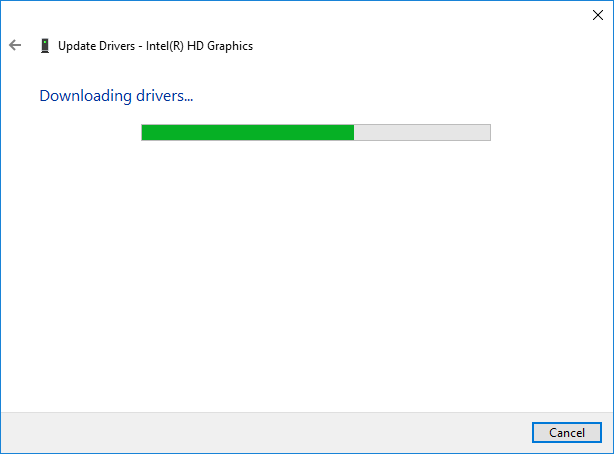
- Click Close when it’s all done.
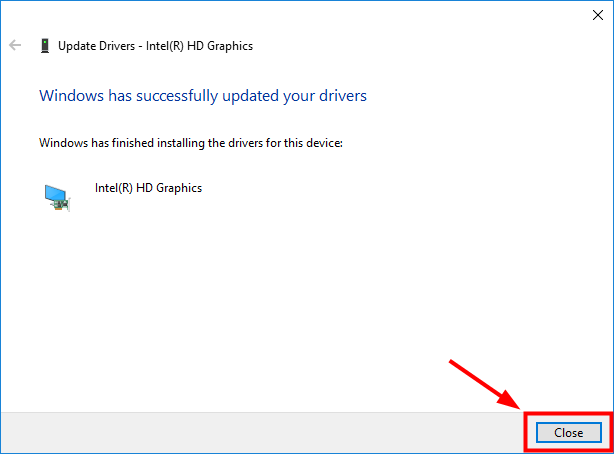
- Now your driver has been updated by Windows successfully. Don’t forget to restart your computer for the changes to take effect even if you’re not asked to.
- After rebooting your computer, open the Power menu and check if you can find the sleep option there.
If your sleep option reappears, that means you’ve successfully solved your problem!
Hopefully you find this post useful. Please feel free to leave a comment below if you have any further questions or ideas. Thanks for reading!