


Many computer users have reported problems with their HDMI port. They’re getting no image or sound coming out from their devices when they’re using that port. If you’re experiencing this problem, don’t worry. You’re not the only one… and you should be able to fix the problem quite easily using one of the solutions we’ve listed below. You don’t have to try them all; just work your way down the list until you find the one that works for you:
- Check Physical Connections
- Configure Your Computer Display Settings
- Update or Reinstall Your Graphics Driver
- Restart and Reconnect Your Devices
- Troubleshoot Hardware Issues
Method 1: Check Physical Connections
Before diving into any advanced troubleshooting, ensure that all physical connections are secure and functioning properly.
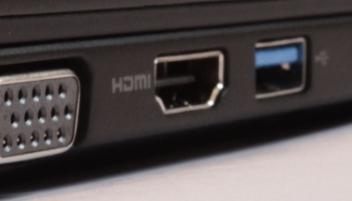
- Inspect the HDMI Cable: Examine your HDMI cable for any visible damage. If possible, test with a different cable to rule out cable-related issues.
- Clean the HDMI Ports: Dust or debris in the HDMI ports can prevent a proper connection. Use compressed air to gently clean out any dust from both the computer’s and the display’s HDMI ports.
- Ensure Secure Connections: Firmly plug the HDMI cable into both the computer and the external display. A loose connection can result in no signal being transmitted.
Method 2: Configure Your Computer Display Settings
If you are using multiple monitors on your computer and you get an issue with your HDMI port, it might be happening because you’re using the wrong display setting. So it’s a good idea to check this setting on your computer and make sure you use the right settings to display your screen.
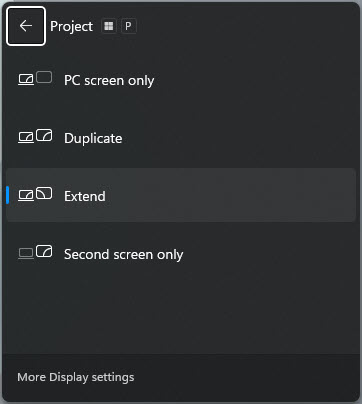
To check your computer display settings, press the Windows logo key and P on your keyboard at the same time. A list of display modes will appear.
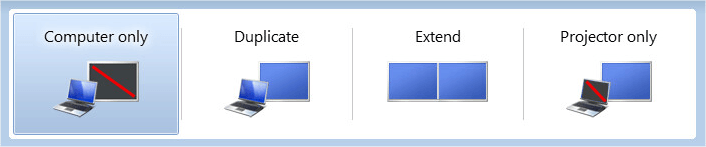
The difference between each mode is as follows:
- PC screen/Computer only — Only using the first monitor.
- Duplicate — Displaying the same content on both monitors.
- Extend — Using both monitors to display an extended desktop.
- Second screen/Projector only — Only using the second monitor.

Experiment with each mode and select the option that is the best match for your needs. If your display settings are correct, you will be able to see images on the screen connected via HDMI.
Method 3: Update Your Graphics Driver
You may experience problems with your HDMI port if you’re using an incorrect graphics driver or it’s out of date. You should try updating or reinstalling your graphics driver and see if this helps you resolve your problem.
There are two ways you can update your graphics driver:
Option 1 – Download and Install the Driver Manually
Your graphics adapter manufacturer keeps updating drivers. To get them, you can go to its website, find the drivers corresponding with your specific flavor of Windows version (for example, Windows 32 bit) and download the driver manually.
Once you’ve downloaded the correct driver for your system, double-click on the downloaded file and follow the on-screen instructions to install the driver.
Option 2 – Automatically Update the Graphics Driver
If you don’t have the time, patience or computer skills to update the graphics driver manually, you can do it automatically with Driver Easy.
Driver Easy will automatically recognize your system and find the correct drivers for it. You don’t need to know exactly what system your computer is running, you don’t need to risk downloading and installing the wrong driver, and you don’t need to worry about making a mistake when installing. Driver Easy handles it all.
- Download and install Driver Easy.
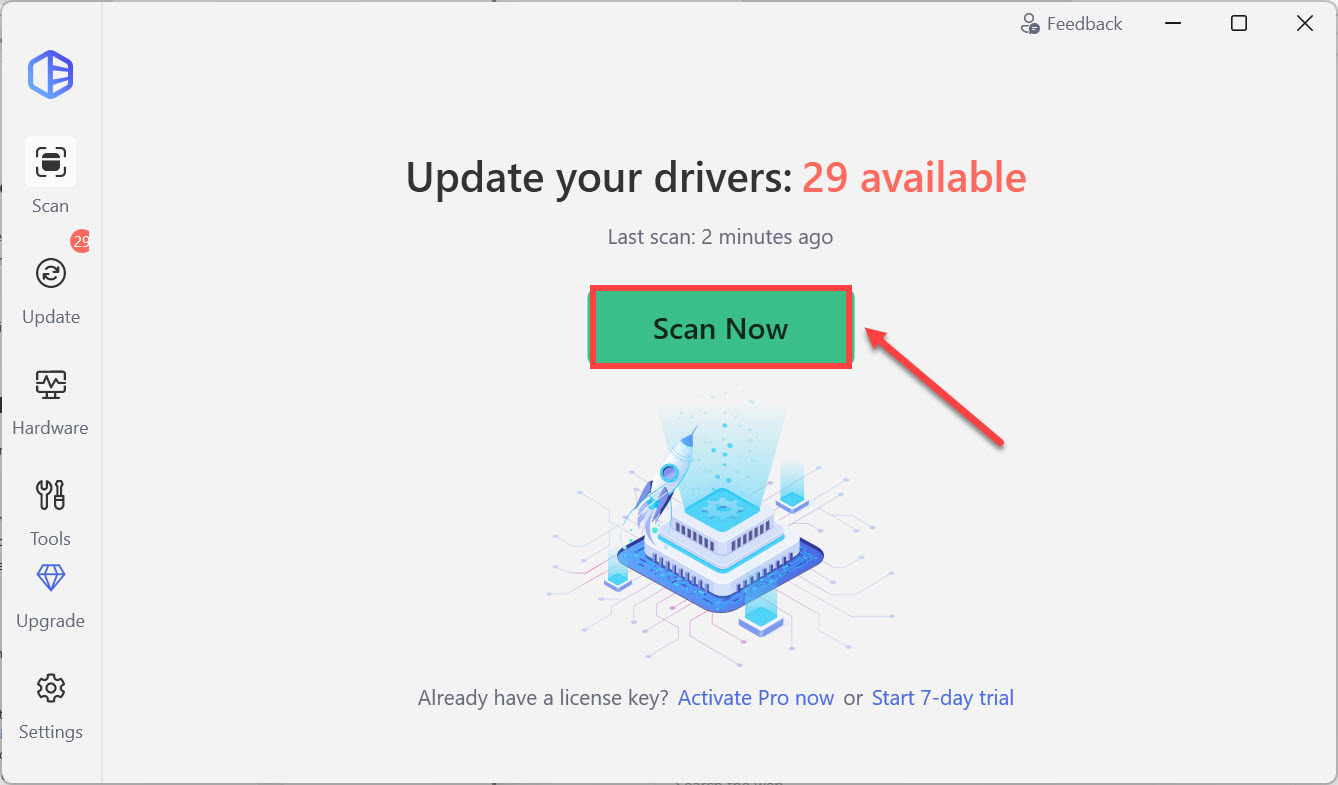
- Run Driver Easy and click the Scan Now button. Driver Easy will then scan your computer and detect any problem drivers.
- Click Update All to automatically download and install the correct version of all the drivers that are missing or out of date on your system. (This requires the Pro version which comes with full support and a 30-day money-back guarantee. You’ll be prompted to upgrade when you click Update All. If you’re not ready to buy the Pro version, Driver Easy offers a 7-day free trial which includes access to all the Pro features such as high-speed download and one-click install. You won’t be charged anything until your 7-day trial has ended.)

- Restart your computer for the changes to take effect.
Method 4: Restart and Reconnect Your Devices
Sometimes restarting and reconnecting your devices is an effective method to get your HDMI port work again. Here’s what you need to do:
- Disconnect all your HDMI cables from your ports.
- Shut down all your devices (your computer, monitor and TV) completely and unplug their power cables (and battery if you are using a laptop).
- Leave them for five minutes.
- Plug the power cables (and the battery) back in.
- Connect the HDMI cables back to your devices.
- Power on the devices.
Now see if you can use your HDMI port.
Method 5: Inspect for Hardware Damage
If none of the above methods resolve the issue, there might be physical damage to your HDMI port.
- Seek Professional Help: If you suspect hardware damage, especially on laptops, it’s advisable to consult a professional technician for repair or replacement.
- Examine the HDMI Port: Look for any visible signs of damage, such as bent or broken pins.
- Check for Debris: Use a flashlight to inspect the port for dust or debris. If necessary, clean it gently with compressed air.
We hope one of these methods helps you resolve the HDMI port issue. If you have any other suggestions or need further assistance, please feel free to share.
