


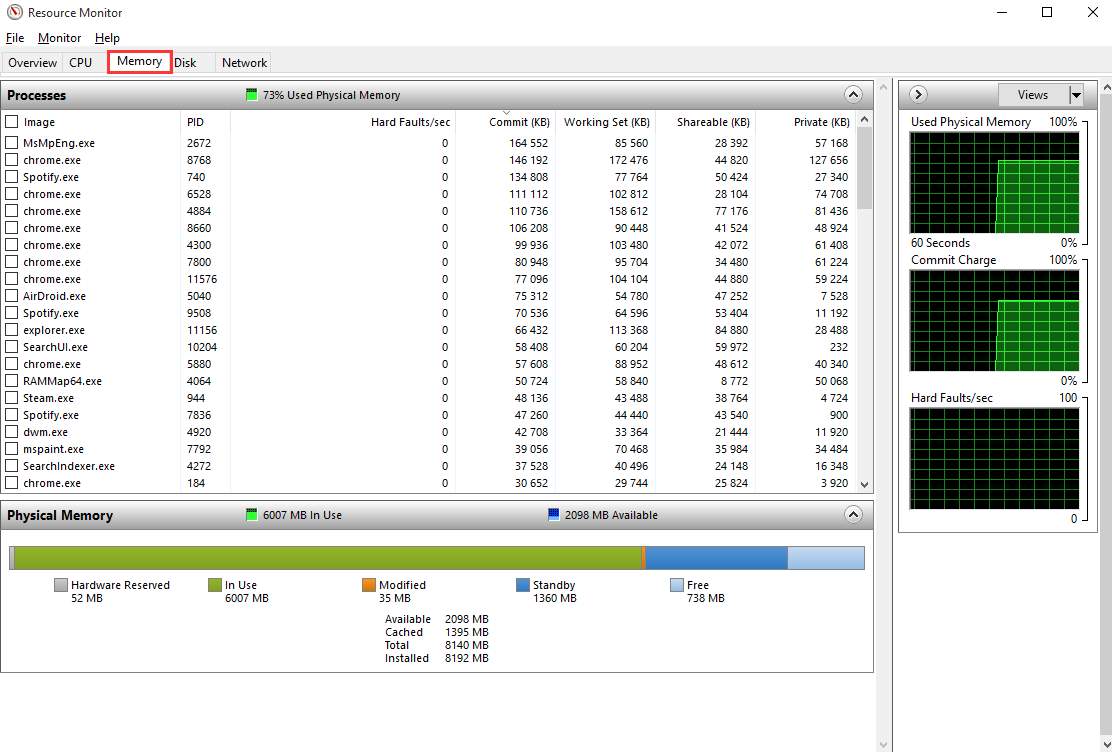
 Users have been reporting to us that they are not exactly having a pleasant experience with Windows 10. They find it impossible to use the PC after some time due to high memory usage. Restarting the computer helps a bit, but the problem comes back again pretty soon.
In some cases, the memory usage could go as high as 70%, and if a restart is not performed, it could go up to 100%, rendering the computer to a freeze.
If you are also having this problem with your Windows 10, no worries, we are here to help you take care of it by presenting you some of the most common and effective methods possible. Just follow the instructions below to sort out your issues and get this problem fixed by yourself!
Users have been reporting to us that they are not exactly having a pleasant experience with Windows 10. They find it impossible to use the PC after some time due to high memory usage. Restarting the computer helps a bit, but the problem comes back again pretty soon.
In some cases, the memory usage could go as high as 70%, and if a restart is not performed, it could go up to 100%, rendering the computer to a freeze.
If you are also having this problem with your Windows 10, no worries, we are here to help you take care of it by presenting you some of the most common and effective methods possible. Just follow the instructions below to sort out your issues and get this problem fixed by yourself!
 Step One: Run Antivirus Programs
Step Two: Disable Superfetch Service
Step Three: Run SFC in Safe Mode
Step Four: Run RAMMap
Step One: Run Antivirus Programs
The first thing you need to do is to run a virus scan of all your system files with the help of the antivirus programs that you trust. If you have not installed such an antivirus program, you can use the built-in Windows Defender for help. This will help you rule out suspicious programs or system files that might be causing this problem.
If you are able to find one, remove it completely from your computer to see if this program persists.
There have been users reporting that antivirus programs, including Windows Defender, is the culprit of the excessively high memory usage. So, if it is not too much trouble for you, try disabling your antivirus programs to see if it helps.
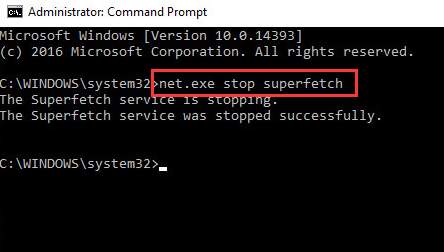
Step Two: Disable Superfetch Service
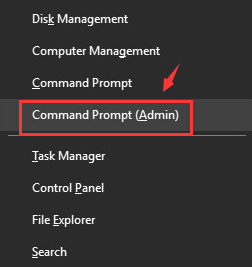
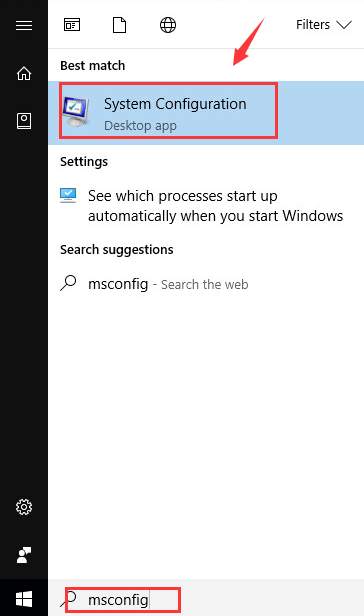
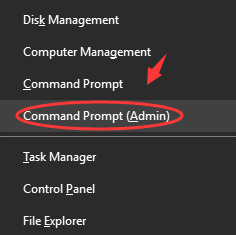
1) Press Windows key and X at the same time, then choose Command Prompt (Admin).
Step One: Run Antivirus Programs
Step Two: Disable Superfetch Service
Step Three: Run SFC in Safe Mode
Step Four: Run RAMMap
Step One: Run Antivirus Programs
The first thing you need to do is to run a virus scan of all your system files with the help of the antivirus programs that you trust. If you have not installed such an antivirus program, you can use the built-in Windows Defender for help. This will help you rule out suspicious programs or system files that might be causing this problem.
If you are able to find one, remove it completely from your computer to see if this program persists.
There have been users reporting that antivirus programs, including Windows Defender, is the culprit of the excessively high memory usage. So, if it is not too much trouble for you, try disabling your antivirus programs to see if it helps.
Step Two: Disable Superfetch Service
1) Press Windows key and X at the same time, then choose Command Prompt (Admin).
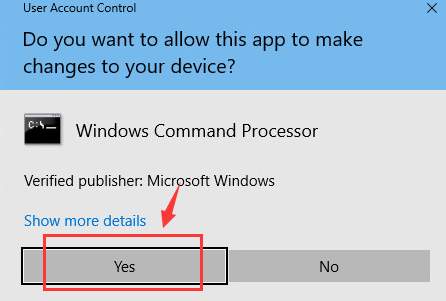
 2) When prompted with the administrator permission, click Yes to continue.
net.exe stop superfetch
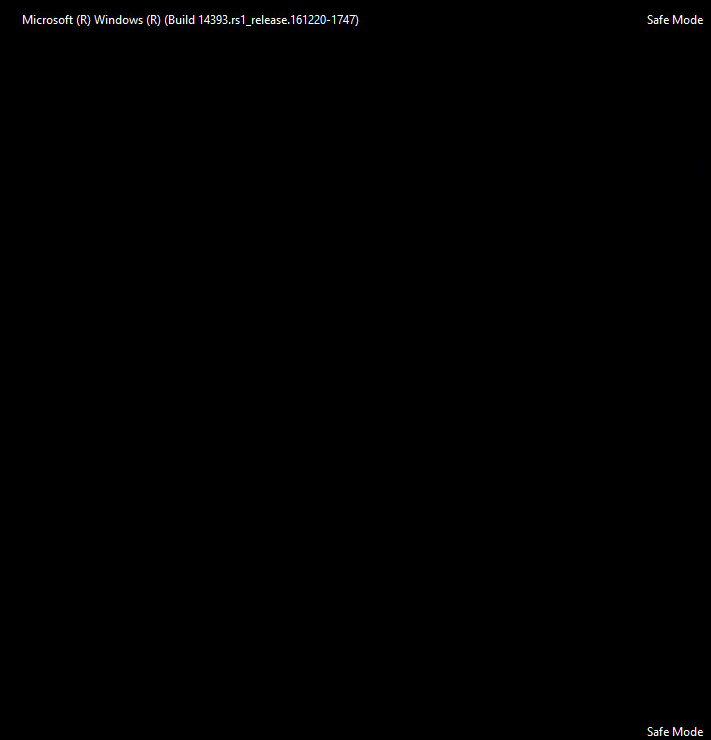
 4) When you restart into safe mode, you will see the word Safe Mode on the four corners of your desktop and your screen background will be all black.
 5) Now press Windows key and X at the same time, then choose Command Prompt (Admin).
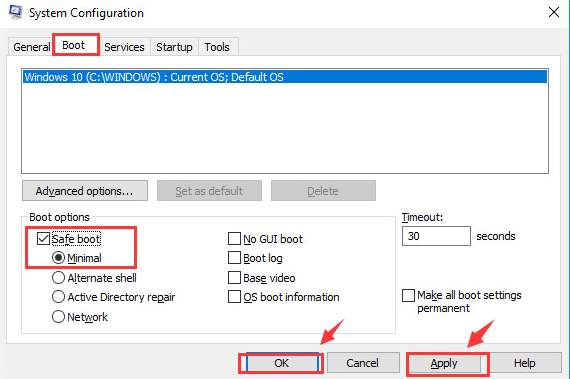
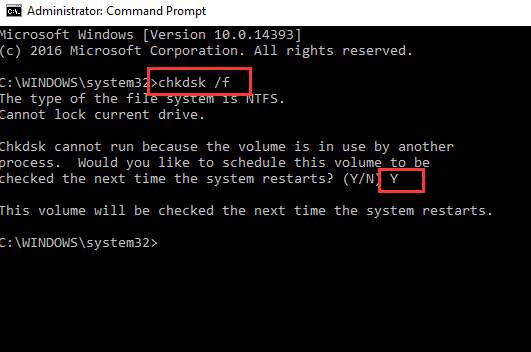
 6) In the command prompt window, type in the following command and then hit Enter.
chkdks /f
Then press Y key to give permission to the disk check the next time you start your computer.
 7) In the same window, type in the following command and then hit Enter.
DISM.exe /Online /Cleanup-image /Restorehealth
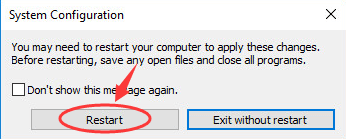
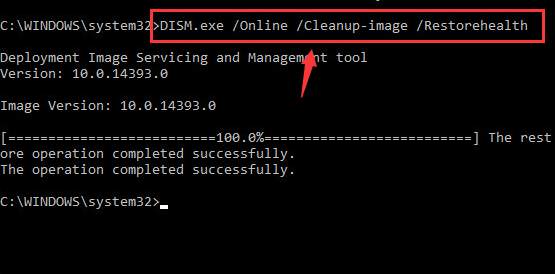 The second command could take some time to finish. When it finishes, restart your computer into normal mode by reversing the procedure in 1) to 3). You will see that your computer go through a disk check before it restarts. The process should not take too long if your disks are problem free.
Step Four: Run RAMMap
If the memory still runs high after all the options above, please consider RAMMap, which is a diagnostic tool provided by Microsoft Sysinternals that is able to provide you with more advanced information that will help you take care of more complex problems.
1) Download RAMMap.
2) After the download, double click it to run the installation.
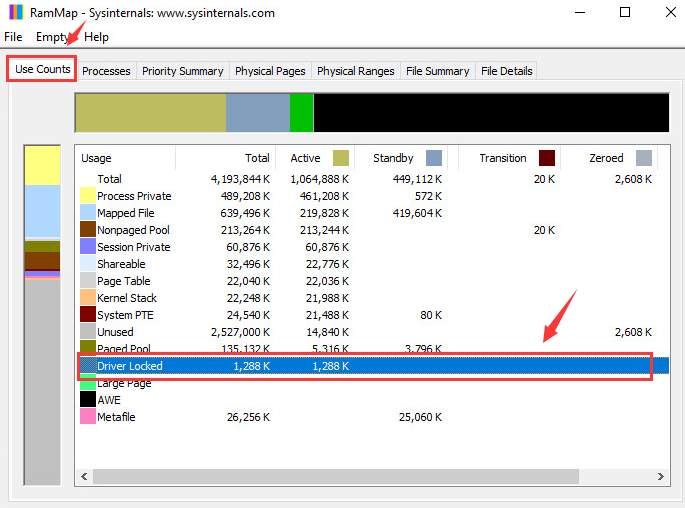
3) Lets’ first take a look at the Use Counts category. Hit Activate so the items will listed in the order of size.
The second command could take some time to finish. When it finishes, restart your computer into normal mode by reversing the procedure in 1) to 3). You will see that your computer go through a disk check before it restarts. The process should not take too long if your disks are problem free.
Step Four: Run RAMMap
If the memory still runs high after all the options above, please consider RAMMap, which is a diagnostic tool provided by Microsoft Sysinternals that is able to provide you with more advanced information that will help you take care of more complex problems.
1) Download RAMMap.
2) After the download, double click it to run the installation.
3) Lets’ first take a look at the Use Counts category. Hit Activate so the items will listed in the order of size.
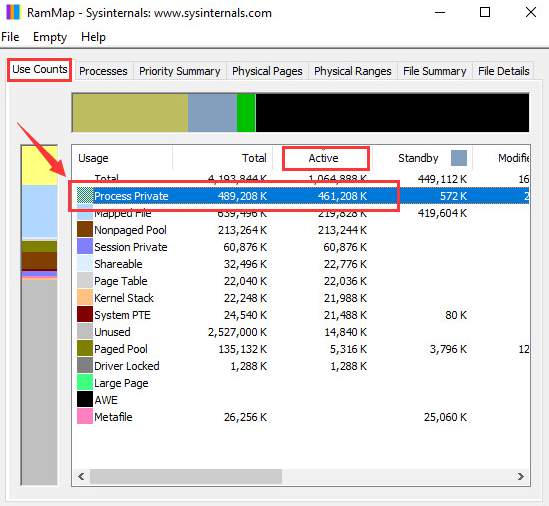 If you see item Process Private lists on top, that means most of your system’s RAM consumption is due to memory allocated by a single process.
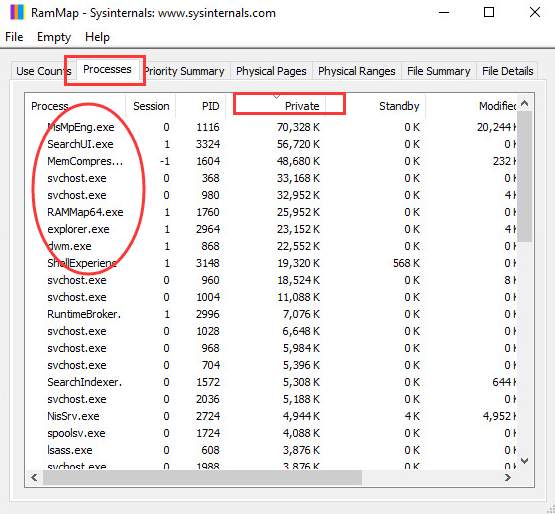
4) Now let’s click Process tab on the top, and then click Private so you will have a better idea what program or programs are taking so much memory.
If you see item Process Private lists on top, that means most of your system’s RAM consumption is due to memory allocated by a single process.
4) Now let’s click Process tab on the top, and then click Private so you will have a better idea what program or programs are taking so much memory.
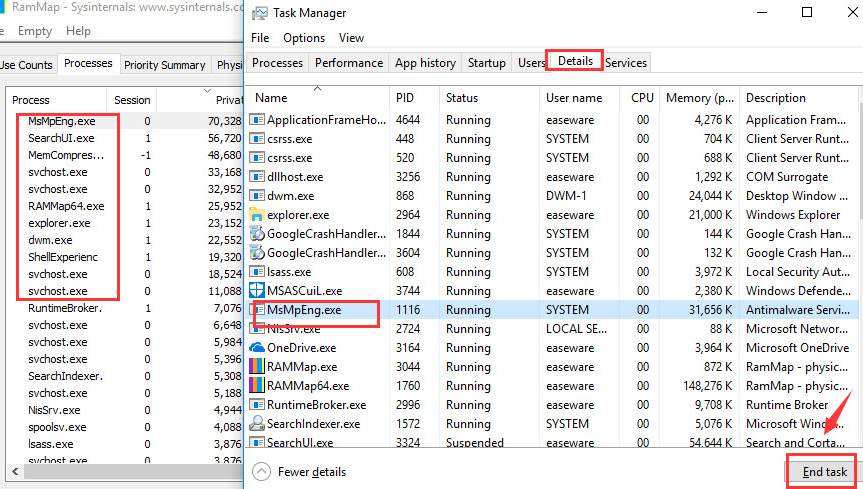
 5) Open Task Manager, then go to Details tab. Locate the services that are hogging your system memory as per the result from RAMMap. Highlight that item and then choose End task. If you have more than one items, repeat the procedure until the memory usage goes back to normal again.
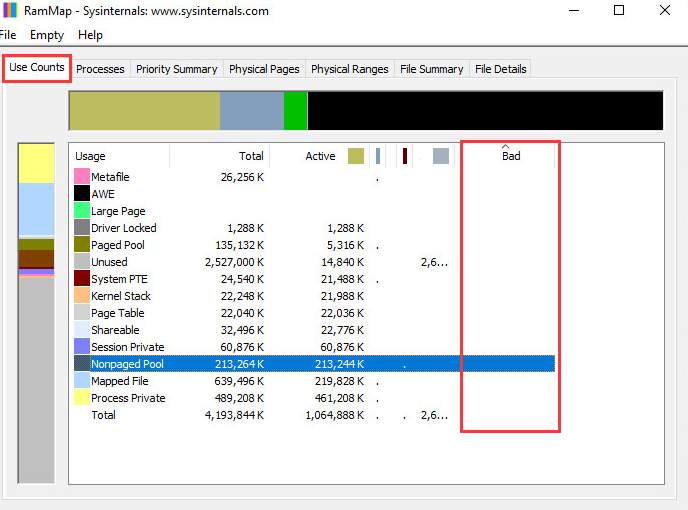
 6) Let’s go back to Use Counts tab. This time, check to see if there is anything listed under column Bad. If things are okay with your system memory, you should not see anything listed here. But if you do, that means your RAM is failing and you need to run Windows Memory Diagnostic Tool to look for the exact cause.
To solve the possible driver problem, it is always suggested that you update your device drivers in the first place.
You can update the device drivers manually, for sure, but that will usually costs you tons of time. Why not have a try at a modern way to update drivers with the help of Driver Easy? It automatically detects, download and install drivers when you need it with just two steps. How easy! 20
20 people found this helpful
2 Comments
Most Voted