Don’t know how to back up your drivers on Windows? Don’t worry! You’ve come to the right place. It’s very, very easy! After reading this article, you should be able to back up your drivers easily and quickly!
Try these methods
- Back up your drivers in Command Prompt
- Back up your drivers in Powershell
- How to restore a driver backup
- Back up and restore your drivers using Driver Easy
Method 1: Back up your drivers in Command Prompt
You can back up your drivers using DISM (Deployment Image Servicing and Management) tool.
As a command line tool built into Windows 8 and later versions of Windows systems, it is often used to service and prepare Windows images. As a nifty tool, it can also be used to scan and repair Windows images. And of course, it can also be used to back up your drivers! Here is how to do it:
- Create a new folder in your local disk drive (D:) or one of any other drives that have not installed Windows 10. Then rename it to Drivers Backup. In this example, I will create a folder in my local disk drive (D:) and call it Drivers Backup.
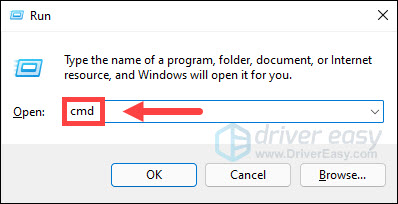
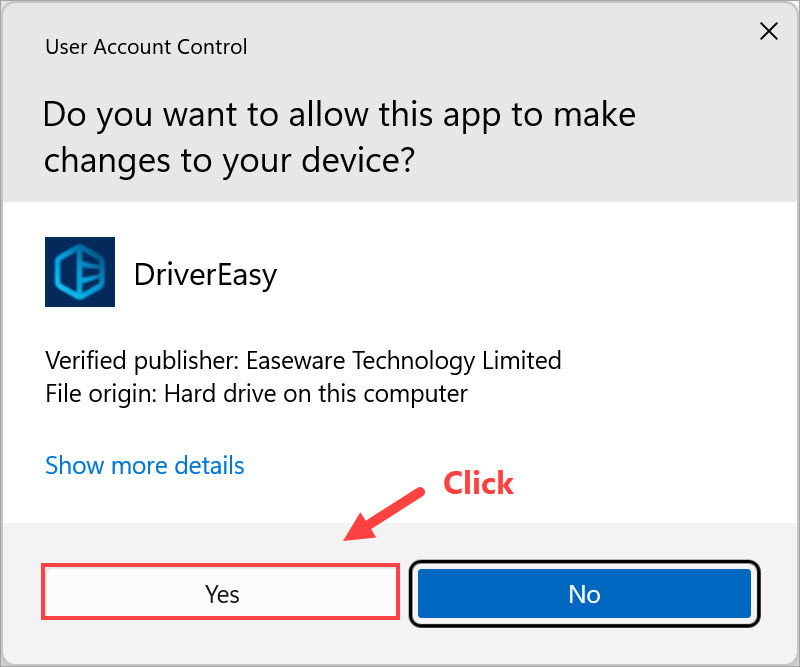
- On your keyboard, press the Windows logo key and R at the same time to open the Run dialog. Type cmd and then press Ctrl, Shift and Enter at the same time to run Command Prompt as administrator. You’ll be prompted for permission. Click Yes to open Command Prompt.
- In Command Prompt, type the following command line and press Enter:
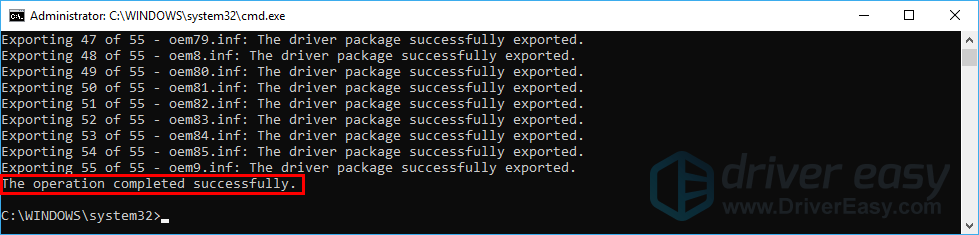
dism /online /export-driver /destination:”D:\Drivers Backup”
NOTE: If you created the folder with the name “Drivers Backup” in your local disk drive (E:), you should type the command line dism /online /export-driver /destination:”E:\Drivers Backup” - When the process is completed, you’ll see the message:
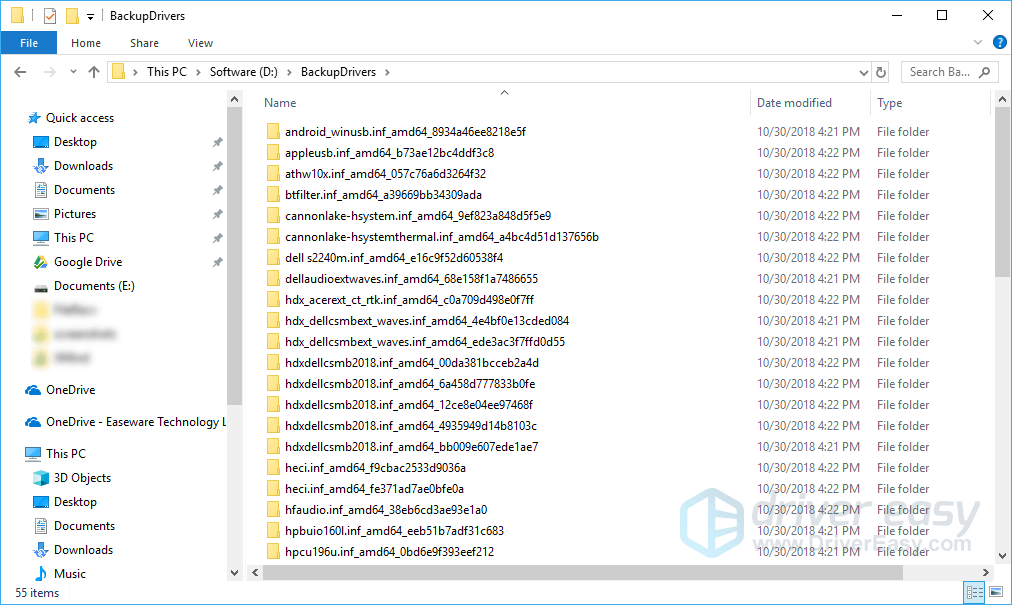
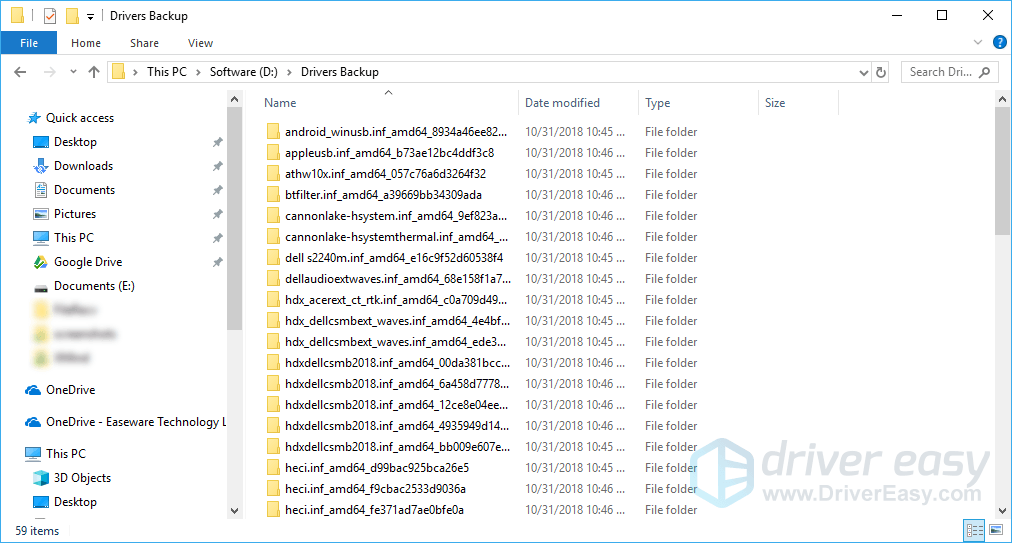
- Now you can go to the Drivers Backup folder to view the backup of all the drivers.
Method 2: Back up your drivers in Powershell
You can also back up your drivers in Powershell, but the command line is a little bit different. It is also very easy! Follow the instructions below to back up your drivers in Powershell.
- Create a new folder in your local disk drive (D:) or one of any other drives that have not installed Windows 10. Then rename it to Drivers Backup. In this example, I will create a folder in my local disk drive (D:) and call it Drivers Backup.
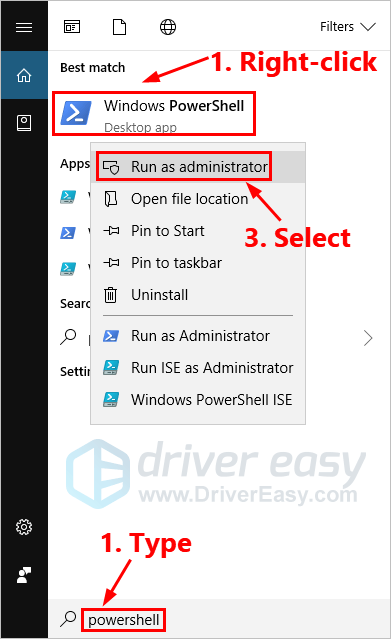
- On your keyboard, press the Windows logo key and type powershell. In the list of search results, right-click Windows Powershell and select Run as administrator. You’ll be prompted for permission. Click Yes to run Powershell as administrator.
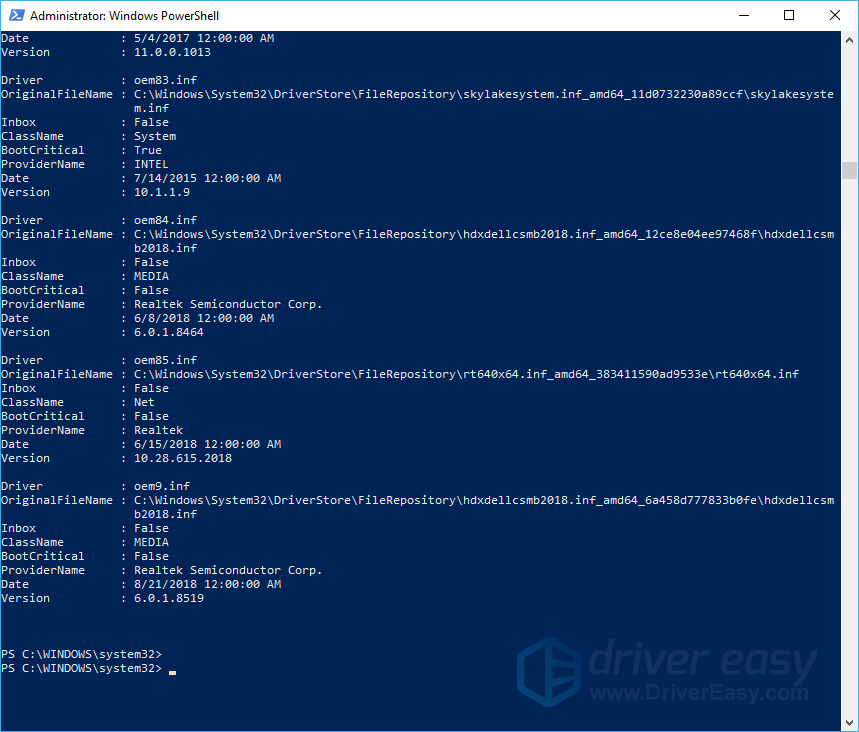
- In Powershell, type the following command line and press Enter:
Export-WindowsDriver -Online -Destination “D:\Drivers Backup”
NOTE: If you created the folder with the name “Drivers Backup” in your local disk drive (E:), you should type the command line Export-WindowsDriver -Online -Destination “E:\Drivers Backup” - Wait until the process is completed.
- Now you can go to the Drivers Backup folder to view the backup of all the drivers.
How to restore a driver backup
In Device Manager, you can manually restore your drivers’ backups one by one. Here is how to do it:
- On your keyboard, press the Windows logo key and X at the same time. Then select Device Manager. You’ll be prompted for permission. Click Yes to open Device Manager.

- Right-click the device you want to restore a driver backup for, then select Update driver.

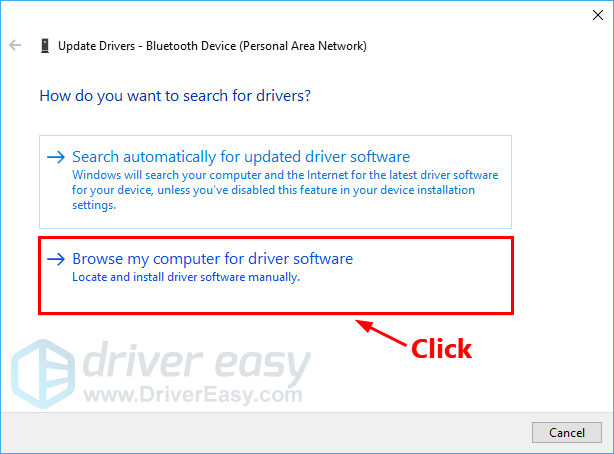
- In the pop-up window, select Browse my computer for driver software.
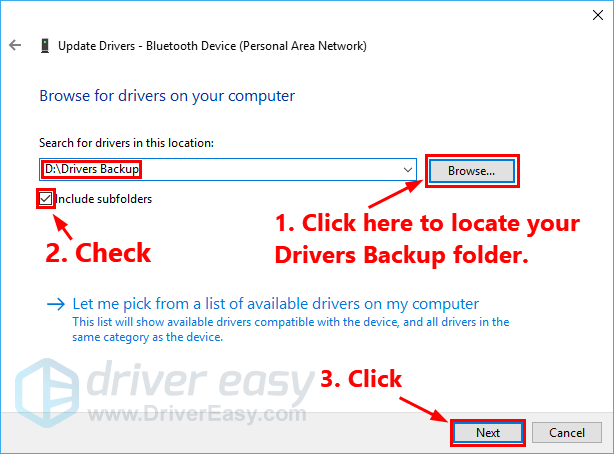
- Click Browse… to locate your Drivers Backup folder. Click the box next to Include subfolders. Then click Next.
- Windows will begin to search the Drivers Backup folder and restore the driver for this device.
- Close the window when the process is completed.
Method 3: Back up and restore your drivers using Driver Easy
If you don’t feel comfortable playing with those command lines, or if you don’t have time, patience or computer skills to back up, restore or update your drivers, you can, instead, do it automatically with Driver Easy.
Driver Easy is easy to use. What’s more, you don’t need to worry about making a mistake when you back up, restore and update your drivers. Driver Easy handles it all.
With the Pro version of Driver Easy, you can back up and restore your drivers easily and quickly!
- Download and install Driver Easy.
- Activate the Pro version of Driver Easy using your license key. If you don’t know how to do it, you can refer to the activation guide.
- In the Pro version of Driver Easy, click Tools.
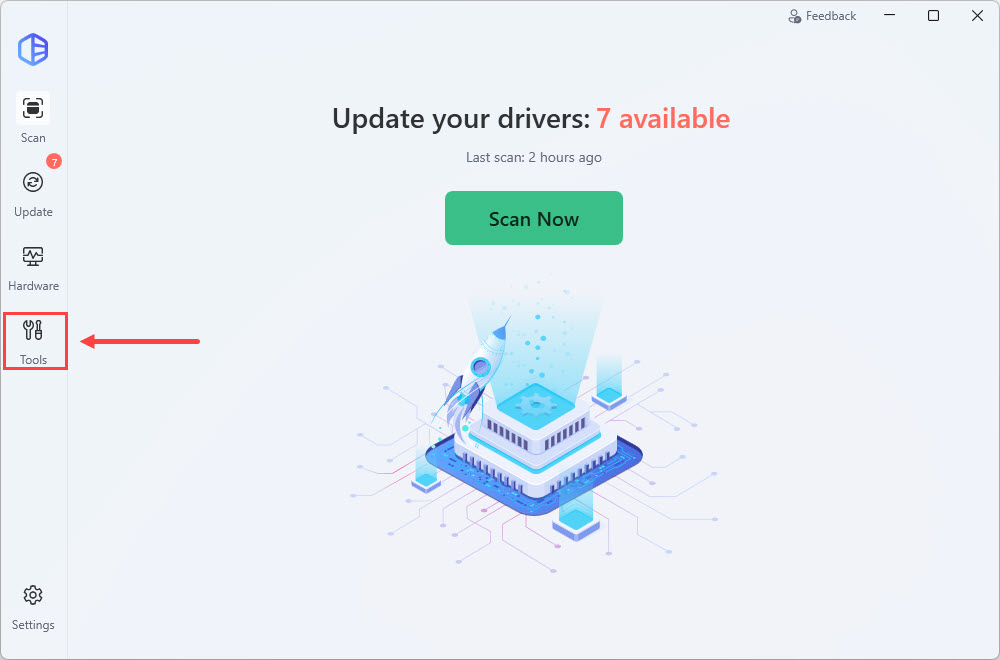
To back up your drivers:
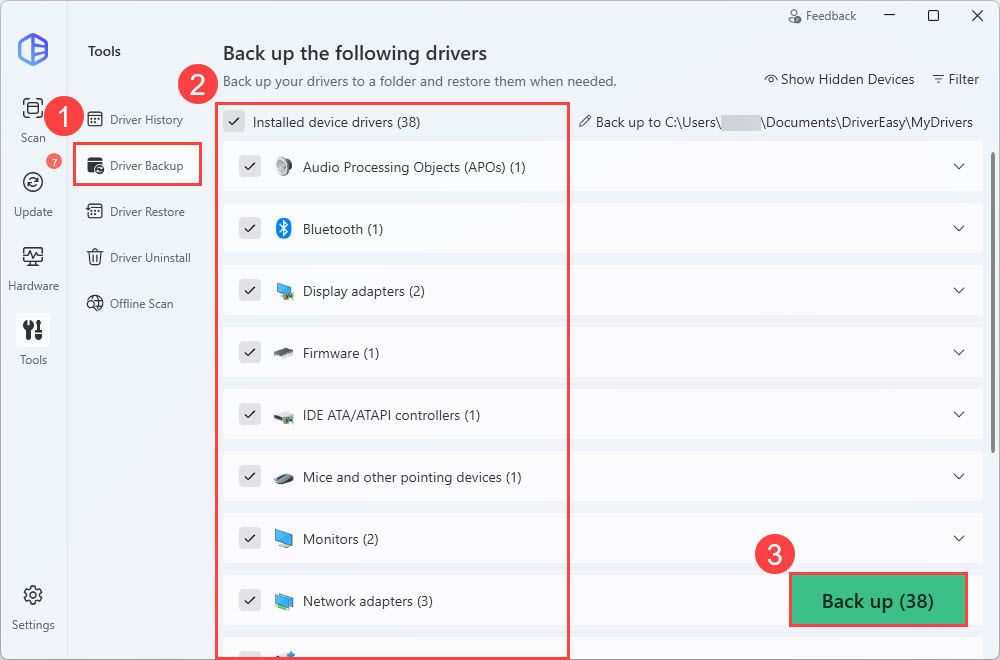
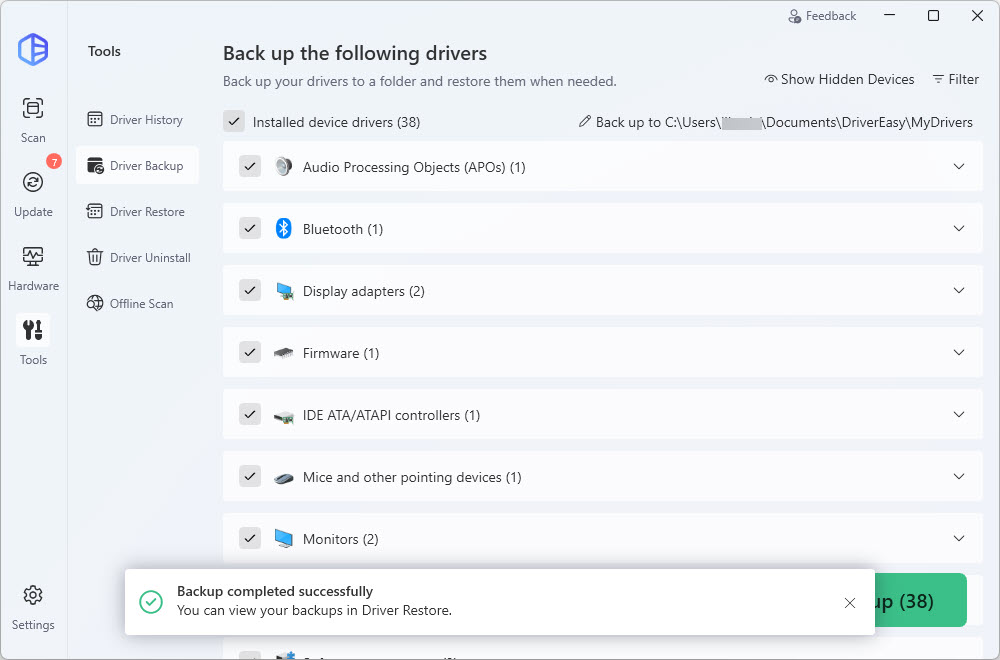
- In the Driver Backup section, select the drivers you want to back up by checking the box next to the device. The driver’s backup folder is located in your local disk drive (C:) by default. You can click the default path to change it. Then click Back up to back up the drivers you select.
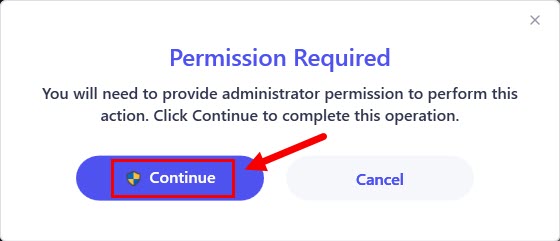
- You’ll be prompted for permission. Click Continue and Yes.
- Wait for the backup process to complete.
To restore your drivers:
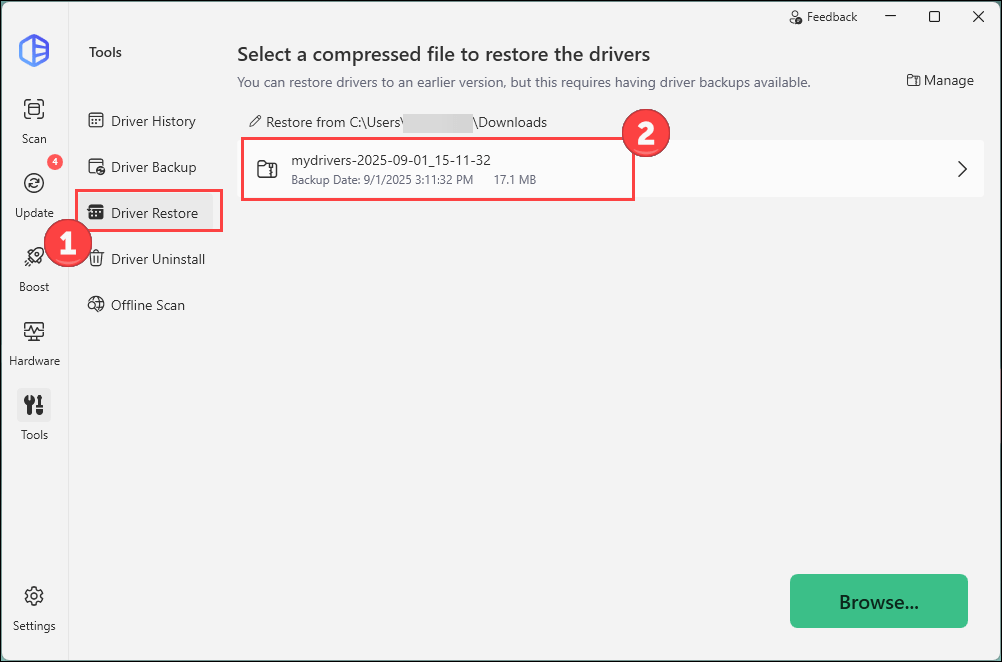
- Run the Pro version of Driver Easy. Then click Tools.
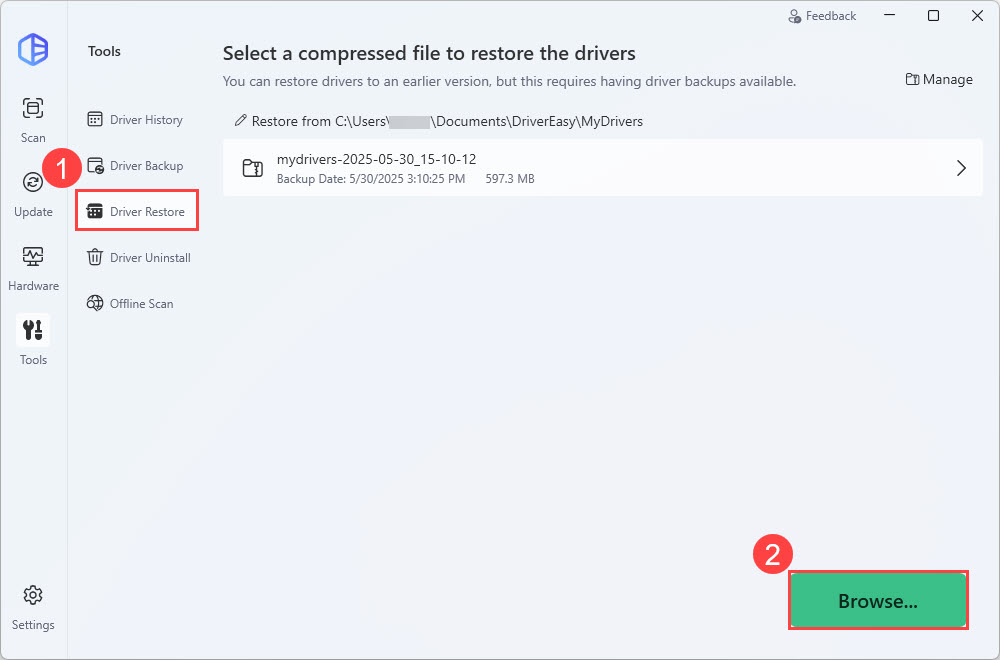
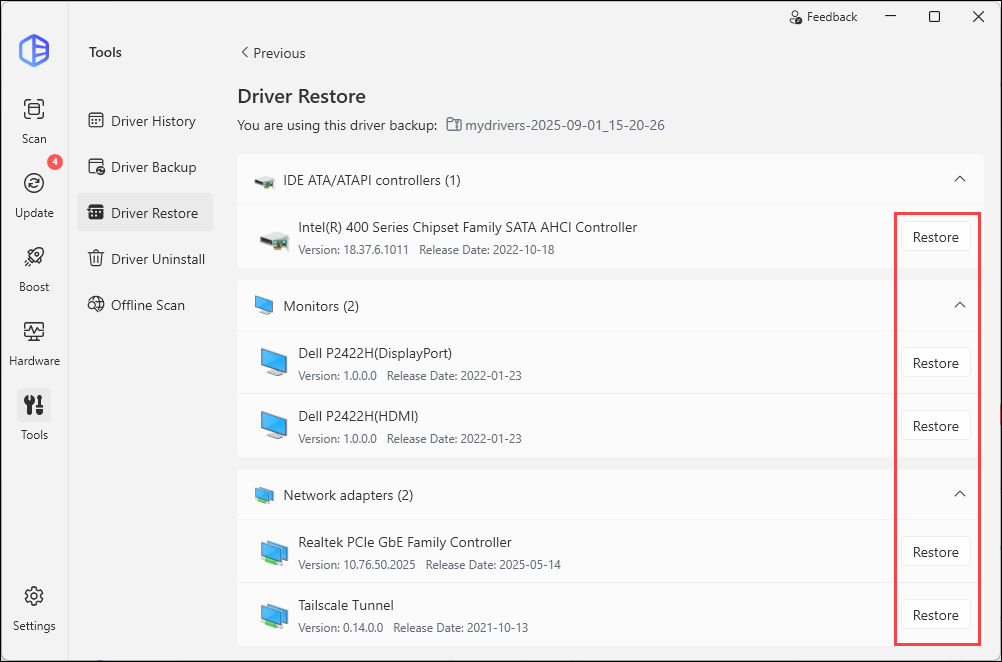
- Click Driver Restore. Choose the backup you want to use.
- Then choose which driver you want to restore.
Alternatively, you can click Browse… to check other backup files. Just make sure the restore file path is the same as the backup path.