


If you back up your iPhone to your iCloud iTunes, you will have a copy of your information to use in case your device is lost, replaced or damaged. Choose accordingly the method you would like to approach and follow the steps below to back up your iPhone.
Try These Methods:
Method 1: Backup with iCloud
1) Connect your device to a Wi-Fi network.
2) On your iPhone, go to Settings >> iCloud >> Backup
. Make sure the iCloud Backup option is on.
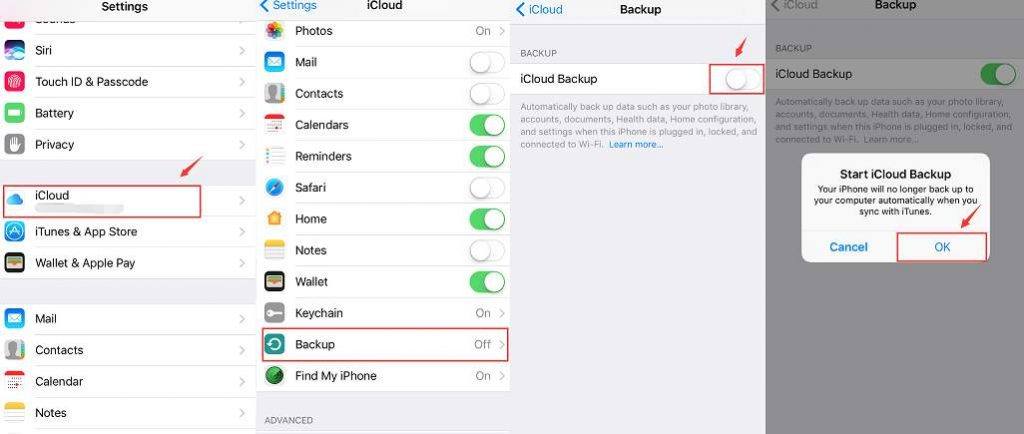
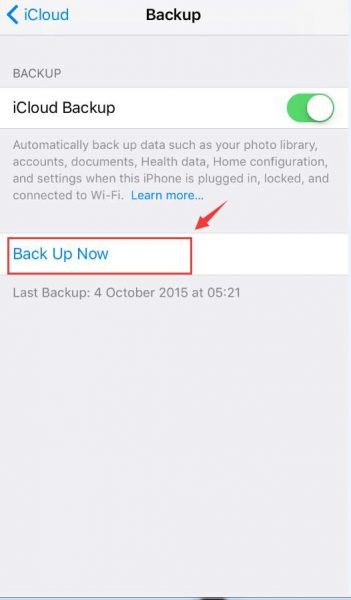
3) Then choose Back Up Now so the backup process can begin. Please make sure that you have your Wi-Fi network running until the process completes.
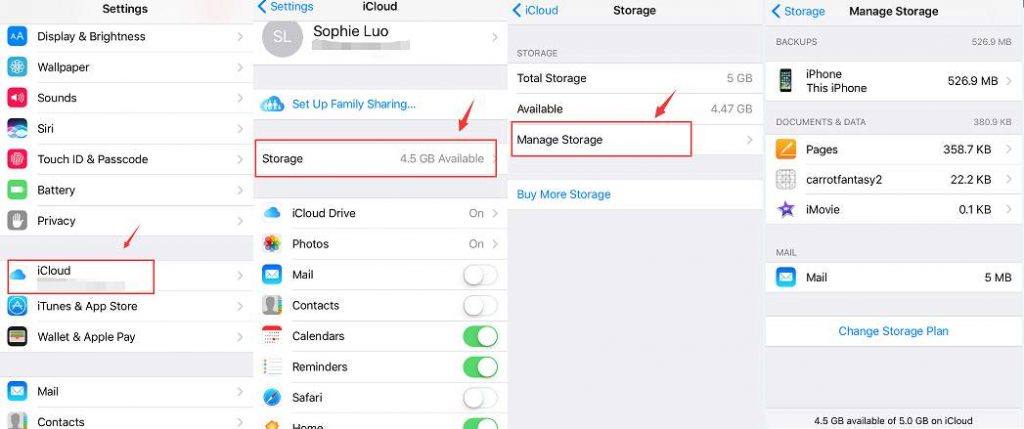
4) Tap Settings >> iCloud >> Storage >> Manage Storage to check your backed up files and to make sure that the backup is finished.
Method 2: Backup with iTunes
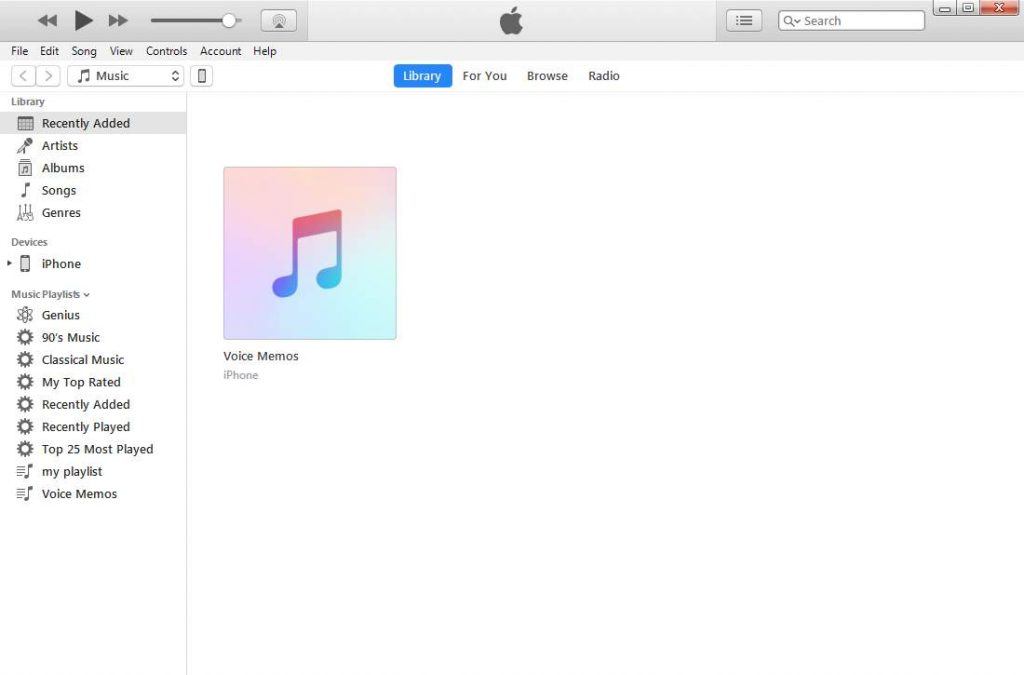
1) Connect your iPhone to your computer, and the open iTunes if it doesn’t open automatically. Make sure that the iTunes installed is the latest version.
2) If prompted to enter the password or to Trust the computer, follow the onscreen instruction to continue. If you forgot your password, please refer to this post for help.

3) You will be able to see the iPhone icon in the menu bar. Click this icon to continue. If you don’t see this icon, please refer to this post for help.
4) Scroll down a little to locate the Backups section. Then choose This computer option, and please make sure that the Encrypt iPhone backup option is ticked. Then press the Back Up Now button on the right side of the pane.
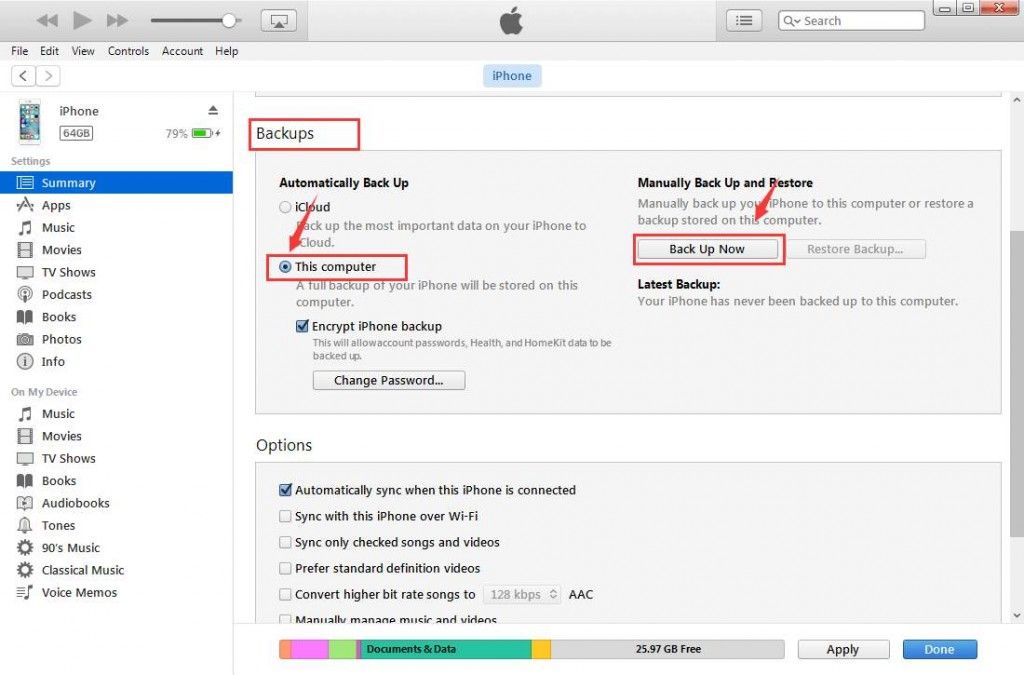
Wait for a while for the process to finish.
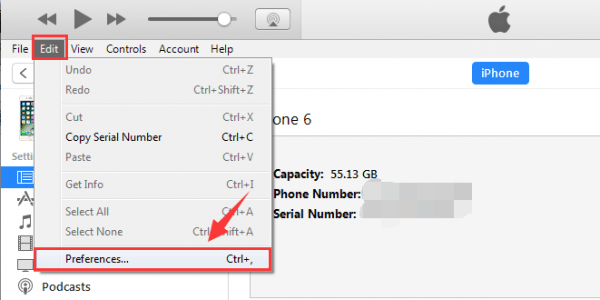
5) To check if the backup is fully completed, you can do to the top bar in iTunes, select Edit >> Preference.
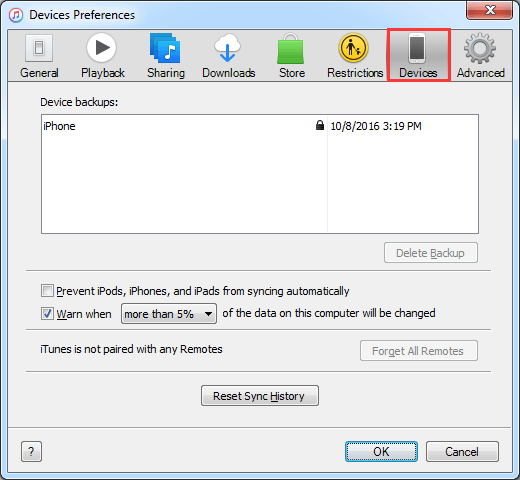
Then choose Devices. You will be able to see the name of your device with the date and data that iTunes created for the backup.
Note
For these two methods, you must know that iTunes/iCloud does backup the whole device and all data, so you cannot choose the exact data types; Besides, after backing up, there is no option for you to view the data in the backup files; So for these annoying issues, we would like to recommend you the third way to backup iPhone XS/XR/X/8/7/6s/6.