You’d like to improve the visual experience of video games on Windows 10? You’ve just connected another monitor to your Windows 10 system? Or, does any app look not enough clear on your Windows 10? Does the window, icon or text on your Windows 10 screen look too big?
…
Whatever the reason, you’d like to view and change the display settings on your Windows 10 system. We’ve put together the tips to change Windows 10 display settings to make it look best. Read on and see how…
Pick the item you’d like to learn:
- Change your screen resolution
- Change the size of text, apps, and other items
- Change the refresh rate of your monitor
- Adjust multiple display settings if you use more than one monitor
- Bonus Tip
Tip 1: Change your screen resolution
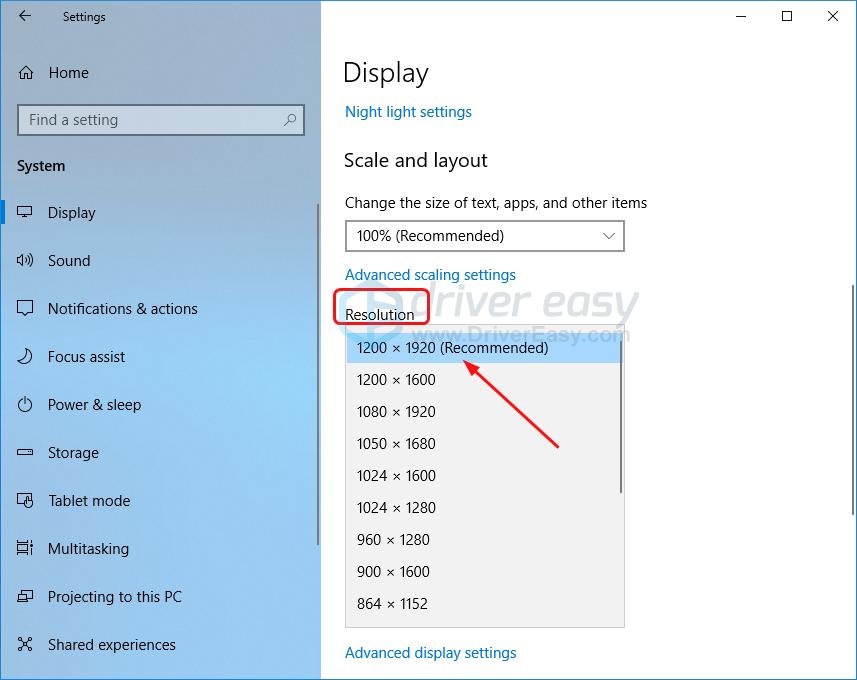
Screen resolutions refers to the clarity of the texts and images displayed on your computer’s screen. At higher resolutions, like 1920 * 1200 pixels, items appear smaller and sharper. At lower resolutions, like 800 * 600, items appear larger. You can set your screen to any resolution you prefer.
We recommend you set your monitor to the native resolution. Usually it’s marked Recommended in the settings.
Scroll down on the Display pane and find the Resolution section. Click the drop down menu, then you’ll see one item marked with Recommended. For my 24” Dell U2412M monitor, 1920 *1200 pixels is recommended.
Tip 2: Change the size of text, apps and other items
If you find it’s hard to read text, recognize icons or navigate apps on Windows 10 because of the high-resolution, you may need to adjust the scaling settings.
Here’s how you can do it:
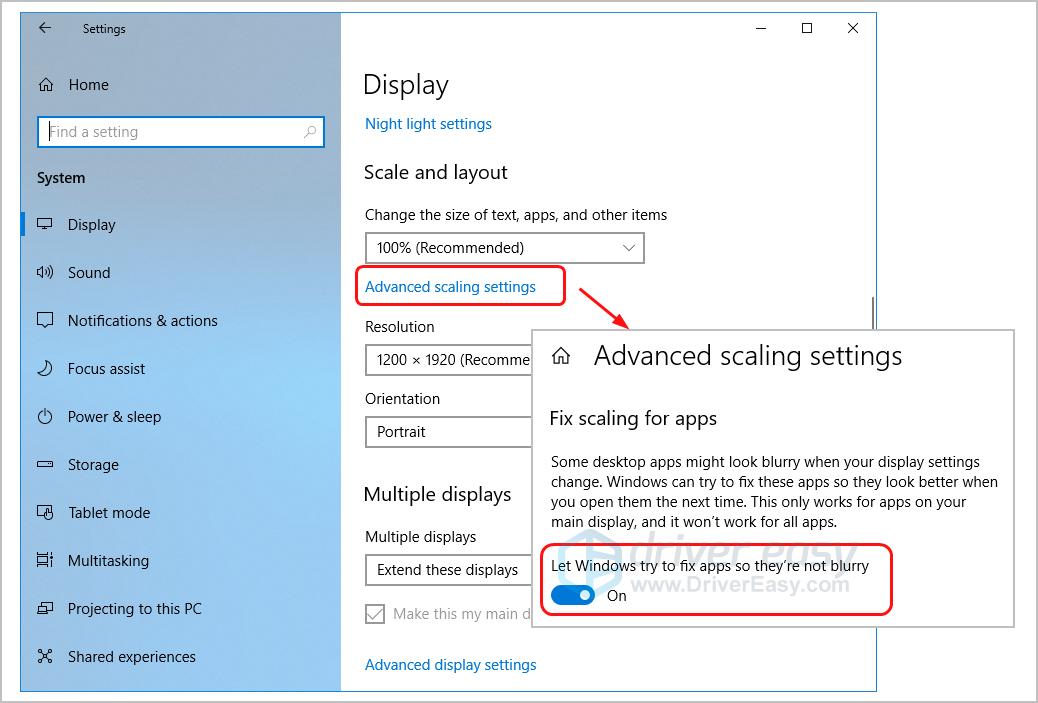
On the Display pane, scroll down to find Scale and layout. Then you can click the drop down menu of Change the size of text, apps, and other items. You’ll see one percentage marked as Recommended, but you’re free to try any other one to find the right balance.
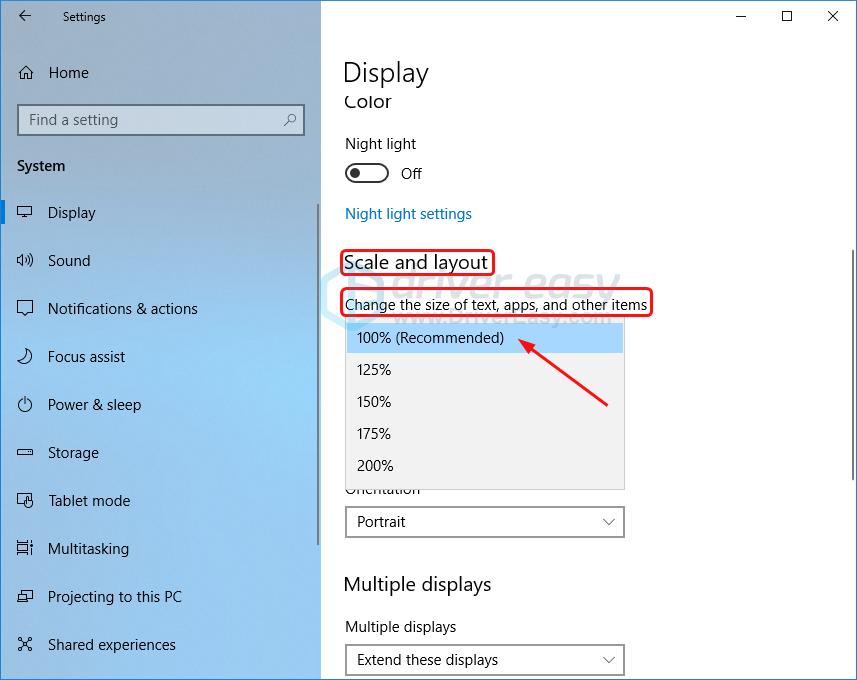
Besides, you can click Advanced scaling settings under the percentage box to enable the Let Windows try to fix apps so they’re not blurry feature.
Tip 3: Change the refresh rate of your monitor
Refresh rate is the number of times per second your Windows 10 screen refreshes its image. Higher refresh rate can improve motion resolution, reduce screen tearing in your games, etc.
See how to change the refresh rate of your monitor:
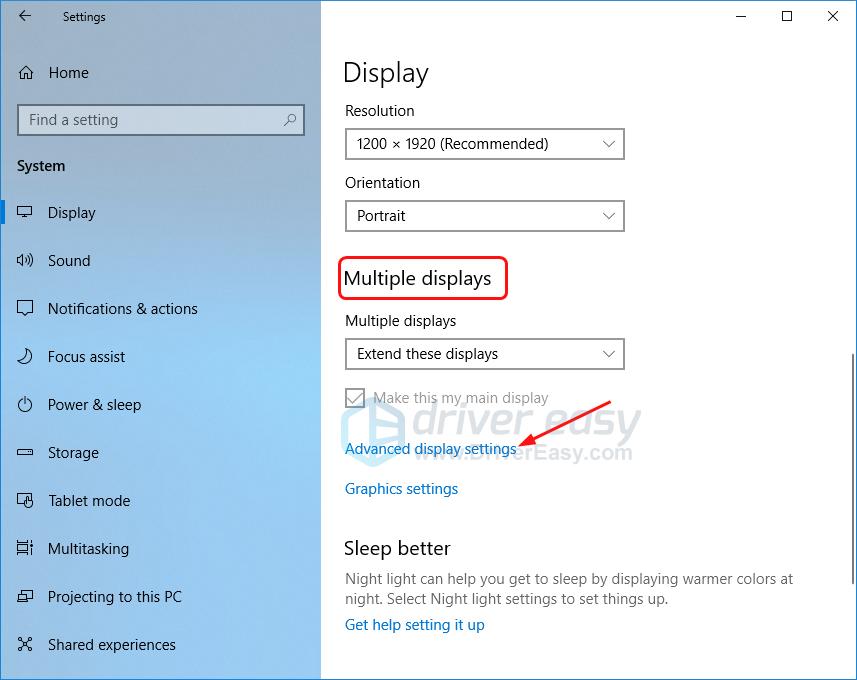
Scroll down on the Display pane and click Advanced display settings under the Multiple displays section.
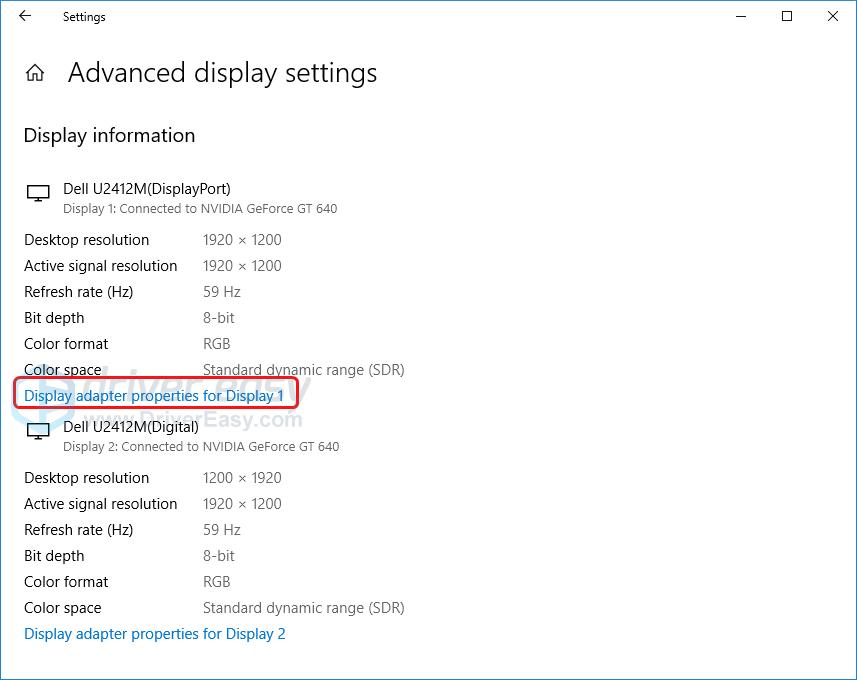
Click Display adapter properties.
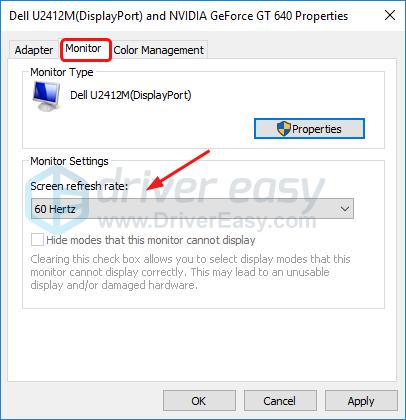
You can then set your screen refresh rate in the Monitor pane.
Tip 4: Adjust multiple display settings if you use more than one monitor
If you’re connecting more than one monitor to Windows 10, you would need to adjust the multiple display settings, such as change the display mode, or set your main display.
Here’s how you can set the monitor you want to be your main display:
On the Display pane, click the monitor that you want to set as your main display.
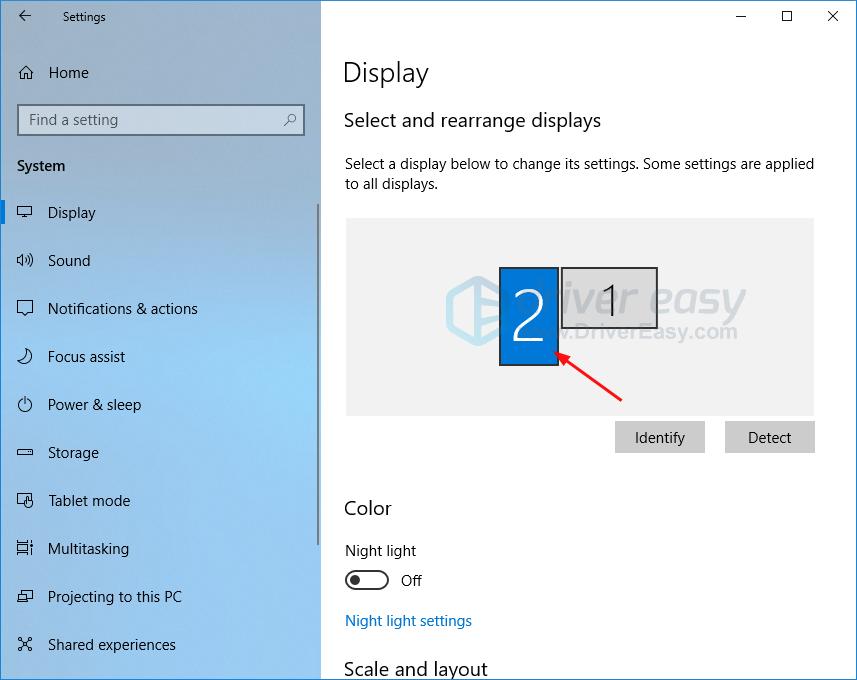
Scroll down to find the Multiple displays section. Then tick on Make this my main display.
Note: You can change the display mode from the drop down menu from Multiple displays.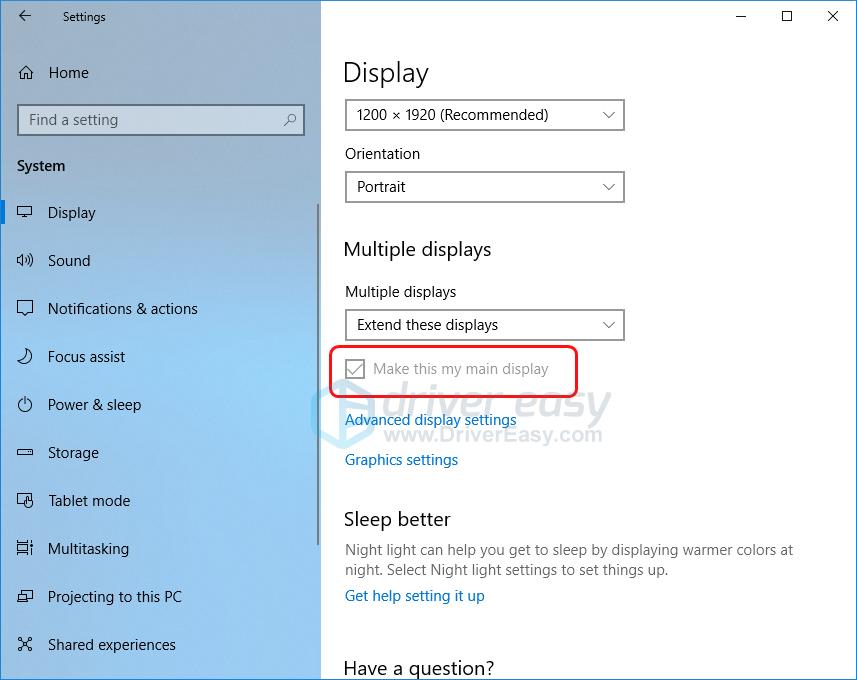
Bonus Tip
To make your Windows 10 look best or improve your gaming experience, there’s one more good way beyond display settings — updating your graphics card driver.
There’re two ways you can get the right graphics card driver:
Manual driver update – You can update your graphics card driver manually by going to the manufacturer’s website for your graphics card, and searching for the most recent correct driver for it. Be sure to choose the only driver that is compatible with your variant of Windows system.
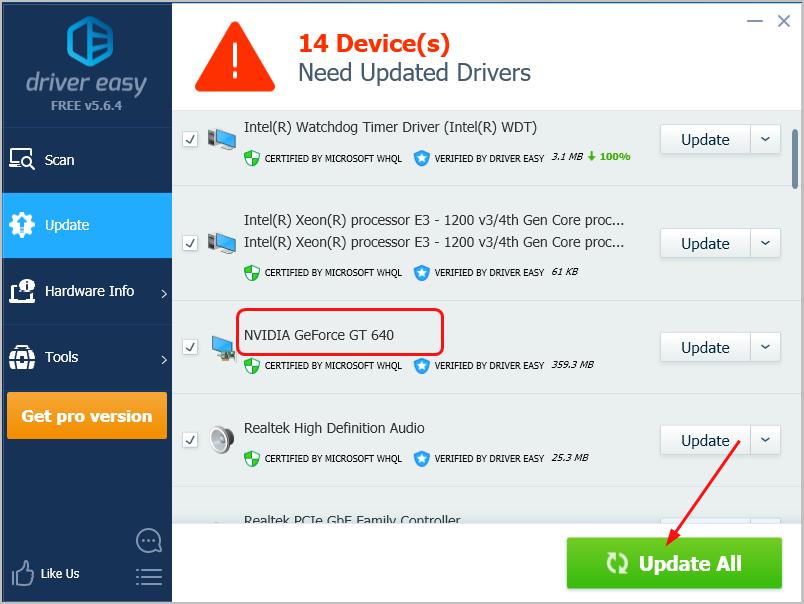
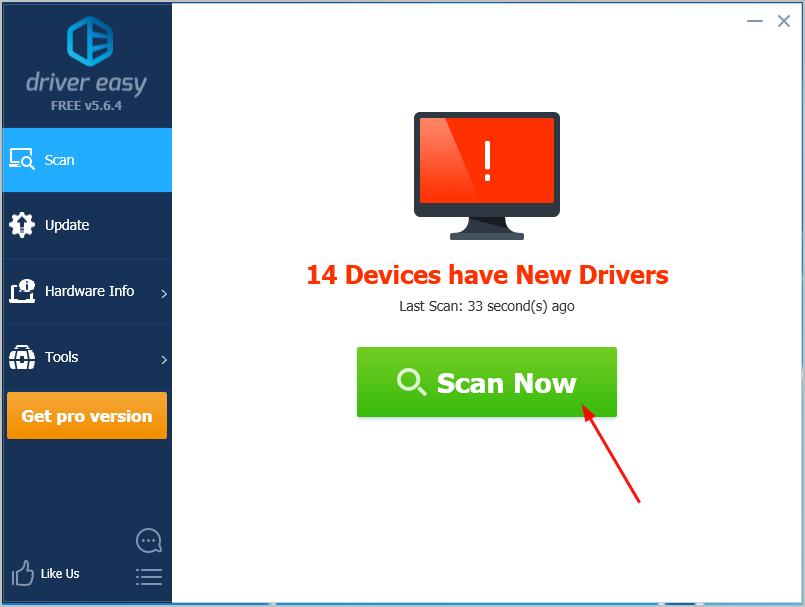
Automatic driver update – If you don’t have the time, patience or computer skills to update your graphics card driver manually, you can, instead, do it automatically with Driver Easy. Driver Easy will automatically recognize your system and find the correct driver for your exact graphics card, and your variant of Windows system, and it will download and install it correctly:
Download and install Driver Easy.
Run Driver Easy and click the Scan Now button. Driver Easy will then scan your computer and detect any problem drivers.
Click Update All to automatically download and install the correct version of all the drivers that are missing or out of date on your system. (This requires the Pro version which comes with full support and a 30-day money back guarantee. You’ll be prompted to upgrade when you click Update All.
Note: You can also do it for free if you like, but it’s partly manual.