


If you’re looking for a step-by-step guide on how to clean install your graphics drivers, then you’ve come to the right place. “Clean install” can be quite new to those who don’t tinker with their computers very often, but it is worth your attention as a potential cure for game crashing and other driver installation problems.
Now use the following procedure to clean install your graphics drivers:
Step 1: Download the driver you need
First and foremost, you should download the driver you need. There’re mainly two options for you to do this:
Option 1 – Automatically (Recommended) – This is the quickest and easiest option. It’s all done with just a couple of mouse clicks – easy even if you’re a computer newbie.
OR
Option 2 – Manually– You’ll need some computer skills and patience to download your driver this way, because you need to find exactly the right driver online and then download it yourself.
Option 1 – Automatically download the driver
If you don’t have the time, patience or computer skills to download your graphics drivers manually, you can do it automatically with Driver Easy.
Driver Easy will automatically recognize your system and find the correct drivers for it. You don’t need to know exactly what system your computer is running, you don’t need to risk downloading and installing the wrong driver, and you don’t need to worry about making a mistake when installing. Driver Easy takes care of everything.
You can use the FREE version of Driver Easy to download the drivers, but you need to install them manually later on, one at a time. And with the PRO version, things become much easier – just two simple clicks and voila!
OK, enough intro. Let’s see what you should do:
1) Download and install Driver Easy.
2) You can run Driver Easy on your computer and download any driver you need. But this is not recommended for now. You should leave it to Step 4 and I’ll show you more details on how to update drivers with Driver Easy.
Option 2 – Download the driver manually
This is the most common way you download a driver, but it costs you more time and effort than using a driver updater tool. Besides, you may also download a wrong driver (e.g. not compatible with your system) so all the previous effort goes down the tubes and you have to start all over again. Anyway, just make sure you find the correct driver online.
1) If you’re using an NVIDIA graphics card, click here to search for your driver.
2) If you’re using AMD, then click here.
3) If you’re using Intel, click here.
Step 2: Create a system restore point
This step is actually not imperative, but I strongly suggest you create a restore point as a precaution before proceeding to the next step. The restore point allows you to revert your system to a previous state when it’s still functioning well (especially before any problems come up). But don’t panic – you’ll rarely have serious issues during the clean installation.
If you don’t know how to create a restore point, here’s the post you may find useful: How to Enable and Create Restore Points in Windows 10?
After creating a restore point, you should move on to the next step, below.
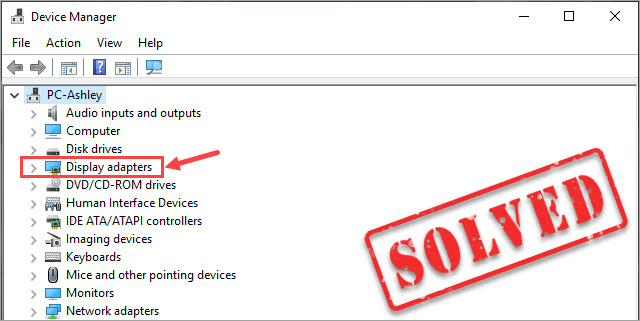
Step 3: Uninstall your current graphics drivers
Whether you’ve known it or not, there are two common ways for people to uninstall their drivers: a) clicking “Uninstall device” in Windows Device Manager and b) uninstalling the drivers from “Programs and Features” on Control panel. However, I’ll introduce neither because they CANNOT completely remove a driver (including its files, folders, and registry keys) from your computer. Also, it’s rather time-consuming and error-prone to delete every single file of a driver manually – you need to find out what files the driver contains, where they locate, and then delete them one by one (that can be quite a lot of work). So, in order to save your time and effort, I suggest you use the Display Driver Uninstaller (DDU) to do the job for you.
DDU is one of the most widely accepted tool for driver removal, and it’s also very easy to use. Note, however, that DDU is a third party software so make sure you download it from a reliable website. Also bear in mind that it might be a cure for driver installation problems, but it could make things worse in some rare cases. In other words, try DDU at your own risk. (As long as you have created a system restore point as illustrated in Step 2, you don’t need to worry too much about the potential risk.)
1) Download and install DDU. (You can download DDU from other websites. Just ensure the program is safe to use.)
2) Prior to running DDU, you should boot your PC in safe mode.
3) After booting in safe mode, launch DDU.
4) Click Select device type and choose GPU.

Then, click Select device and choose your graphics card type, such as NVIDIA.
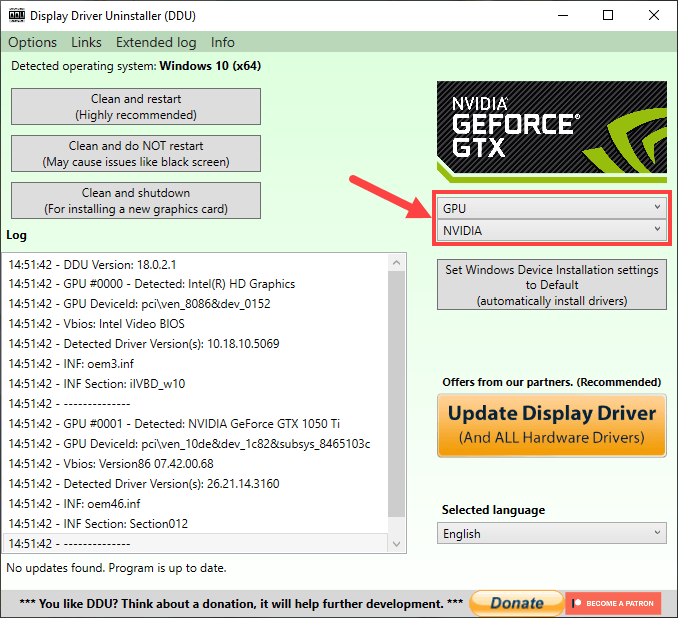
5) There are three options in the upper left:
Clean and restart – if you decide to keep your current graphics card or just do some sort of troubleshooting, this is the one you should click.
Clean and do NOT restart – if you need to remove several graphics cards, then this one should be your choice.
Clean and shutdown – If you want to replace the current video card with a new one, then you should click this option.
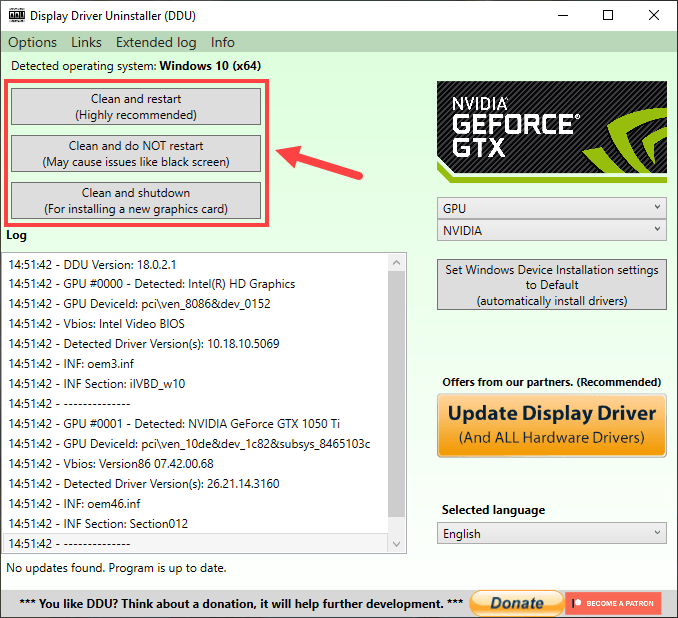
Select the option based on your actual situation and then wait for the uninstallation process to complete. No matter which one you choose, you’ll need to reboot your computer in order to move on.
Step 4: Install the downloaded driver
Finally, the last step is to install your driver.
- If you download the driver from your manufacturer’s website, here’s what you should do now:
After your PC restarts in normal mode, locate the driver file you downloaded in Step 1. Double-click on that file (with an “.exe” extension) and then follow the onscreen instructions to install the driver. Don’t forget to restart your computer on completion for the changes to take effect.
- If you use Driver Easy to update your driver, here’s the procedure:
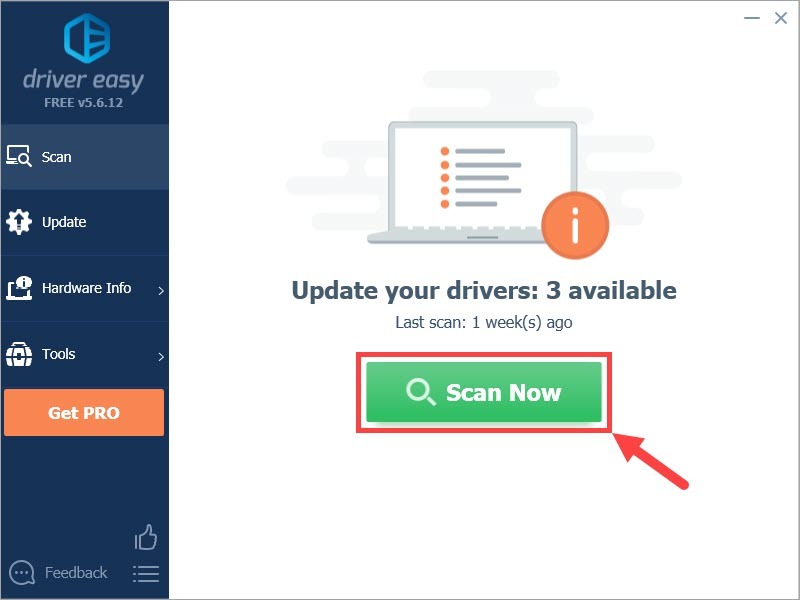
1) Download and install Driver Easy. (Skip this step if you’ve already done it.)
2) Run Driver Easy and click the Scan Now button. Driver Easy will then scan your computer and detect any problem drivers.
3) Click Update All to automatically download and install the correct version of all the drivers that are missing or out of date on your system (this requires the Pro version – you’ll be prompted to upgrade when you click Update All). Or if you just want to update the graphics driver, simply click the Update button next to it.
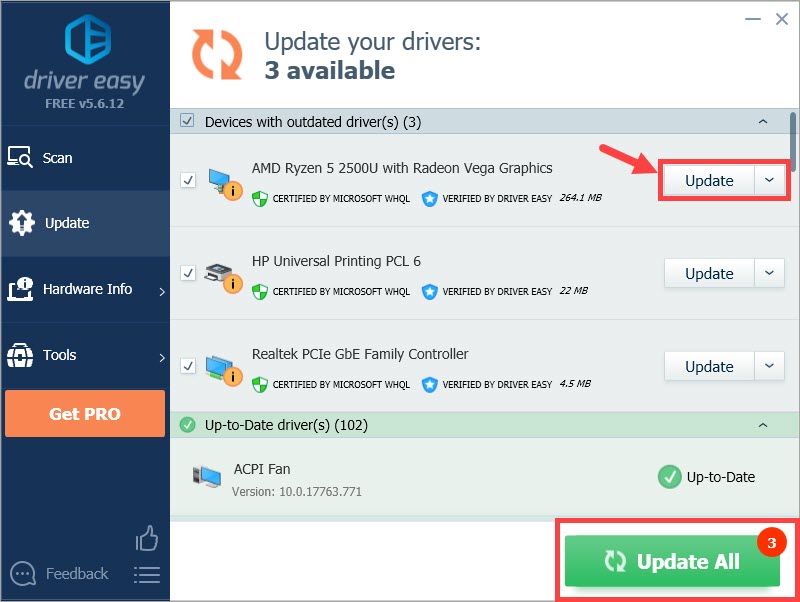
Note: you can do it for free if you like, but it’s partly manual.
4) Reboot your PC even if you’re not asked to.
Now your graphics driver should have been reinstalled successfully. Go on to check if everything goes well.
There you go – 4 easy steps on how to clean install graphics drivers! Hopefully this post helped solve your problem. If you have any further questions or ideas, please feel free to leave a comment below. Thanks for reading! 🙂