


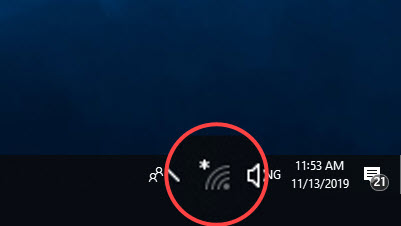
It is annoying when you open your computer but couldn’t connect to Wifi. Don’t worry, this problem should be easy to fix. Follow the below fixes and you’ll get your internet back!
Before you go…
Before you start trying any fixes, there’re two things you need to do:
- Ensure Wi-Fi is enabled on your PC
- Connect your smartphone or tablet with the same Wi-Fi
If your other device can connect to the Wi-Fi successfully, the issue is on your PC. Move to Fix 3-8.
If your other devices couldn’t join in the Wi-Fi network, then you should troubleshoot the problem on the network. Try Fix 1 and Fix 2.
Try these fixes:
You don’t need to try them all, just work your way down till find the one that works for you.
- Restart your modem and router
- A soft reset on your network
- Run Windows Troubleshoot
- Reinstall your Wi-Fi driver
- Update your Wi-Fi driver
- Reset your network adaptor and TCP/IP
- Renew your IP address
- Temporarily turn off the third-party antivirus software on your laptop
Fix 1: Restart your modem and router
You can quickly troubleshoot your Wi-Fi network issue by restarting your modem and Wi-Fi router. Here’s how you can do it:
- Remove the cables of both your modem and router.
- Wait for a moment (at least 30 seconds).
- Plug your modem back in. (Please note that just your modem.) If your modem doesn’t power on, you may need to press the power button on it.
- Wait for a moment (at least 1 min).
- Plug your router back in. If your router doesn’t power on, you may need to press the power on it.
- Wait for at least 2 mins.
See if your laptop is connecting to the Wi-Fi.
Fix 2: A soft reset on your network
A soft reset can refresh your router and modem so that they can perform well. Usually pressing the power button on your router would perform a soft reset. You can follow the instructions from your router manufacturer’s official website.
Fix 3: Run Windows Troubleshoot
Windows has many built-in troubleshooters to quickly diagnose and fix various common problems, you could find a corresponding troubleshooter for your problem. This tool will diagnose and fix the problem automatically which is an easy and effective way to solve problems. Some users may think this tool is useless but it’s no harm to try and it won’t take long to give you a result.
HOW: Right-click on the Wi-Fi button on your Taskbar and click Troubleshoot problems.
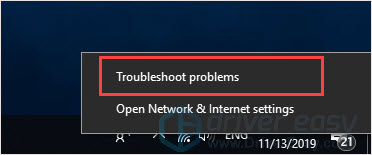
If the troubleshooter was unable to fix the issue, you could move to the next fix.
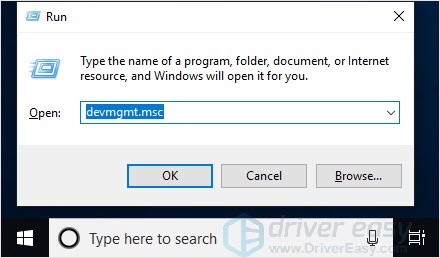
Fix 3: Reinstall your Wi-Fi driver
Sometimes your Wi-Fi adapter may encounter conflicts with other devices and power interruptions, as a result, your laptop won’t connect to Wi-Fi. If this is the case, you can solve the problem by resetting your Wi-Fi driver. Follow these easy steps:
- Press the Windows logo key + R together to evoke the Run box.
- Type devmgmt.msc and press the Enter key.
- Expand Network adapters. Right-click on your Wireless adapter and select Uninstall device.
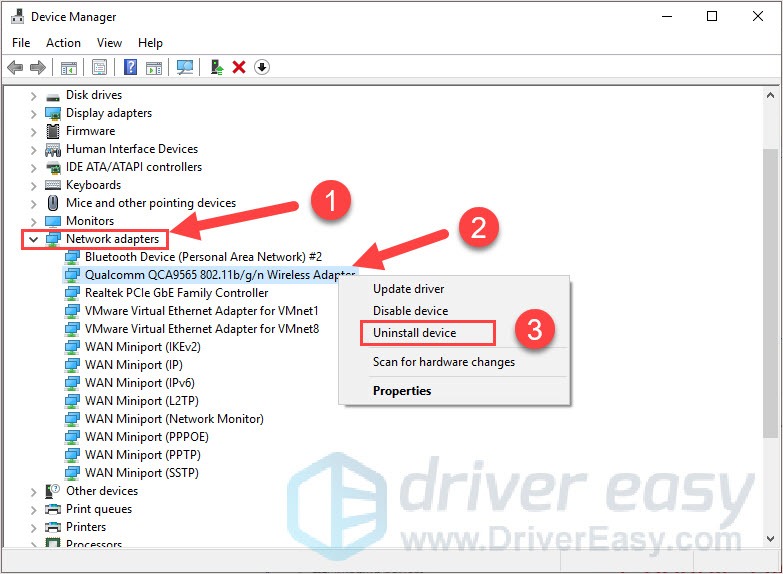
- Follow the on-screen instruction to finish the process.
- Restart your computer and check your Wifi connection.
Fix 4: Update your Wi-Fi driver
One common reason for this connection issue is old, corrupted or missing Wi-Fi driver. We recommend updating your Wi-Fi driver to the latest version to solve your network issue and improve the performance of your PC.
Since your computer couldn’t connect to the internet, you can use Driver Easy Offline Scan to download the latest driver easily.
- Download and install Driver Easy on both computers.
- On the computer without internet access, run Driver Easy and click Tools.

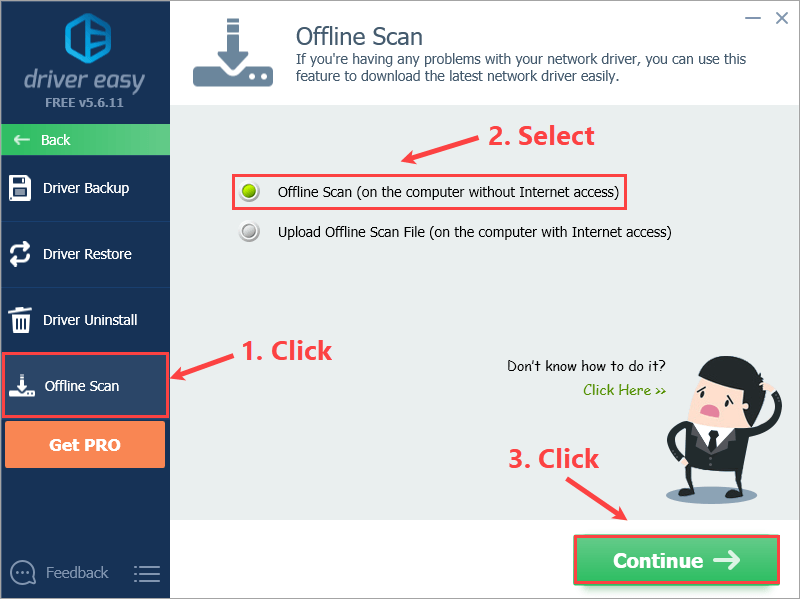
- Click Offline Scan in the left panel, select Offline Scan (on the computer without internet access) and click Continue.
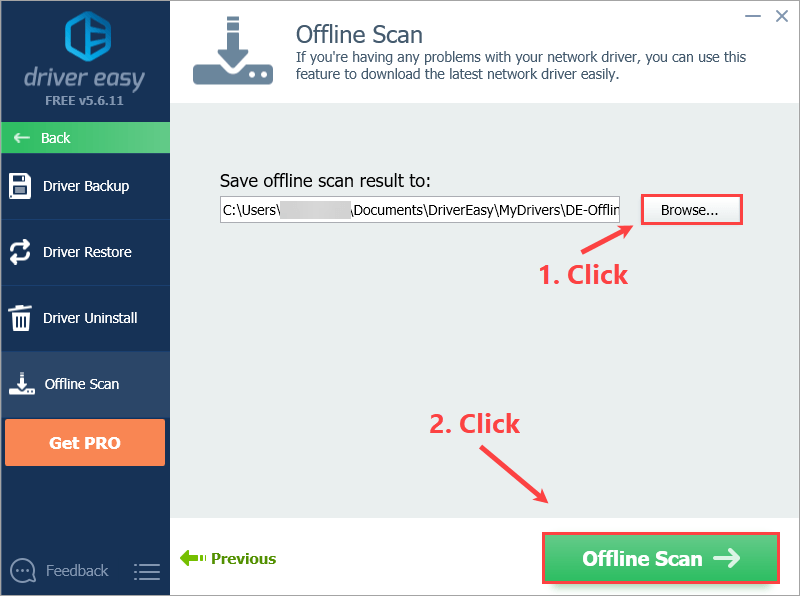
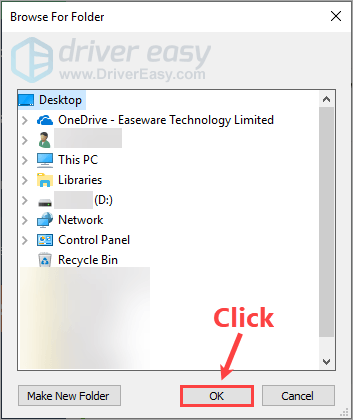
- Click Browse to choose where you want to save your offline scan result. Then click the Offline Scan button.
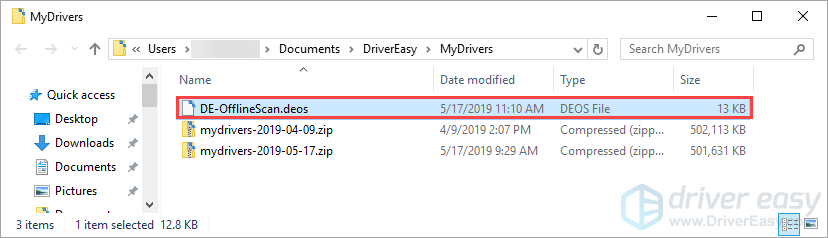
- Click OK when the offline scan file has been saved.
- Copy the offline scan file and paste it to another computer that has Internet access.
- Move to another computer that has internet access, run Driver Easy and click Tools.

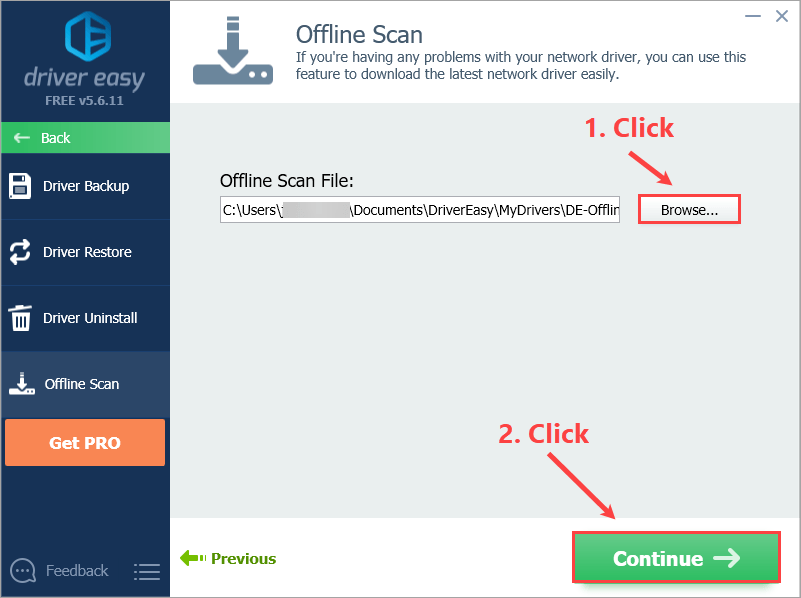
- Click Offline Scan in the left panel, select Upload Offline Scan File (on the computer with Internet access) and click Continue.

- Click Browse to locate your offline scan file (the one you copy and paste in Step 6). Once you find it, double-click on it. Then click Continue.
- Click Download next to the network driver.
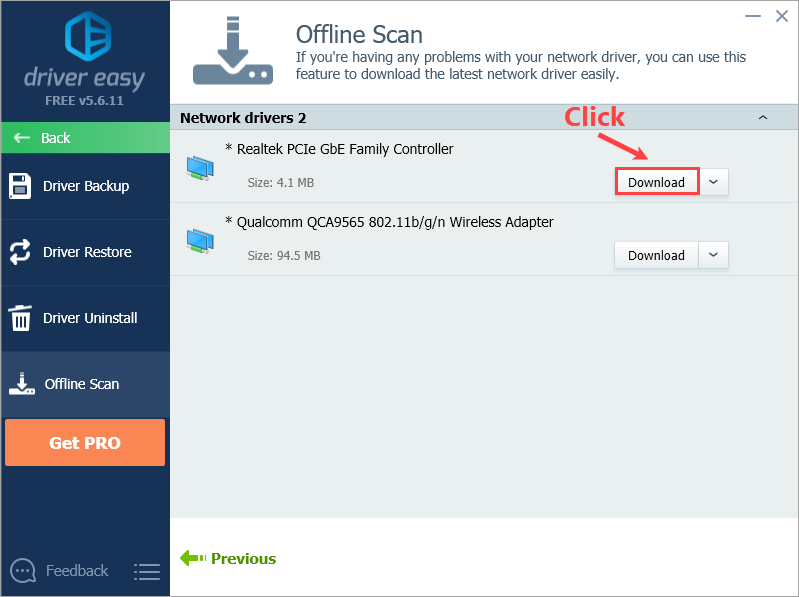
- Choose the saving file for your network driver, then click OK.
- Wait for the download process to complete.
- Install the network driver on the computer without Internet access.
- Situation A: If the network driver you downloaded is a .exe file
- Situation B: If the network driver you downloaded is a .zip file
- Situation A:
Move the driver file on the computer without internet access, double-click the file and follow the on-screen instructions to install it.
Once you update your Wi-Fi driver, reconnect your computer to Wi-Fi to see if it works.
Fix 5: Reset your network adaptor and TCP/IP
A possible cause for this issue is something wrong with the network adaptor or TCP/IP settings. So resetting your network adaptor and TCP/IP may fix this problem directly.
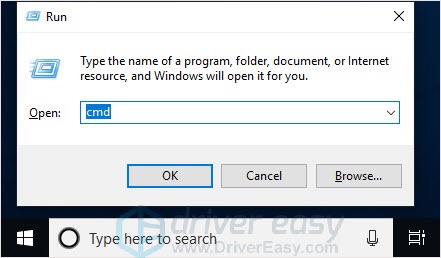
- Press the Windows logo key + R to open the Run box.
- Type “cmd” and press Ctrl + Shift + Enter together to run as administrator.
- Type netsh winsock reset and press Enter.
- Type netsh int ip reset and press Enter.
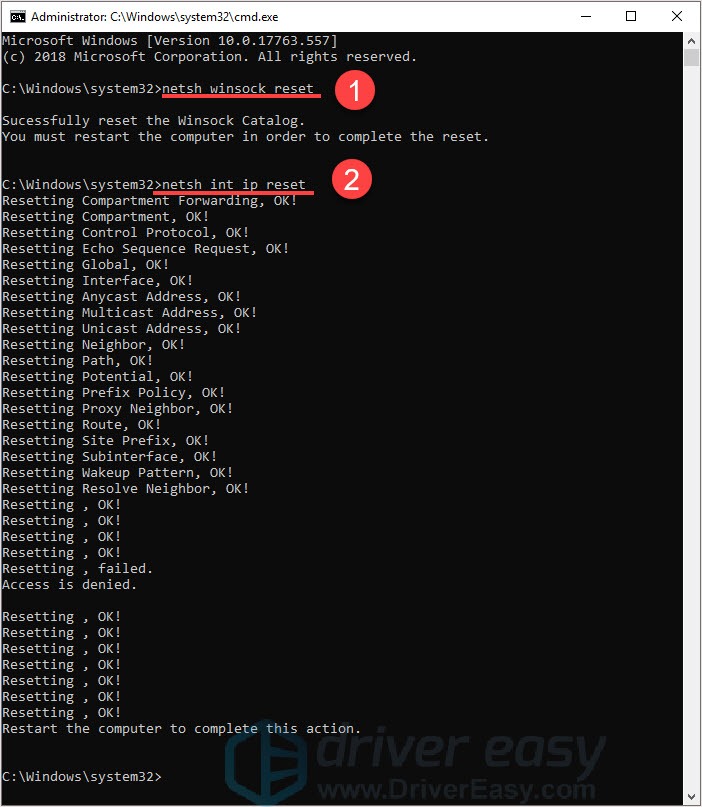
- Reboot your computer and connect with your network.
If this method doesn’t work, go to Fix 6.
Fix 6: Renew your IP address
If your routers and driver are working properly but the problem is still there, it might be the IP address that prevents you from the network. You can simply renew the IP address to fix the problem. Here’s how:
- On your keyboard, press the Windows logo key+ R to evoke the Run box.
- Type cmd and press the Enter key.

- On the open black window, type ipconfig /release and press Enter. Wait for the command to complete.
ipconfig /release
Once the command completes, proceed to type ipconfig /renew and press Enter. Wait for the command to complete.ipconfig /renew
Once you’ve done, connect your computer to Wifi to see if it works. If it connects successfully, great! If your laptop still won’t connect to Wi-Fi, don’t give up hope, move onto Method 6.
Fix 7: Temporarily turn off the third-party antivirus software on your laptop
In some cases, third-party antivirus software may cause conflict or block the internet to your computer. If all the methods above fail, you can try to temporarily turn off your antivirus software, then see if your laptop could connect to Wi-Fi.
Hopefully this post helps. Feel free to comment below with your own experiences and share with your friends if they’re having the same problem.