


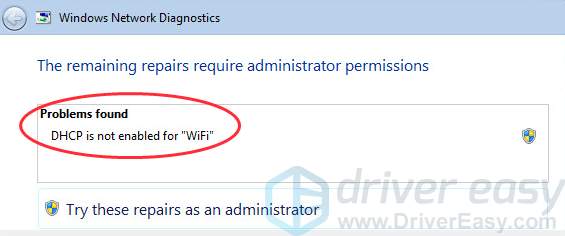
Does this look familiar? You may see an error message like that when you’re trying to access Internet in your Windows computer.
It can read either:
- DHCP is not enabled for WiFi
- DHCP is not enabled for Ethernet
- DHCP is not enabled for Local Area Connection
But don’t worry. We’ll help you fix the error and get your Internet connection again.
Try these fixes
- Change network adapter settings
- Enable DHCP client service
- Reinstall your network driver
- Update your network driver
What is DHCP?
What is DHCP? In short, Dynamic Host Configuration Protocol (DHCP) can automatically assign and manage IP address for your device. It minimizes the configuration errors, such as typographical errors and address conflicts.
Generally speaking, if you want to access to the Internet, your computer must have a unique IP address. When you enable DHCP, it means you allow DHCP server to automatically assign IP address for your device, so you don’t need to manually type the IP address and DNS for your computer from time to time.
DHCP is not enabled means your wireless access point is not running as a DHCP server, then it will not give an IP address, and you can’t access to the Internet.
Note: In most home and small companies, your router acts as the DHCP server. So it’s recommended to enable DHCP. However, in some large companies, you will need a static IP address in your computer. But in that case, you can still access to the Internet although DHCP is not enabled.
All the screenshots below are shown in Windows 10, but the fixes apply to Windows 7 & 8 as well.
Solution 1: Change network adapter settings
This problem probably results from the wrong network settings. First of all, you may need to make sure it is set up properly to accept automatic configurations. Follow these steps:
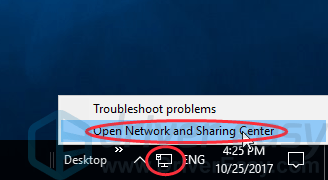
1) Right click the Internet icon, and select Open Network and Sharing Center.
2) Click Change adapter settings.

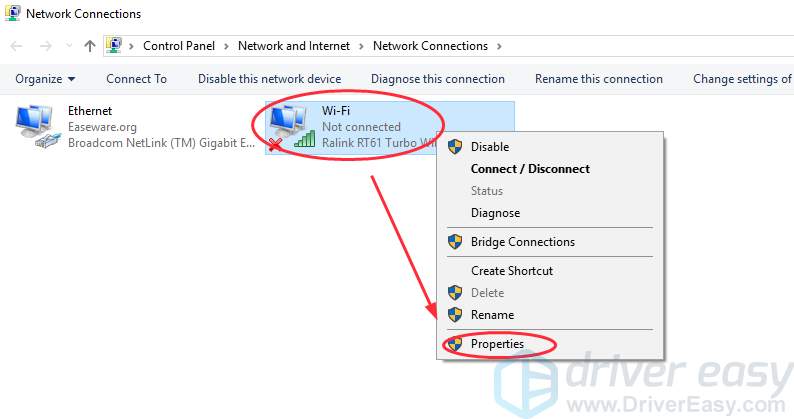
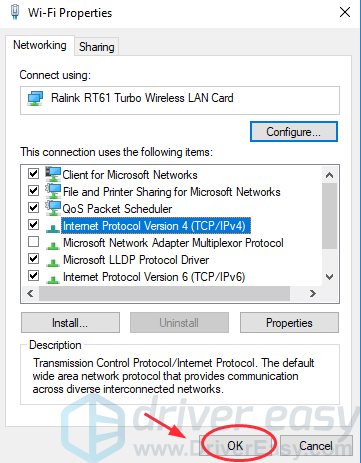
3) Right click WiFi (or Wireless Network Connection), and click Properties.
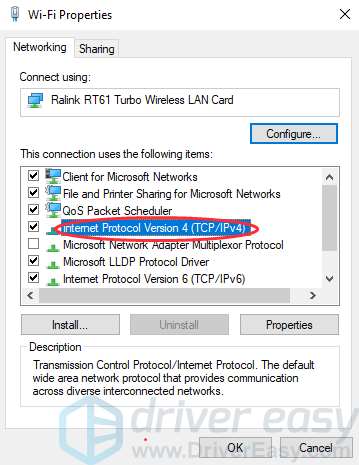
4) Double click Internet Protocol Version 4 (TCP/IPv4).
5) Select Obtain an IP address automatically and Obtain DNS server address automatically. Then click OK.
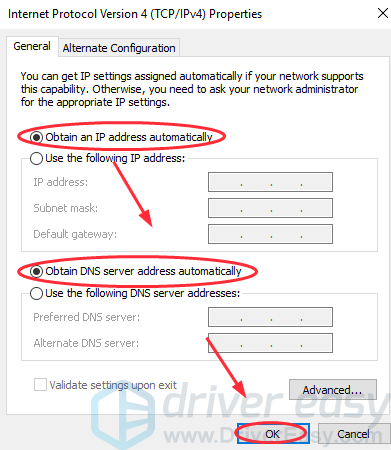
6) Click OK on the WiFi properties window.
7) Reboot your Windows, and try to access to the Internet again to see if it works.
Solution 2: Enable DHCP client service
The DHCP client service helps register the IP address and update DNS records for your computer. That is to say, if you disable the DHCP client service, your computer will not receive any dynamic IP address and DNS updates, so any service depends on it will force to stop. Check these steps to know how to enable DHCP client service:
1) On your keyboard, press Windows logo key  + R at the same time to invoke the Run box.
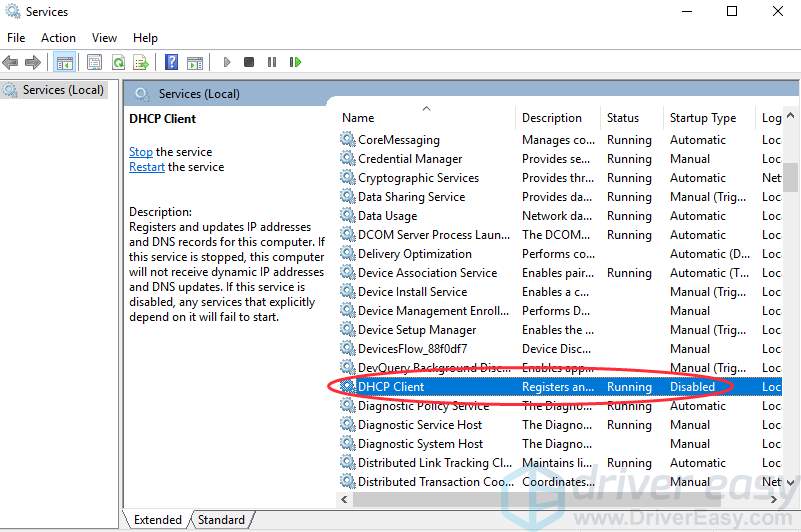
2) Type services.msc, and press Enter.

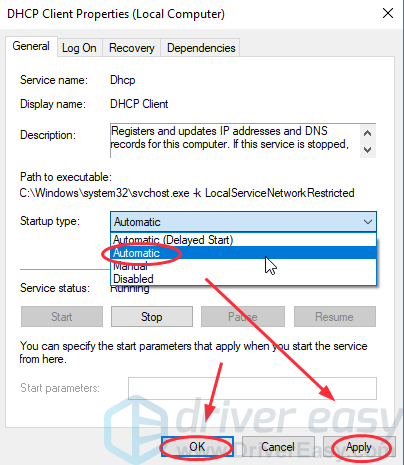
3) Double click DHCP Client.
4) Select Automatic in Startup type, then click Apply, and click OK.
5) Restart your Windows and try to access to the Internet again to see if it works.
Solution 3: Reinstall your network driver
This solutions above should resolve your problem. But if it still persists, this problem may happen due to the faulty network driver, so you can try to uninstall your network driver, and reinstall it to have the latest network driver.
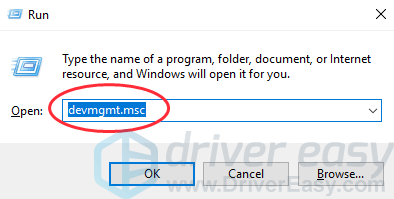
1) On your keyboard, press Windows logo key + R at the same time to invoke the Run box.
2) Type devmgmt.msc, and press Enter.
3) Double click Network adapters. Then right click your WiFi adapter (Wireless network adapter), and click Uninstall device (If you are using Windows 7 & 8, click Uninstall).

4) Check the box next to Delete the driver software for this device, and click Uninstall (If you are using Windows 7 & 8, click OK).

5) On another computer with Internet, download the correct driver to a USB drive. It should match with your computer and operating system.
6) Plug your USB drive to the computer, and install the new driver.
7) Reboot your computer, and try to access to Internet again and see if it works.
Solution 4: Update your network driver
The steps above may resolve the problem. If they don’t, try to update the driver.
You can update your network driver by searching on the Internet to get the latest version of your driver, then manually install it in your computer. This requires time and patience.
Or if you’re not confident playing around with drivers manually, you can do it automatically with Driver Easy.
Driver Easy can automatically find the correct drivers for you. You don’t need to spend much time to update it manually, and you don’t need to worry installing the wrong drivers.
You can update all your drivers automatically with either the FREE or Pro version. But with the Pro version, it takes just 2 clicks (and you get full support and a 30-day money back guarantee).
1) Download and install Driver Easy (At first connect your computer to the Internet via a Ethernet cable or via WiFi. If both of them are not working, you can download Driver Easy into the USB drive on another computer with Internet connection).
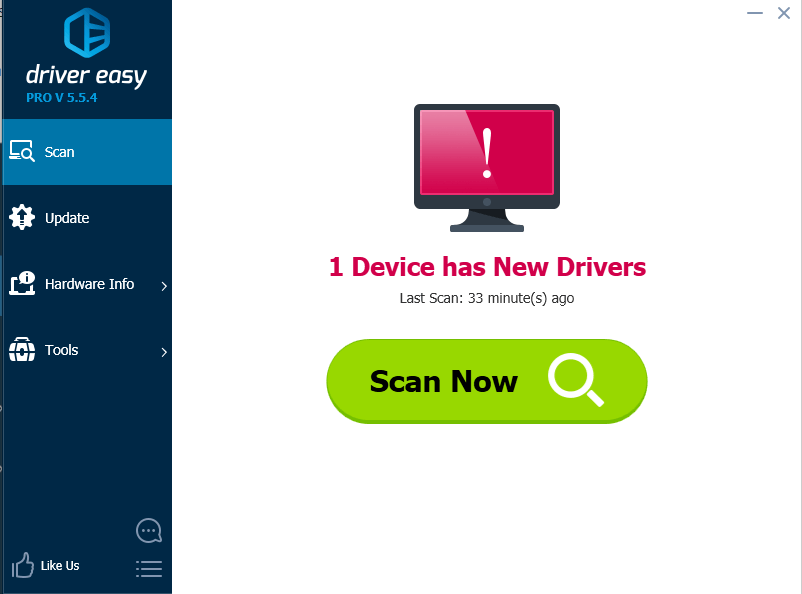
2) Run Driver Easy and click Scan Now. Then Driver Easy will scan your computer and detect the problem drivers.
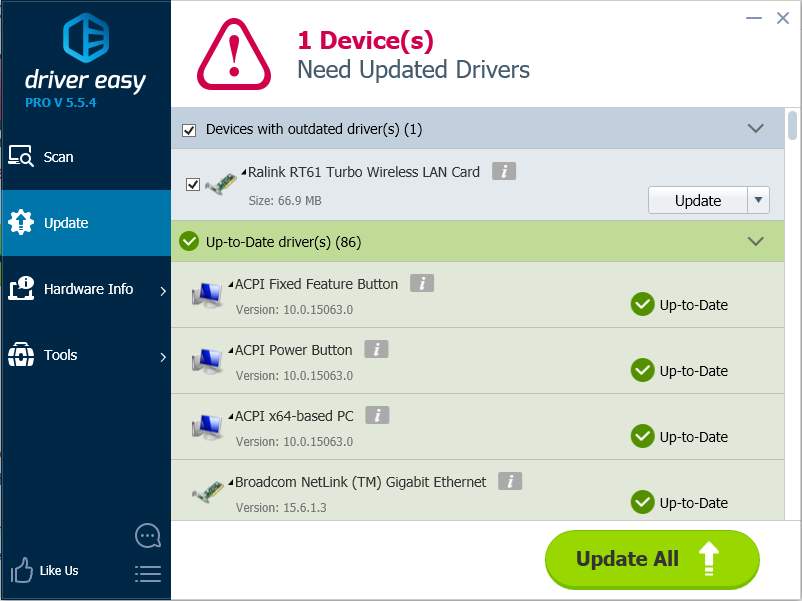
3) Click the Update button next to the driver name to install the correct driver (you can do that with the FREE version).
Or click Update All to automatically install all drivers (you can do that with Pro version, and you will be prompted to upgrade when you click Update All).
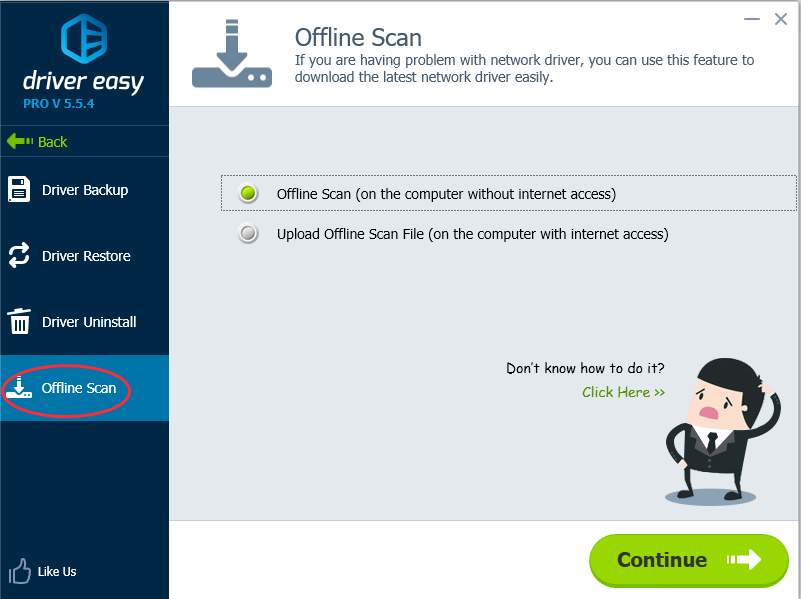
Important: If you still can’t access to the Internet, try the Offline Scan feature provided by Driver Easy. But first, you may need to download Driver Easy on another computer with the Internet, and install it in this computer.
4) After updating, restart your computer and try to access to the Internet again, and see if it works.
That’s all about it. Leave us a comment below if you have any questions. Don’t forget to share with us if it’s helpful. And if your problem still persists, please feel free to let us know, and we will see what more we can do to further help.