


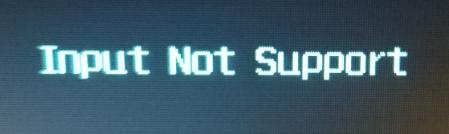
If you see ‘Input Not Supported‘ warning floating on your monitor, don’t worry. You can fix Input Not Supported error quickly and easily.
Why does the error occur to my monitor?
The ‘Input Not Supported‘ error usually occurs to your computer after booting up, and it happens with a black screen on your computer. This problem happens especially when you’re using multiple monitors. Meanwhile, most of the people who are having this problem are using the Acer monitors.
The input is not supported by your monitor because your screen resolution is set to the wrong resolution. In addition, your monitor driver issue can result in the error.
But don’t worry. We’ll help you fix your problem.
Try these fixes
Here are the solutions that have helped people resolve the error. You don’t have to try them all, just work your way down the list until everything’s working again.
- Troubleshoot the monitor connection
- Change the display settings
- Update your monitor driver and graphics card driver
Fix 1: Troubleshoot the monitor connection
You may see the ‘Input Not Supported‘ error if there’s something wrong with the monitor connection. So you should check the monitor cable to make sure it works properly. Or you can switch to a new monitor cable.
In addition, make sure the connection ports are working correctly.
Fix 2: Change the display settings
As you may know, “Input Not Supported” by your monitor because of the improper screen resolution, so you can change the screen resolution and refresh rate to fix the problem.
Here’s what you can do:
If you’re using Windows 11/10:
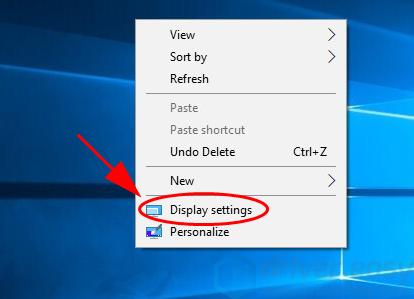
- On your desktop, right click on any empty area and select Display settings.
- Scroll down and find the Scale and layout section, then choose the recommended resolution for your display. If you’re on Windows 11, it’ll be Display resolution.
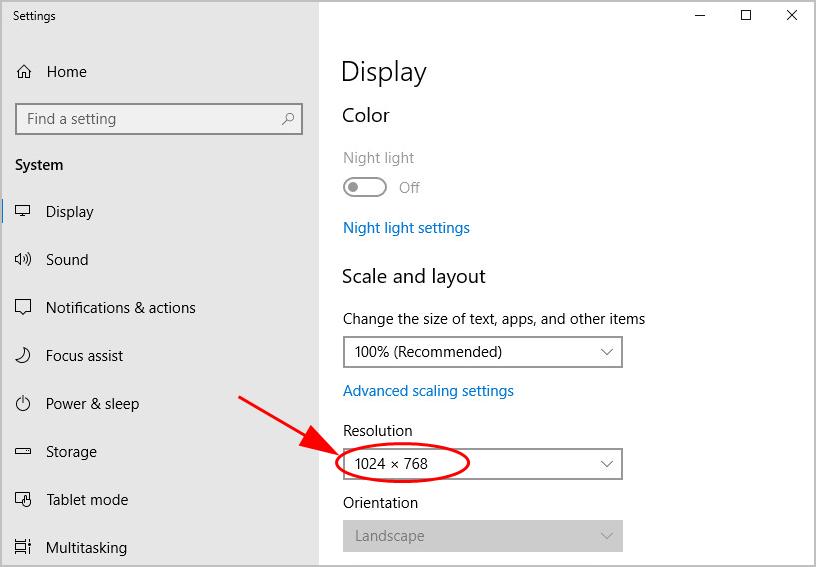
- If you see a popup to confirm the change, click Keep changes to confirm.

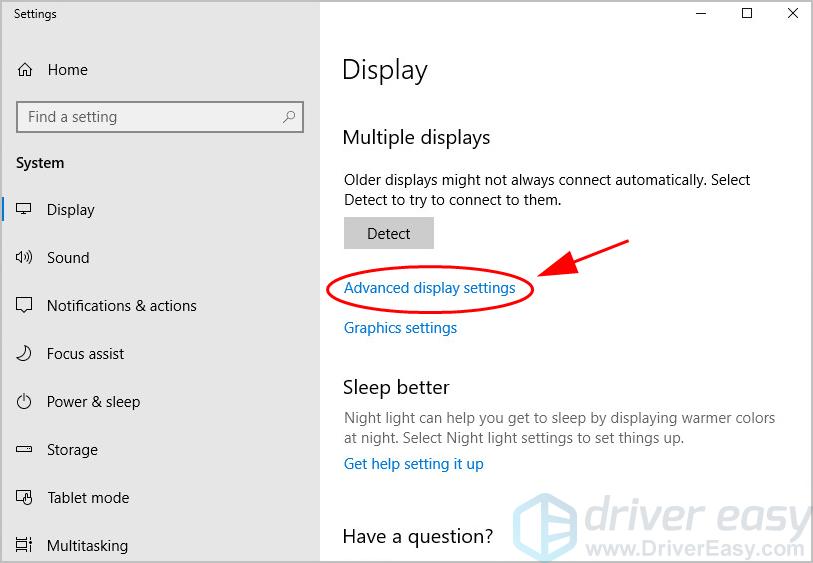
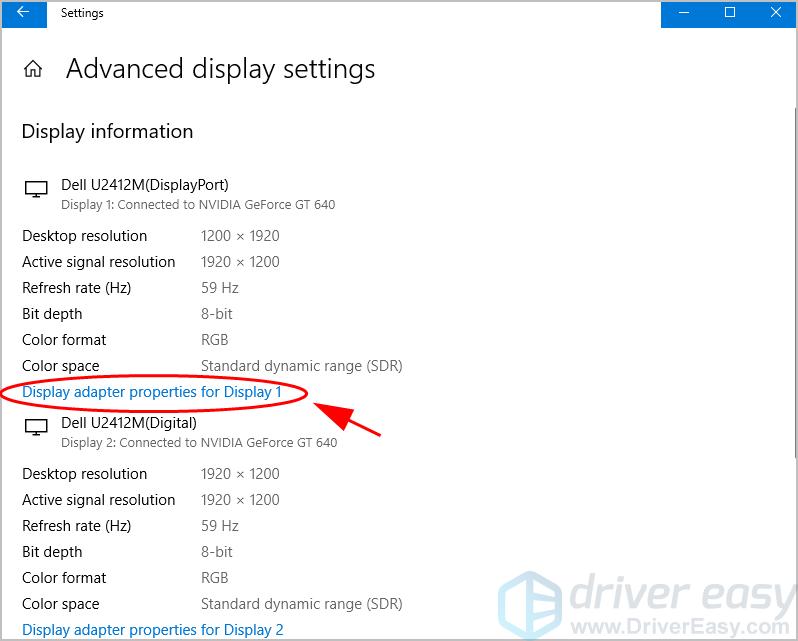
- Then click Advanced display settings.
- Under the monitor name that is having the Input Not Supported error, click Display adapter properties for Display.
- In the popup pane, click the Monitor tab. In the Screen refresh rate, choose the recommended or default rate in the drop down menu.
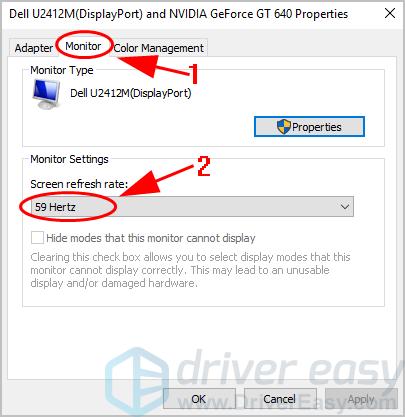
- Save the changes and restart your computer.
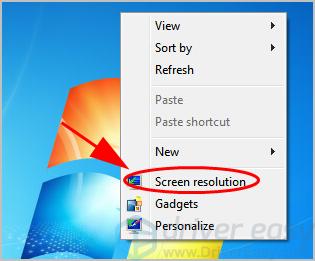
If you’re using Windows 8 and Windows 7:
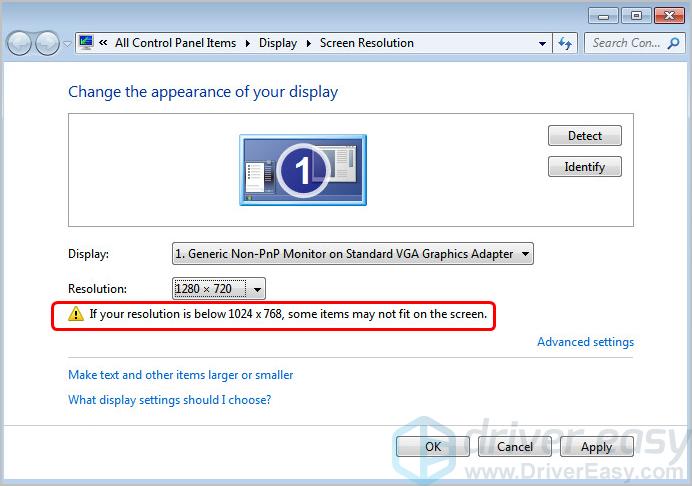
- Right click on any empty area on your desktop, and select Screen resolution.
- If you have multiple displays, select the display that is having the error. Then choose the recommended resolution, and click Apply.
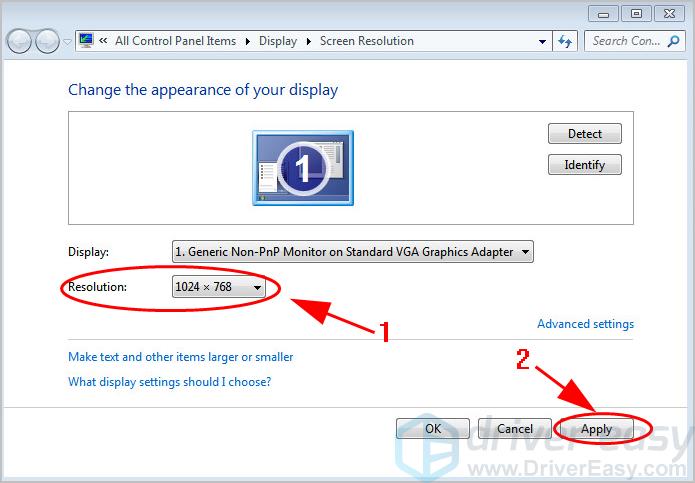
If your current screen resolution is not proper, you’ll see a notification like this:
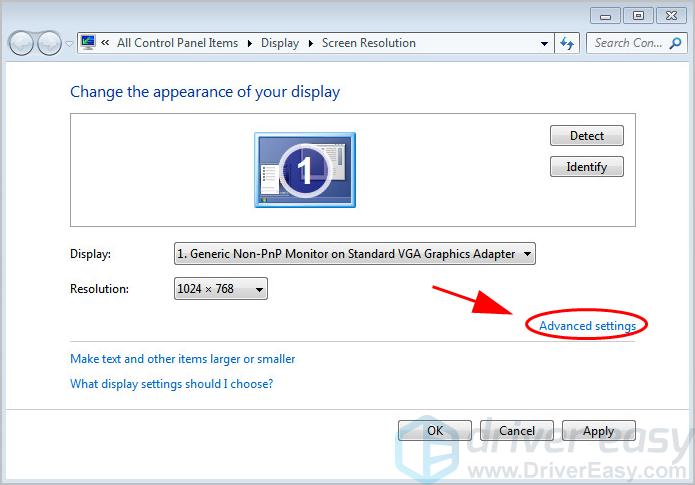
- On the same pane, click Advanced settings.
- Click the Monitor tab, then choose the recommended or default refresh rate setting in the Screen refresh rate section.
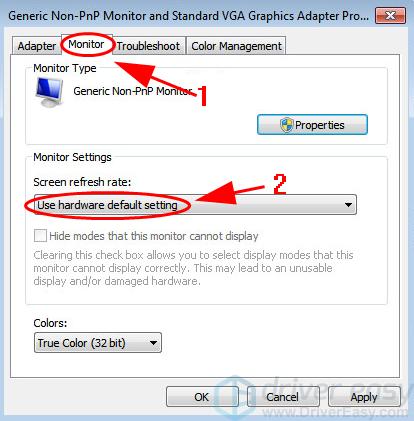
- Save the changes and restart your computer.
You should fix the error and boot your computer as normal.
Fix 3: Update your monitor driver and graphics card driver
The missing or corrupted device drivers (especially the monitor driver and graphics card driver) will cause the “Input Not Supported” error on monitors. So you should update these drivers in your computer.
There are two ways to update drivers: manually and automatically:
Manual driver update – You can go to the manufacturer’s website of your device, find the latest version for the driver, then download and install it in your computer. This requires time and computer skills.
Automatic driver update – If you don’t have time or patience, you can do it automatically with Driver Easy.
Driver Easy will automatically recognize your system and find the correct drivers for it. You don’t need to know exactly what system your computer is running, you don’t need to risk downloading and installing the wrong driver, and you don’t need to worry about making a mistake when installing.
You can update your drivers automatically with either the FREE or the Pro version of Driver Easy. But with the Pro version it takes just 2 clicks (and you get full support and a 30-day money back guarantee):
- Download and install Driver Easy.
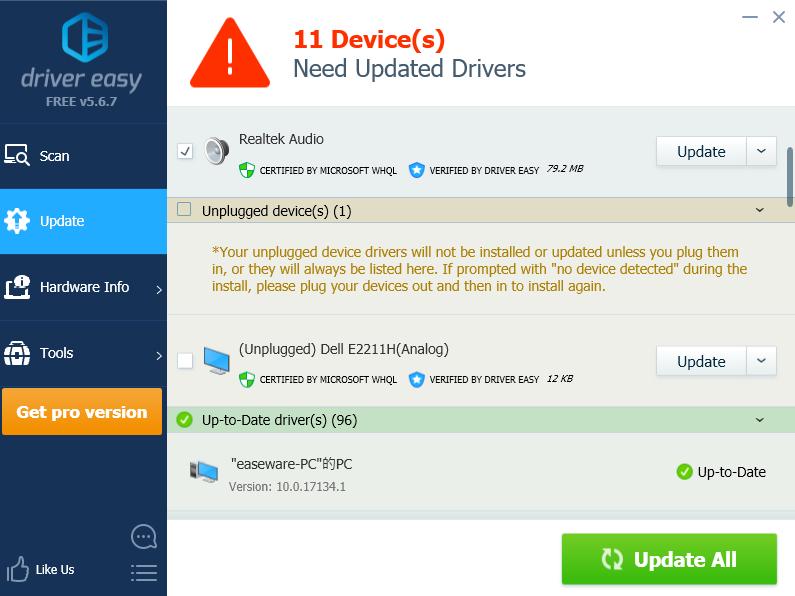
- Open Driver Easy and click Scan Now. Driver Easy will then scan the problem drivers in your computer.
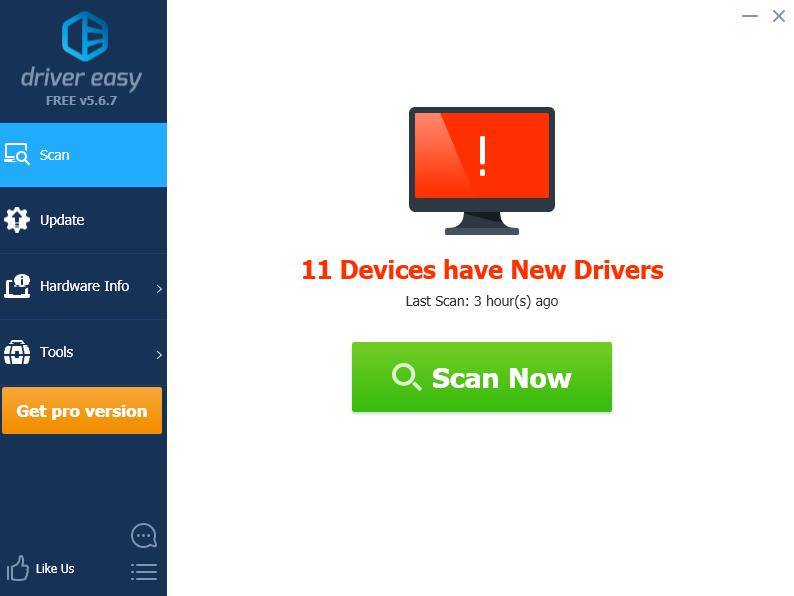
- Click the Update button next to the flagged monitor and graphics card to automatically download the correct version of their driver (you can do this with the FREE version). Then install it in your computer.
Or click Update All to automatically download and install the correct version of all the drivers that are missing or out of date on your system (this requires the Pro version – you’ll be prompted to upgrade when you click Update All).
- Restart your computer to take effect.
So there you have it – three easy methods to fix monitor input not supported issue. If you have any questions, feel free to leave a comment below and we’ll see what more we can do.