


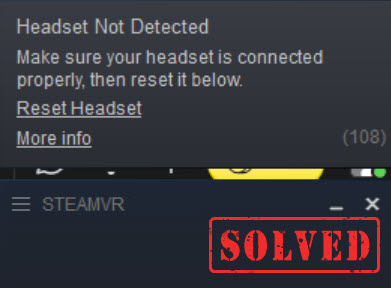
Ready to enjoy an exciting game with SteamVR but found your headset is not detected with an error code 108? That’s a bummer! Quite many users are running into the same problem, but in fact it’s not hard to fix. In this post, we’ve listed 6 best solutions for you to solve the issue easily and quickly.
Fixes to try:
You don’t have to try them all. Simply work from the top down until you find the one that does the trick.
- Restart your headset and PC
- Check for connection
- Update your devie drivers
- Disable USB power management
- Run Steam as an administrator
- Opt into SteamVR Beta
Fix 1 – Restart your headset and PC
A simple restart is one of the easiest troubleshooting methods (and very effective in most situations). You just need to reboot your computer after shutting down SteamVR and check for the issue. But if there’s no luck, also restart your headset as follows:
- Launch your SteamVR and right-click the headset icon.
- Select Devices > Reboot Headset.
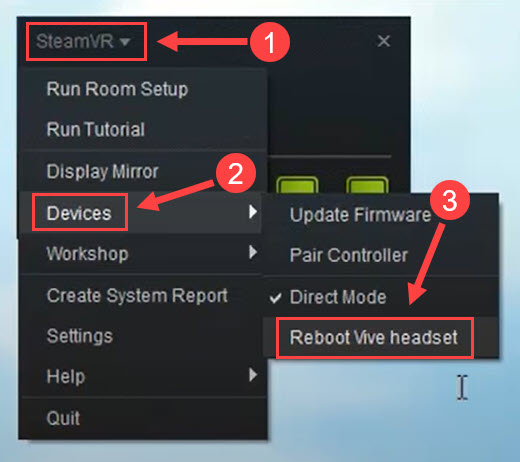
Wait until the process completes and then test your peripheral. If the issue persists, move on to the next fix.
Fix 2 – Check for connection
In most cases, your devices might not be detected by the operating system due to poor connections. So it’s necessary to double-check if your headset is firmly and properly connected. Here are a few basic steps to take:
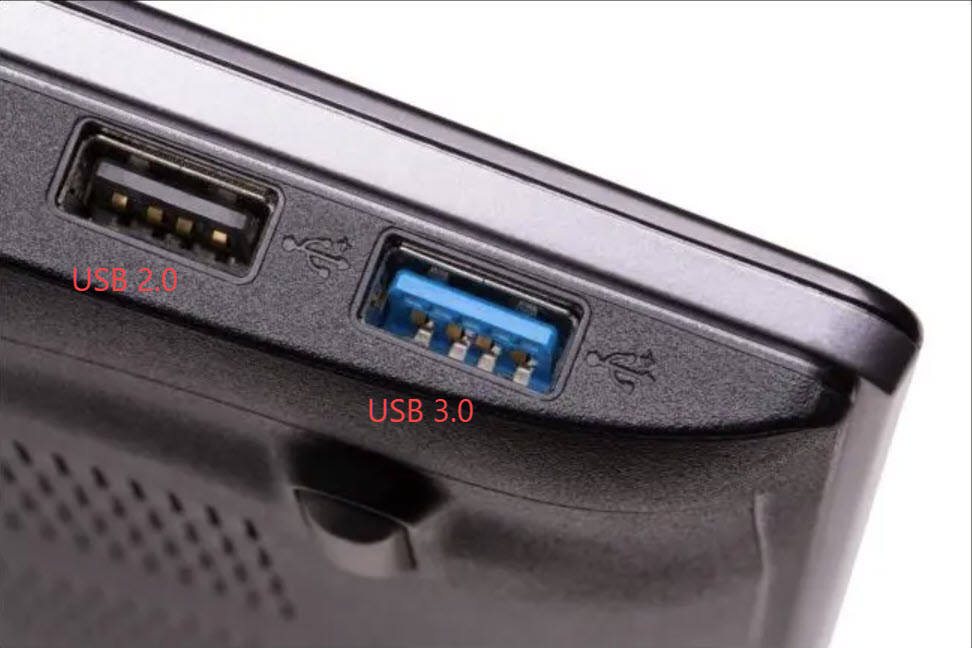
Use different USB ports
Plug your Link Box into a UBS 2.0 port on your computer as some USB 3.0 and 3.1 chipsets will cause connection issues.
Connect your headset directly into the PC
Plug your headset’s USB and HDMI cables directly into the computer. You could still connect the power supply to Link Box or choose another power adapter.
Power cycle your Link Box
This is a simple trick reported by some users to resolve the Steam VR headset not detected issue. To power cycle the Link Box, follow the steps:
- Disconnect all the cords on your headset and unplug the Link Box.
- Launch SteamVR and go to Settings > Developer. Click Remove All SteamVR USB Devices, and this will clear your SteamVR device memory.
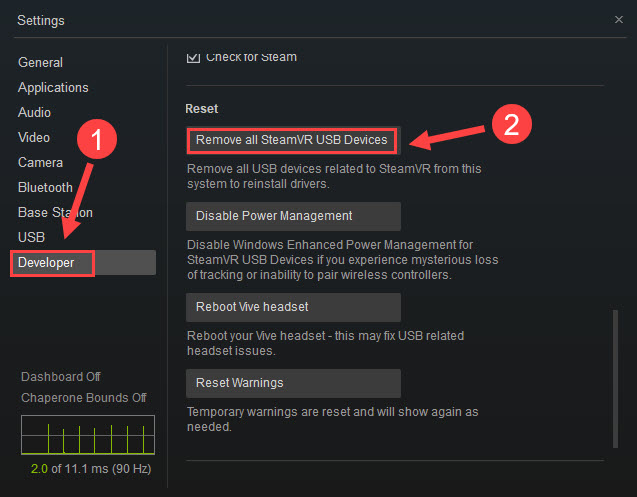
- Wait until it completes and plug all the cords back in after a couple of minutes.
The steps above can help you troubleshoot the USB port, Link Box and connection. If they’re not the cause, take a look at Fix 3.
Fix 3 – Update your device drivers
Drivers are responsible for communication between your system and headset. If there’s something wrong with your device drivers (especially the monitor and USB drivers), the headset may not connect to PC and Steam. To get the most out of SteamVR, you should always keep the drivers intact and up to date.
You can go to the manufacturer’s website for each device and search for the most recent correct driver. Once you find it, download and install it on your computer. This is completely free but could be time-consuming and error-prone if you’re not a computer expert.
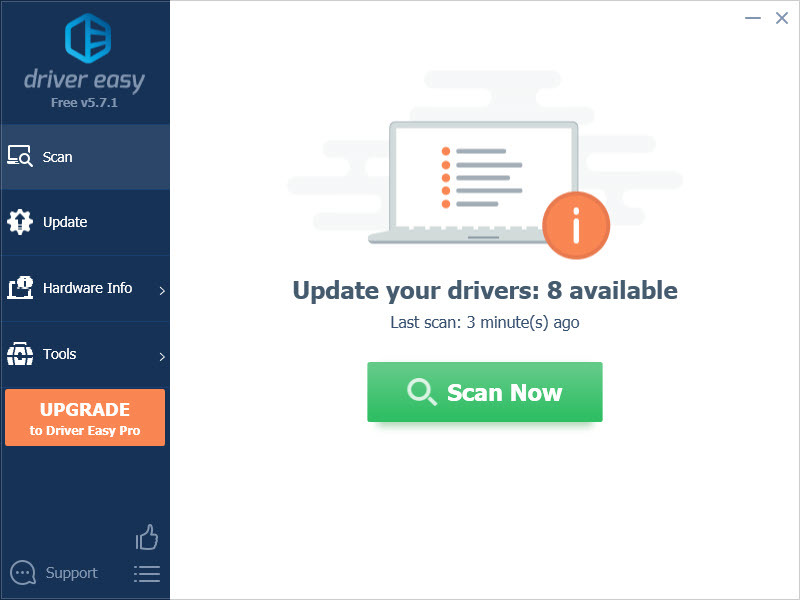
If you don’t have the time, patience or computer skills to update your drivers manually, you can, instead, do it automatically with Driver Easy. Driver Easy will automatically recognize your system and find the latest device drivers for it. You can download and install all of them in 3 steps:
- Download and install Driver Easy.
- Run Driver Easy and click the Scan Now button. Driver Easy will then scan your computer and detect any problem drivers.
- Click the Update button next to the flagged driver to automatically download the correct version of that driver, then you can manually install it (you can do this with the FREE version).
Or click Update All to automatically download and install the correct version of all the drivers that are missing or out of date on your system. (This requires the Pro version which comes with full support and a 30-day money back guarantee. You’ll be prompted to upgrade when you click Update All.)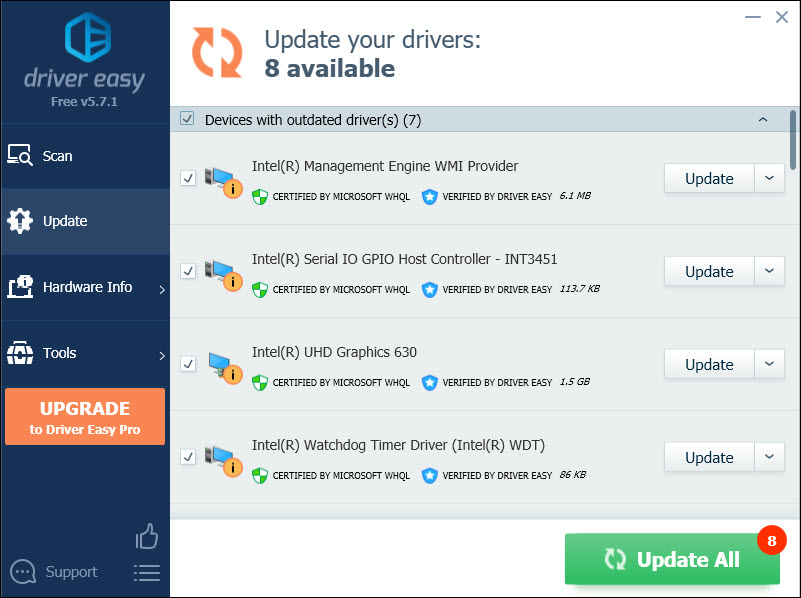
If you need assistance, please contact Driver Easy’s support team at support@drivereasy.com.
Restart SteamVR and see if the problem is fixed. If not, continue to more fixes below.
Fix 4 – Disable Power Management
Enabling the SteamVR Power Management will power off your USB devices when they’re not in use and may affect the headset detection. To turn it off, follow the steps:
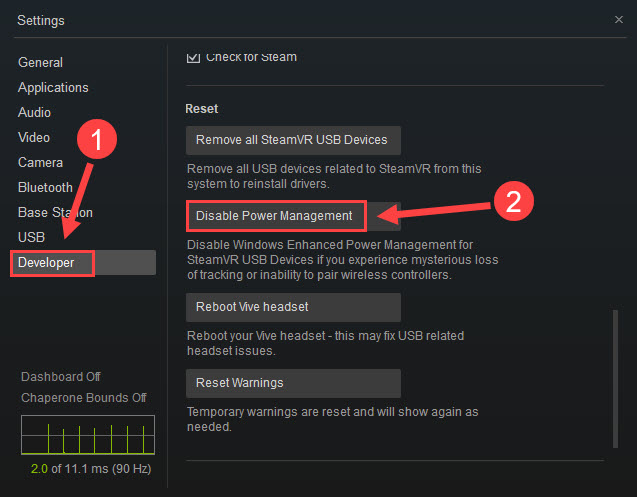
- Open SteamVR and navigate to the Settings panel.
- Choose the Developer tab and click Disable Power Management.
See if the headset is detected now. If not, go on to the next solution.
Fix 5 – Run Steam as an administrator
Lacking necessary permissions will also prevent your SteamVR from working and thus failing to detect the headset as normal. To grant unrestricted access, you should run the Steam client as an administrator. Here’s how:
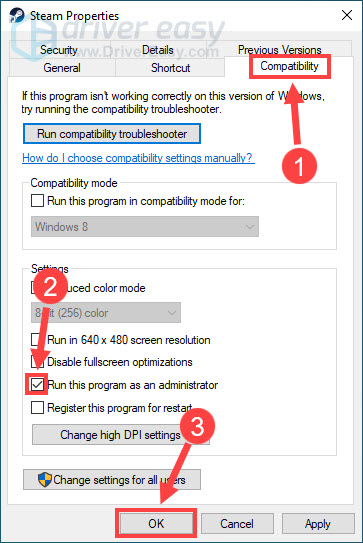
- Right-click Steam on your desktop and click Properties.
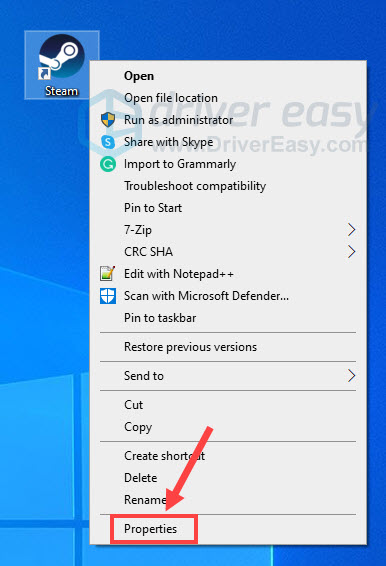
- Select the Compatibility tab. Tick Run this program as an administrator and click OK.
Now that the settings are applied. Check if your headset works now. If not, there is one more fix to try.
Fix 6 – Opt into SteamVR Beta
When SteamVR isn’t performing the right way, consider switching to the Beta version and see how it works. It usually delivers the latest features and comes with some bug fixes.
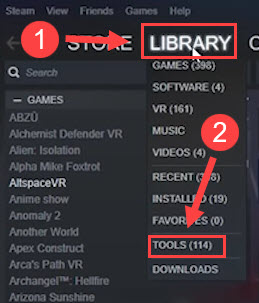
- Launch Steam.
- Hover your mouse over the Library tab and click Tools.
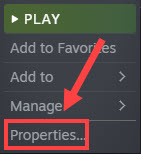
- Right-click SteamVR and click Properties.
- Select the BETAS tab from the left panel. Choose beta – SteamVR Beta Update from the drop-down list under Select the beta you would like to opt into.
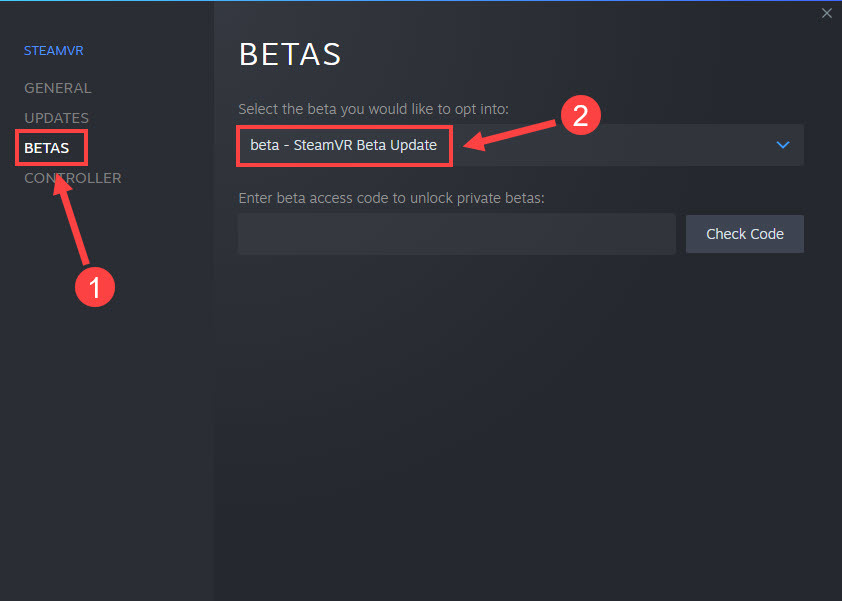
If you’re already on Beta, simply turn it off by choosing NONE – Opt out of all beta programs and check if your SteamVR is more stable.
Hopefully one of the fixes above helped. Feel free to leave a comment below if you have any questions or suggestions.