


When you’re listening to music or focusing on your deadline work, your Windows 10 computer crashes, and you don’t know what you’ve done to cause the crash. This would be so frustrating.
Why is Windows 10 crashing? There are various causes for this problem, such as corrupted files or hardware faulty. But don’t panic! There are workarounds to fix the problem. Before throwing your computer out of the window, try these solutions.
7 Fixes for Windows 10 Crashing Issues
Here are the solutions that have helped people resolve the crashing issues. You shouldn’t have to try them all; just work your way down the list until everything’s working again.
- Update available drivers
- Turn off Link State Power Management
- Scan and repair system files
- Disconnect external devices
- Check malware and virus
- Disable fast startup
- Restore to the previous state
Fix 1: Update available drivers
A missing or outdated driver in your computer can cause your system to crash, so you should keep the drivers in your computer up to date, and update those that are out of date.
There are two ways to update drivers: manually and automatically.
Manually update the driver: you can go to the manufacturer’s website of your hardware device, find the latest driver that is compatible with your operating system, then download and install it on your computer. This requires time and computer skills.
Automatically update the driver: if you don’t have time or patience, you can do it automatically with Driver Easy.
Driver Easy will automatically recognize your system and find the correct drivers for it. You don’t need to know exactly what system your computer is running, you don’t need to risk downloading and installing the wrong driver, and you don’t need to worry about making mistakes when installing.
You can update your drivers automatically with either the 7 days free trial or the Pro version of Driver Easy. It takes just 2 clicks, and you get full support and a 30-day money-back guarantee with the Pro version:
1) Download and install Driver Easy.
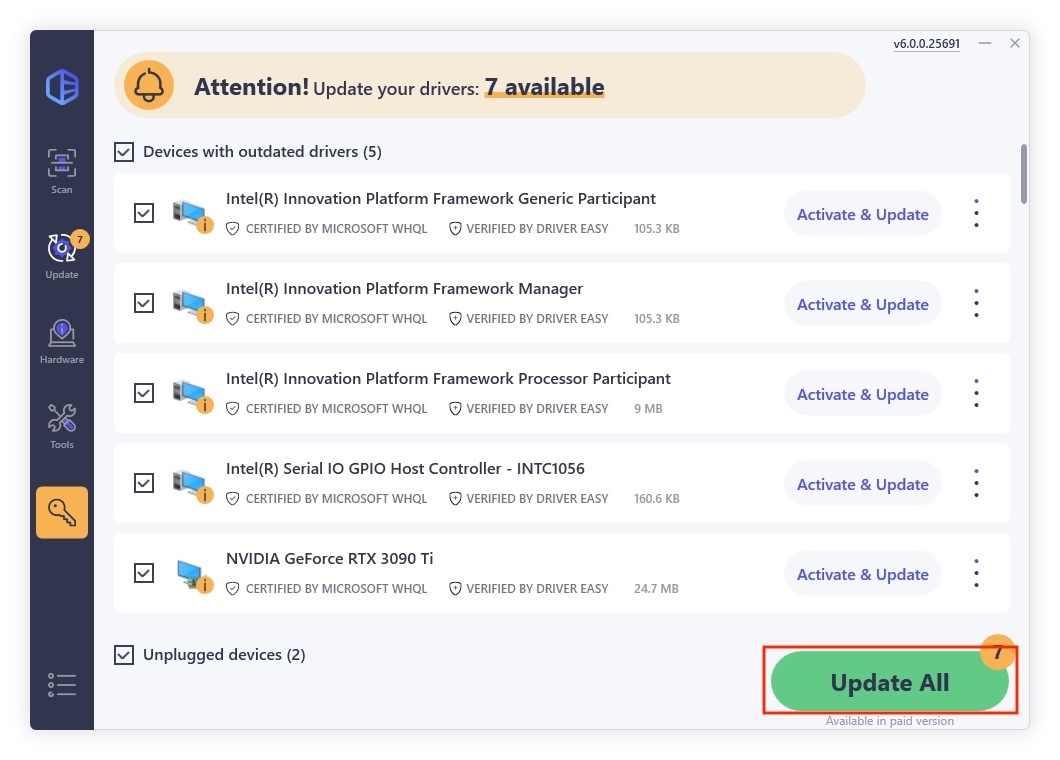
2) Run Driver Easy and click the Scan Now button. Driver Easy will then scan your computer and detect any problem drivers.

3) Click the Activate & Update button next to the flagged device to automatically download and install the correct version of this driver.
Or click Update All to automatically download and install the correct version of all the drivers that are missing or out of date on your system (You’ll need the Pro version for this – when you select Update All, you’ll get a prompt to upgrade. If you’re not prepared to purchase the Pro version yet, Driver Easy provides a 7-day trial at no cost, granting access to all Pro features like fast downloads and easy installation. No charges will occur until after your 7-day trial period ends.)
After updating, restart your computer to take effect.
Fix 2: Turn off Link State Power Management
The PCI Express option Link State Power Management is a part of the PCI-E Specification, and it works with active state power management. It’s possible that something is wrong with the power management in your computer, so you should turn off Link State Power Management. Here’s how to do it:
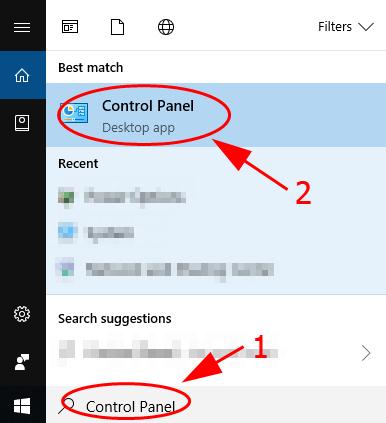
1) Type Control Panel from the search box on your desktop, and click Control Panel to open it.
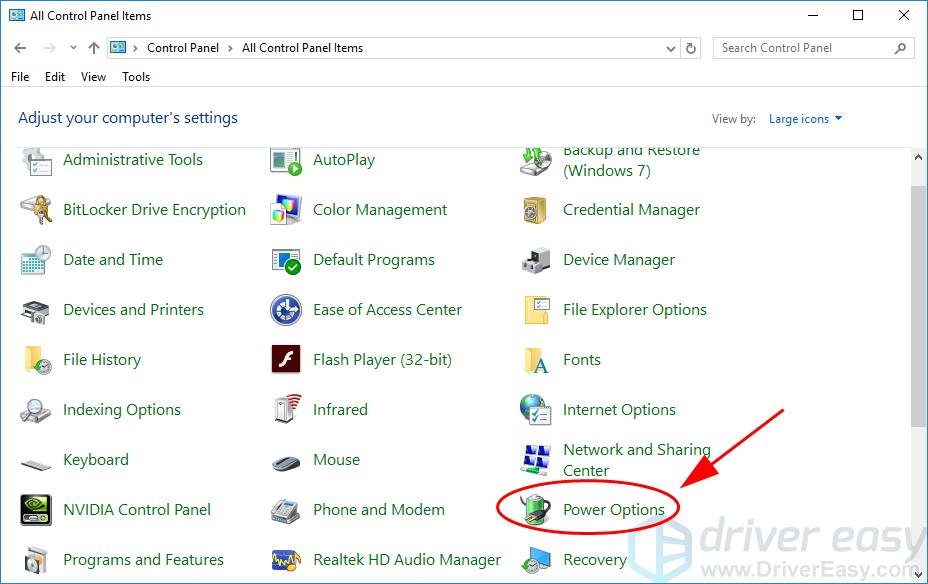
2) Click Power Options (be sure to view Control Panel by small icons or large icons).
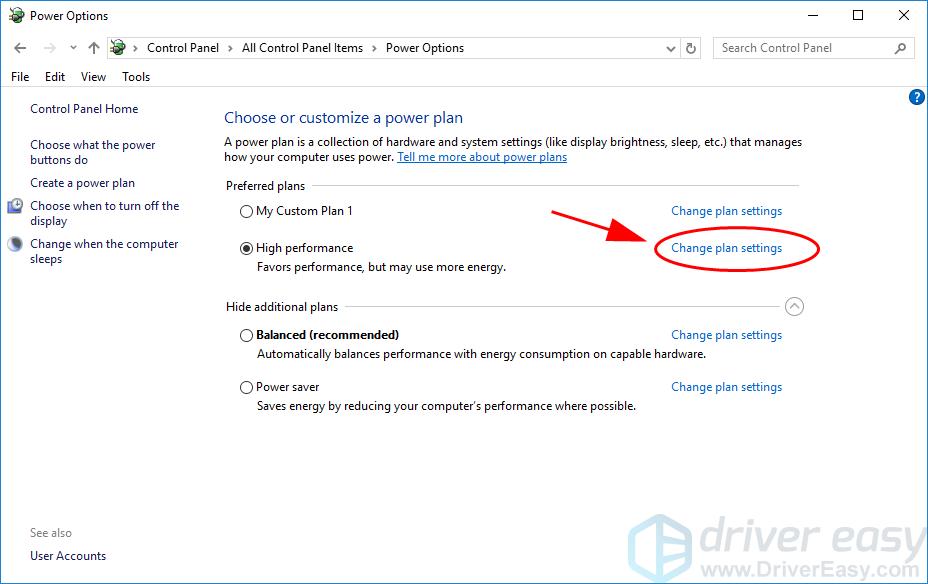
3) Click Change plan settings for whichever power plan you have selected. In my case, I click Change plan settings for High Performance.
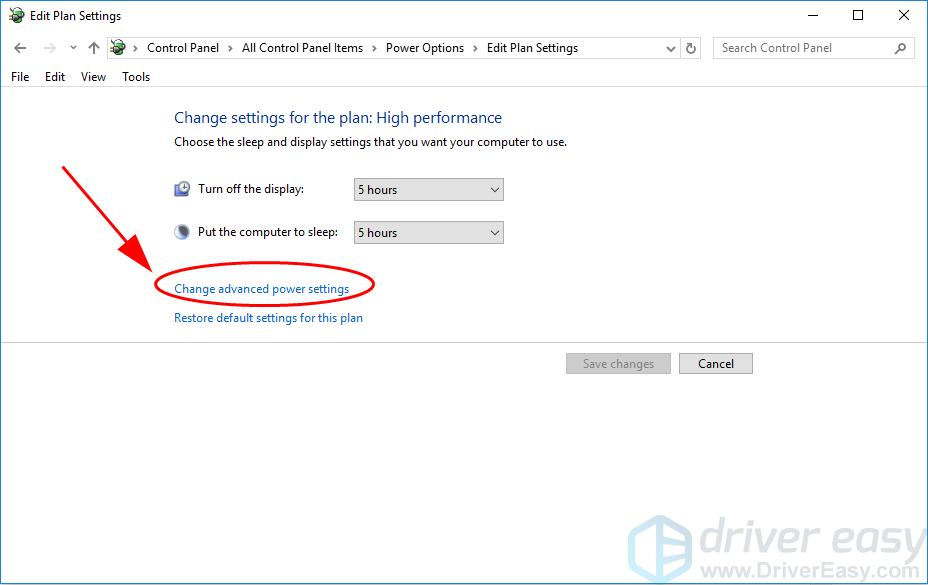
4) Click Change advanced power settings.
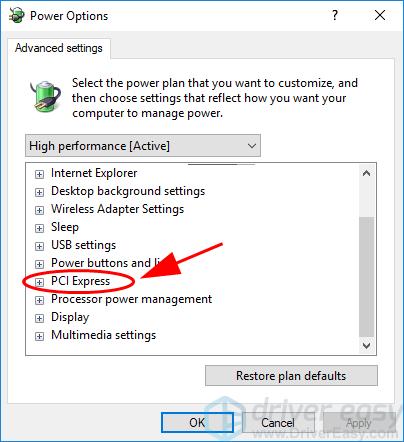
5) Scroll down and double-click PCI Express to expand it.
6) Double click Link State Power Management, and change its status to Off.
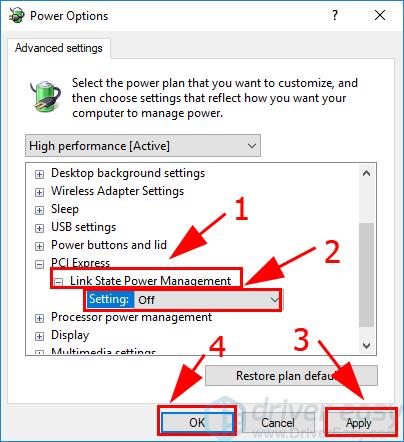
7) Click Apply and OK to save the settings.
Restart your computer and it should fix the Windows 10 crashing issue.
Fix 3: Scan and repair system files
Corrupted or missing system files can cause the Windows 10 crashing issue. If you have corrupted system files, you may encounter a Blue screen issue or the Windows 10 crashing issue.
System File Checker (SFC) is a built-in Windows tool that scans and repairs corrupted system files. If there are corrupted system files in your computer, your system will be crashing without a doubt. So you should run SFC to fix the problem. To do so:
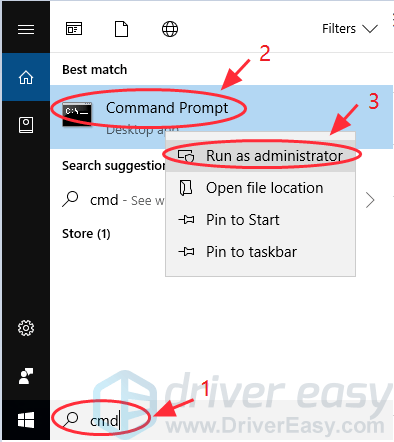
1) Type cmd in the search box on your desktop. Right-click Command Prompt (or cmd if you’re using Windows 7) to select Run as administrator, and then click Yes to verify UAC.
2) Once you see the command prompt, type sfc /scannow and press Enter.
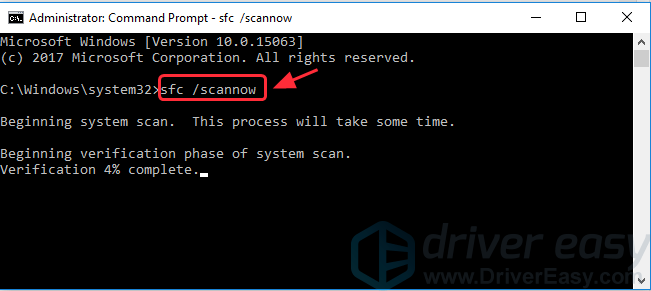
3) Windows will now verify the system files, and automatically fix any issues.
4) Once verification is complete, exit the Command Prompt and try to launch the program that was giving you the error.
If Windows 10 still crashes, don’t worry. We have something else to try.
Fix 4: Disconnect external devices
If you’ve connected any external device to your computer, it’s possible to cause the Windows system to crash, because there may be a problem with the communication between your device and the Windows 10 system.
You should unplug or disconnect the external devices, such as a headset, Bluetooth, or SSD, then restart your computer to see if it fixes the Windows 10 crashing issue.
If your computer stops crashing, you should have resolved your problem. Then you can connect the external device once a time, and reboot your computer, in order to locate the cause.
Fix 5: Check malware and virus
If your Windows 10 computer is infected with malware or virus, the virus will crash your computer every now and then. So it’s necessary to run a full scan through the system.
Unfortunately, Windows defender alone may not be enough, so you should also try a third-party antivirus program, like McAfee or Norton.
If any problem has been detected, follow the instructions provided by the antivirus program to fix the problem. Then restart your computer.
Fix 6: Disable fast startup
The fast startup feature enabled can cause your Windows 10 computer to crash, so make sure to disable fast startup. To do so:
1) Type Control Panel from the search box on your desktop, and click Control Panel to open it.

2) Click Power Options (be sure to view Control Panel by small icons or large icons).

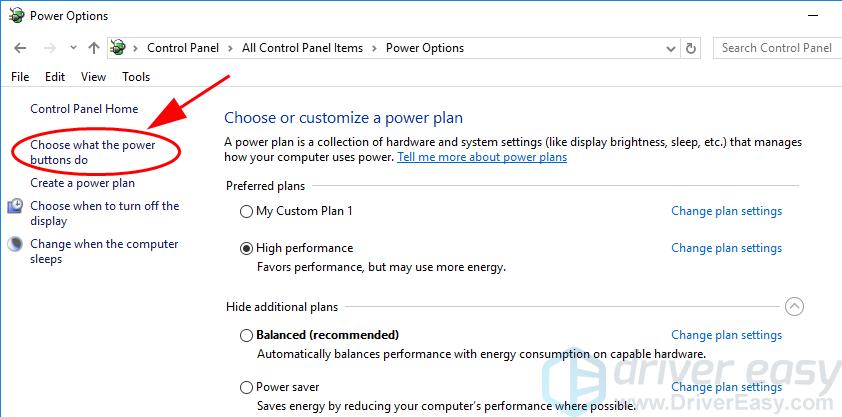
3) Click Choose what the power buttons do on the left.
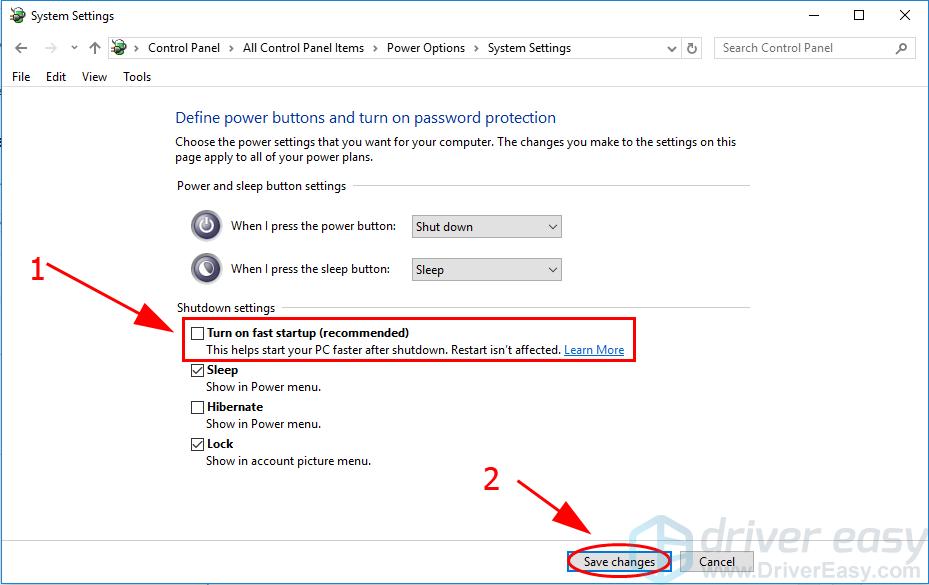
4) If the Shutdown settings button is grayed out and can’t be changed, click Change settings that are currently unavailable.
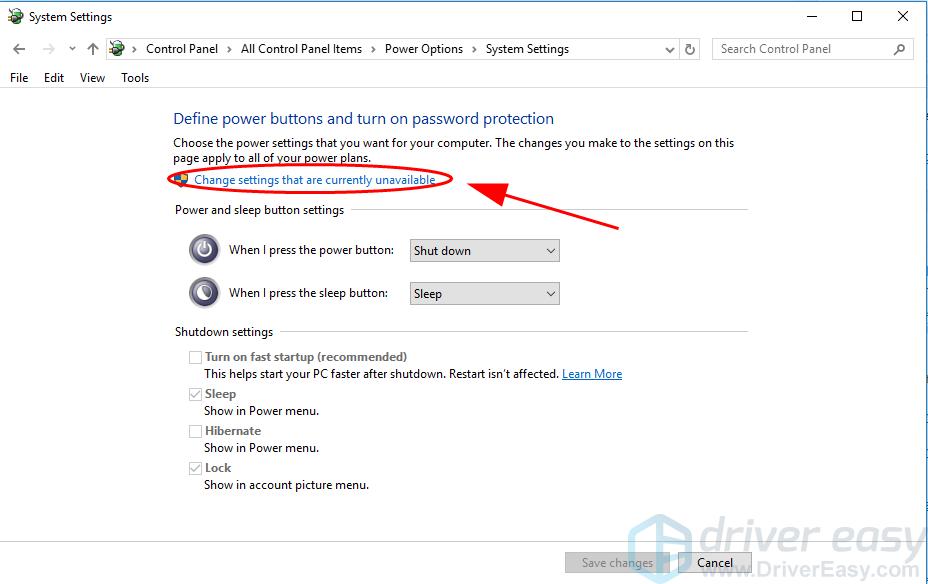
5) Uncheck the box next to Turn on fast startup (recommended). And click Save changes.
Restart your computer and see if it fixes the Windows 10 crash issues.
Fix 7: Restore to the previous state
If you’ve recently installed a new application or program, or if you’ve upgraded the Windows system, it’s likely to cause the Windows 10 crashing issue. So you can roll back to the previous state.
Way 1: Uninstall the programs that are recently installed
If you’ve installed new programs or applications, uninstall them.
1) On your keyboard, press the Windows logo key and R at the same time to invoke the Run box.
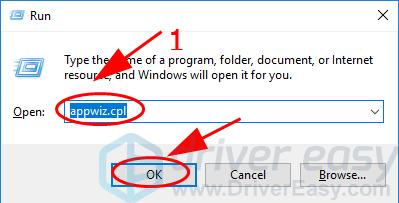
2) Type appwiz.cpl and click OK.
3) Select the program/application that you recently installed, and Uninstall it.

You’ll need to repeat the uninstallation if there is more than one application. Then restart your computer to fix the crashing issue.
Way 2: Perform a system restore
You can resolve Windows 10 crashing by restoring your system to a previous state. To do so, you should use the System Restore feature.
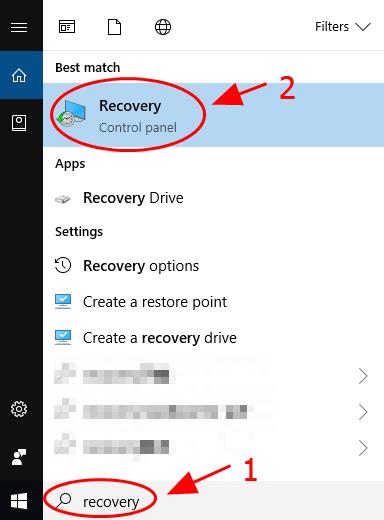
1) Type recovery in the search box on your desktop, and click Recovery in the list of results.
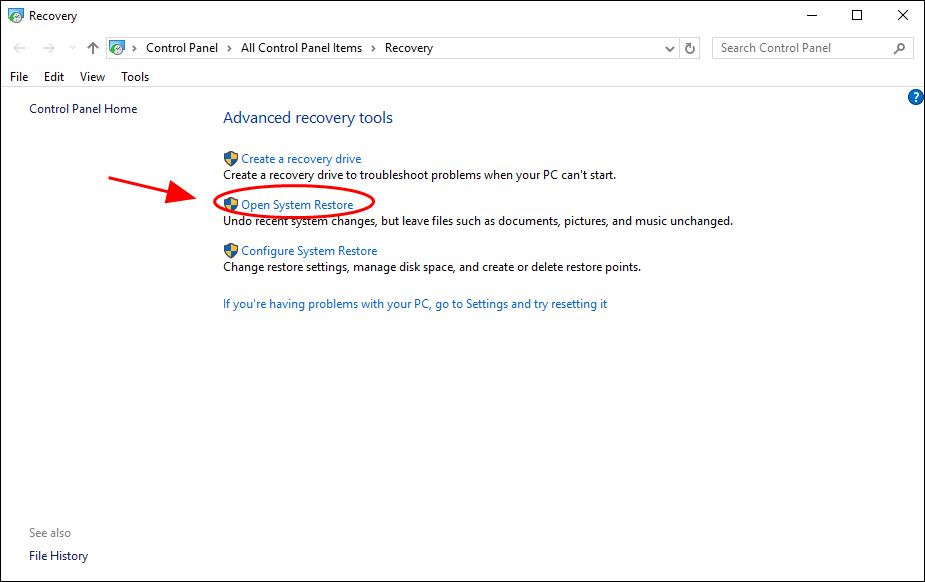
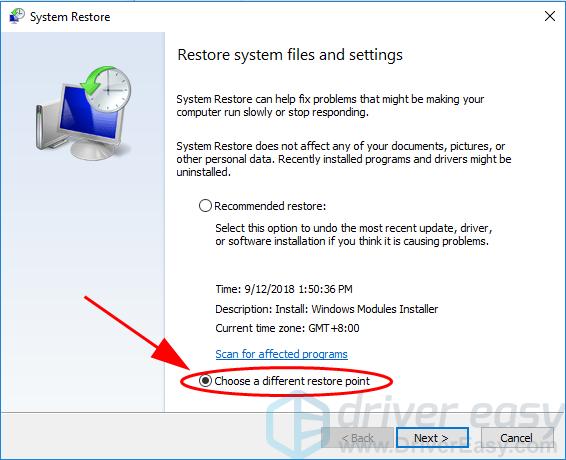
2) Click Open System Restore.
3) Click Choose a different restore point, and select the restore point before the system crash occurs.
Follow the on-screen instructions to finish the restore.
So there you have it – seven effective solutions to fix Windows 10 crashing issues in your computer. Hope this post comes in handy and helps resolve your problem.
