


It’s very frustrating when you push the power button but Windows failed to start. Don’t worry, Windows has put a lot of effort to make this problem easy to fix. And this post will guide you how to fix it.
Before starting any fixes, make sure the power cable is connected with your computer firmly. If you’re using a laptop, plug in your power cable instead of using the battery.
Try these fixes:
You don’t have to try them all; just work your way down the list until you find the one that works for you.
- Remove newly installed hardware or devices and reboot
- Run Startup Repair
- Boot to Safe Mode
- Use Command Prompt
- Perform a System Restore
- Reinstall your system
- Bonus: Update your drivers
Fix 1: Remove newly installed hardware or devices and reboot
The newly installed hardware or external devices could be the culprit for the failing. So you need to remove or disconnect all unnecessary and newly installed hardware, discs and devices from the computer.
HOW:
- Make sure your computer is completely off.
- Cut off the power cable.
- Remove peripheral equipment.
- Reboot your computer.
Fix 2: Run Startup Repair
If the problem is not related to hardware or devices, the fix should be the next one to try. Booting your computer into the recovery environment (RE) and perform the Startup Repair to make your Windows system running again. Here’s how:
- Ensure your PC is off.
- Press the power button to turn on your PC, then hold the power button down until PC shuts down automatically (about 5 seconds).
- Repeat this more than 2 times until you see the Preparing Automatic Repair.
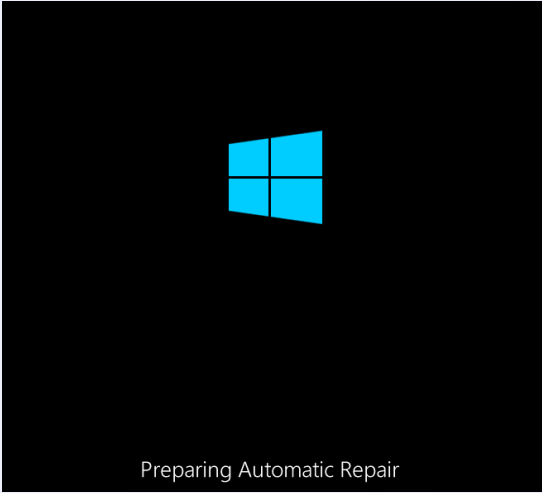
Note: This step aims to bring up the Preparing Automatic Repair screen. If you’ve seen this screen for the first time when you power up the computer, skip this step. - When Windows doesn’t boot properly, your computer would attempt to fix the problem by itself. Then wait for Windows to diagnose your PC.

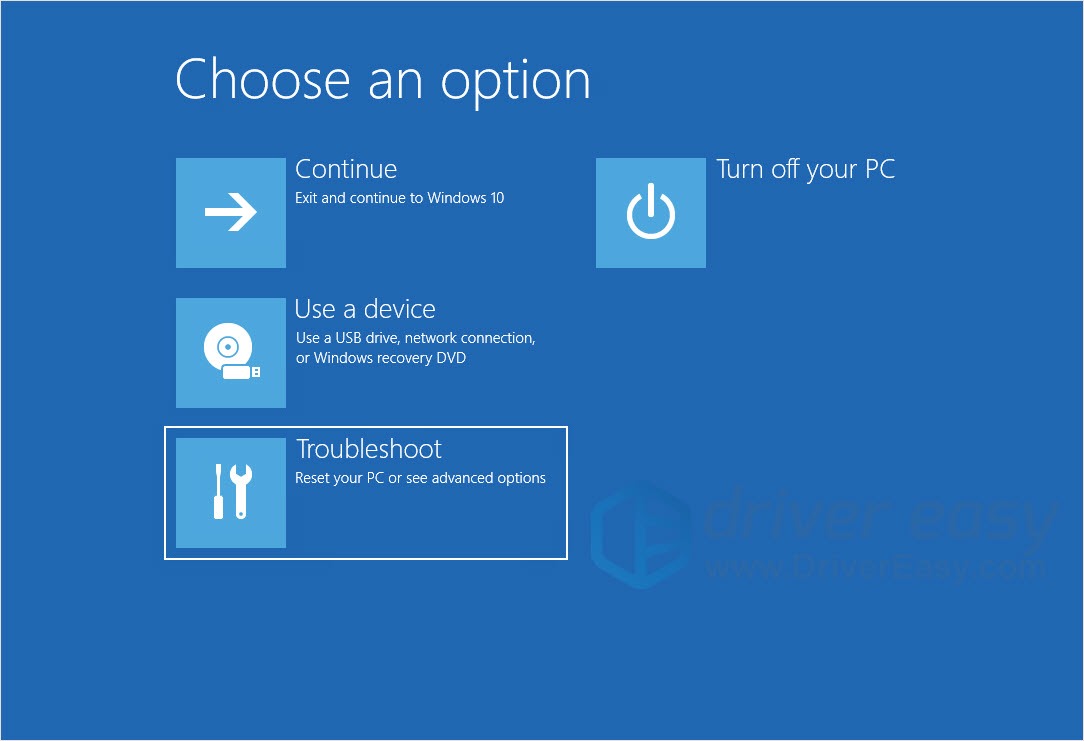
- Next, you should see this screen. Select Troubleshoot.
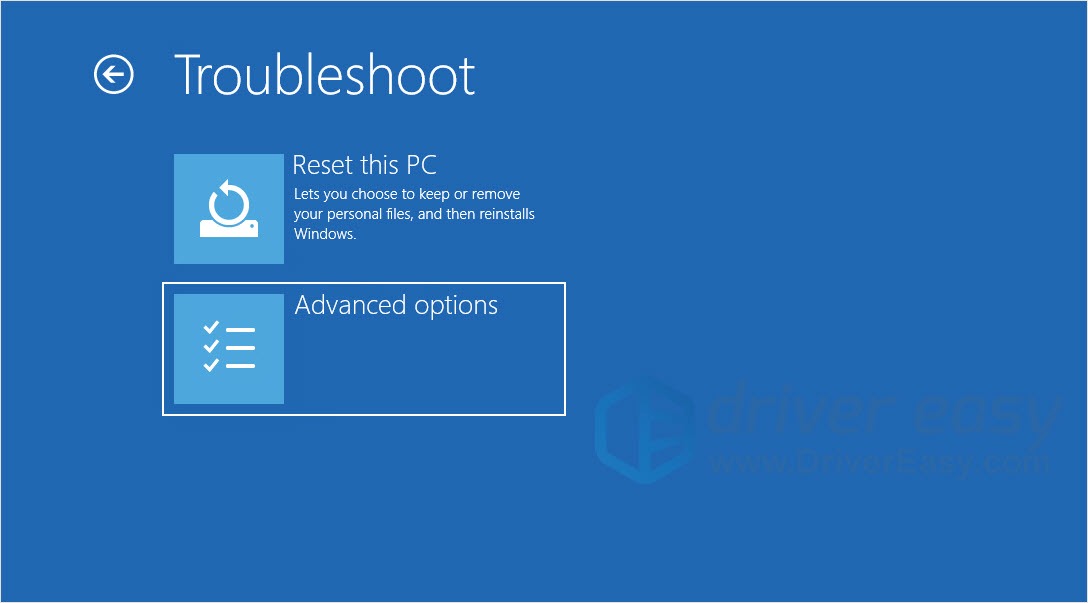
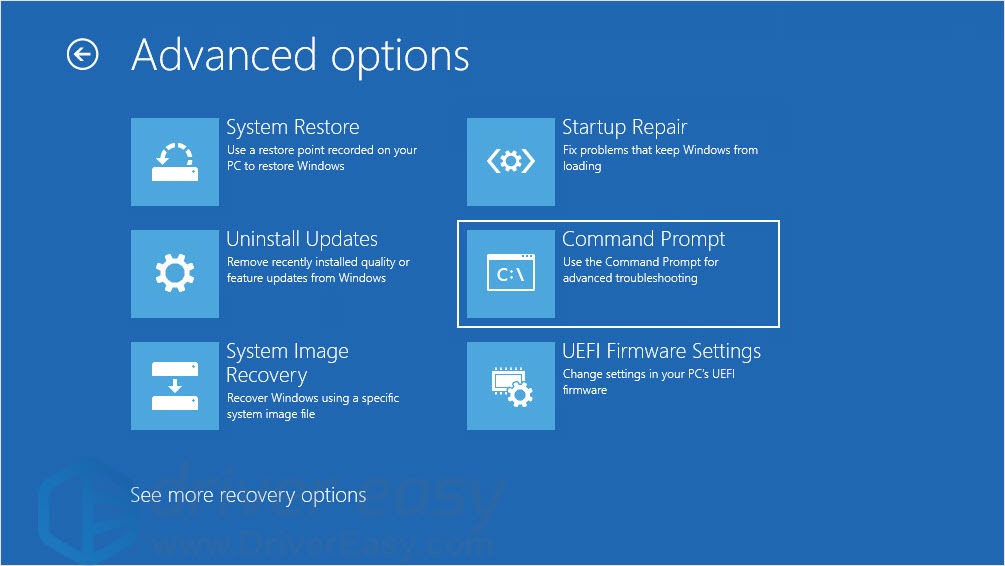
- Click Advanced options.
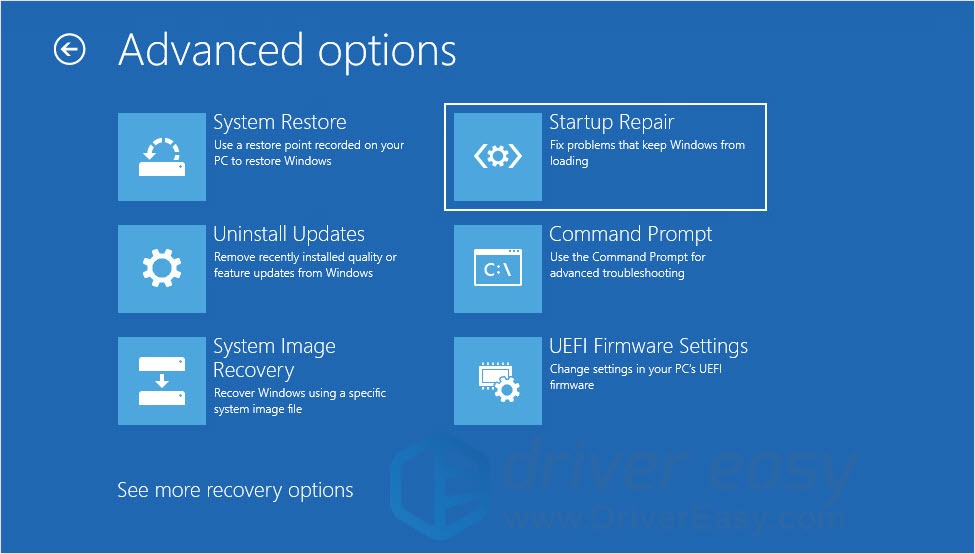
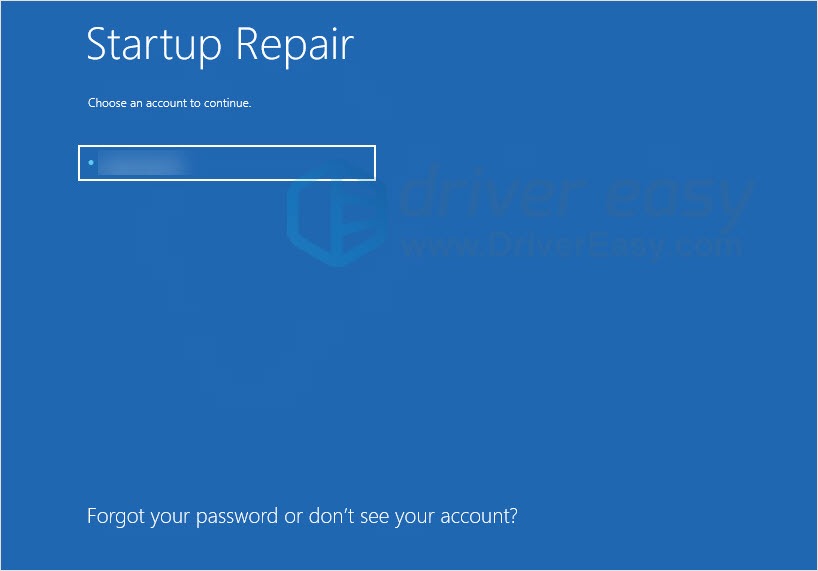
- Choose Startup Repair.
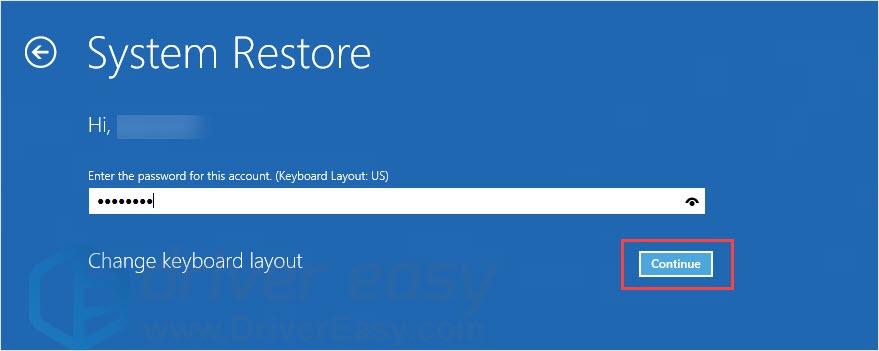
- Choose an account, type your password and click Continue. It will diagnose your computer and fix it.
Fix 3: Boot to Safe Mode
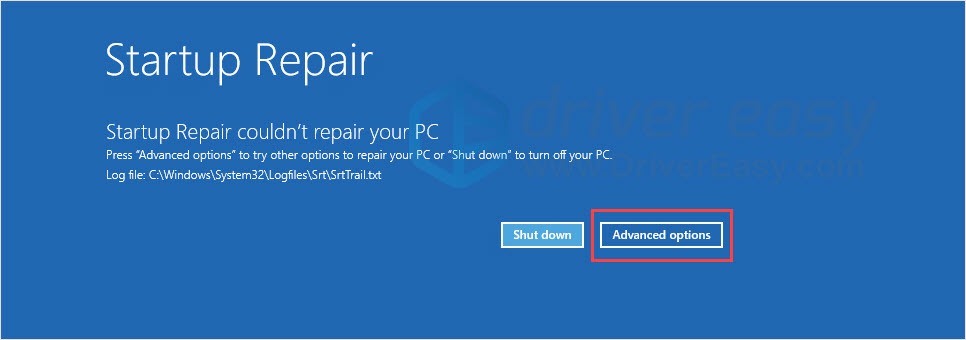
If your computer tells you Startup Repair couldn’t help, then you may follow steps to enter Safe Mode.
Safe mode is an easy and convenient fix for the “Windows won’t boot” issue. It is an alternative boot scheme that uses a minimum of drivers, software and service to start your computer. By entering safe mode, you can trigger which part goes wrong and cause your Windows 10 computer won’t boot after update.
The first 6 steps are the same as Fix 2.
- Click Advanced options.
- Click Troubleshoot.
- Click Advanced options.
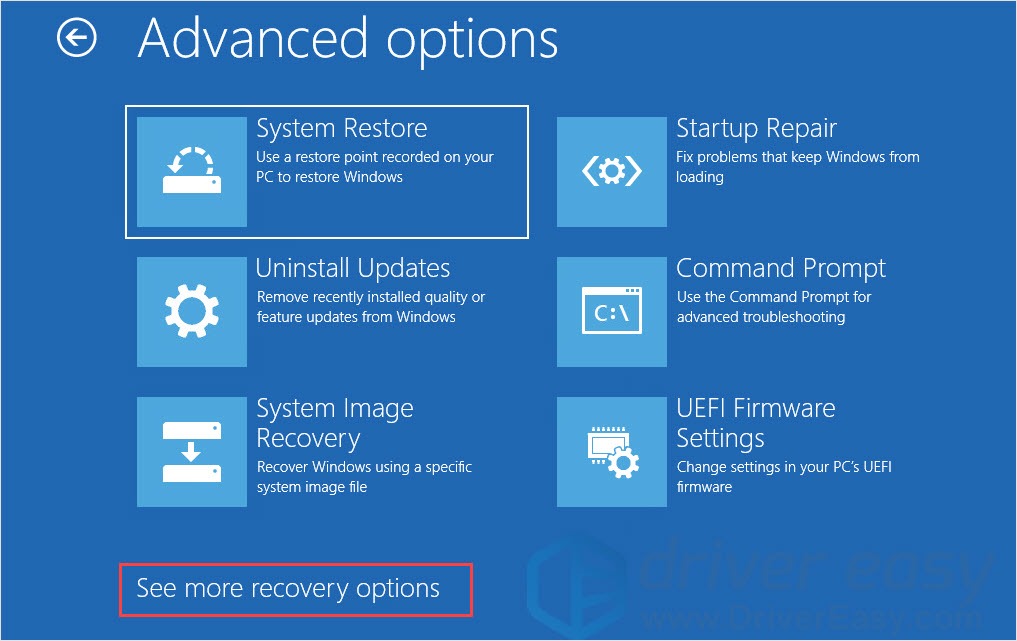
- Click See more recovery options.
- Click Startup Settings.
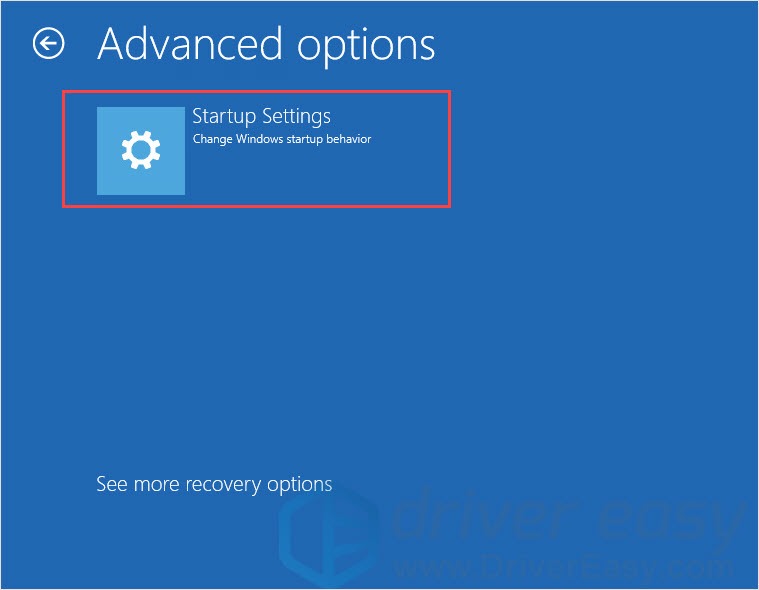
- Click Restart.

- Use arrow keys to select Safe Mode, then press the Enter key.

Fix 4: Use Command Prompt
The broken system files may relate to this issue. If so, you could run Command Prompt to check and fix the problem.
The first 6 steps are the same as Fix 2.
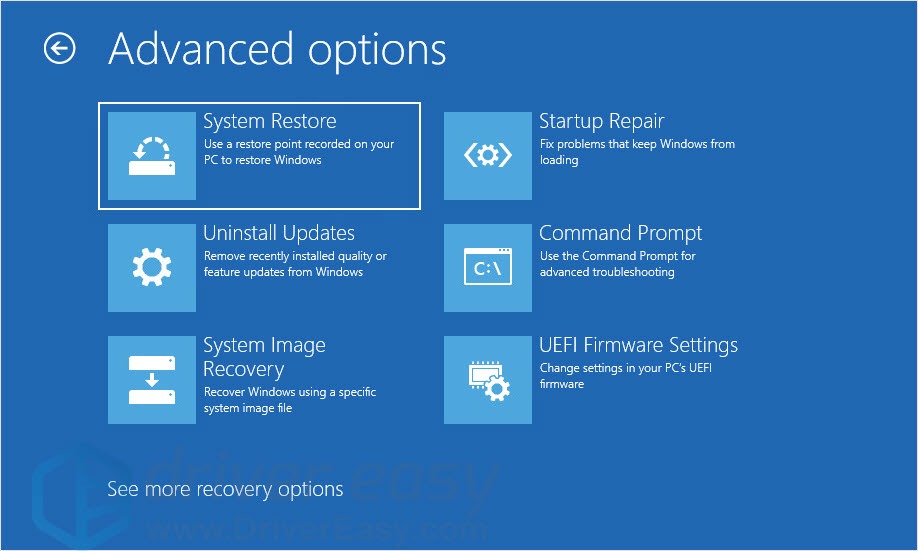
- When you see Advanced options, click System Restore.
- Choose the account, type password and click Continue.
- Type chkdsk/f to fix errors on the disk.
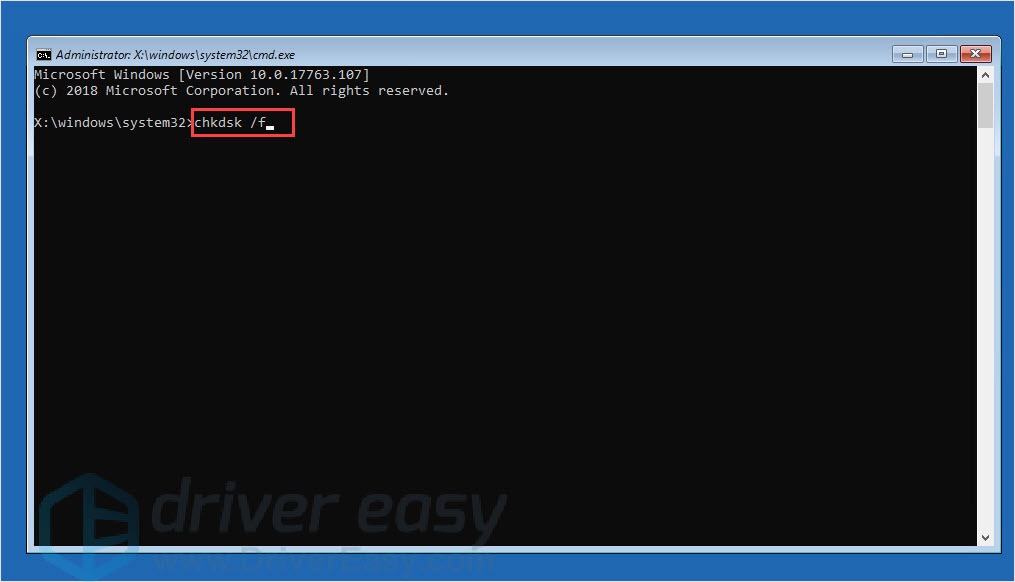
- After this process, reboot your computer to check.
Fix 5: Perform a System Restore
Performing a system restore could help you start your computer normally. Reverse to the previous system logically should fix this issue.
Please note, system restore only affect recently installed programs and drivers.
The first 6 steps are the same as Fix 2.
- When you see Advanced options, click System Restore.
- Choose the account, type password and click Continue.
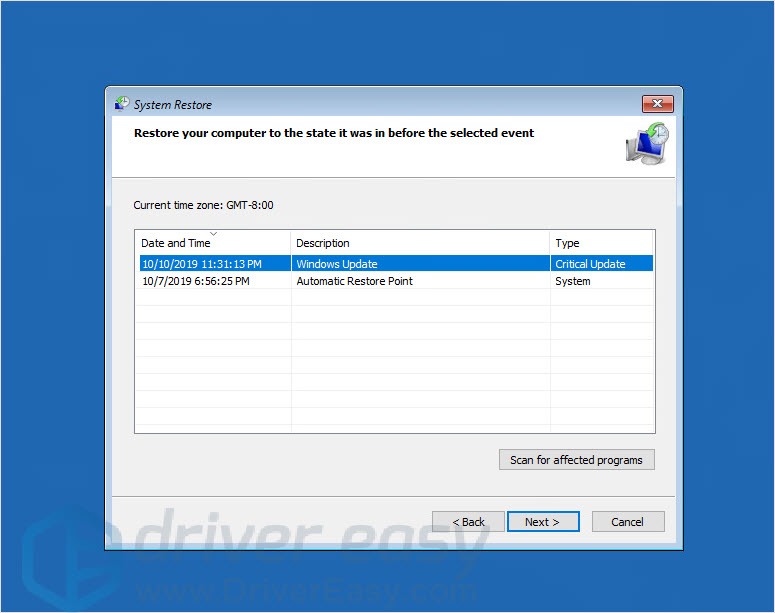
- Choose a restore point.
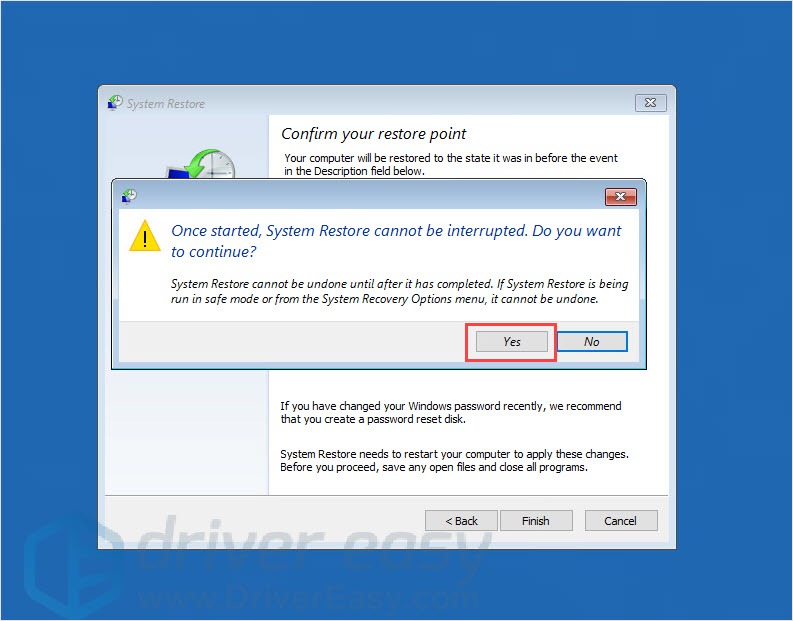
- Click Yes to start system restore.
Fix 6: Reinstall your system
If all else fails, don’t worry, you still could try this fix. Reinstalling your operating system could solve the problem but the problem is, it will delete all the data on your hard drive and this fix takes quite a long time. So it’s suggested as the last option.
Bonus: Update your driver
Drivers are an important part of your computer. With the correct and latest drivers, your computer could be running smoothly and powerfully. So it’s really important to keep your drivers updating to get a better user experience.
There are two ways you can update your driver: manually and automatically.
Option 1 – Download and install the driver manually
You can download drivers from the manufacturer official website. Search for the model you have and find the correct driver that suits your specific operating system. Then download the driver manually.
Option 2 – Automatically update drivers
If you don’t have time or patience to manually update your drivers, you can do it automatically with Driver Easy.
Driver Easy will automatically recognize your system and find the correct drivers for it. You don’t need to know exactly what system your computer is running, you don’t need to risk downloading and installing the wrong driver, and you don’t need to worry about making a mistake when installing.
You can update your drivers automatically with either the FREE or the Pro version of Driver Easy. But with the Pro version it takes just 2 clicks (and you get full support and a 30-day money back guarantee):
- Download and install Driver Easy.
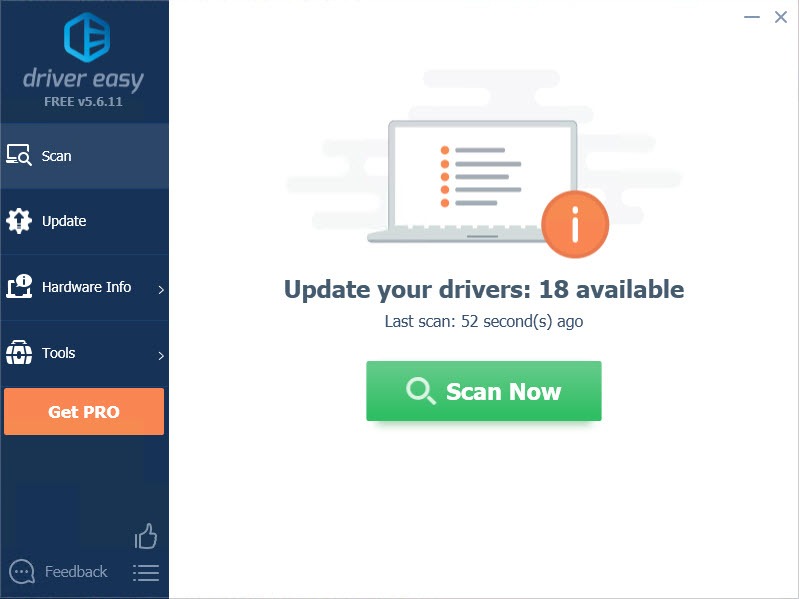
- Run Driver Easy and click the Scan Now button. Driver Easy will then scan your computer and detect any problem drivers.
- Click the Update button next to the flagged driver to automatically download the correct version of that driver, then you can manually install it (you can do this with the FREE version).
Or click Update All to automatically download and install the correct version of all the drivers that are missing or out of date on your system. (This requires the Pro version which comes with full support and a 30-day money back guarantee. You’ll be prompted to upgrade when you click Update All.)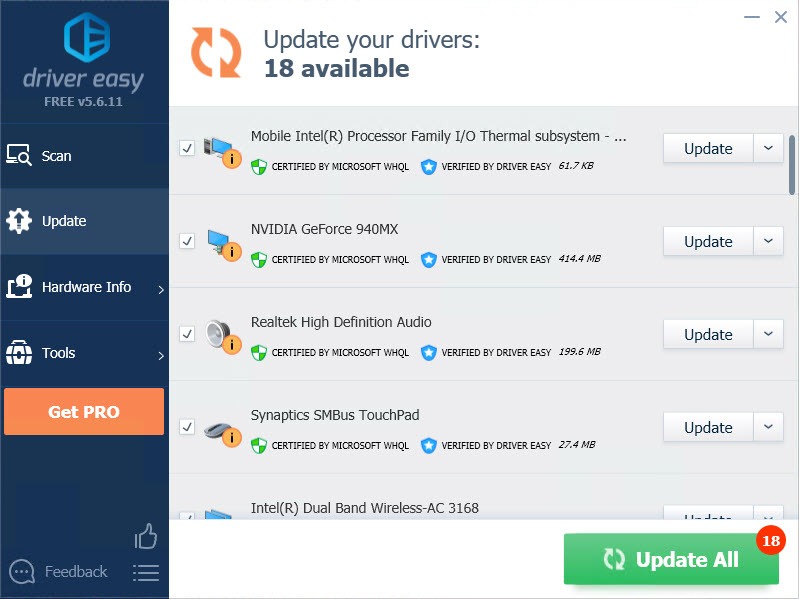
Be sure to attach the URL of this article if needed for more expedient and efficient guidance.
Bonus: Update your drivers
After you entering to the Windows system normally, you need to update your drivers. It’s because the missing or outdated device drivers in your computer can result in the Windows failed to start issue. To rule it out as the cause for your problem, you should verify that your drivers are up to date, and update those that aren’t.
There are two ways you can update your driver: manually and automatically.
Option 1 – Download and install the driver manually
You can download drivers from the manufacturer official website. Search for the model you have and find the correct driver that suits your specific operating system. Then download the driver manually.
Option 2 – Automatically update drivers
If you don’t have time or patience to manually update your drivers, you can do it automatically with Driver Easy.
Driver Easy will automatically recognize your system and find the correct drivers for it. You don’t need to know exactly what system your computer is running, you don’t need to risk downloading and installing the wrong driver, and you don’t need to worry about making a mistake when installing.
You can update your drivers automatically with either the FREE or the Pro version of Driver Easy. But with the Pro version it takes just 2 clicks (and you get full support and a 30-day money back guarantee):
- Download and install Driver Easy.
- Run Driver Easy and click the Scan Now button. Driver Easy will then scan your computer and detect any problem drivers.
- Click the Update button next to the flagged driver to automatically download the correct version of that driver, then you can manually install it (you can do this with the FREE version).
Or click Update All to automatically download and install the correct version of all the drivers that are missing or out of date on your system. (This requires the Pro version which comes with full support and a 30-day money back guarantee. You’ll be prompted to upgrade when you click Update All.)
Be sure to attach the URL of this article if needed for more expedient and efficient guidance.
Hopefully this article has helped you resolve the Windows failed to start error. But if nothing helped, you’re suggested to contact your computer manufacturer’s customer service.
If you have any questions or suggestions, please leave a comment below, and we’ll do our best to help.