


Want to know how to take a screenshot on your HP laptop? You’ve come to the right place. The following are all the methods that will help you take a screenshot on your laptop easily.
To take a screenshot on your HP laptop
Here are two ways you can take a screenshot:
1. Use Snagit (Recommended)
To take a screenshot on your HP laptop, we recommend using Snagit.
Snagit is a screenshot program with image editing and screen recording. You can use it to take a screenshot quickly, you can edit the screenshot easily with its advanced image editing tools, and you can even capture videos.
Taking a screenshot with Snagit takes just a few clicks:
1) Download and install Snagit.
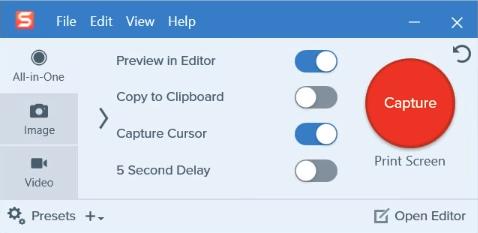
2) Run and sign in the program, then click the Capture button.
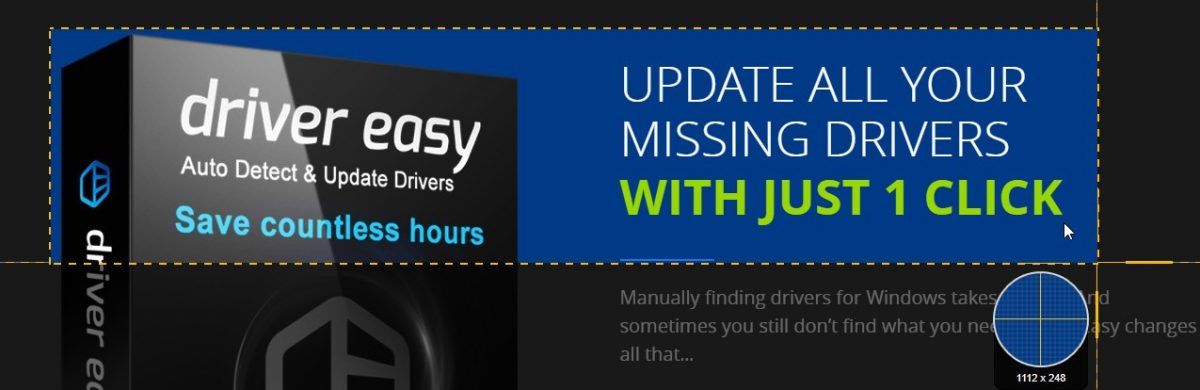
3) Hover over windows or regions to auto-select the area, then click it to capture the area. Or click and drag to select a custom area.
4) Click the camera icon on the toolbar to save your screenshot as an image.

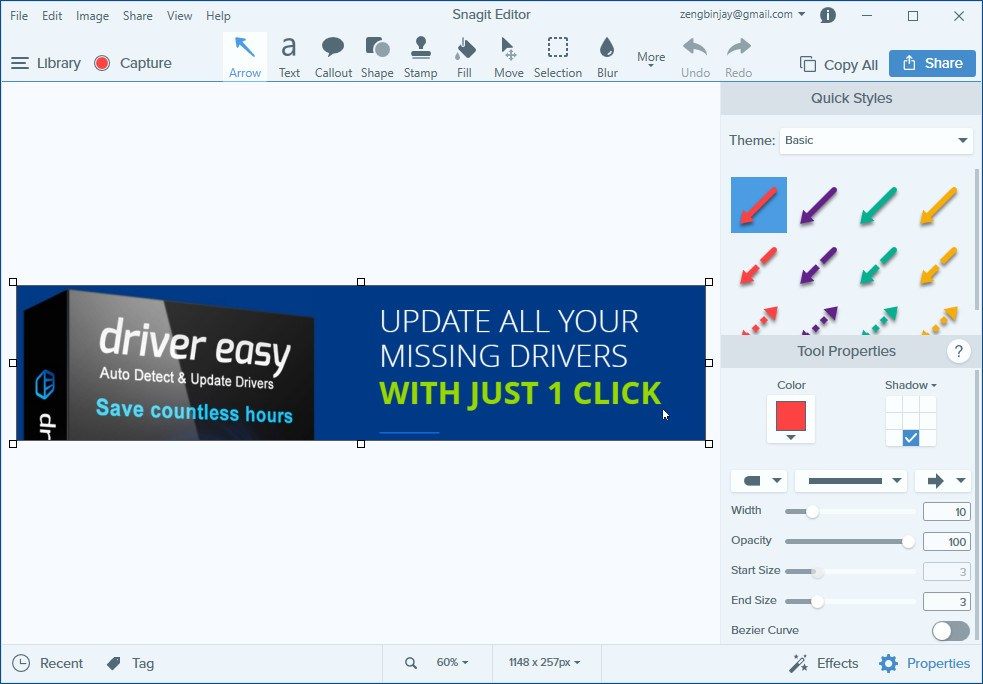
5) Edit your image on the pop-up Snagit Editor. You can add shapes, text, effects, or make adjustments to your image.
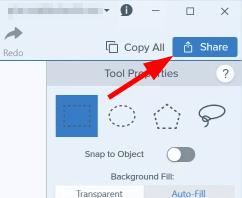
6) Save your image. Or click the Share button in the upper right corner to share it.
2. Take a screenshot with the Windows screenshot feature (Free but limited)
You can choose this option if you only need to take a simple screenshot on your HP laptop, and edit the image manually.
1. Take a screenshot of the whole screen
To take a screenshot of the whole screen on your HP computer:
- Press the Print Screen or PrtScn key on your keyboard. This will capture the whole screen and save it to the clipboard on your computer.
- Open an image editor (like the Paint app or Photoshop), then paste the screenshot to it.
- Edit the screenshot with the editor as you want, then save the image on your computer.
That’s it. You have taken a screenshot of the whole screen and saved it on your HP computer.
If you’re on Windows 8/10, there’s a simpler method:
- Press the Windows logo or Win key and the Print Screen or PrtScn key on your keyboard at the same time. (Your screen will dim for a moment.)
- Open File Explorer (press the Windows logo key and E on your keyboard at the same time), then go to This PC > Pictures > Screenshots (C:Users[YOUR NAME]PicturesScreenshots) and you’ll find the screenshot you’ve taken there.

2. Take a screenshot of an active window
To take a screenshot of an active window (the window currently in use) on your HP computer:
- Press the Alt key and the Print Screen or PrtScn key on your keyboard at the same time. This will capture the active window on your system and save it to the clipboard.
- Open an image editor (like the Paint app or Photoshop), then paste the screenshot to it.
- Edit the screenshot with the editor as you want, then save the image on your computer.
The active window is now captured and saved to your computer.
3. Take a custom screenshot
If you want to take a screenshot of a certain area, there are a few tools you can use:
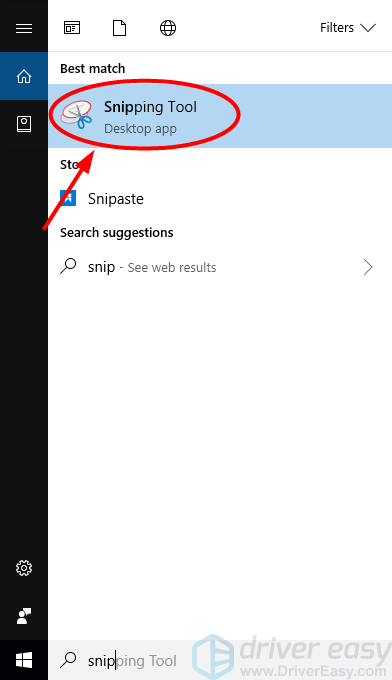
- Click the Start button in the lower left corner of your screen and type “snip“. Then click Snipping Tool in the list of results.
- On Snipping Tool, click New.
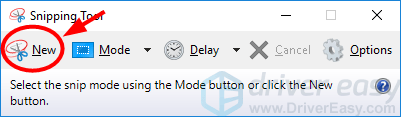
- Click and drag your mouse across the region of your screen you’re going to select. Then release the mouse button.

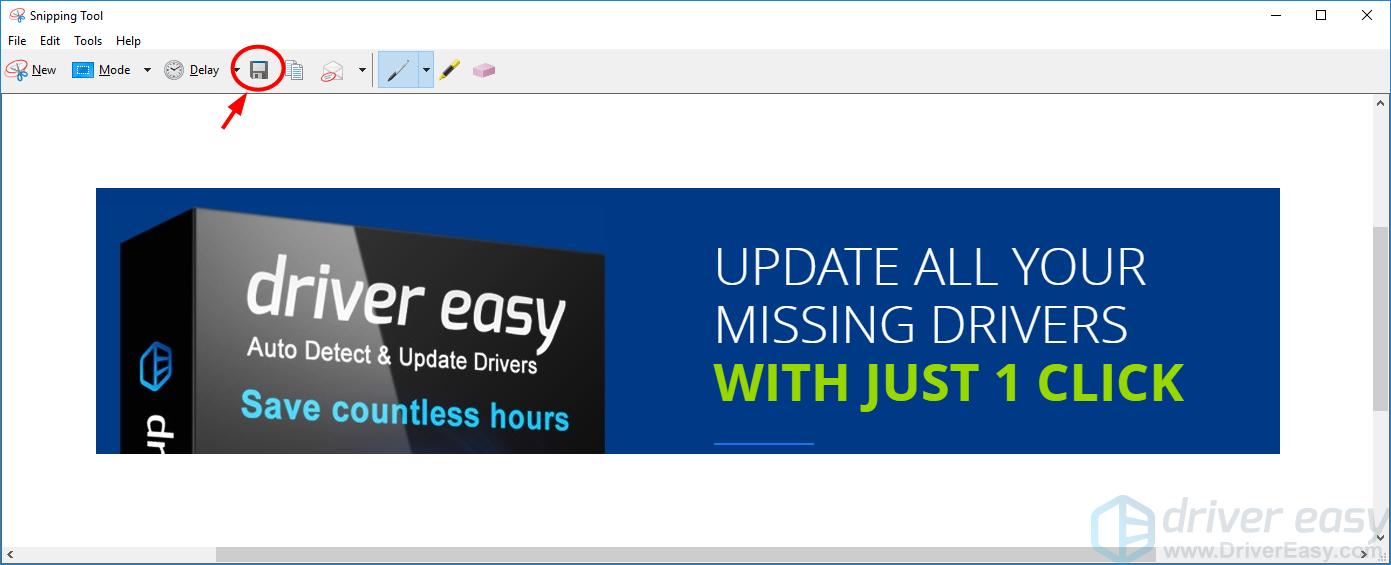
- Click the Save Snip icon to save the screenshot.
How to screenshot on Windows
How to screenshot on Android
Bonus tip: to fix your screenshot issue…
Sometimes you may experience an issue when taking screenshots — you can’t capture anything, or the screenshot you’ve taken is black or twisted. A lot of the times, this happens because you’re using a wrong or outdated device driver. So you should make sure all your drivers are up to date.
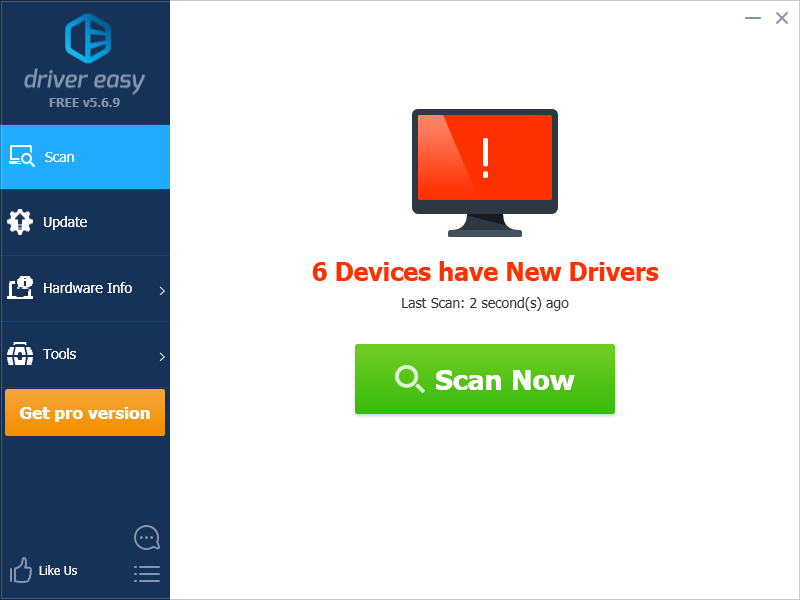
You can update your drivers manually. But if you don’t have the time, patience or skills to do that, you can do it automatically with Driver Easy.
You don’t need to know exactly what system your computer is running, you don’t need to risk downloading and installing the wrong driver, and you don’t need to worry about making a mistake when installing. Driver Easy handles it all.
- Download and install Driver Easy.
- Run Driver Easy and click the Scan Now button. Driver Easy will then scan your computer and detect any problem drivers.
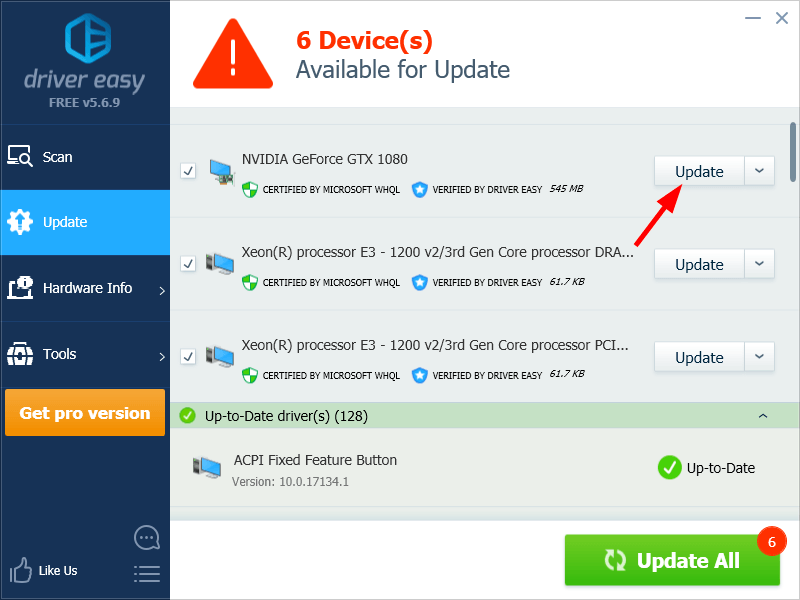
- Click the Update button next to your device to download the correct version of its driver, then you can manually install it. Or click the Update All button at the bottom right to automatically update all the drivers. (This requires the Pro version — you will be prompted to upgrade when you click Update All. You get full support and a 30-day money back guarantee.)
You can do it for free if you like, but it’s partly manual.
Hopefully the information above is helpful to you. And if you have any questions or suggestions, feel free to leave us a comment below!