


If you’re looking for the easiest ways to take screenshots on a laptop, you’ve come to the right place. This article shows you how to take screenshots on a laptop quickly and easily. Just try the tips below.
How to take screenshots on a laptop easily?
- Use keyboard shortcuts to screenshot the entire screen and an active window
- Use the Snipping Tool to take and edit screenshots
- Use Snagit to take, edit and share screenshots (Recommended)
Tip 1: Use keyboard shortcuts to screenshot the entire screen and an active window
If you want to take screenshots on your laptop and then use them in an app, the quickest way is using Windows keyboard shortcuts.
If you want to take a screenshot of the entire screen, press the Print Screen or PrtSc key.
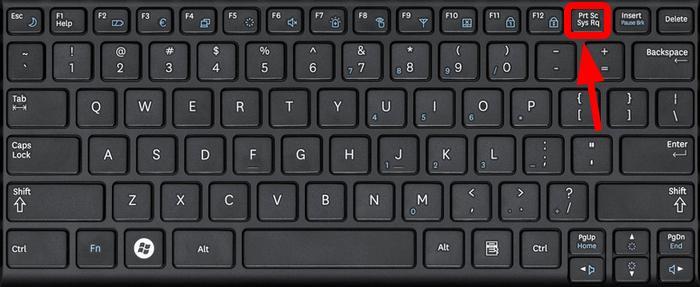
The entire screen will be captured and automatically copied to the Windows clipboard. Then you can paste the screenshot into Paint, Word or any other apps.
If you want to take a screenshot of an active window, press Alt+PrtScn.
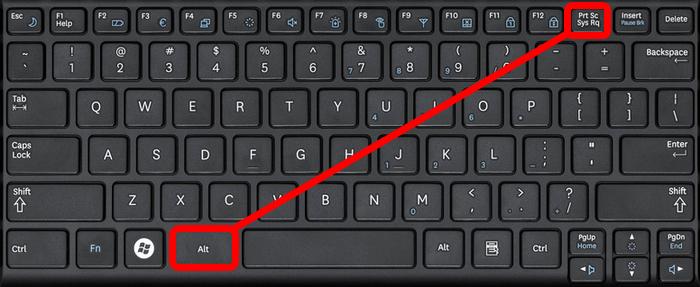
Select the window you want to capture, then press the Alt and PrtScn keys at the same time, and the picture will be taken and copied to the clipboard.
Tip 2: Use the Snipping Tool to take and edit screenshots
Snipping Tool is a pre-installed system tool for screenshots. You can use it to capture your screen and do some simple editing. Here’s how to use the Snipping Tool to take screenshots on a laptop:
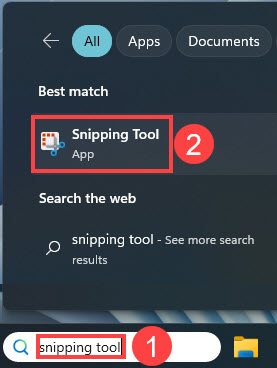
- Type snipping tool in the Windows search box, and select Snipping Tool from the results.
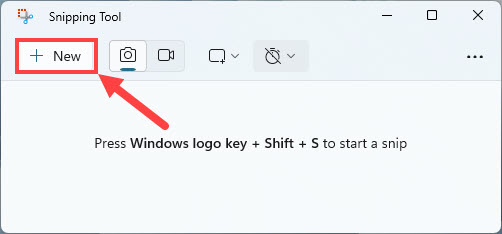
- At Snipping Tool, click New to capture a screenshot.
- Move the crosshair to where you want to start the screenshot, then drag to select an area.
Note: If you want to cancel, press Esc before you click.
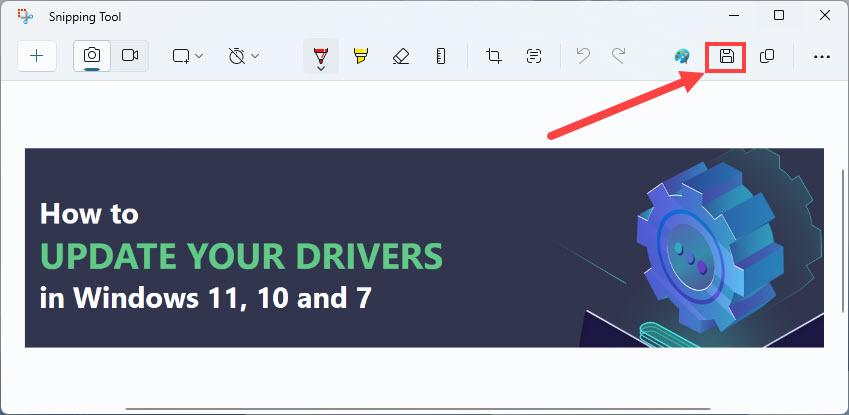
- Click the Save Snip icon to save the screenshot.
Note: You can save the picture in PNG or JPEG format.
Note that the screenshots above are captured from a Windows 11 operating system. If you are using Windows 10 or older versions, please be aware that the visual appearance of your screen may vary slightly.
Tip 3: Use Snagit to take, edit and share screenshots (Recommended)
There are many screenshot apps available on the Web. Among them, we recommend Snagit.
Snagit is a screenshot program with image editing and screen recording features. You can use it to take a screenshot quickly, you can edit the screenshot easily with its advanced image editing tools, and you can even capture videos.
Here’s how to screenshot with Snagit:
- Download and install Snagit.
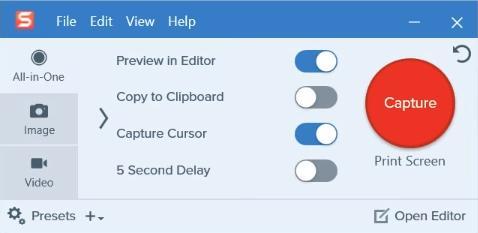
- Run and sign in to the program, then click the Capture button.
- Move the pointer to where you want to start the screenshot, then drag to select an area. Or hover over a window or area to auto-select it, then left-click your mouse to capture the area.
- Click the camera icon on the toolbar to save your screenshot as an image.

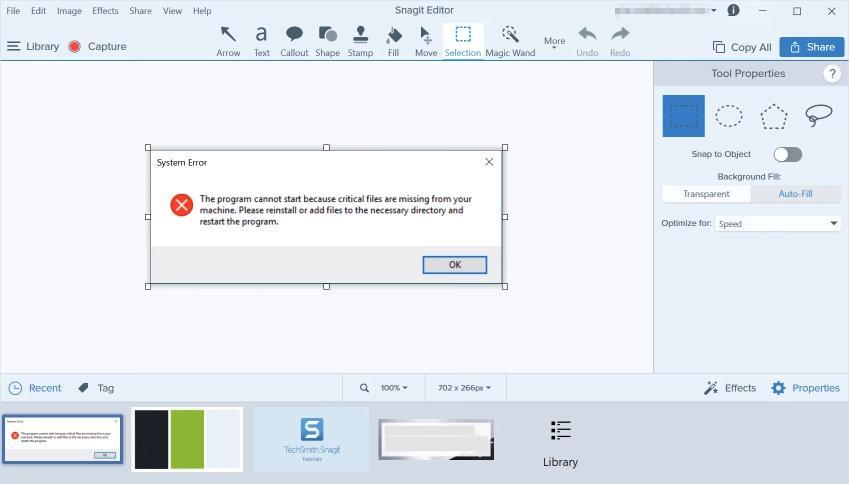
- Edit your image in the pop-up Snagit Editor window. You can add shapes, text, effects, or make adjustments to your image.
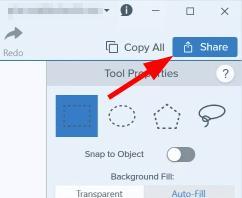
- Save your image or click the Share button in the upper right corner to share the image.
Note: You can only try the full version of Snagit for 15 days. You’ll need to purchase it when the free trial is over.
If you have any other suggestions, please feel free to leave a comment below.