


When your computer connects to a wireless network, it will save the settings and profile of that network. If you have altered the Pre-shared key (PSK) of your router accidentally when changing your Wi-Fi password, your PC may not delete the old profile and it starts giving you the incorrect PSK provided for network SSID error message.
Apart from a faulty network profile, you may also run into this problem when you’ve entered the wrong Wi-Fi password, or in some cases, when your network driver is corrupted. But no worries, you can fix it. Here’re 4 fixes to try.
Table of contents
You may not have to try them all; just work your way down the list until you find the one that works for you.
Fix 1: Delete the existing wireless network profile
Your computer will save the settings and profile of the wireless network you’ve previously connected to. The saved profile and settings may remain unchanged after the wireless network password or the router password is altered. In this case, you’re likely to get the incorrect PSK provided for network SSID error message.
To fix it, try removing wireless network profiles on your computer. Here is how to do it:
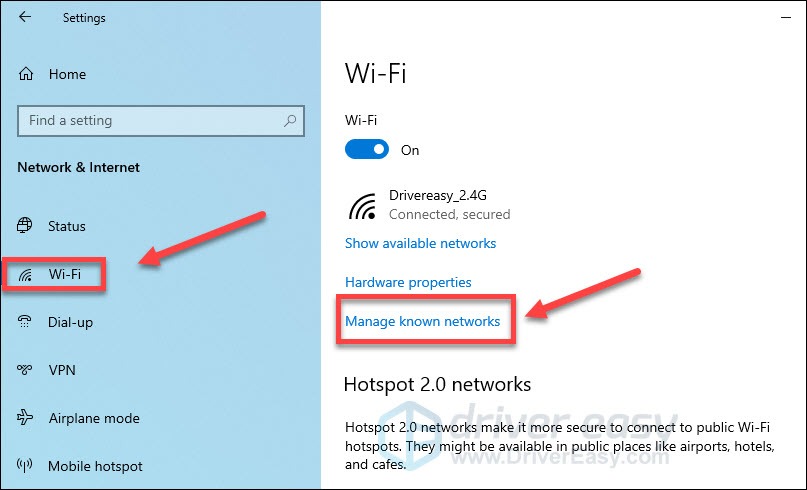
1) Right-click the Network icon in the notification area and select Open Network & Internet settings.

2) Click the Wi-Fi tab, then click Manage known networks.
3) Click the network you want to delete, then click Forget. ( The wireless network profile will be deleted then. )
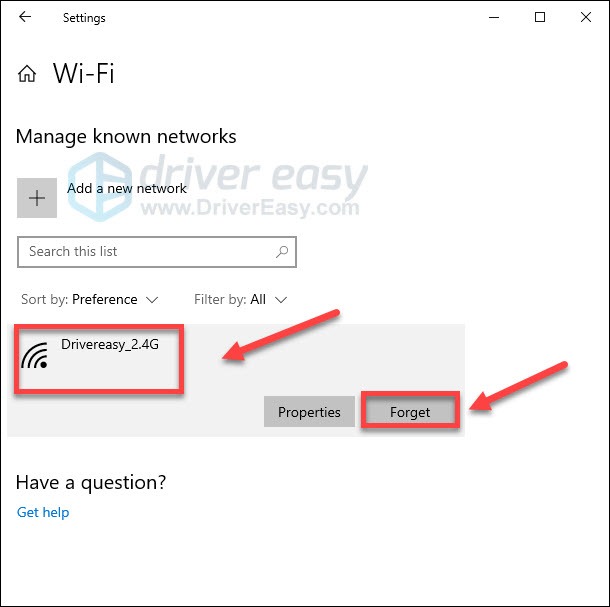
4) Try connecting to the network again to test your issue.
If your problem persists, move on and try the next fix,
Fix 2: Restart your modem and router
If your router and modem have been working non-stop for a long time, it may get overheated and cause errors. To see if that’s the core issue, turn off your modem and router, and wait for 3 minutes to cool them off. Then, turn your modem and router back on.
This will refresh the Internet connection, and, hopefully, fix the issue. If this didn’t work, read on and try the fix below.
Fix 3: Manually connect to the wireless network
If you’ve deleted your wireless profile and still get the Incorrect PSK provided for network SSID error, try manually connecting to the wireless network and create a new wireless network profile on your PC.
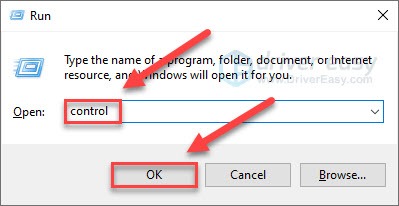
1) On your keyboard, press the Windows logo key and R.
2) Type control, then click OK.
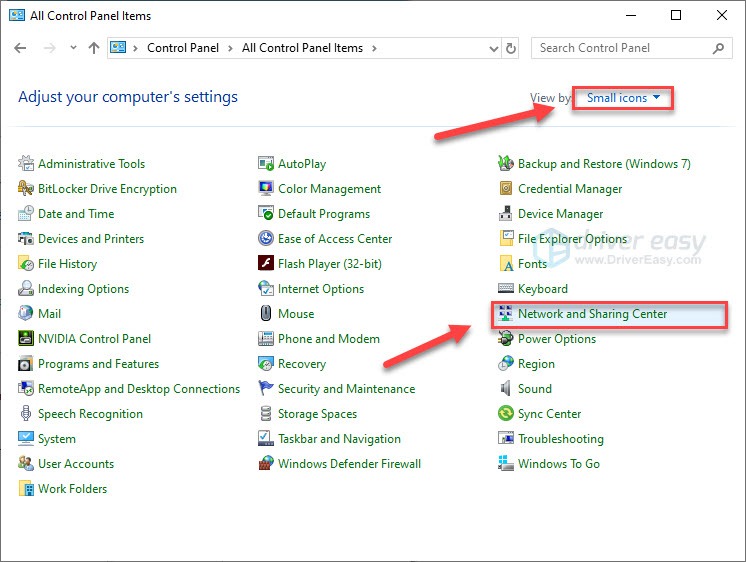
3) Under View by, select Small icons; then click Network and Sharing Center.
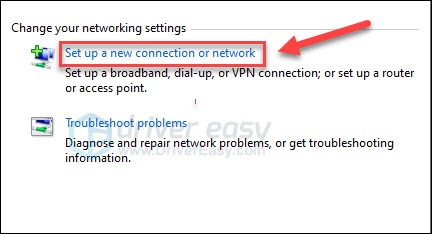
4) Click Set up a new connection or network.
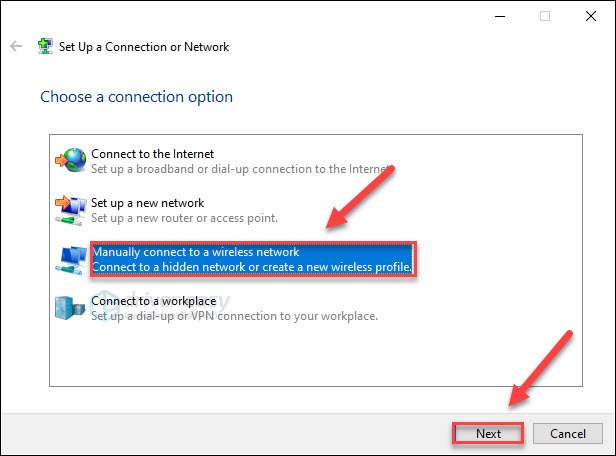
5) Click Manually connect to a wireless network, then click Next.
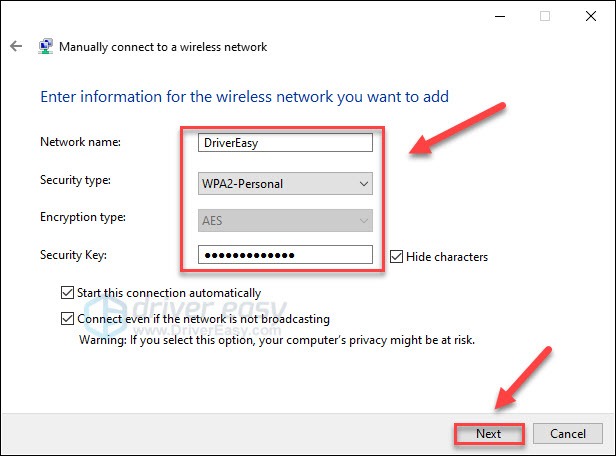
6) Enter the name and password of your wireless network. Then set the Security Type to WPA2-Personal and click Next.
7) Click Use the existing network.

8) Try opening a web page to test your issue.
If the issue continues to occur, then move on and try Fix 4, below.
Fix 4: Update your network driver
This error happens when your network driver becomes corrupted or outdated. If that’s the problem, updating your network driver should fix it.
Since your computer can’t connect to WiFi, you can try the Ethernet connection or download the driver into a USB drive on another computer that has Internet access.
There are 2 ways you can update your network driver:
Update your network driver manually
If you wish to update your network driver manually, follow the instructions below:
1) Identify the manufacturer of your wireless adapter.
2) Visit the manufacturer website of your network adapter on another PC that has Internet access, and search for the most recent correct driver.
3) Find the driver corresponding with your specific flavor of Windows version (for example, Windows 32 bit) and download the driver manually.
4) Copy the downloaded file and paste it to the PC that you’re having issues with.
5) Double-click on the downloaded file and follow the on-screen instructions to install the driver.
Update your driver with Driver Easy
If you don’t have the time, patience or computer skills to update the network driver manually, we recommend that you use Driver Easy offline mode to do it.
1) Download and install Driver Easy on both computers.
2) On the computer you’re having issues with, run Driver Easy and click Tools.

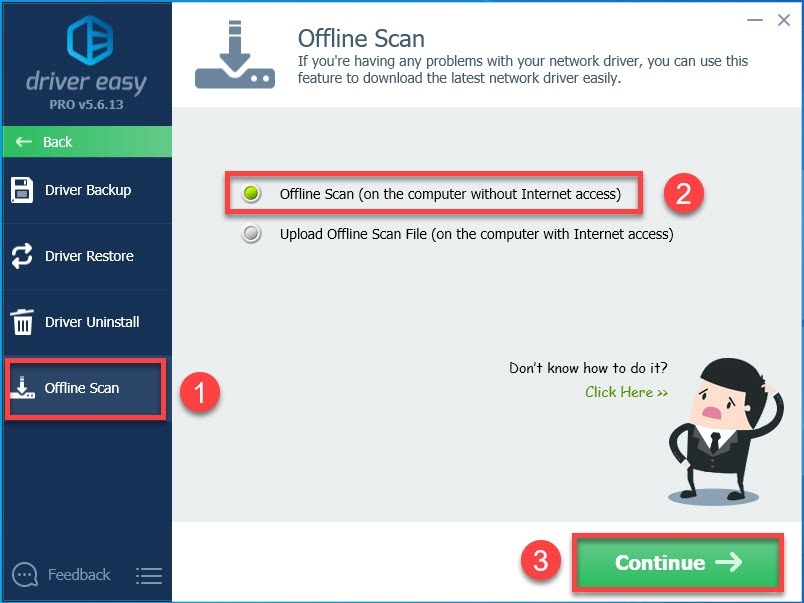
3) Click Offline Scan in the left panel, select Offline Scan (on the computer without internet access) and click Continue.
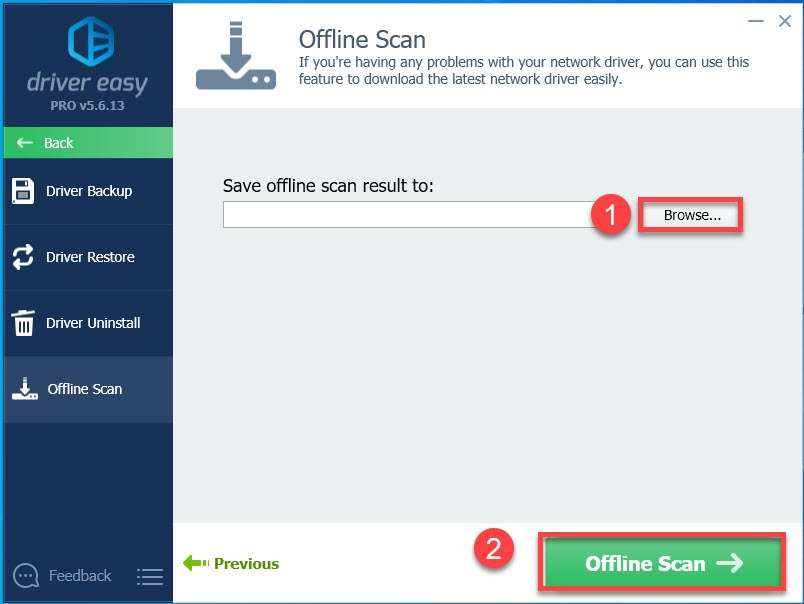
4) Click Browse to choose where you want to save your offline scan result. Then click the Offline Scan button.
5) Click OK.
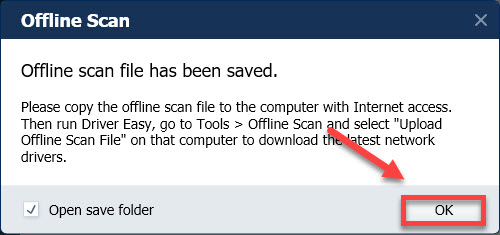
6) Copy the offline scan file and paste it to another computer that has Internet access.
7) Run Driver Easy and click Tools on the computer that has Internet access.

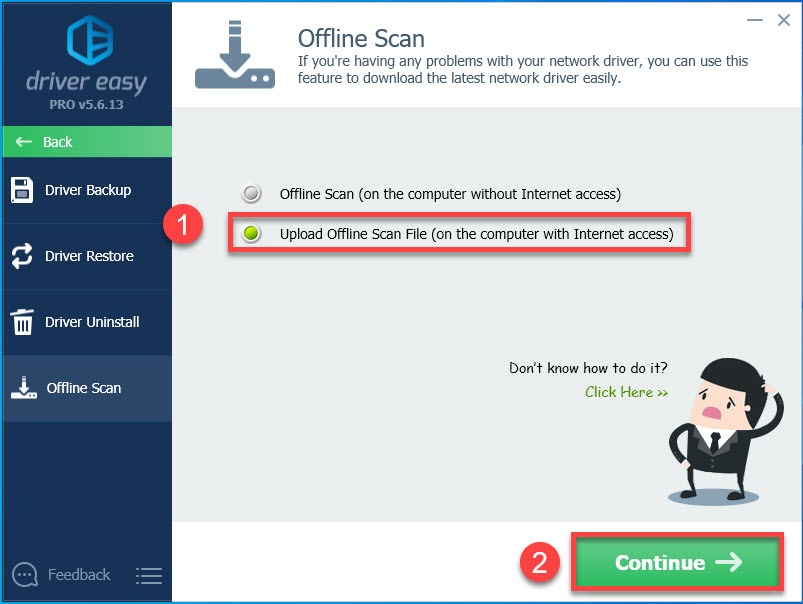
8) Click Offline Scan in the left panel, select Upload Offline Scan File (on the computer with Internet access) and click Continue.
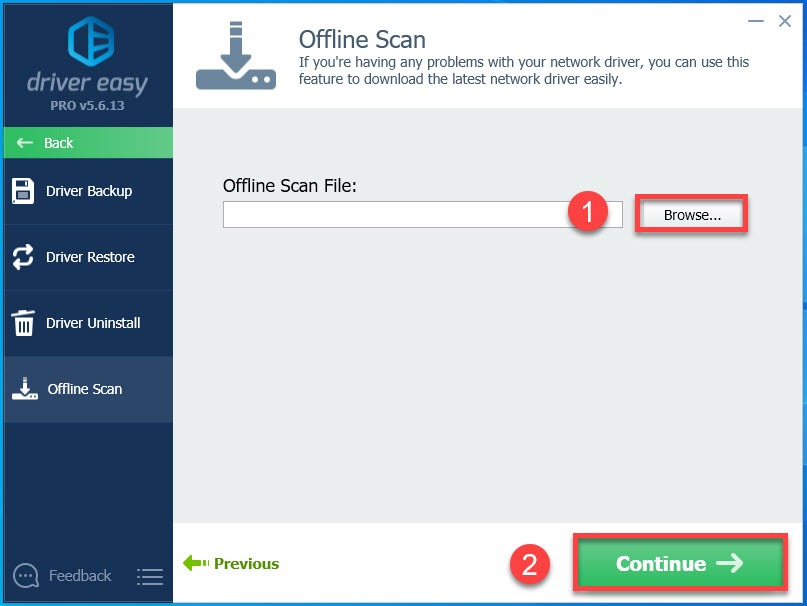
9) Click Browse to locate your offline scan file (the one you copy and paste in Step 6). Once you find it, double-click it. Then click Continue.
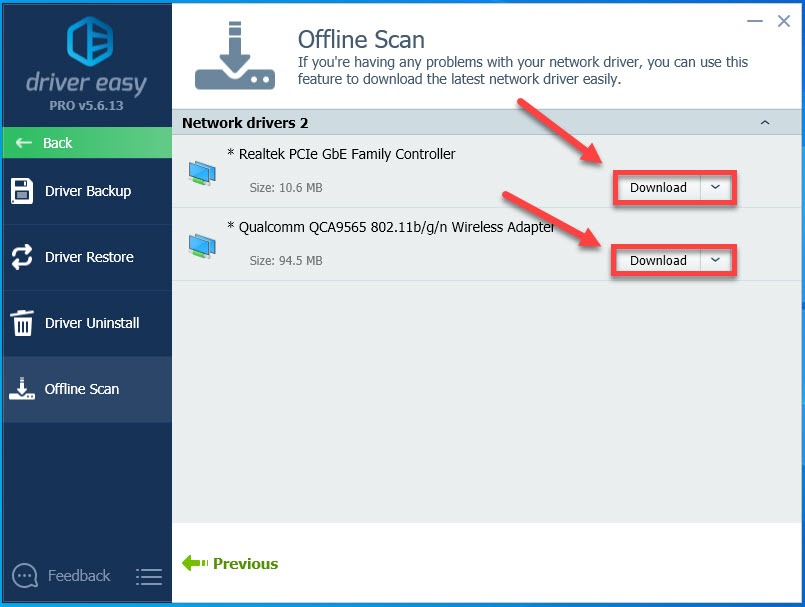
10) Click Download next to the network driver, then select the folder where you want to save the file and click OK.
11) Wait for the download process to complete.
12) Copy the network driver you download, and paste it to the computer without Internet access.
13) Double-click on the downloaded file and follow the on-screen instructions to install the driver.
Once you update your network driver, reconnect your computer to your wireless network to test your issue.
Hopefully, one of the solutions here worked for you. Feel free to leave a comment below if you have any questions or suggestions, or if you have a better idea on how to fix this issue.