


You see “No scanners were detected” error message, or your scanner is not detected by your computer when trying to use your scanner from the computer? Don’t worry. You can fix the scanner not detected issue. Many users have resolved their problem with the solutions in this post.
How do I fix No scanners were detected?
- Check your scanner setup routine
- Update the driver for your scanner
- Reconfigure the scanner setup
- Troubleshoot the hardware issue
Why does No scanners were detected happen in my computer?
Generally, the hardware device should start working after turning on. But if your Windows can’t detect your scanner, it’s possibly because of the scanner itself, the cable or the software problem in your computer.
Try the following methods to troubleshoot the problem and solve No scanners were detected issue step by step.
Fix 1: Check your scanner setup routine
As mentioned above, one of the possible causes is the scanner itself, especially when your printer works but the scanner doesn’t. Try the steps below to troubleshoot.
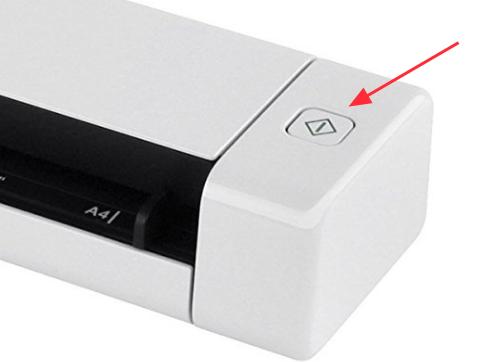
Step 1: Check if the scanner is powered on
If the scanner is turned off, your computer cannot connect to it, so it fails to be detected.
Check if you plug the scanner to the power source, and check the switch button to power on the scanner.
Step 2: Check the cables are working properly
Sometimes the cable issue can also cause the problem. Make sure that the cables are working properly, and plugged correctly and firmly at both ends. If possible, you can try another cable to plug in your scanner to see if it’s the cables faulty.
If it’s a wireless printer or scanner, check the wireless connection properly.
Step 3: Check the USB port
The USB faulty can cause the scanners not detected by your computer, because it can’t be connect due to the USB port problem. So you can unplug your scanner, plug it into another USB port to have a try.
Step 4: Check the network connection
Connecting to the scanner requires the Internet connection, so make sure that you have a good Internet connection during the process.
In addition, some scanners don’t support scanning over the network. You can check with the manufacturer, or check the product manual to see if your scanner supports the network scan.
If unfortunately, it’s not capable of the network scan, you can’t directly use the scanner from your computer over the Internet. If it supports the network scan, and your computer doesn’t detect it, stick around and check the methods below.
Fix 2: Update the driver for your scanner
The missing or outdated device driver probably leads to the no scanners detected issue as the communication process breaks down and the device doesn’t function properly . So you can try to update the scanner driver in your computer to solve the no scanners detected issue. There are two ways to update drivers for your scanner:
You can manually download the scanner driver from the manufacturer and install it in your computer. This requires time and computer skills. If you don’t have time or patience, you can do it automatically with Driver Easy.
Driver Easy will automatically recognize your system and find the correct drivers for it. You don’t need to know exactly what system your computer is running, you don’t need to risk downloading and installing the wrong driver, and you don’t need to worry about making a mistake when installing.
You can download and install your drivers by using either Free or Pro version of Driver Easy. But with the Pro version it takes only 2 clicks (and you get full support and a 30-day money back guarantee):
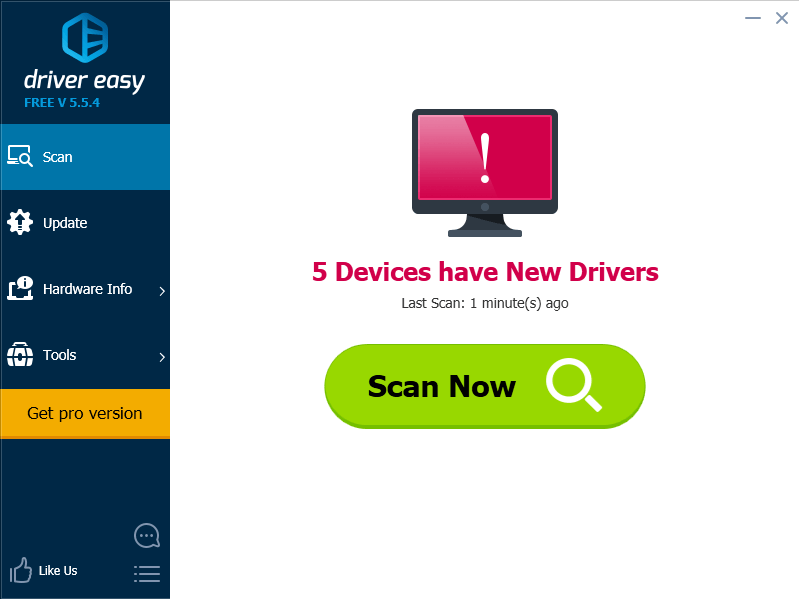
1) Download and install Driver Easy.
2) Run Driver Easy and click Scan Now. Driver Easy will then scan your computer and detect any problem drivers.
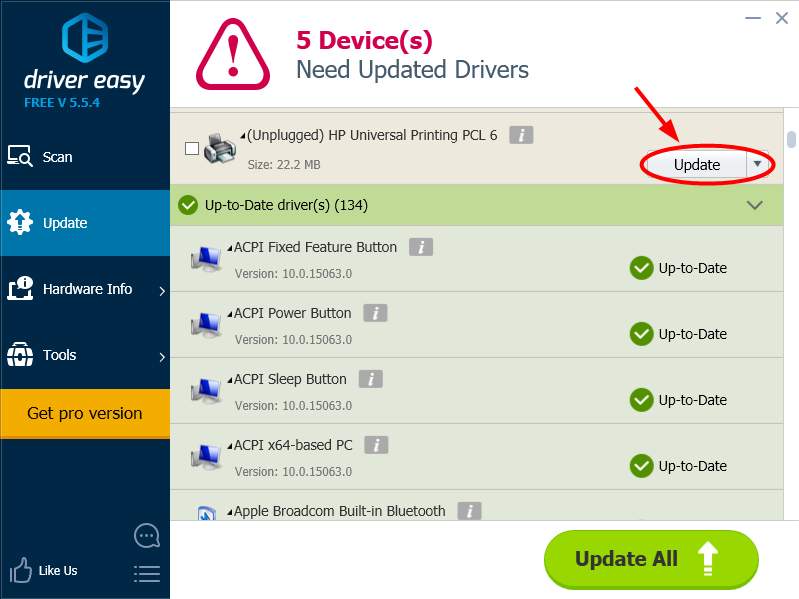
3) Click the Update button next to your printer/scanner to download the latest and correct driver for this device (you can do this with the FREE version), then install it in your computer.
Or you can also click the Update All button at the bottom right to automatically update all outdated or missing drivers on your computer (this requires the Pro version – you will be prompted to upgrade when you click on Update All).
4) Restart your computer, then check to see if your scanner can be detected.
Fix 3: Reconfigure the scanner setup
check for sure that you have configured it correctly by the manual. If the problem still persists, you can try to add the scanner as a new device in your Windows. Follow the instructions:
1) Plug and connect your scanner properly. Make sure it’s powered on during the process.
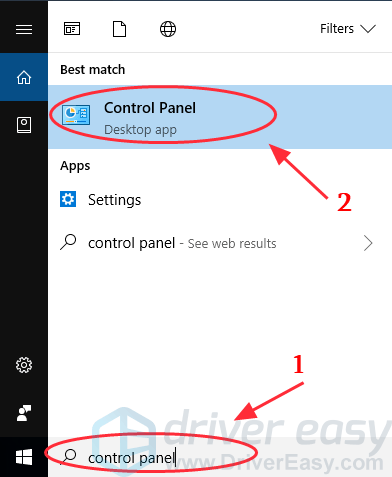
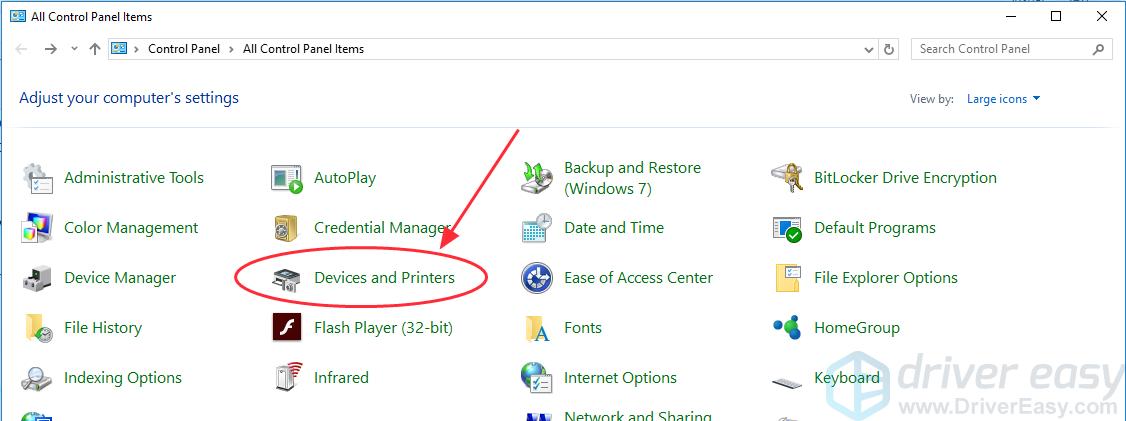
2) Type Control Panel in the search box at the bottom left corner, and click Control Panel to open it.
3) Click Devices and Printers.
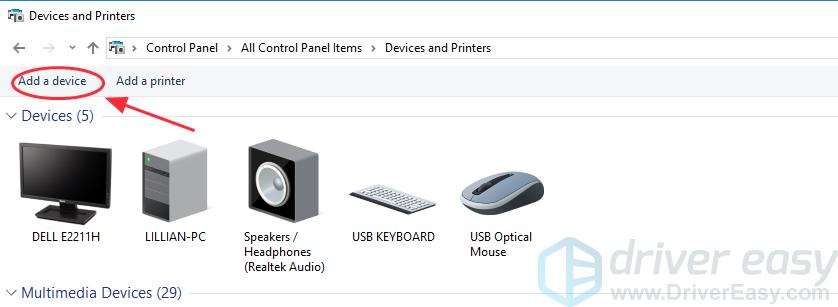
4) Click Add a device on the upper left.
5) You Windows will start searching a printer or scanner for you. And you’ll see the devices listed in the box.
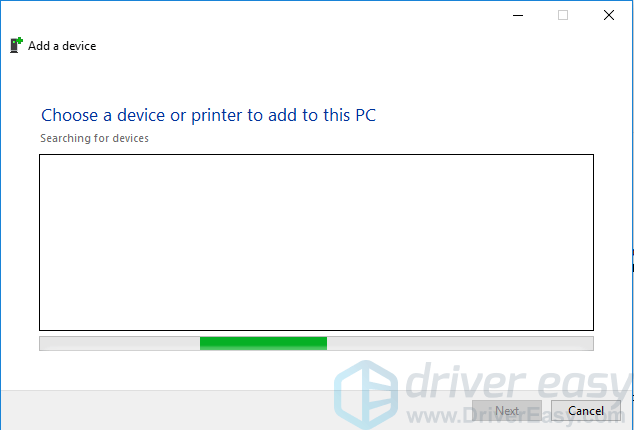
6) Select the printer or scanner you are trying to connect, and click Next.
7) Your Windows starts to install the printer or scanner for you, and wait for the process to complete.
8) Re-open the Windows Fax & Scan app or your printer/scanner software, and try to connect to your scanner and scan again to see if it works.
Fix 4: Troubleshoot the hardware issue
You can use the Troubleshooting tool built-in Windows to scan the issue and fix it. To do so, follow the steps below:
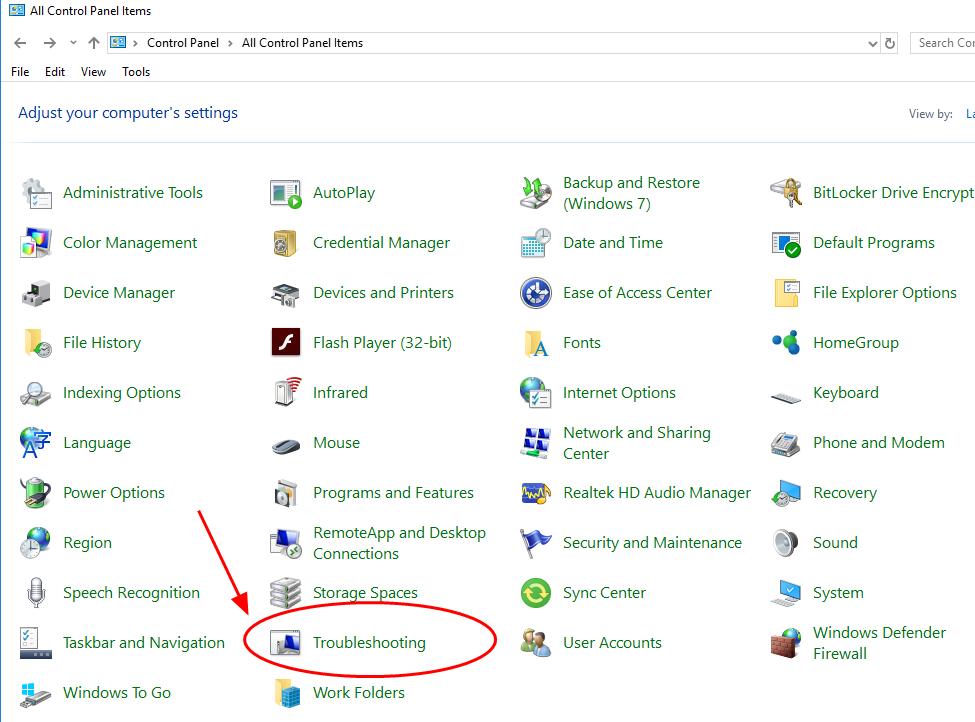
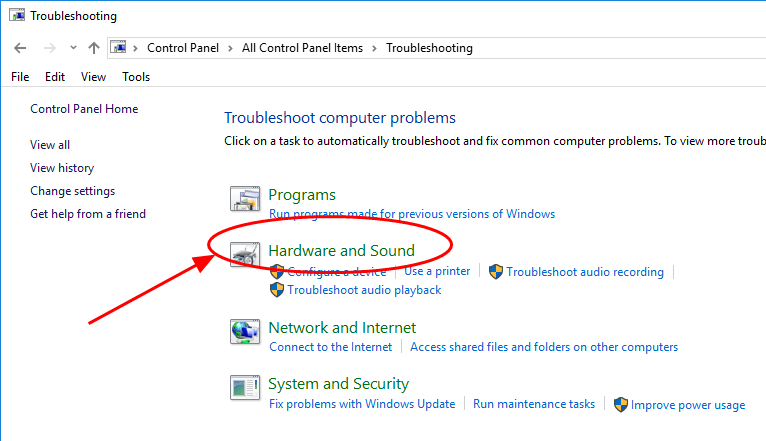
1) Open Control Panel in your computer, view by small icons or large icons.
2) Click Troubleshooting.
3) Click Hardware and Sound.
4) Click Hardware and Device in the Device section.
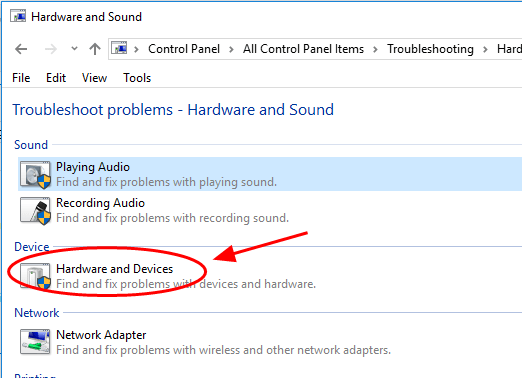
5) Click Next to start troubleshooting.

6) Follow the on-screen wizard to finish.
7) Check if your scanner is detected and works on your computer.
There are the 3 effective methods to solve No scanners were detected. Feel free to comment below and share with us your thoughts.