




Seeing a Blue Screen of Death (BSOD) pointing to ntoskrnl.exe can be alarming, but it’s one of the most common Windows errors – and completely fixable.
ntoskrnl.exe is a core Windows kernel file, and a BSOD can point to it when problems like a faulty driver, corrupted system files, unstable BIOS settings, or memory issues cause Windows to crash. Below, we’ll show you how to fix this error, step by step.
4 fixes for the ntoskrnl.exe blue screen
Here are 4 solutions you can try. Just work your way down the list until you find the solution that works for you.
- Update your device drivers
- Repair corrupted system files
- Reset overclocking and BIOS settings
- Check your memory for errors
What is ntoskrnl.exe?
Ntoskrnl.exe, short for Windows NT operating system kernel executable, is a core Windows system file. It handles essential operating-system functions, including memory management and other kernel-level operations.
Because ntoskrnl.exe is involved in many parts of Windows, a crash dump may identify it even when the underlying problem is elsewhere. For example, a faulty driver or unstable memory can cause an error that eventually results in a crash inside the Windows kernel.
1: Update your device drivers
Faulty, outdated, or incompatible drivers can cause Windows to crash. If you’ve recently updated Windows, installed new hardware, or started seeing BSODs after a driver change, updating or reinstalling the relevant drivers is a good place to start.
Pay particular attention to drivers for your graphics card, chipset, network adapter, storage controller, and other recently changed hardware.
There are two ways you can get the right drivers for your video card and monitor: manually or automatically.
Manual driver update – You can update your device drivers manually by going to the PC or device manufacturer’s website. Search for your computer or device model, and download the most recent correct driver for it. Be sure to choose only drivers that are compatible with your version of Windows.
Automatic driver update – If you don’t have the time, patience or computer skills to update your device drivers manually, you can, instead, do it automatically with Driver Easy. Driver Easy will automatically recognize your system and find the correct drivers for your hardware, and your version of Windows, and it will download and install them correctly. Here’s what you need to do:
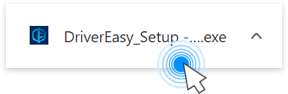
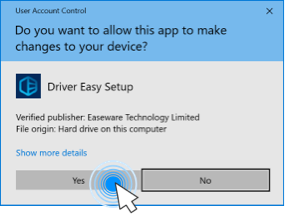
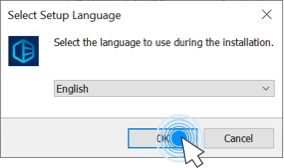
- Download and install Driver Easy.
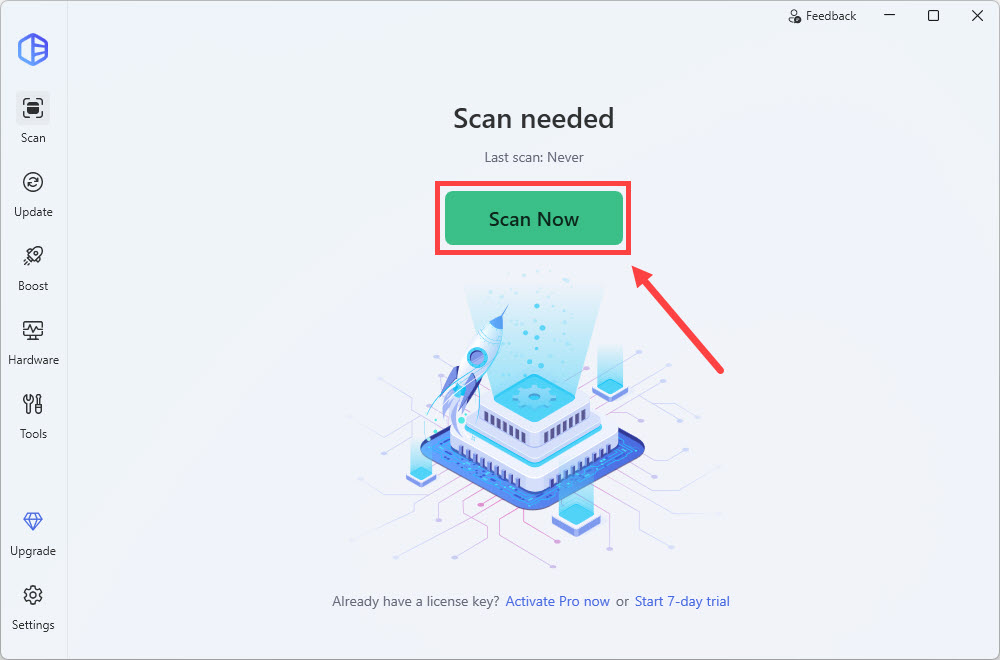
- Run Driver Easy and click the Scan Now button. Driver Easy will then scan your computer and detect any problem drivers.
- Click Activate & Update next to the flagged devices to update their drivers, or click Update All to automatically download and install the correct version of all the drivers that are missing or out of date on your system.
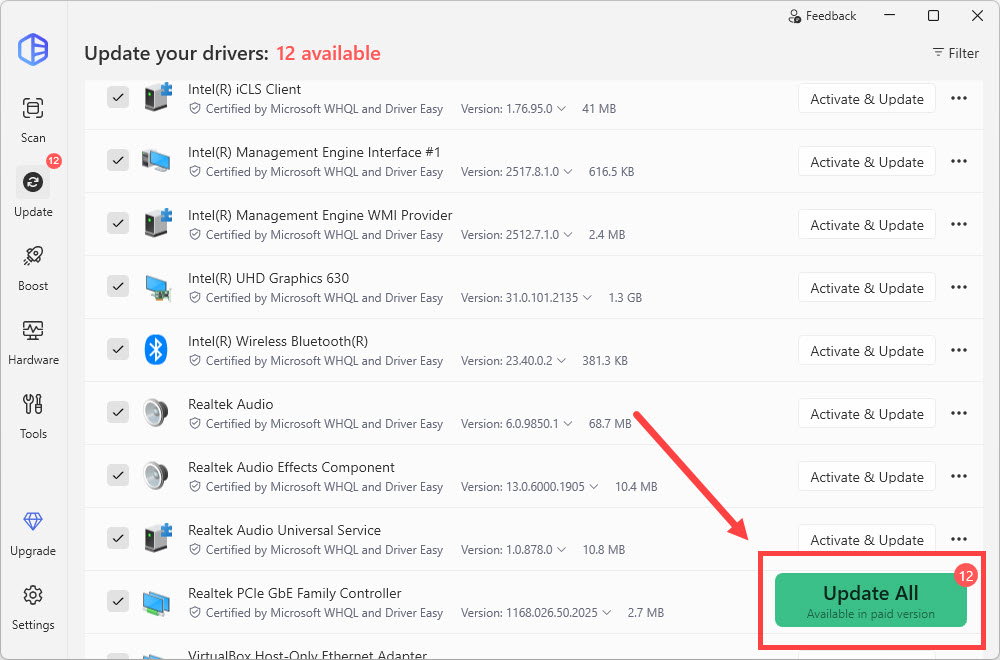
- Restart your computer for the changes to take effect.
You’ll be prompted to start a 7-day free trial or upgrade to Driver Easy Pro. Either option will automatically download and install the latest drivers for you. It also includes easy driver backup and rollback, advanced tools like Game Boost and System Clean, plus full technical support. If you go Pro now, you’ll get a 50% OFF discount!
If the ntoskrnl.exe blue screen of death error remains, please move on to the next fix.
2: Repair corrupted system files
Corrupted or missing Windows system files can cause Windows to malfunction and may contribute to BSODs. To see if this is the case, you should run a Windows repair. There are two built-in tools – DISM and System File Checker (SFC) for scanning and repairing Windows components and system files.
- On your keyboard, press the Windows logo key and type cmd into the search box. Then right-click on Command Prompt and click Run as administrator.
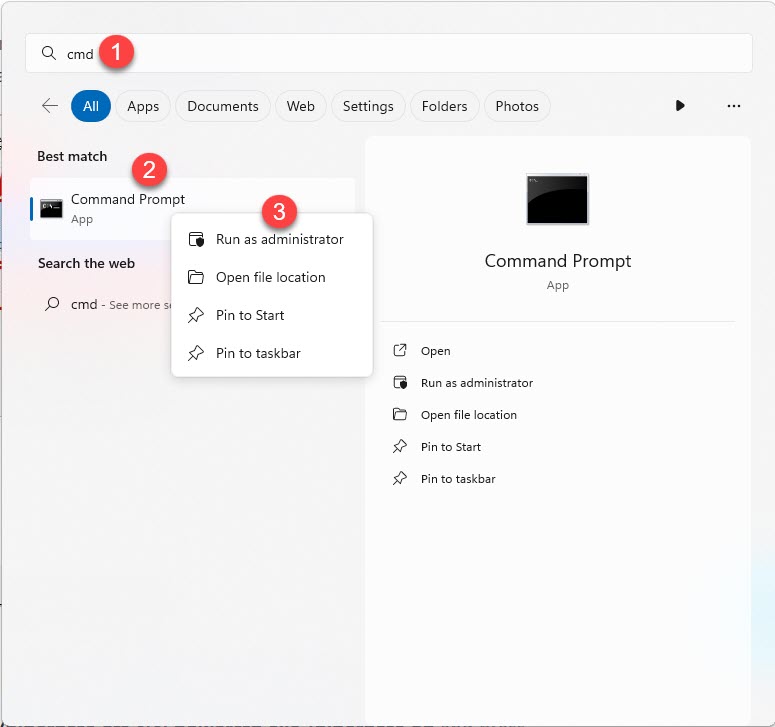
- Click Yes when prompted to confirm.
- In the Command Prompt window, copy and paste DISM.exe /Online /Cleanup-image /Restorehealth and press Enter.

- Wait for the process to complete. This may take several minutes.
- After DISM finishes, type sfc /scannow in the Command Prompt and press Enter.
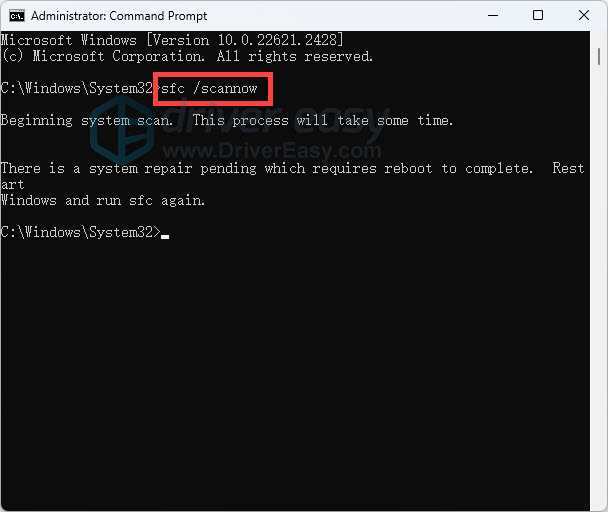
It’ll take some time for the SFC to replace the corrupted system files with new ones if it detects any. - Restart your computer for the changes to take effect.
- Check your computer to see if the ntoskrnl.exe BSOD problem has been fixed. If yes, then congrats! If the issue still persists, please move on to the next fix below.
3: Reset overclocking and BIOS settings
If you’ve overclocked your CPU, GPU, or RAM, or enabled a memory profile such as XMP or EXPO, unstable settings can contribute to BSODs.
As a troubleshooting step, return your BIOS/UEFI settings to their defaults. This can help determine whether an overclock or other firmware setting is contributing to the instability.
If not, use the steps below to clear the CMOS from the BIOS menu and restore your BIOS settings to factory defaults.
- Press and hold the power button for about 10 seconds or until your system completely shuts down.
- Power on the system. When the computer logo appears, immediately press F1, F2, F10, ESC, or Delete for desktops to enter the BIOS.
NOTE: The keys to press to boot into BIOS differ between computers depending on the manufacturer and model. Try to read what comes up on the initial load screen, as it will usually tell you the right key to press.
- Use the arrow keys to navigate and find options like Clear CMOS, Reset CMOS, or Load Setup Defaults. For instance, in my case, I go to Exit and find Load Setup Defaults.
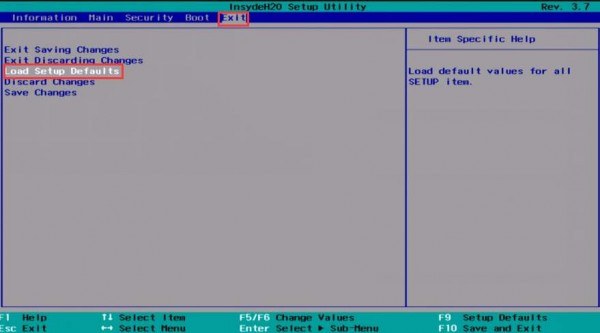
- When you see the option that allows you to reset your settings to default, save the change, and exit BIOS. Then restart your computer.
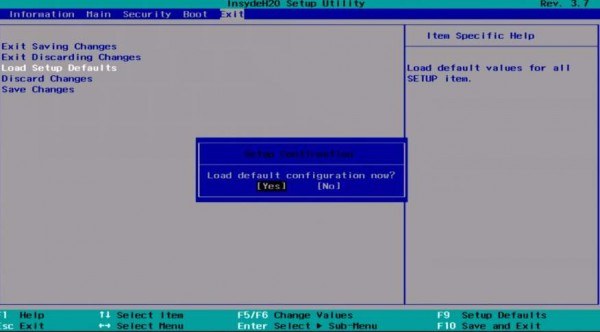
Again, the information shown on your computer may be different from ours, and you should change the settings according to the prompts on your screen. If you’re not sure how to complete a step, please go to the official support page for your computer’s manufacturer and ask for help. Or you can ask a question in the comments section below, and we’ll do our best to help.
4: Check your memory for errors
Faulty RAM or unstable memory settings can cause memory corruption and different types of BSODs, including crashes that appear to involve ntoskrnl.exe. You can use the Windows Memory Diagnostic tool to check if your RAM is faulty.
Note: If you’re overclocking any apps or programs, please shut them down first before you run the tests. You will need to reboot your computer to perform the test. During the test, you won’t be able to use your computer, so make sure to save anything important before starting the test.
- Type Windows Memory Diagnostic into the search box on your taskbar, and then press Enter.
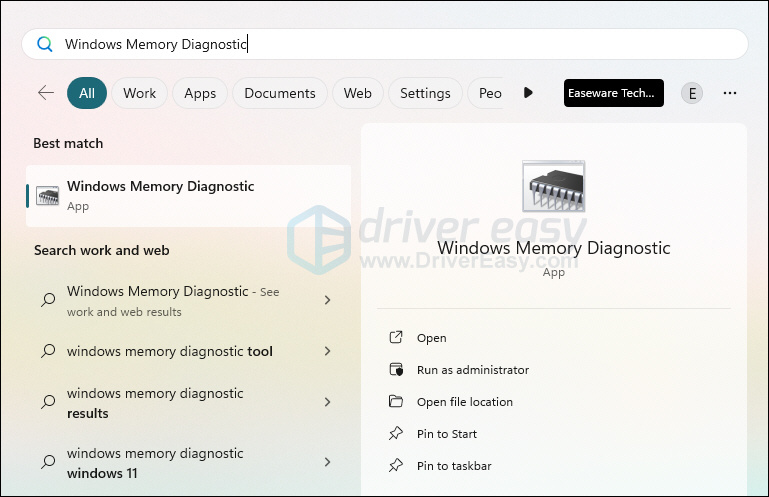
- Click Restart now and check for problems(recommended). Be sure to save your work first because your computer will restart immediately.
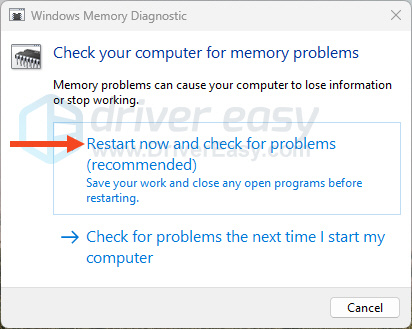
- Windows will run the diagnosis automatically, which can take a few minutes. When it’s finished, your PC will reboot.
Don’t worry if your test takes some time to finish. That’s normal. You’ll see the test results after signing back into Windows.
If you don’t see them, you can check this way. Open Event Viewer by searching for it in the Windows search box, check Windows Logs > System, and look for an event from MemoryDiagnostics-Results.
If the test reports memory errors, the problem may be related to faulty RAM or unstable memory settings. If you have multiple RAM modules, you may need to test them individually or use a more thorough memory-testing tool to identify the problematic component.
That’s it for the post on how to fix the ntoskrnl.exe blue screen error on Windows. If you have any other suggestions, please feel free to share them with us by leaving a comment below.
