


PC Health Check is a lightweight Microsoft application that provides info on the health of your Windows device. While it can display some basic PC health info and help users in performance troubleshooting, the app’s more major feature is the ability of Windows 11 eligibility checking.
However, when many Windows users try to use this app to see if their computers meet the requirements for upgrading to Windows 11, they just find that the app isn’t working at all. Problems with the PC health check app include it getting stuck during the installation process, showing up in the taskbar or task manager but no windows popping up, and so on. If you’re having similar issues, continue reading and check out the fixes offered in this post!
Fixes to try:
You don’t have to try them all, just work your way down the list until you find the one that does the trick!
4. Reinstall the PC Health Check app
Bonus tip: How to keep the hardware in your computer in top condition!
Fix 1 – Repair the app
The quickest and easiest technique to troubleshoot any app crash or not-working issue is to simply repair it with the built-in Windows program. Before attempting anything more complicated, you should always try this fix first. Here’s how:
- On your keyboard, press the Windows + R keys at the same time to open the Run box.
- Type or paste appwiz.cpl into the box and then click OK.

- In Programs and Features, locate the Windows PC Health Check. Right-click on it and select Repair.

- After it finishes repairing, relaunch the app and see if it’s now working.
If this fix doesn’t work for you, try the following below.
Fix 2 – Repair system files
The PC Health Check app not working/crashes problem may also be triggered by missing, corrupted, or damaged system files on your PC. If you feel this is your case, we recommend that you try the following to scan and repair system files.
SFC (System File Checker) is a Windows local utility that can help you identify computer problems and repair corrupted system files. To run the SFC scan, follow these steps:
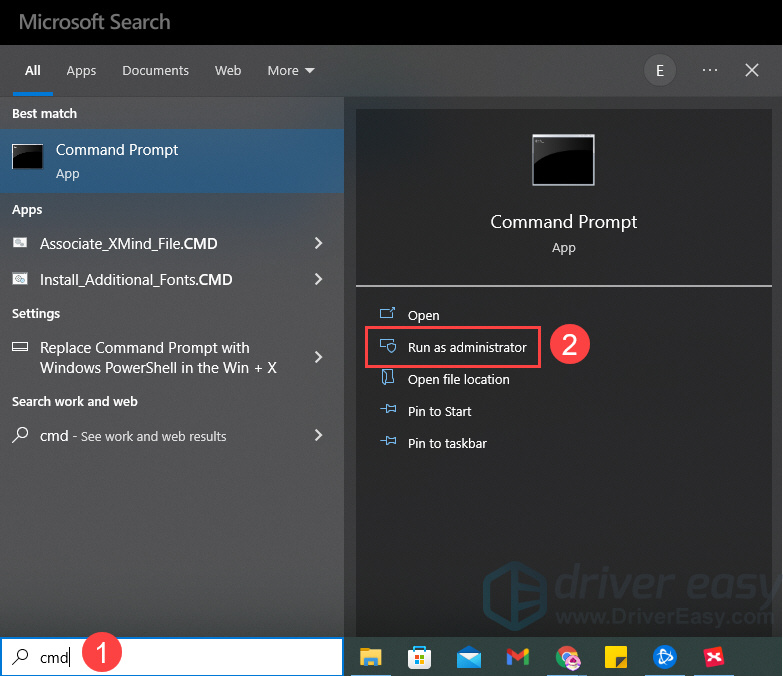
- Type cmd in the search box on the taskbar and then select Run as administrator.
- In the command prompt window, type or paste sfc /scannow and hit Enter.
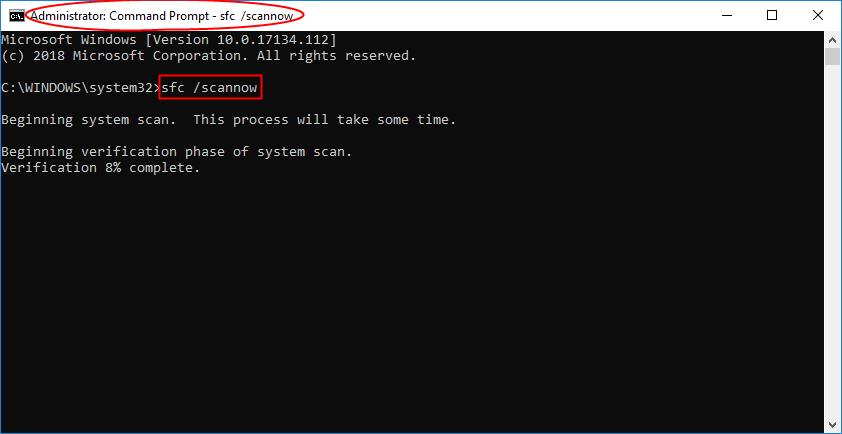
- Wait while SFC scans for corrupted system files and replaces them with new ones if any are found.
- Restart your PC and check if your problem can be fixed.
Fix 3 – Perform a clean boot
Some of the programs or software installed on your PC may conflict with the PC Health Check app and prevent it from opening properly. In this case, you can perform a clean boot to help you start Windows with the minimum sets of system services and programs. By doing so, you can exclude any conflicting software that could be causing the PC Health Check app to stop working or crash. Here’s how it’s done:
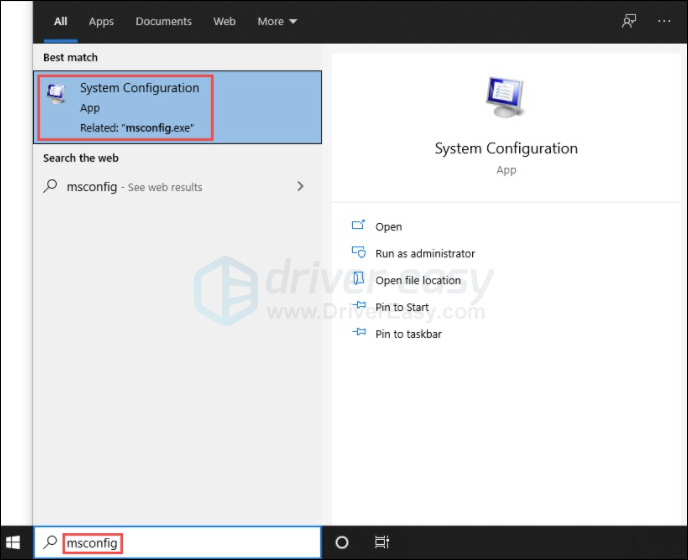
- Type or paste msconfig in the search box on the taskbar, then click System Configuration.
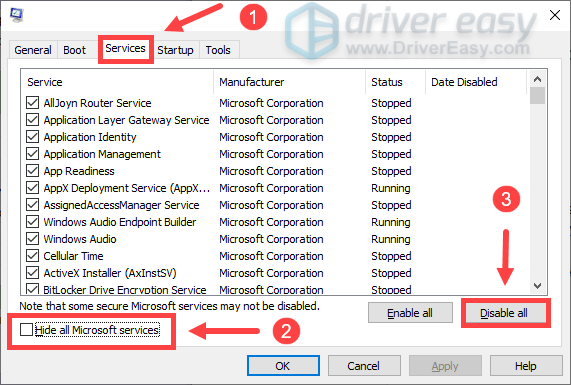
- Click on the Services tab. Tick the box next to Hide all Microsoft services and then click Disable all.
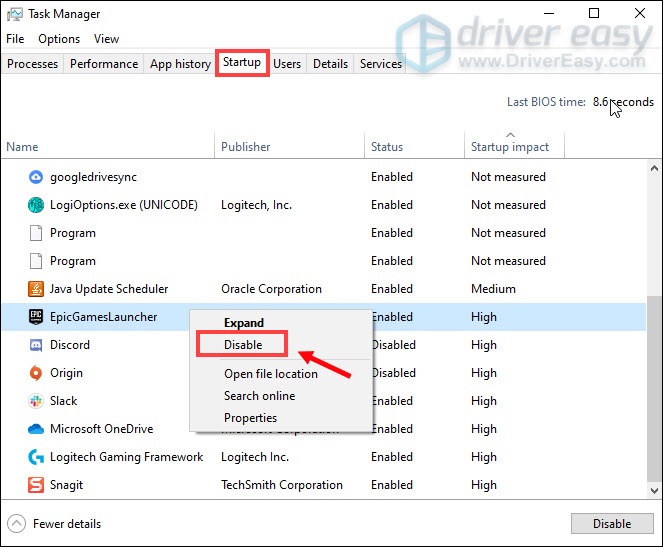
- Click on the Startup tab and click Open Task Manager.

- Under the Startup tab, right-click the programs and select Disable one at a time.
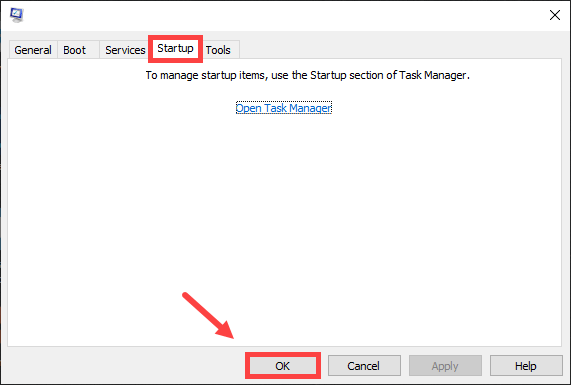
- Close the Task Manager and go back to the System Configuration.
- Click OK to save the changes you just made.
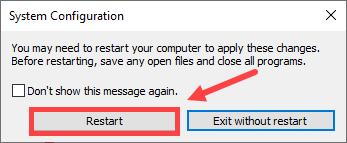
- Click Restart to restart your PC.
Relaunch PC Health Check after your PC restarts. Check to see if it can be opened and work normally.
If so, you can now use this app to see whether your computer is ready for Windows 11. If not, check out the next fix below.
Fix 4 – Reinstall the PC Health Check app
The final fix is to restart the whole installation process. This is also an effective way to solve the app not working trouble, particularly if you were struck in the installation. To reinstall the app is quite easy:
- Refer to steps 1 – 2 in the fix 1 to open Programs and Features.
- In Programs and Features, right-click on the Windows PC Health Check and then select Uninstall.

- Click Yes in the pop-up window.

- Download and install the latest version of Windows PC Health Check.

Now check if you can start the app correctly!
How to check for Windows 11 Compatibility
If the problem is solved and you can now access the PC Health Check app, it’s time to use it to check whether your computer is ready to upgrade to Windows 11. Here’s how:
- In the Windows PC Health Check app, click Check now.
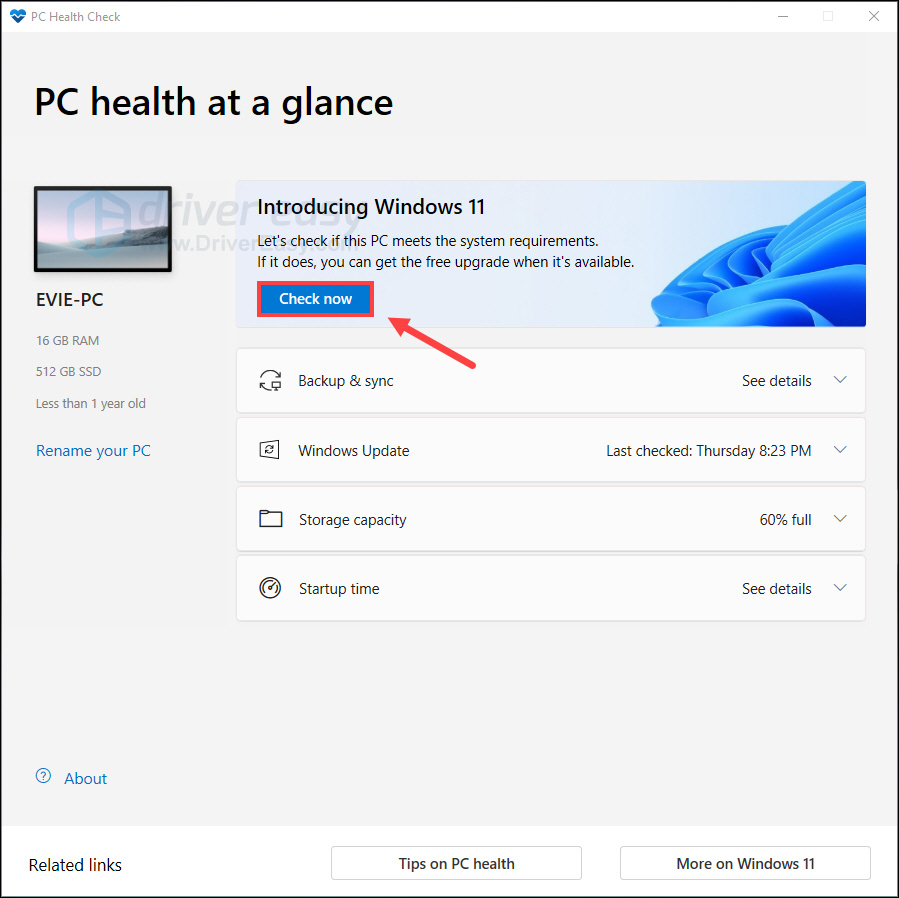
- A message box will pop up right away indicating whether your PC meets the Windows 11 requirements.
If you received the message below, congratulations! You can now proceed to upgrade your PC to Windows 11 and explore all the new features.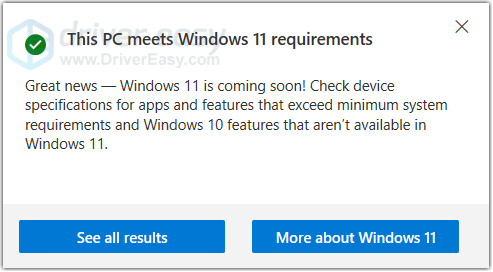
If your computer doesn’t meet the Windows 11 requirements, you can check to see which part of the hardware requirements your PC is lacking.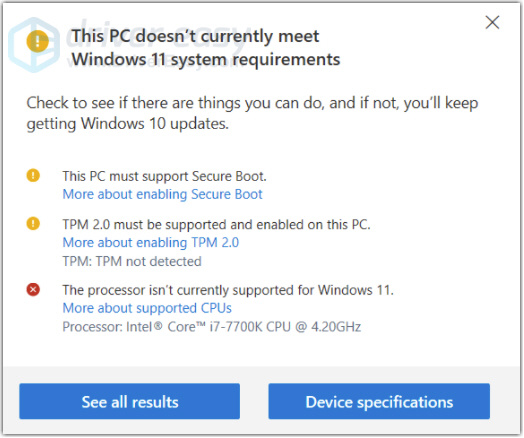
Bonus tip: How to keep the hardware in your computer in top condition
Updating drivers improves the stability of your hardware devices, whether it is a graphics card, CPU cooler or processor. If you want to keep your computer in tip-top shape and avoid various errors, you should keep all your device drivers up to date.
There are two ways to update your drivers: manually and automatically.
Update your drivers manually — you can update your drivers manually by going to the hardware manufacturer’s website and searching for the latest driver. But if you take this approach, be sure to choose the driver that’s compatible with the exact model number of your hardware, and your version of Windows.
Or
Update your drivers automatically — If you don’t have the time, patience or computer skills to update all your drivers manually, you can do it automatically with Driver Easy. You don’t need to know exactly what system your computer is running, you don’t need to risk downloading and installing the wrong driver, and you don’t need to worry about making a mistake when installing. Driver Easy handles it all.
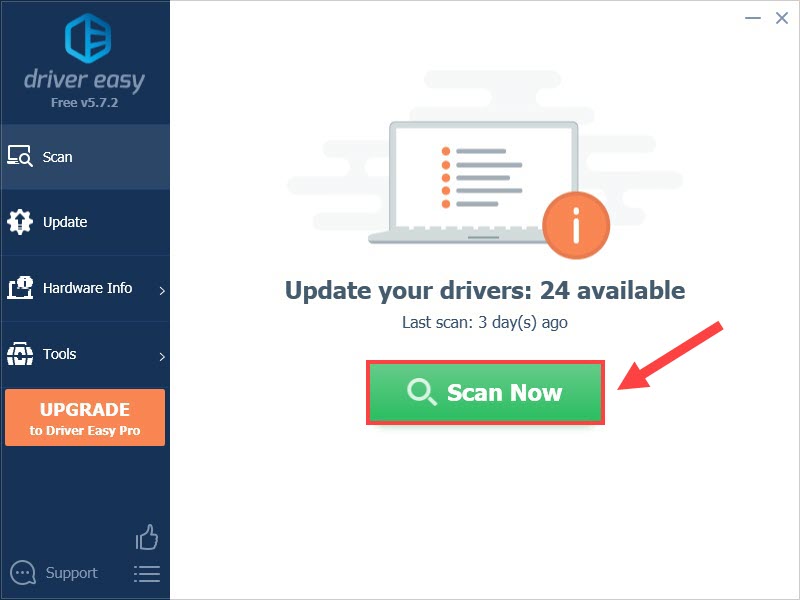
- Download and install Driver Easy.
- Run Driver Easy and click Scan Now. Driver Easy will then scan your computer and detect any problem drivers.
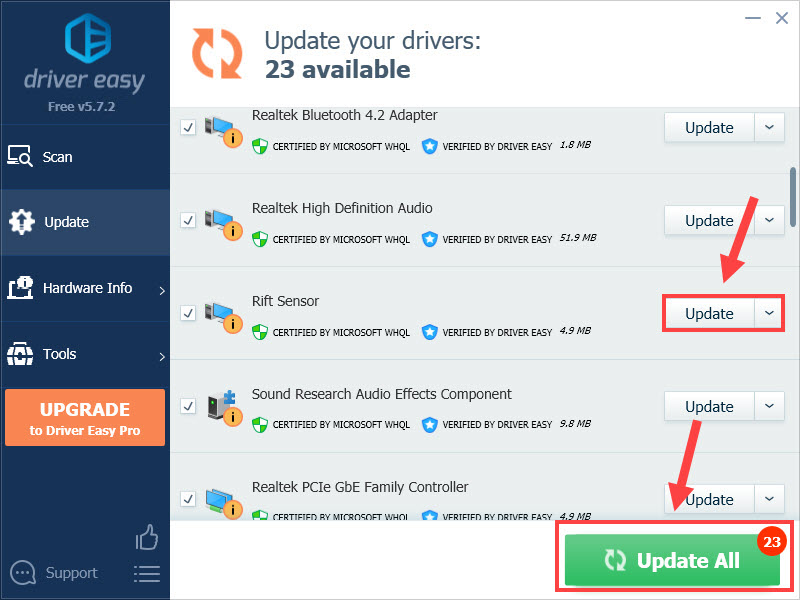
- Click Update next to any flagged devices to automatically download the correct version of their drivers, then you can install them manually. Or click Update All to automatically download and install them all automatically. (This requires the Pro version – you’ll be prompted to upgrade when you click Update All. You get full support and a 30-day money-back guarantee.)
If you need assistance, please contact Driver Easy’s support team at support@drivereasy.com.
Hopefully, you found this post helpful. If you have any other questions or thoughts, please feel free to leave a comment below. Thanks for reading!