


When you are playing PS4 games, you may have problems chatting on line with other people in the party chat. And you find the PS4 NAT Type Failed when you are testing the Internet connection. Don’t worry! There are fixes to the PS4 NAT Type failed problem.
This article introduces 4 methods to solve the PS4 NAT type failed issue. Try the following methods. You don’t need to try them all; just work your way through until your problem is solved.
Method 1: Manually configure the PS4 network settings
Method 2: Enable UPnP for your router
Method 3: Make your PS4 the DMZ server
Method 4: Forward Port for your PS4 network
What is PS4 NAT type?
NAT stands for Network Address Translation, which represents the ability to translate a public IP address to a private IP address, and vice versa. In PS4 games, it tells the ease or difficulty of connecting to other PS4 systems, especially when you are using the communication features, like the party chat.
There are 3 types of NAT in your PS4:
Type 1 (Open): The system is directly connected to the Internet (no router or firewall), and you should have no problems connecting to other PS4 systems.
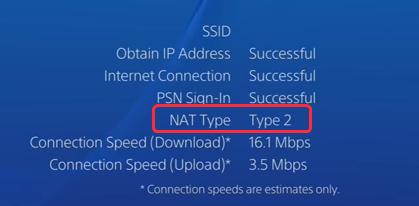
Type 2 (Moderate): The system is connected through a router properly, and generally you won’t have problems.
Type 3 (Strict): The system is connected through a router without open ports or DMZ setup, and you may have problems related with the connection or voice chat.
The NAT type failed normally because of the network issues, such as the incorrect network settings or the network firewall problems. Changing NAT Type can be an effective method to improve your PS4 network status. At present, you can’t manage the NAT type status directly by your PS4 settings, and you need to change the NAT type by the router settings.
Method 1: Manually configure the PS4 network settings
The PS4 NAT type failed issue can be caused by the incorrect network setting in your PS4, so you can check if your PS4 IP address changed or not. Furthermore, you can manually configure the network settings in your PS4 to make it correct.
How to check your PS4 IP address?
If you don’t know your PS4 IP address, and you want to check your PS4 IP address, follow this steps:
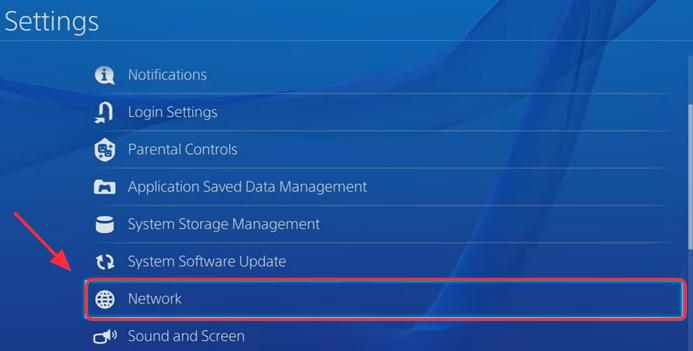
1) Go to PS4 Settings > Network.
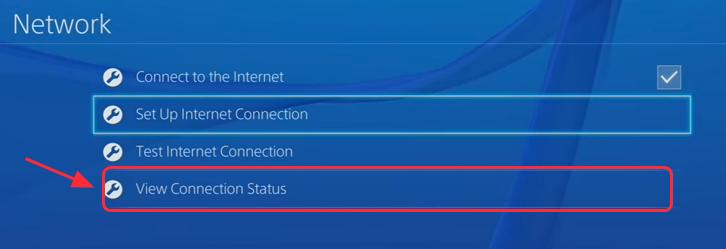
2) Select View Connection Status.
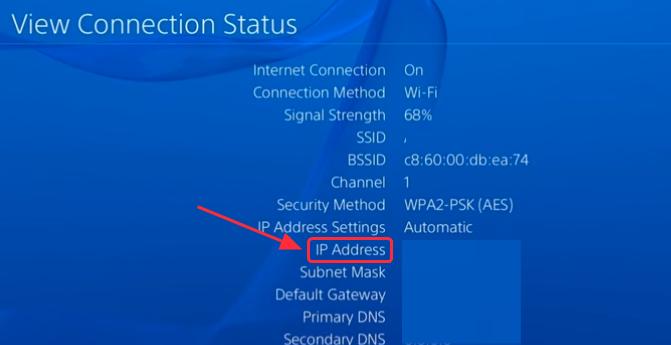
3) You will see the information about the network your PS4 are connecting, including the IP address.
How to manually configure PS4 network settings?
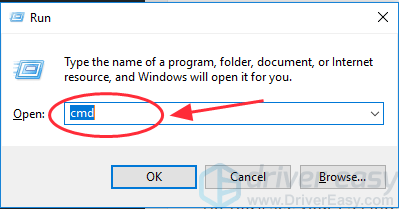
1) On a Windows PC/laptop that connects to the same network as your PS4 does, press the Windows logo key + R at the same time on your keyboard.
2) Type cmd in the Run box, and press Enter.
3) Copy and paste the following command in the Command Prompt, and press Enter.
ipconfig/all
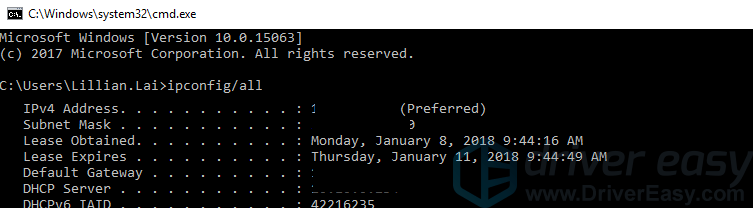
4) Note down the IP address, the default gateway, the subnet mask and the DNS server.
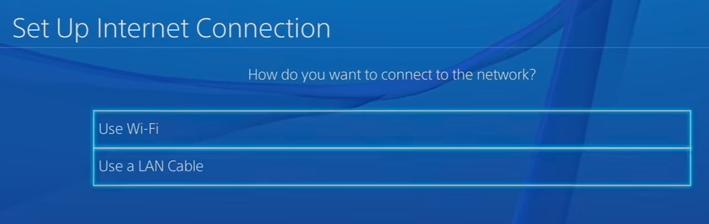
5) Go to PS4 Settings > Network > Set Up Internet Connection.
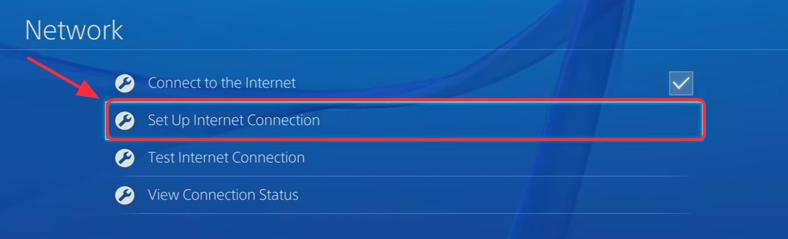
6) Select Use WiFi if you are connecting to WiFi, or select Use a LAN Cable if you are connecting to the Ethernet.
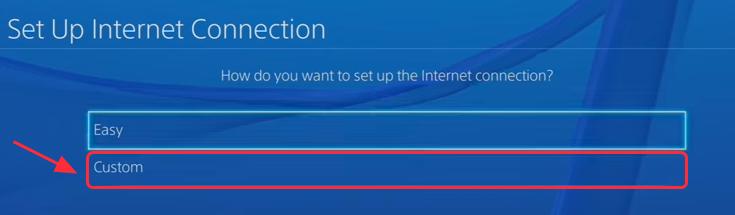
7) Select Custom, then enter the network information you just noted down.
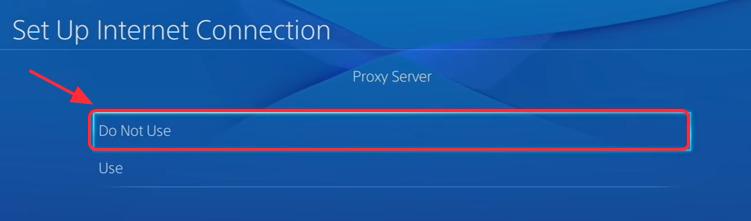
8) Select Do Not Use as for Proxy Server.
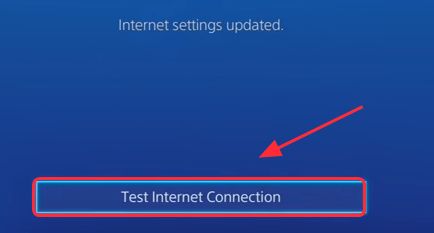
9) Wait for it to update. When you see Internet settings updated, select Test Internet Connection.
10) You’ll see your PS4 Internet connection and know the NAT Type.
Method 2: Enable UPnP for your router
If manually configuring the network settings doesn’t work for you, you can try to enable UPnP for your router. UPnP stands for Universal Plug and Play, which allows the devices on a network to discover each other.
Enabling UPnP in your router can help improve the connection when you are playing games and chatting with other people. Follow these steps:
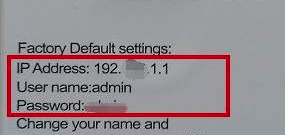
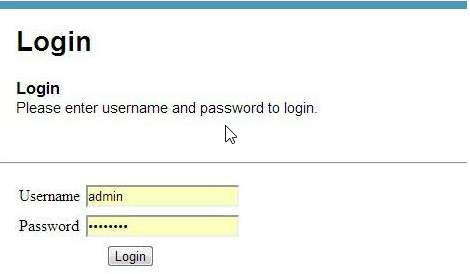
1) Go and see the IP address, Username and Password on your wireless router (you will see that on the stick of your router, or find the information on the manual).
2) Open your browser on PC or mobile phone, then type the IP address in your browser, and press Enter.
3) Type your Username and Password, then login.
4) Go to Advanced > Forwarding, and you will see UPnP. (Or you can find the UPnP section in other tab according to the different routers.)
5) Turn UPnP on.
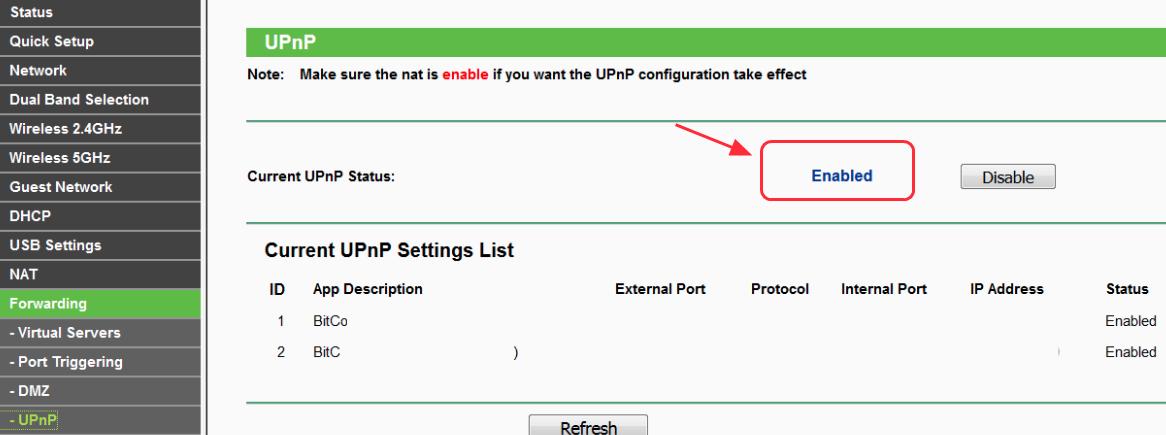
6) Click Apply/Save to save your settings.
7) Reboot your router and wait for it to connect.
8) Go to PS4 Settings > Network > Test Internet Connection, and check if your NAT Type is on (you’ll see the type 1 or type 2 since it’s on).
Method 3: Make your PS4 the DMZ server
DMZ means Demilitarized Zone, which is a physical or logical subnetwork that contains an organization’s external-facing services to an untrusted network.
This can help you correct the network configurations on your router, and improve your network performance if the settings are properly checked. (Some people may worry about causing security problems by this method, but it’s OK since you are using the network at your home instead of in the public.)
1) Go and see the IP address, Username and Password on your wireless router.
2) Open your browser on PC or mobile phone, then type the IP address in your browser, and press Enter.
3) Type your Username and Password, then login.
4) Go to Advanced > Forwarding, and you’ll see DMZ on the left. (Or you can find the DMZ section in other tab according to the different routers.)
5) Click Enable to enable DMZ.
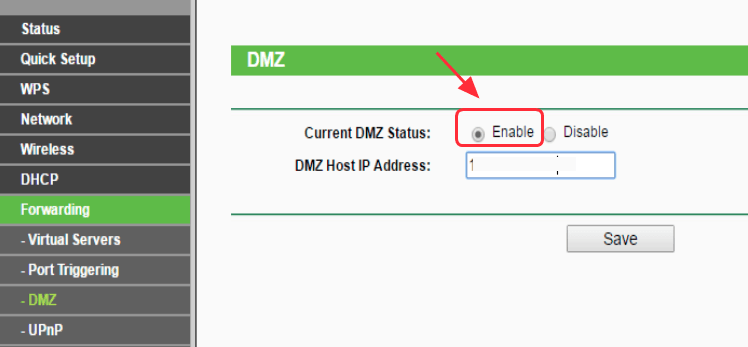
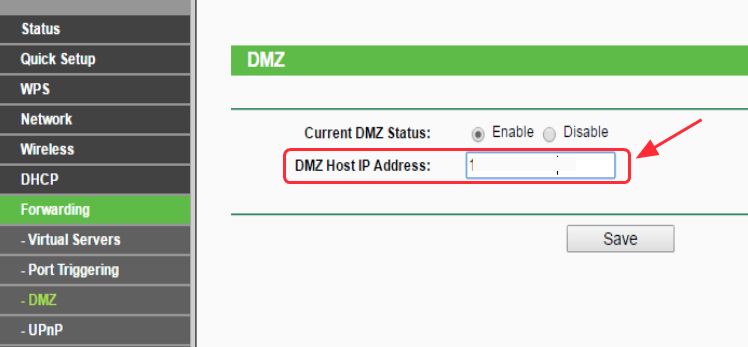
6) Change the IP address to match with the IP address in your PS4. (If you don’t know your PS4 IP address, click here to know how to check.)
7) If you are using routers that has the NAT Filtering option, such as NETGEAR router, you can also click to open NAT filtering. (You can skip to the next step if you don’t have this option.)
8) Click Apply/Save to save your settings.
9) Reboot your routers and wait for it to connect.
10) Go to PS4 Settings > Network > Test Internet Connection, and check if your NAT Type is on (you’ll see the Type 1 or Type 2 if it works).
This may get all the network traffic to your PS4 and reduce the network restrictions when using your PS4.
Method 4: Forward Port for your PS4 network
Ports forwarding, also referred to ports mapping, redirects a communication request from one address and port number to another while packets are traversing a network gateway, such as a router. You can improve the connection performance by forwarding the ports.
1) Go and see the IP address, Username and Password on your wireless router.
2) Open your browser on PC or mobile phone, then type the IP address in your browser, and press Enter.
3) Type your Username and Password, then login.
4) Go to the forward ports section (or ports forwarding, Virtual Server, Applications according to different routers).
5) Add the custom forwarding ports. You can try the following ports recommended by Sony:
80(TCP), 443(TCP), 3478(TCP and UDP), 3479(TCP and UDP), 3480(TCP)
6) Apply/Save your changes.
7) Go to PS4 Settings > Network > Test Internet Connection, and check your NAT Type.
These are the 4 easy methods to solve PS4 NAT type failed. Feel free to comment below to share your ideas. If you have any further questions, please let us know and we’ll see what more we can do to help.