


Some users have found that the right-click button on their laptop touchpad suddenly stopped working, which makes it quite tricky to view more property options by right-clicking.
This is rather strange while the left click and the navigation zone work just fine. Up till now, there is no solid explanation as to why this error keeps happening. But there are some effective workarounds that might be able to help. You may not need to try them all; just work your way down the list until you find the one that works.
Option 1: Enable your touchpad
Option 2: Check your touchpad setting
Option 3: Reinstall your driver
Note: Before you proceed, it is suggested that you plug in a mouse.
Option 1: Enable your touchpad
Windows 10
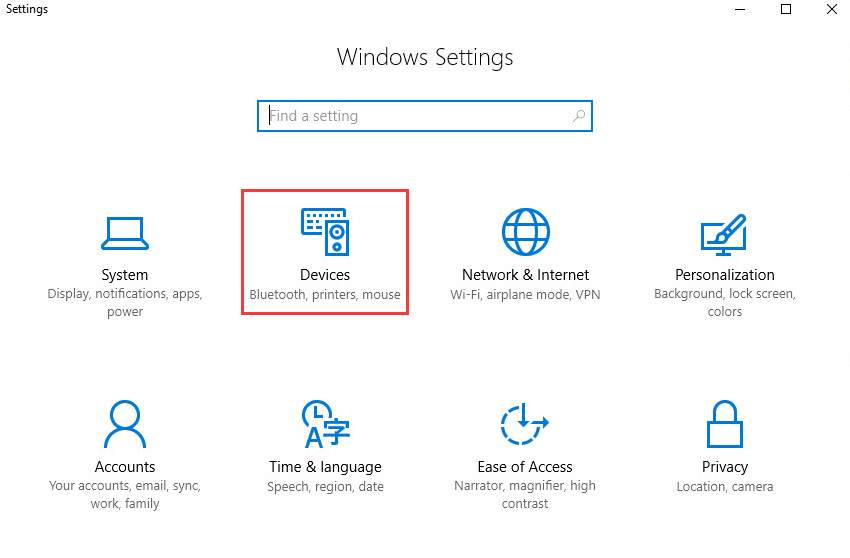
1) Click Start button, and then choose Settings. Then choose Devices.
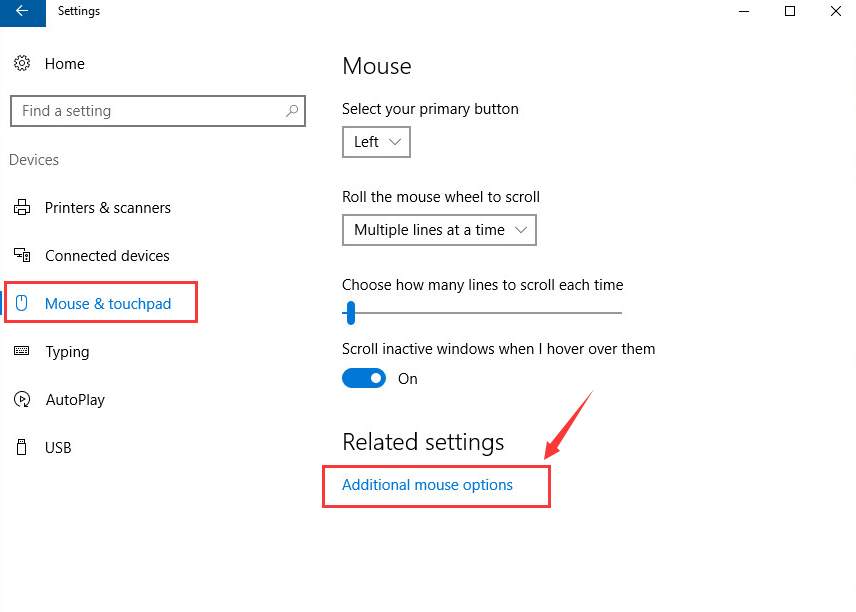
2) On the left side of the pane, choose Mouse & touchpad. Then scroll down to the bottom of the screen and click Additional mouse options.
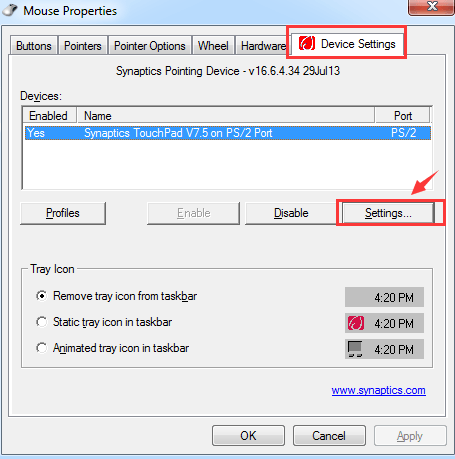
3) Then the Mouse Properties window will open. Go to the furthest right option (the name of this option could be Device Settings or ELAN), then make sure your touchpad is enabled.
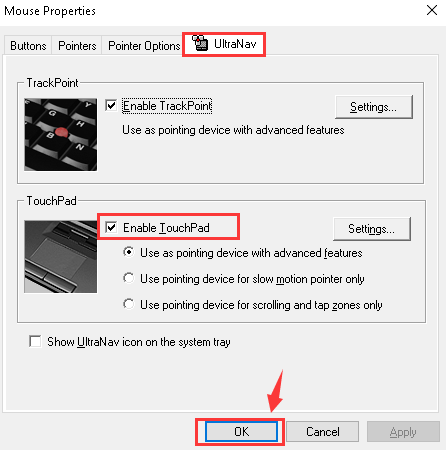
If the option you see here is Device Settings, check to see if the the Touchpad is enabled. If not, you need to press the Settings button to change the status to Enabled.
4) You should also check to see if there is a function key that enables or disables the touchpad. On some laptop, this key is F6, or the combination of Fn+F5, or Fn+F6. The icons looks like a tiny touchpad with a diagonal line through it. You should check your manual to see which key or keys could be at fault.
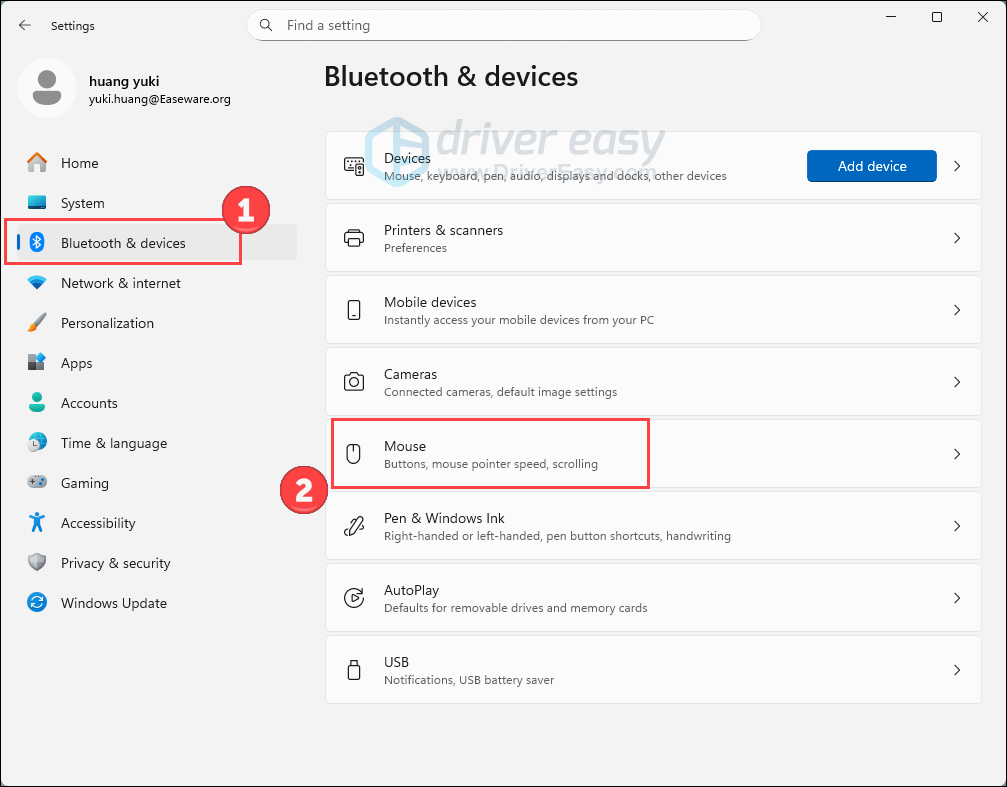
Windows 11
- Press the Windows logo key and I on the keyboard to invoke Settings. Select Bluetooth & devices on the left panel, and then click Mouse on the right.
- Scroll down and click Additional mouse settings.
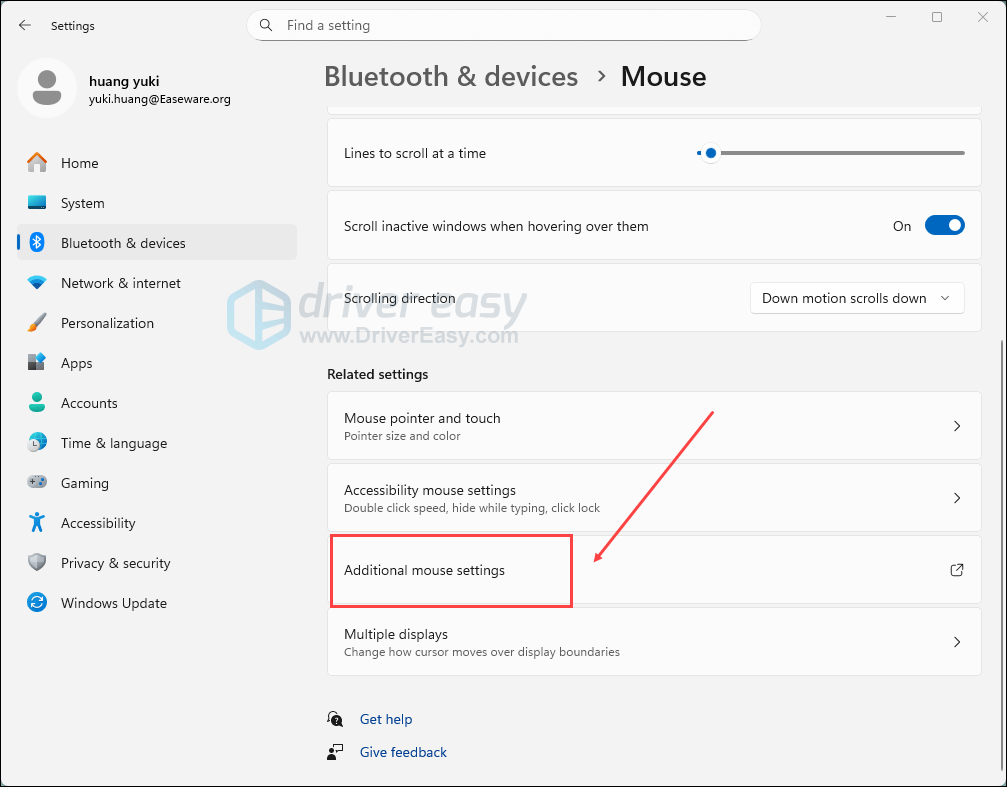
- Follow steps 3 and 4 in Windows 10.
Option 2: Check your touchpad setting
Sometimes the primary settings for your touchpad may be changed after Windows Updates. Make sure you’ve enabled those settings that are essential to the proper functioning of your touchpad’s right-click button. Here’s how to do it:
1) On your keyboard, press the Windows logo key and I at the same time to invoke the Settings window.
2) Go to Devices.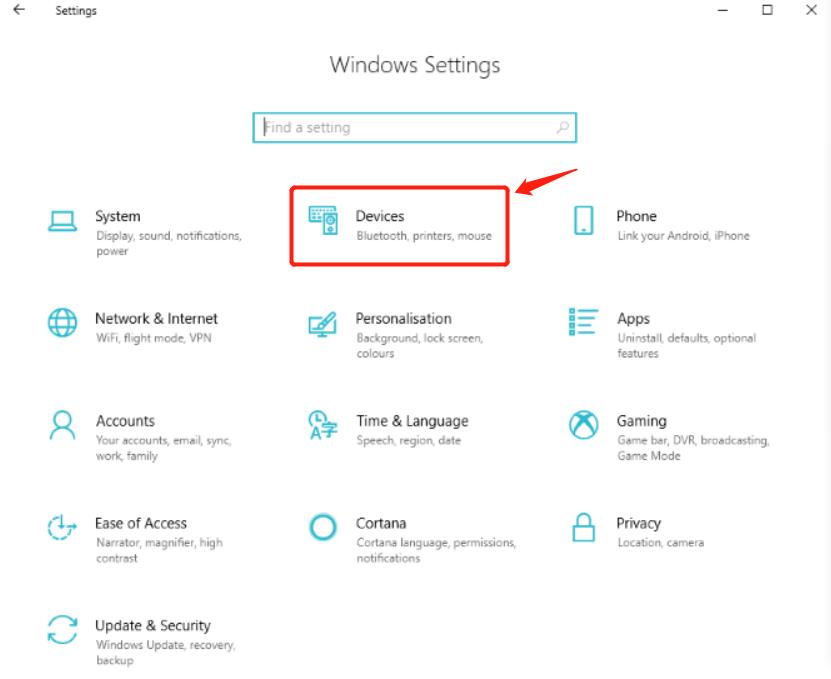
3) On the Touchpad tab, in the results pane, make sure you tick the Press the lower right corner of the touchpad to right-click option.
Option 3: Reinstall your driver
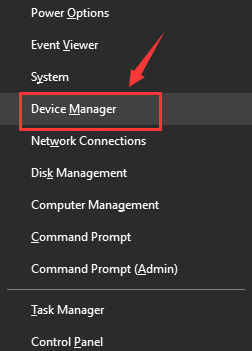
1) Press Windows key and X at the same time, then choose Device Manager.
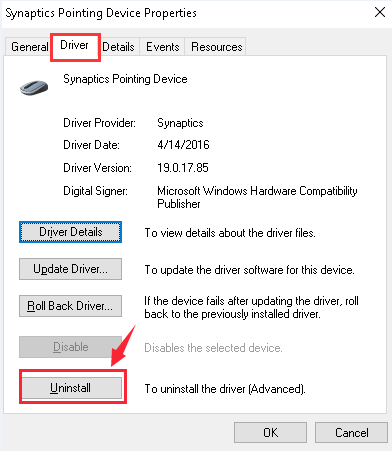
2) Locate and expand the option Mice and other pointing devices. Then right click your touchpad drive. (Mine is called Synaptics Pointing Device , yours could be different.)

3) Then go to Driver tab, choose Uninstall option.
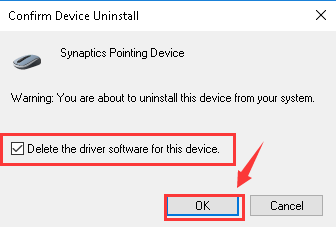
4) Confirm the uninstall of your touchpad driver by ticking the box of Delete the driver software to uninstall this device from your system. Then check OK to save the change.
5) When the uninstall completes, restart your computer. Windows should help you automatically install the latest version of the driver it could find. See if your problem solved after the reinstall. If not, please follow the third option below.
Option 4: Update your driver
There’re mainly 2 ways for you to update your driver:
Way 1 – Manually update drivers from the Windows Device Manager
Way 2 – Automatically update your drivers
Way 1 – Manually update drivers
You can update your touchpad drivers from the Windows Device Manager using the following procedure:
1) Press the Windows logo key and X at the same time, then choose Device Manager.
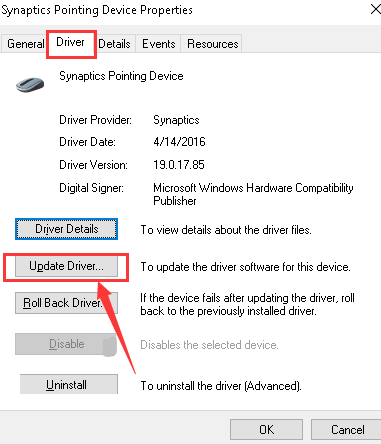
2) Locate and expand the option Mice and other pointing devices. Then right click your touchpad drive.
3) Then go to Driver tab, choose Update Driver… option.
4) Windows will start helping you find the latest version of touchpad driver that it could find. But if you see the notification like the following one:
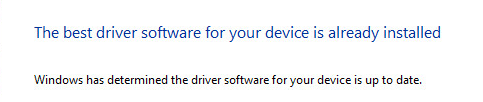
You might need to search for the driver by yourself on the Internet.
But the whole process of searching for and then download and install the driver could be a hassle: you need to decide what driver you need, then choose from the manufacturer website the right one for your operating system, and you probably need to install it in compatibility mode, since some manufacturers have not yet released touchpad driver for Windows 10.
In this case, it is suggested that you use Driver Easy to save yourself that much time and effort, as illustrated in Way 2.
Way 2 – Automatically update your drivers
Driver Easy will automatically recognize your system and find the correct drivers for it. You don’t need to know exactly what system your computer is running, you don’t need to risk downloading and installing the wrong driver, and you don’t need to worry about making a mistake when installing. Driver Easy takes care of everything.
You can update your drivers automatically with the Pro version of Driver Easy, and it takes just 2 clicks:
1) Download and install Driver Easy.
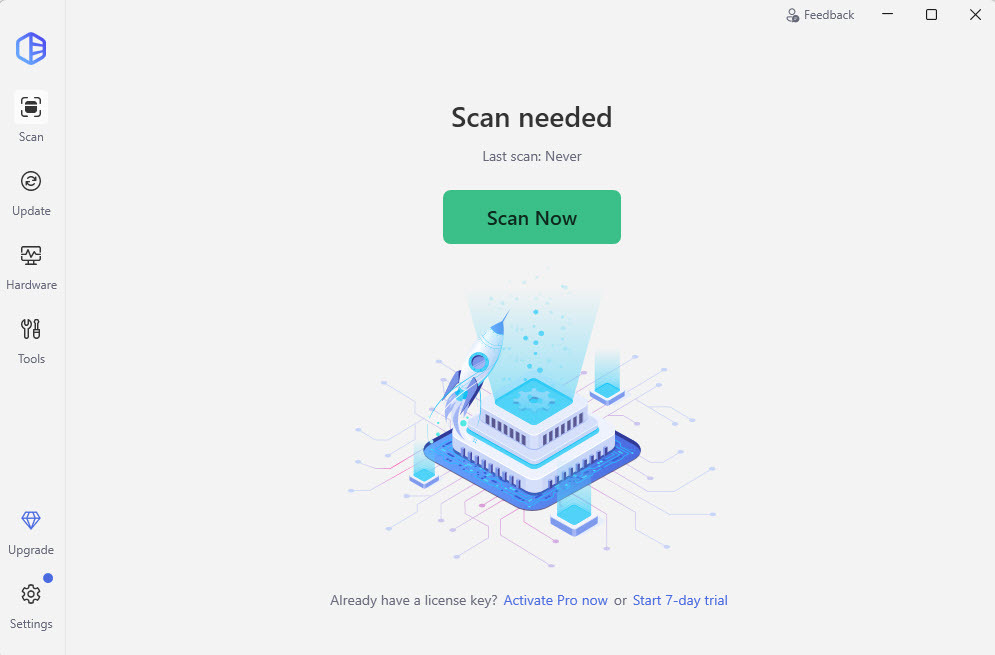
2) Run Driver Easy and click the Scan Now button. Driver Easy will then scan your computer and detect any problem drivers.
3) Click the Update button next to a flagged driver to automatically download the correct version of that driver.
Or click Update All to automatically download and install the correct version of all the drivers that are missing or out of date on your system. (This requires the Pro version which comes with full support and a 30-day money back guarantee. You’ll be prompted to upgrade when you click Update All.)

Note: If you have any problems using Driver Easy Pro to update your driver, please feel free to email us at support@drivereasy.com. We are always here to help.
Hopefully this post helped you resolve the “right-click not working” problem. If you have any follow-up questions or ideas, please feel free to leave a comment below. Thanks for reading!