


Want three monitors for better gaming or multitasking in Windows? You’ve come to the right place! After reading this article, you’ll know exactly what to do.
5 simple steps:
- Check if your computer supports triple monitors
- Buy extra hardware if it doesn’t
- Check if you have the required cables
- Configure your display settings
- Update the drivers for your monitors
Note that we’re not talking about 3 monitors showing exactly the same thing, here. We’re talking about extending your desktop across all 3 monitors, and being able to move your mouse from one monitor to the next. Like this…
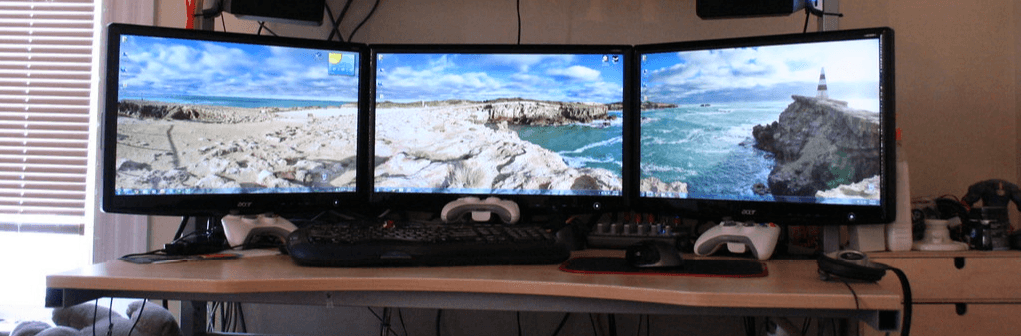
“Seamless”, by Jon B, is licensed under CC BY-SA 2.0, cropped from original.
Step 1: Check if your computer supports triple monitors
Not all computers support triple monitors – particularly older or cheap computers. To determine if yours does, you need to look at its video ports.
Video ports look like this:
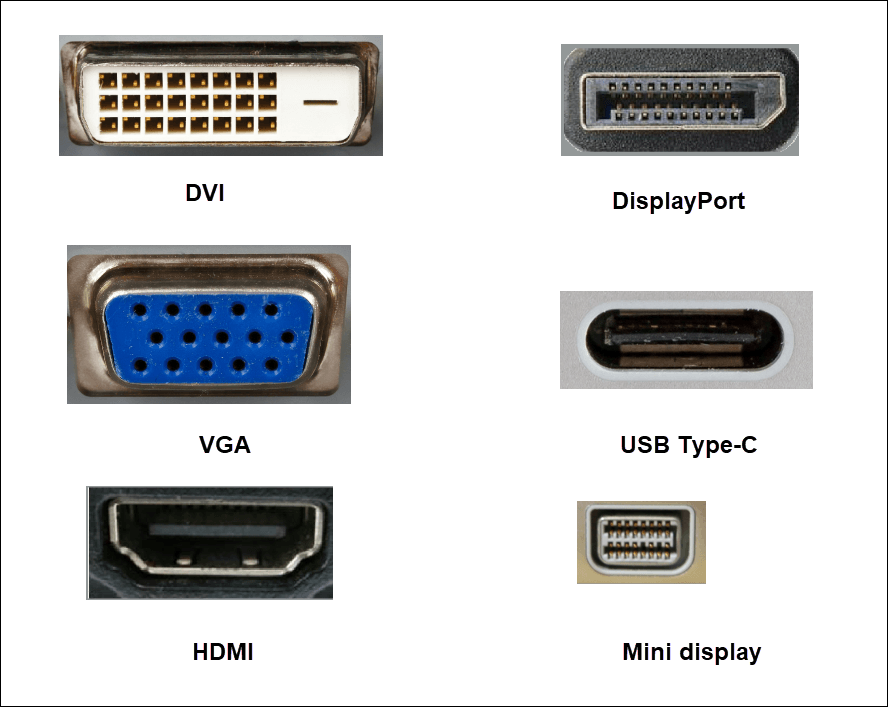
To run triple monitors, you need at least 3 video ports that can all be used at once.
To check your video ports:
Check how many monitors your desktop supports
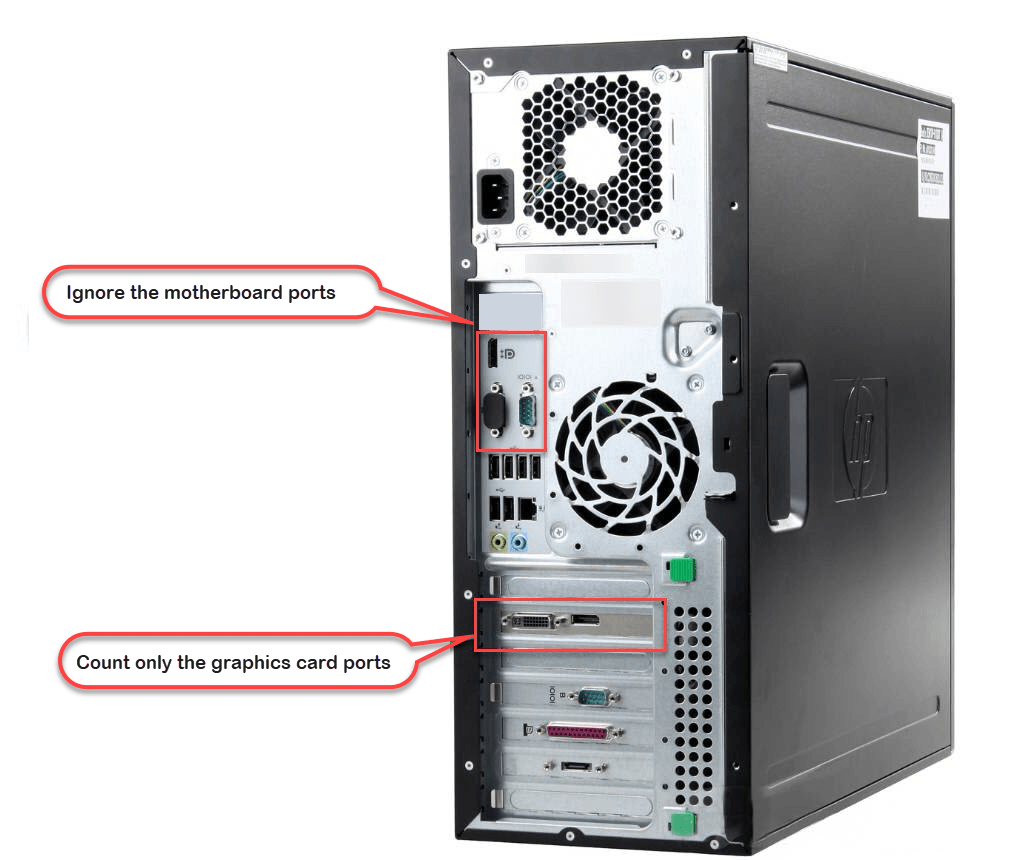
Your video ports will be on the back of your computer. Count how many you have, and note what type they are.
Next you have to determine if all the ports you see can be used simultaneously. There are two considerations here…
- You probably don’t want to use integrated graphics AND a graphics card at the same time
- On some graphics cards (and some motherboards), you can’t use all ports at the same time
You probably don’t want to use integrated graphics AND a graphics card at the same time
A lot of computers have a motherboard with video ports (called ‘integrated graphics’) AND a graphics card with video ports. If your computer has this setup, you’ll see two groups of video ports. But don’t be fooled by all those ports. Although you sometimes can run monitors off your integrated graphics and graphics card at the same time, you probably wouldn’t want to. Things will get pretty laggy – particularly when you switch between monitors.
Instead, if you have a dedicated graphics card, use it rather than the integrated graphics. (Alternatively, you could use only the integrated graphics, but you wouldn’t normally do that because the graphics card will do a better job – higher resolution, better quality, more responsive, etc.)
If you’re not concerned about lag, and you want to use integrated graphics and your graphics card at the same time, you have to go into your PC’s BIOS and permanently enable your integrated graphics card. (Do this by going to Configuration > Video > Integrated graphics device > Always enable. Your menu options may be slightly different.) If you don’t do this, any monitors connected to your integrated graphics (motherboard) will stop working as soon as you plug a monitor into your graphics card.
On some graphics cards (and some motherboards), you can’t use all ports at the same time
Some graphics cards have more ports than you can use at once. E.g. Yours might have 3 ports, but you may only be able to use 2 at the same time. To determine how many of the ports you can use simultaneously, you’ll have to consult your graphics card’s documentation. Alternatively, you could Google it; search for the brand and model of your video card, and the number of monitors you want to run. (e.g. “Nvidia GTX 570 three monitors”).
The same applies to motherboards. So if you don’t have a dedicated graphics card, and you see 3 ports on your motherboard, you may only be able to use 2 at the same time. So you’ll need to check the motherboard’s documentation to see what it supports (or, again, Google it).
Check how many monitors your laptop supports
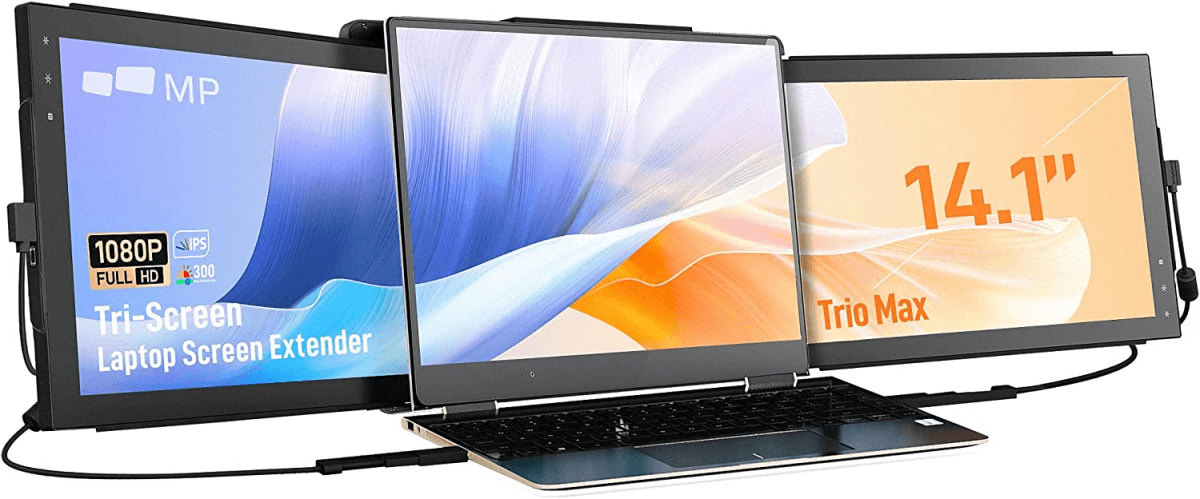
If you’re using a laptop, chances are that you only have one video port on the left or on the right side of your laptop:
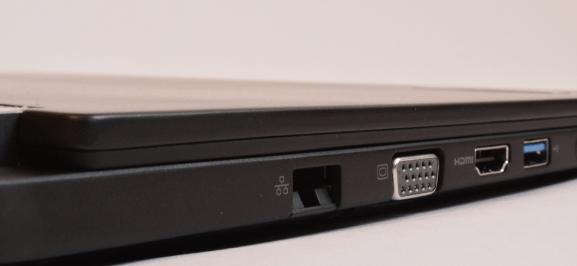
It’s possible you have two, but it’s very unlikely you have three. So you won’t be able to run triple monitors unless you buy extra hardware, as explained below.
If your computer doesn’t have the required ports to run triple monitors, don’t give up. You may still be able to do it. Read Step 2, below to find out how…
If your computer DOES have the required ports to run triple monitors, you can skip ahead to Step 3, below.
Step 2: Buy extra hardware if your computer doesn’t already support triple monitors
If you don’t have enough video ports on your computer, you can still have triple monitors! To make it happen, you need to buy one of the following:
Jump ahead to the device you’re interested in
(You can’t just use a normal video splitter, and attached 3 monitors to it, because that will simply mirror your laptop’s display on all 3 monitors.)
A new graphics card (desktop PCs only)
If you’re using a desktop PC, you can buy a new graphics card that supports triple monitors. (You can’t do this for a laptop, because most laptops use an integrated graphics card which is permanently attached to the motherboard.)
You should be able to pick one up from about USD $150 (e.g. Gigabyte Geforce GTX 1050 Ti).
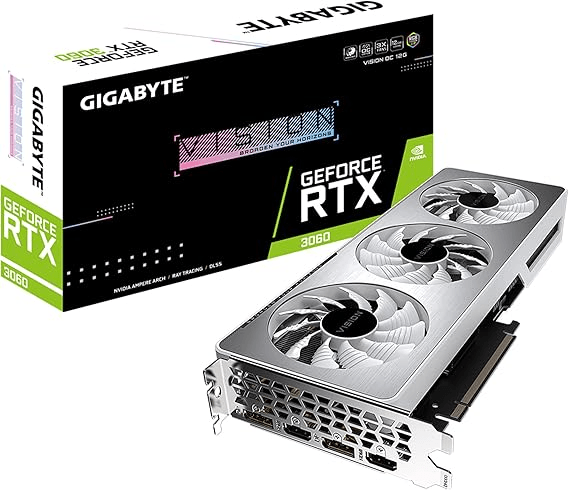
GIGABYTE GeForce RTX 3060 Vision OC 12G (REV2.0)
√ NVIDIA Ampere Streaming Multiprocessors
√ 2nd Generation RT Cores
√ 3rd Generation Tensor Cores
√ Powered by GeForce RTX 3060.Avoid using unofficial software
√ Integrated with 12GB GDDR6 192-bit memory interface
But before investing in a new graphics card, you should know that not all graphics cards are compatible with your PC’s motherboard. To see if a graphics card is compatible with your PC, you need to check your motherboard’s PCI Express slot, the size of your chosen graphics card and the power requirements.
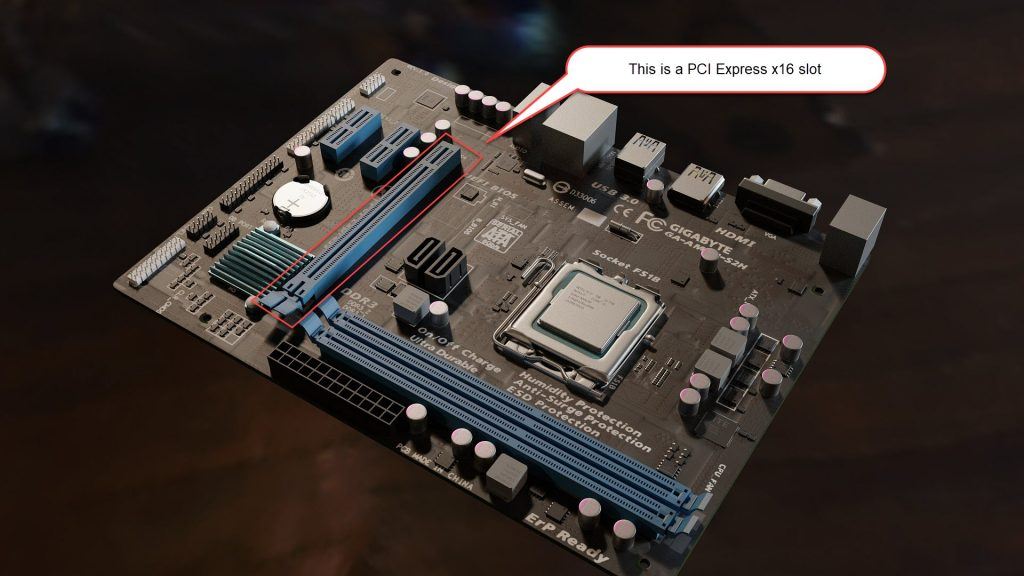
Check the PCI Express slot on the motherboard
There are different types of expansion slots on a motherboard. For a graphics card to be connected, you need a PCI Express x16 slot. The quickest way to find out if you have this slot is to Google your motherboard’s manufacturer and model. Alternatively, you can open up your computer case to check if you have the slot. (The PCI Express x16 slot should be the longest on the motherboard.)
Check the size of your chosen graphics card
You’ll need to be sure that your computer case has enough room for the new graphics card (they’re often quite bulky because they have an attached cooling fan).
If you’re not sure how big your chosen graphics card is, ask the manufacturer or retailer.
Once you know how big it is, check how much space you have where the card will go. I.e. Locate the PCI Express x16 slot, and imagine plugging something like the below into it. Will it fit, or will the surrounding cards and cables get in the way?

Check the power requirements
A graphics card that supports triple monitors will draw a lot more power than a card that supports just one. E.g. A standard graphics card needs between 100W to 300W, but a card that supports triple monitors may need 600W.
If your PC doesn’t have enough power to support it, your computer may shut down unexpectedly or fail to turn on when you install the new graphics card.
Check your computer’s specifications to see how many watts the power supply unit (PSU) can provide. If you can’t find any specifications, you should be able to see the output on your computer’s power supply. You’ll need to look inside the case, for something like this:
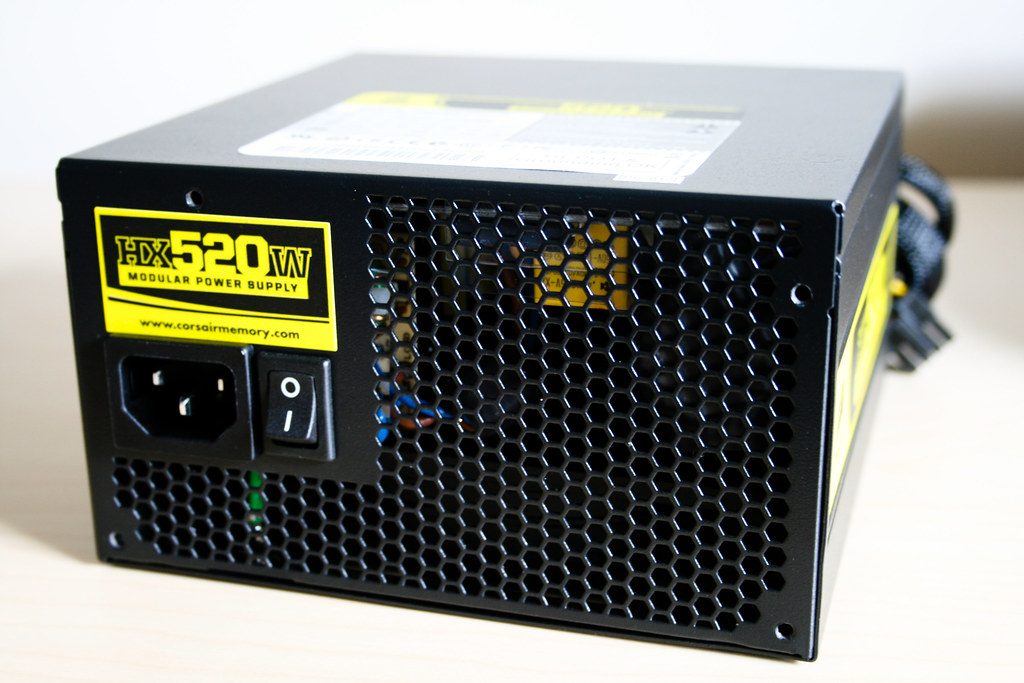
“Corsair HX4520 PSU”, by Willian Hook, is licensed under CC BY-SA 2.0.
An external multi-display adapter
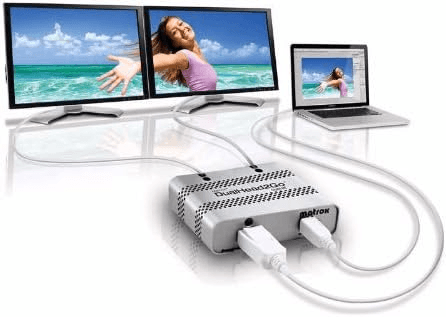
Even if your system only supports one monitor output, you can still run three independent monitors with an external multi-display adapter such as the Matrox DualHead2Go Digital ME.
An external multi-display adapter should be cheaper than a new graphics card – they retail for approx USD $150. They’re also much easier to install – you just plug one of the supplied cables into your USB port (this powers the adapter) and the other into your Mini DisplayPort or USB Type-C port (this sends the video signal from your computer to the adapter).
A USB to HDMI adapter
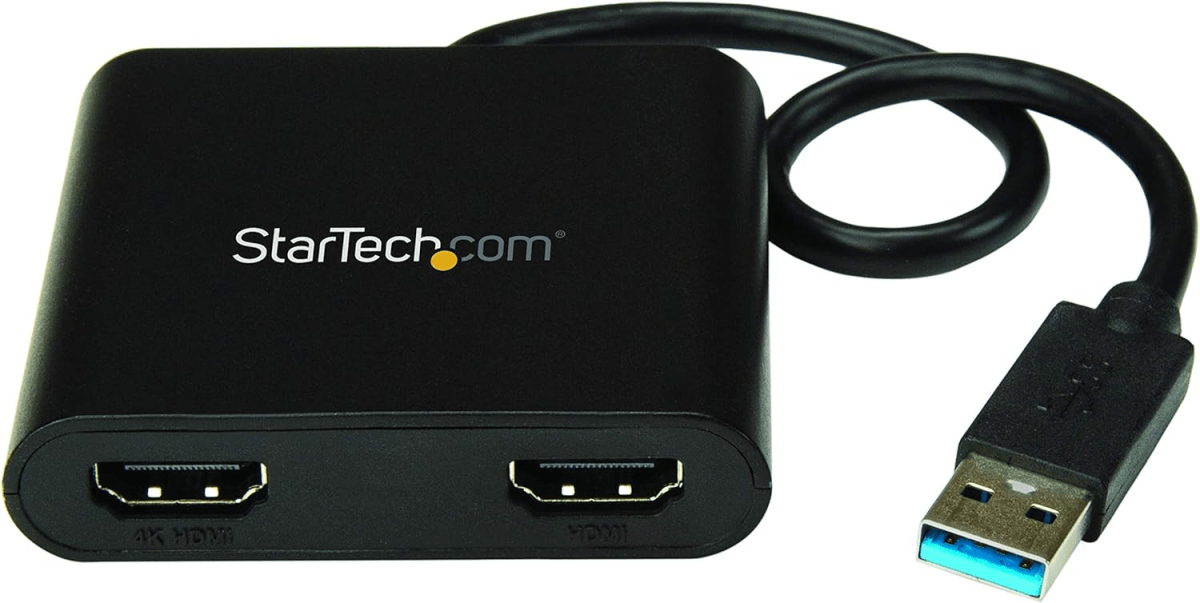
StarTech.com USB 3.0 to Dual HDMI Adapter
Allow you to add up to two HDMI monitors to your laptop/desktop;
Compatible with Windows 10, Windows 10 (32/64), Windows 8 / 8.1 (32/64), Windows 7(32/64).
If you don’t have the budget for an external multi-display adapter, you can buy a USB to HDMI adapters. You’ll need one adapter per additional monitor – so if you have one monitor already, just plug two of these adapters into your PC’s USB ports, attach a couple of monitors to the other end, and voila! You have an extended desktop with three monitors!
These adapters are great if you want a cheap way to get triple monitors (they cost around USD $50), but they don’t perform as well as a powerful graphics card or an external multi-display adapter. So they’re not a great choice for gaming or HD video playback.
A docking station
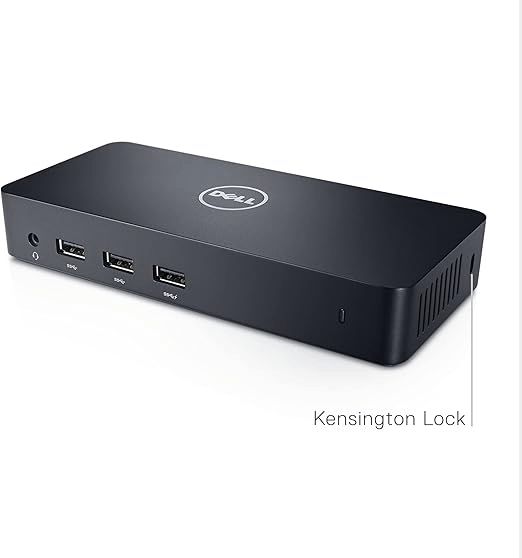
A docking station like the one pictured above allows you to attach up to three additional monitors to your computer. You just connect your computer to the docking station with the supplied USB host cable, then connect your extra monitors to the docking station’s DisplayPort and HDMI ports.
One of these docking stations costs around USD $150.
The drawback of a docking station like this is that it doesn’t have any cooling fans. Some users have reported that it heats up quickly, so it may not be ideal for long-term or aways-on use.
Step 3: Check if you have the required cables
Once you’ve confirmed that your computer has the necessary video ports to support triple monitors (or you’ve bought additional hardware to support them), you need to make sure you have all the necessary cables to connect everything.
Recall the video ports you identified on your computer in step 1. E.g. If you have two HDMI ports and one DisplayPort on your computer, you’ll need two HDMI cables and a DisplayPort cable to connect three monitors.
Next, you need to check the ports on your monitors. E.g. If you’re connecting to a computer with two HDMI ports and one DisplayPort, ideally you’ll have two monitors with an HDMI input, and one with a DisplayPort input.
If you don’t have the required cables
If you don’t have the cables you need, you can simply buy them (e.g. on Amazon). Most cables will cost less than USD $10.
If the ports on your monitors don’t match those on your computer
If the ports on your monitors don’t match those on your computer, don’t panic. You can simply buy an adapter or an adapter cable. E.g. If your computer has a DisplayPort, but your monitor has only a VGA input, you can get either a DisplayPort-to-VGA adapter like the below, and then connect from the VGA input of the adapter to the VGA input of your monitor with a male-to-male VGA cable.

Or you can get a DisplayPort-to-VGA cable like the below (for less than USD $10) and plug one end into your computer and the other into your monitor:

Step 4: Configure your display settings
Once you have all the necessary hardware (as described in steps 1, 2 and 3 above) and you’ve connected everything properly, it’s time to set up your monitors. Here’s how:
Jump ahead to the section you’re interested in
Configure your display settings on Windows 7 or 8
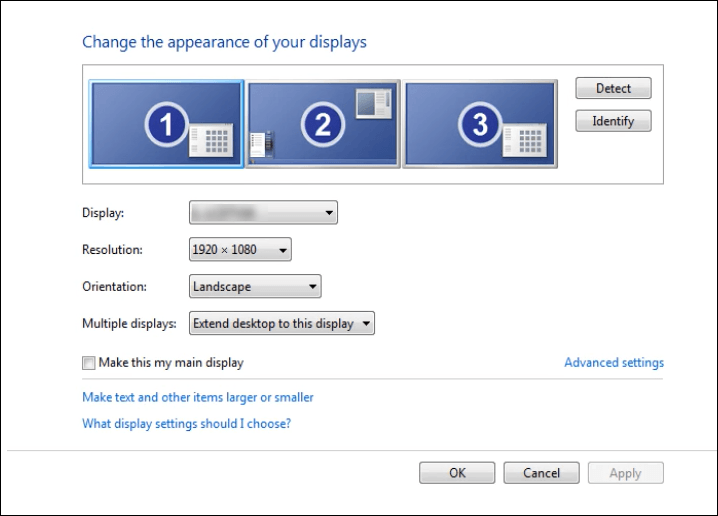
1) Right-click on your desktop and select Screen resolution.
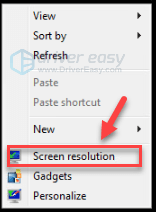
You should now see a collection of monitors illustrated, each with a number on it.
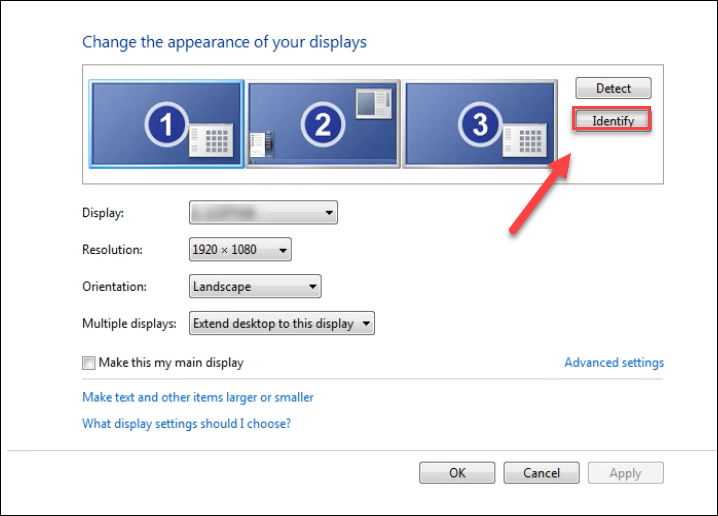
2) Click on one, then click Identify to see which illustrated monitor represents which monitor on your desk. E.g. Click on the monitor marked with a 1, and a number 1 will appear on one of the monitors on your desk.
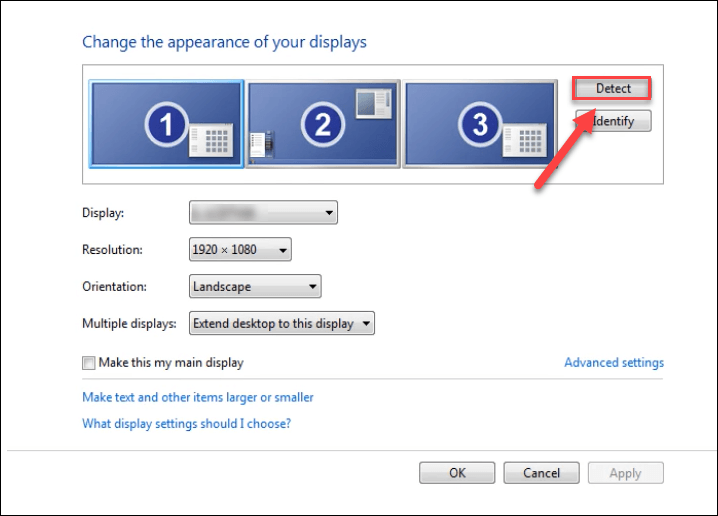
3) If any of your monitors are missing, click Detect and wait for your computer to detect it. (If the problem persists, go to step 5 to update drivers for your graphics product and monitors.)
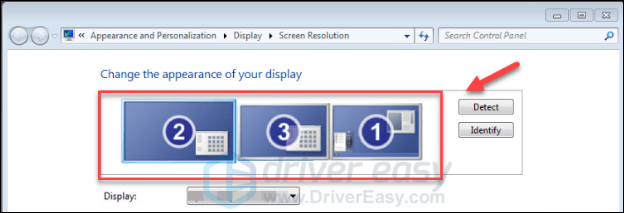
4) If the arrangement on-screen doesn’t match how your monitors are arranged on your desk, just rearrange it by dragging and dropping with your mouse.
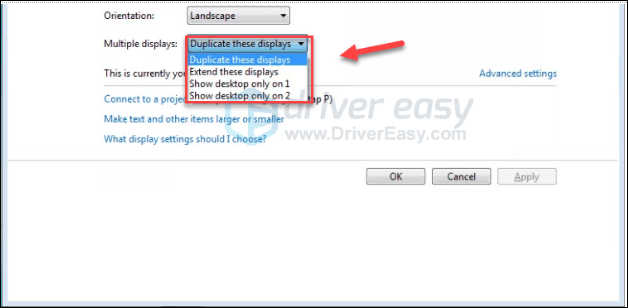
5) Click the drop-down menu next to Multiple displays and select Extend these displays. You’ll then see one continuous display that stretches across all of your monitors (i.e. you can drag your mouse or windows from one screen to the other).
5) Click Apply to save all the changes you made.

Hopefully, when you complete this step, your monitors run properly! However, if any problems occur, update drivers may be able to help! Follow step 5 to see how to do it.
Configure display settings on Windows 10
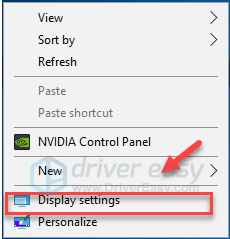
1) Right-click on your desktop and select Display settings.
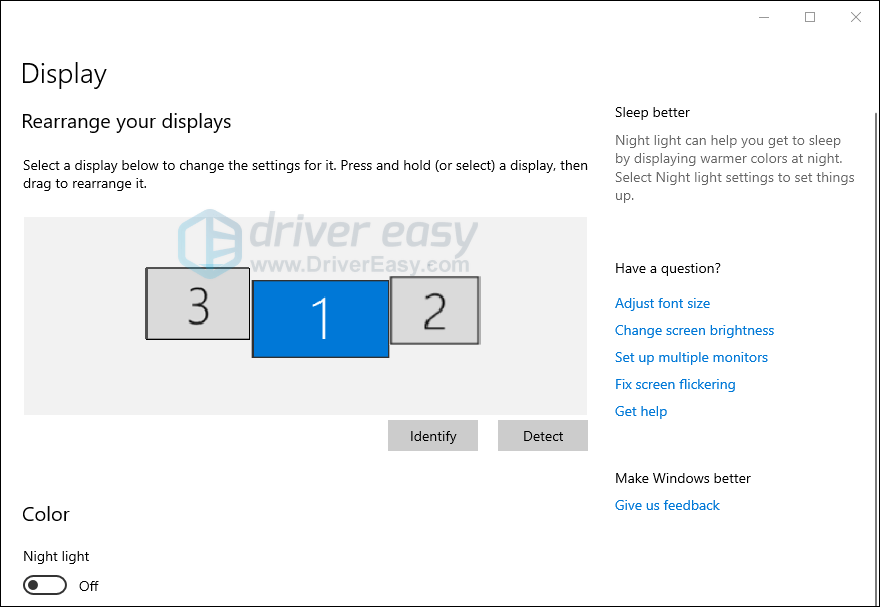
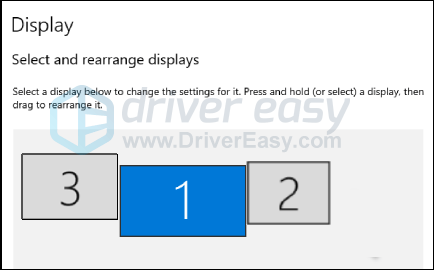
You should now see a collection of monitors illustrated, each with a number on it.
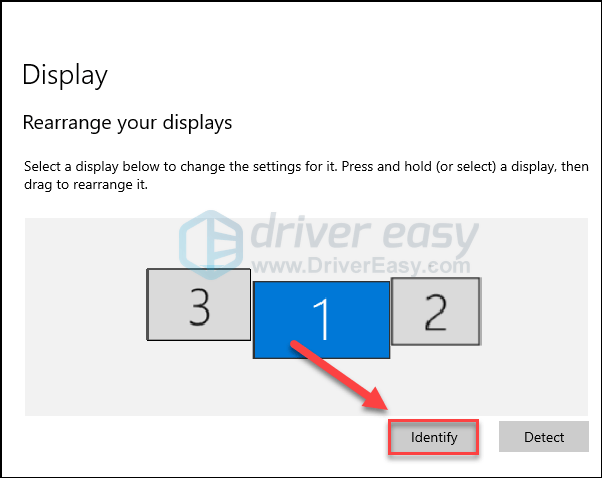
2) Click on one, then click Identify to see which illustrated monitor represents which monitor on your desk. E.g. Click on the monitor marked with a 1, and a number 1 will appear on one of the monitors on your desk.
3) If any of your monitors are missing, click Detect and wait for your computer to detect it. (If the problem persists, go to step 5 to update drivers for your graphics product and monitors.)
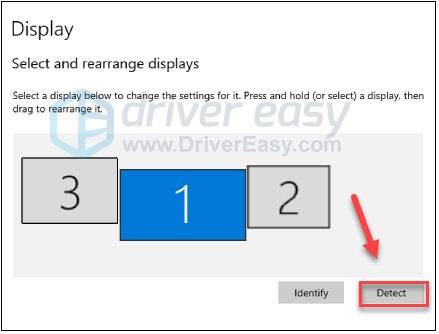
4) If the arrangement on-screen doesn’t match how your monitors are arranged on your desk, just rearrange it by dragging and dropping with your mouse.
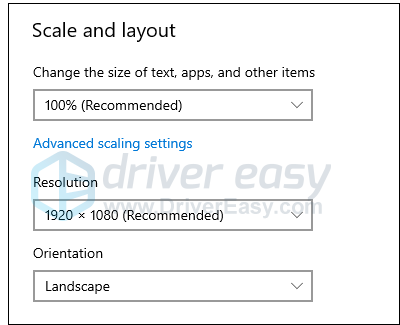
5) If you want, you can customize Scale and layout to change the size of text, apps and other items on your screens. You can also adjust the resolution and orientation.
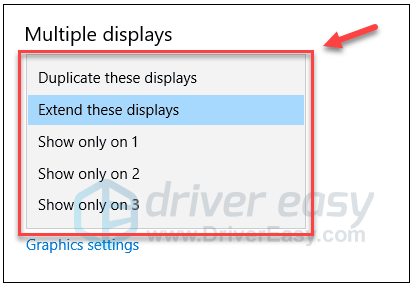
6) Click the drop-down menu next to Multiple displays and select Extend these displays. You’ll then see one continuous display that stretches across all of your monitors (i.e. you can drag your mouse or windows from one screen to the other).
Hopefully, when you complete this step, your monitors run properly! If you have any problems, try updating your drivers as described in step 5 below.
Step 5: Update your graphics drivers and monitor drivers
To ensure your triple monitor setup runs smoothly, and to prevent problems like loss of signal and black screens, you should update the drivers for both your graphics card and your monitors. There are two ways you can do this:
- Option 1 – Download and install drivers manually
- Option 2 – Automatically update your graphics drivers
Option 1 – Download and install drivers manually
To manually get the latest drivers for your graphics card and monitors, you can go to all the manufacturers’ websites, find the right drivers for your device models and version of Windows, then manually download and install each.
Option 2 – Automatically update your graphics drivers
If you don’t have the time, patience or computer skills to manually update the drivers for your monitors and your graphics card, you can do it automatically with Driver Easy. All it takes is a couple of clicks.
Driver Easy will automatically recognize your system and find the correct drivers for it. You don’t need to know exactly what system your computer is running, you don’t need to risk downloading and installing the wrong driver, and you don’t need to worry about making a mistake when installing.
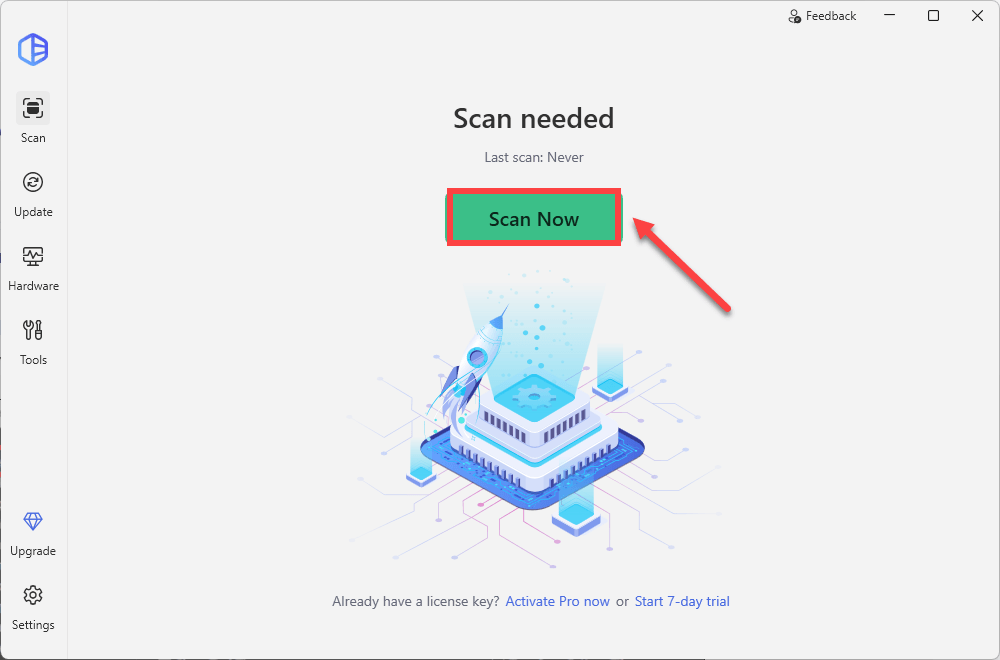
1) Download and install Driver Easy.
2) Run Driver Easy and click the Scan Now button. Driver Easy will then scan your computer and detect any problem drivers.
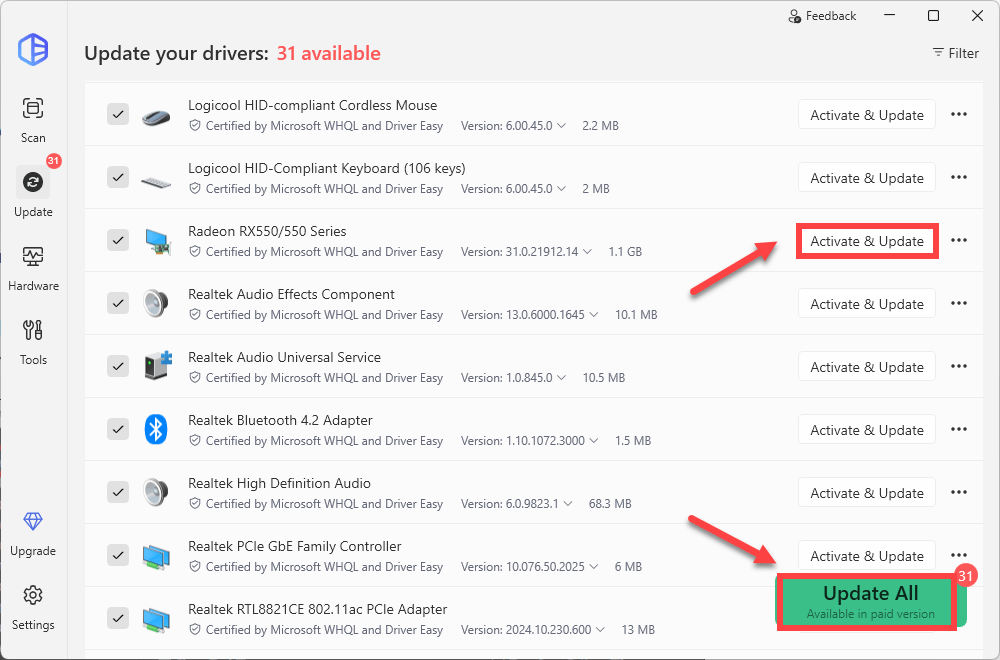
3) Check if your graphics card model is flagged in the scan results. If it is, click Activate & Update to start a 7-day free trial or upgrade to Driver Easy Pro. Either option will automatically download and install the latest graphics driver for you.
Hopefully, after following this guide, you’ve been able to get your triple monitor setup working perfectly.
If not, please contact Driver Easy’s support team at support@drivereasy.com or leave a comment below.
.cg-tbl-rate.cg-teight-rate{display: none;}