


Does your computer turn on and off in a loop? Don’t worry. You’re not the first one who have encountered this problem. You can follow the tips below to fix this problem.
We’ve put together 8 methods for you to fix the problem. You can work the way down until you find the one that works for you. Let’s start from the easy methods.
- Check if your computer has a virus
- Update the drivers on your computer
- Remove any peripherals from your computer
- Reset CMOS to the default settings
- Check PSU (Power Supply Unit)
- Check the fan
- Clean dust
- Replace the motherboard
Method 1: Check if your computer has a virus
Virus can cause your computer to work strangely. They can change the computer settings without your knowledge. And they can cause your computer to turn on and off repeatedly.
So check if your computer has a virus. You can use your anti-virus software to scan your computer and remove the virus if necessary. If you haven’t installed a anti-virus software, see Free Virus Removal Tool and pick the anti-virus software you trust.
Method 2: Update the drivers on your computer
The problem “computer repeatedly turns and off” can be caused by faulty drivers. To fix the problem, you can try to update the drivers on your computer.
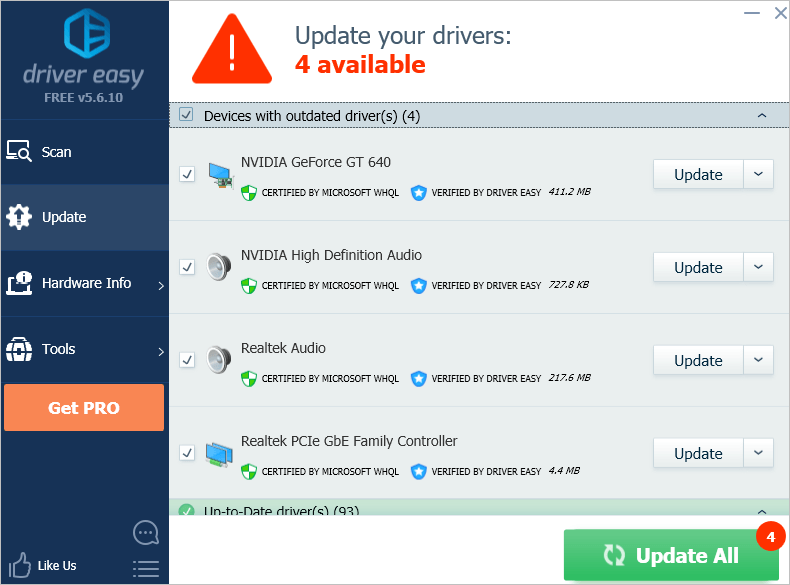
If you don’t have the time, patience or computer skills to update the drivers manually, you can do it automatically with Driver Easy.
Driver Easy will automatically recognize your system and find the correct drivers for it. You don’t need to know exactly what system your computer is running, you don’t need to risk downloading and installing the wrong driver, and you don’t need to worry about making a mistake when installing.
You can update your drivers automatically with either the FREE or the Pro version of Driver Easy. But with the Pro version it takes just 2 clicks:
1) Download and install Driver Easy.
2) Run Driver Easy and click the Scan Now button. Driver Easy will then scan your computer and detect any problem drivers.

3) Click Update All to automatically download and install the correct version of all the drivers that are missing or out of date on your system (this requires the Pro version – you’ll be prompted to upgrade when you click Update All).
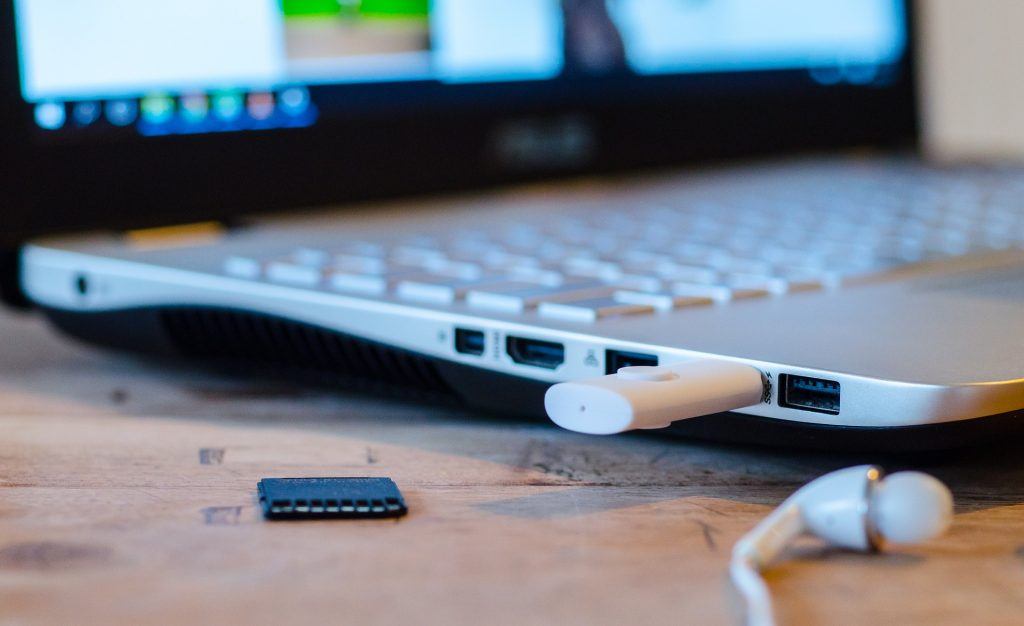
Method 3: Remove any peripherals from your computer
If the problem was caused around the time you connected peripherals to your computer, it’s probably a hardware conflict issue. You can remove the peripherals easily. If you have connected multiple peripherals to your computer, just remove the peripherals one by one.
Once removing a peripheral, check to see if the problem is resolved, then you can figure out which peripheral is causing the problem.
Method 4: Reset CMOS to the default settings
Corrupted CMOS can cause booting errors, such as the error “computer repeatedly turns on and off”. To fix the problem, you can try to reset CMOS to the default settings.
How to reset CMOS to the default settings
Resetting CMOS means resetting BIOS. To reset BIOS, you can follow these steps:
Firstly, enter the BIOS menu.
1) Restart your computer.
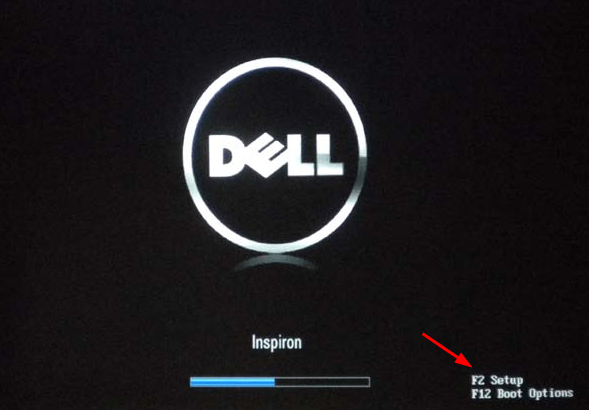
2) As soon as your computer restarts, on your keyboard, press the function key that can open the BIOS menu (Setup utility). For many manufacturers, the key could be Esc, Del, F2, F8 or F12. It depends on your computer manufacturer. You can try any of these keys and see if they work.
Or you can notice the key at the first screen. Usually, this key opens the BIOS menu.
For example, many Dell PCs show this key like below at the first screen:
After you enter the BIOS menu, refer to these steps to reset the settings:
1) Find the option to reset the BIOS settings. This option is probably called Setup Defaults. It also depends on the computer manufacturers. But you can expect it has the “Default” words.
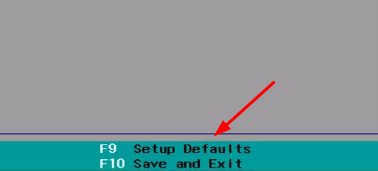
2) You can see a function key next to the option. Just press that key on your keyboard to bring up the edit dialog box.
3) On your keyboard, use the narrow key to select Yes to save the changes.
4) Exit BIOS.
5) Restart your computer and check to see if the problem is resolved.
Method 5: Check PSU (Power Supply Unit)
If the PSU short circuits, the computer will shut down automatically for hardware safety. So check the PSU is working properly. You can replace the PSU with a good PSU and see if the problem is resolved. With the new PSU, if the problem is not resolved, it means the problem is not caused by the PSU.
For laptop, you can easily replace the PSU. But for desktop, you need to open the case. This could be technical and dangerous. If you know what you’re doing, that’s fine. But if not, we recommend you to take your computer to the repair store to have it checked.

Method 6: Check the fan
The fan is one of the key components that makes computer to run properly. If it doesn’t work, the computer can overheat easily. Computer overheating can cause serious problems. So the system will try to prevent computer overheating. If the fan doesn’t work, the computer can shut down automatically to prevent the internal heating damaging the computer.
So check to see if the fan is working. For desktops, you can check this by hearing the sound from the fan. Or you can open the case to check if the fan is spinning. For laptops, it’s a little difficult to check. You may need to take the repair store to have it checked.
If you find the fan stop working, take your computer to the repair store to have a further check. You may need to replace the fan with a new one.
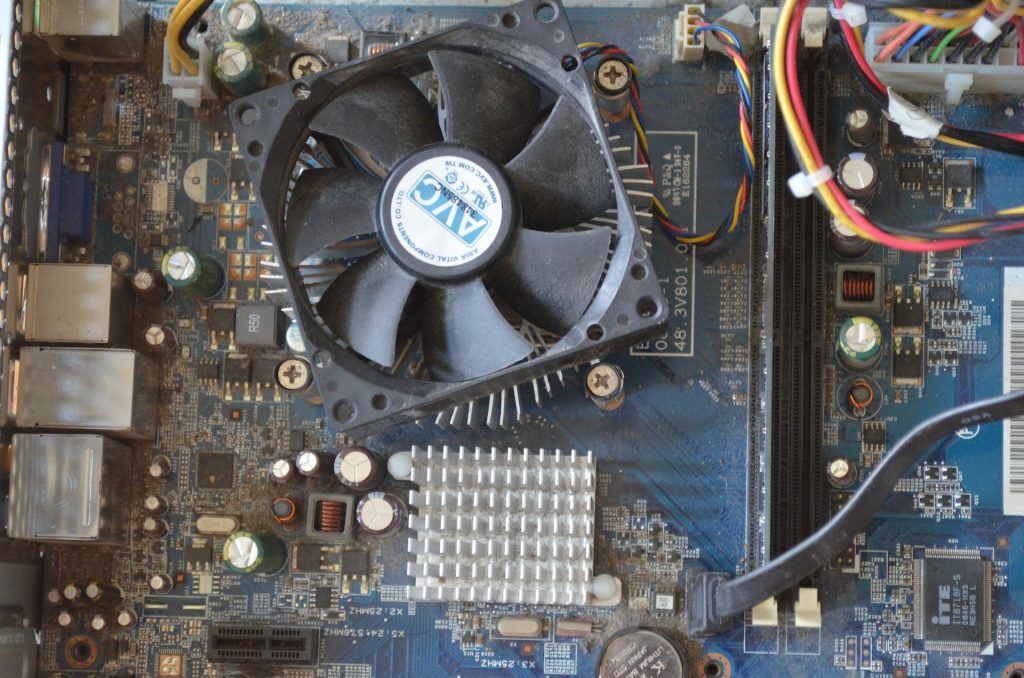
Method 7: Clean dust
Computer collects dust everyday, but we won’t notice this until too much dust causes some computer problems, like computer overheating. As we mentioned before, overheating could be the cause of the problem “computer repeatedly turns on and off”.
For desktops, you can open the case and use a soft cloth to wipe the dust. The much easier method is to use a compressed gas cleaning duster to get rid of the dust. For laptops, you’ll need to consult the manual or get technical help there if you haven’t opened one before.
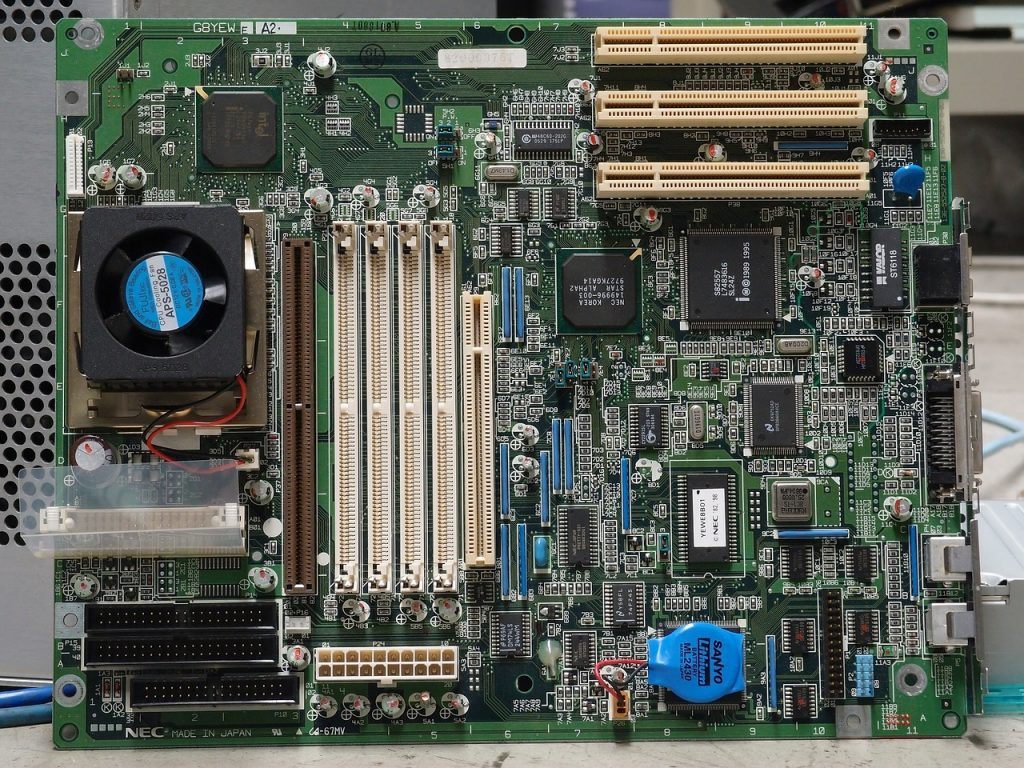
Method 8: Replace the motherboard
The last method to fix the problem is replace the motherboard. Replacing motherboard is a little technical and pricey. We recommend you to take your computer to the repair store for technical help.
Hopefully you find the tips above helpful. If you have any questions, ideas or suggestions, feel free to leave a comment below.