


Find your mic not working in CS:GO? Surely this is one of the most depressing moments when you lose audio in an intense battle, especially with so many enemies lurking around and teammates waiting for your response. In this post, you’ll be shown a few simple but useful methods that help tackle your mic-not-working issue. Read and check out…
How to fix CS:GO mic not working
Here are 9 fixes that prove to be useful to many players. You don’t have to try all of them; simply work from the top down until you find the one that works.
- Fix 1: Set your microphone as the default device
- Fix 2: Disable exclusive control for your microphone
- Fix 3: Check in-game settings
- Fix 4: Update device drivers
- Fix 5: Verify the integrity of game cache files
- Fix 6: Restart the Windows Audio service
- Fix 7: Check Privacy settings
- Fix 8: Enter ‘voice_enable 1’
- Fix 9: Repair corrupted system files
Note: The screenshots in this post are captured from a Windows 11 operating system. If you are using Windows 10 or older versions, be aware that the visual appearance of your screen may vary slightly, but the steps to perform the task remain consistent.
Fix 1: Set your microphone as default device
It is best practice to set your microphone as the default device when you come across the mic-not-working issue. To do so, you need to perform the following procedure:
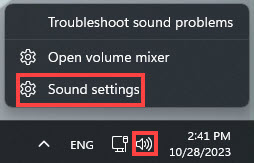
- At the bottom right corner of your computer screen – namely the notification area – you’ll find the volume icon. Right-click on it and select Sound settings.
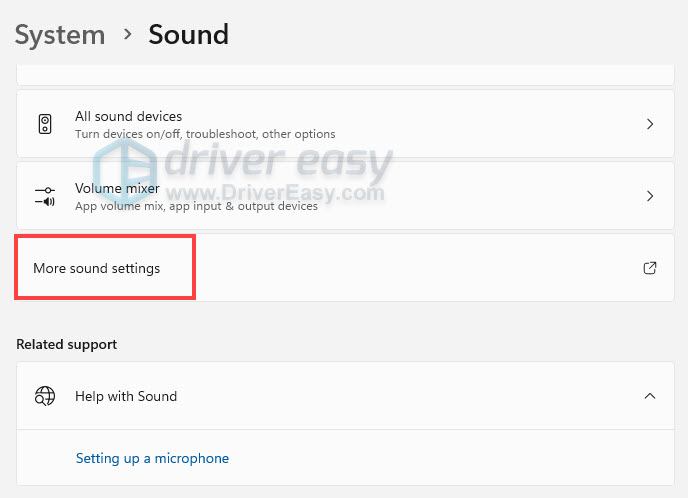
- Scroll down and click on More sound settings.
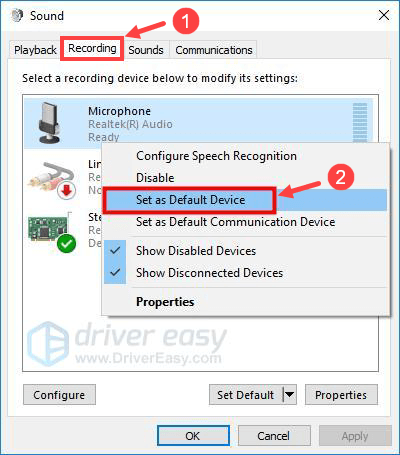
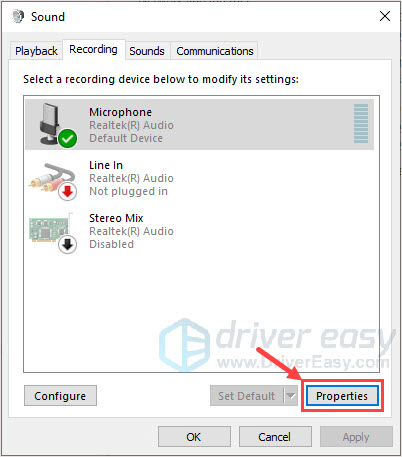
- Select the Recording tab. Right-click on the device that you’re currently using and then select Set as Default Device from its context menu.
- Click to highlight your default microphone and then click Properties.
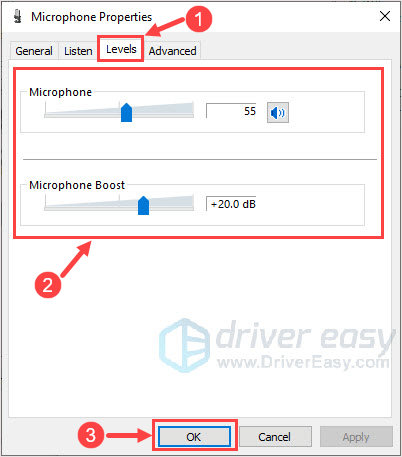
- On the Levels tab, drag the sliders of Microphone and Microphone Boost to turn up the volume. Just make sure you haven’t muted them or set them to such low levels that you cannot hear the voice yourself. After that, click OK to save the changes.
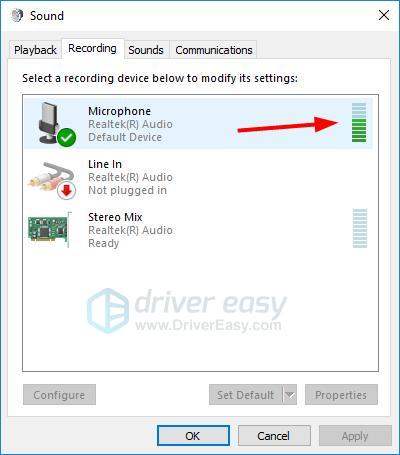
- You may do a voice test by speaking into your mic. If the recording device is working properly, you should witness a rise in the green bar as you talk.
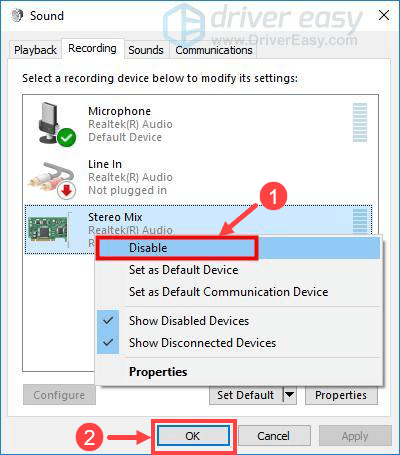
- Right-click on other recording devices and select Disable to turn them off temporarily. If you’d like to turn them on after playing CS:GO, simply repeat this step and select Enable.
Also, if you have other output devices, go to the Playback tab and disable them (except the one in use) in the same way as you did on the Recording tab. - After everything’s done, click OK to save the changes.
Now it’s time to launch CS:GO and see whether your mic is working properly. If not, please proceed to the next fix below.
Fix 2: Disable exclusive control for your microphone
If the above sound setting modifications don’t help to restore your CS:GO mic, you can try to disable the Allowing executive control of microphone feature, as it’s proven to be effective by some community gamers. To do so:
- At the bottom right corner of your computer screen – namely the notification area – you’ll find the volume icon. Right-click on it and select Sound settings.
- Scroll down and click on More sound settings.
- Select the Recording tab. Right-click on the device that you’re currently using and then select Set as Default Device from its context menu.
- Click to highlight your default microphone and then click Properties.
- Go to Advanced, and untick the box for Allow applications to take exclusive control of this device. After that, click OK to save the changes.
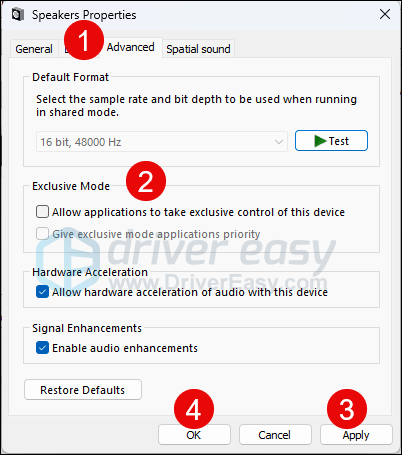
- Click OK to save the change.
Try the CS:GO mic again to see if it works. If the problem remains, please move on.
Fix 3: Check in-game settings
Make sure you haven’t turned off any options related to microphone in CS:GO. Usually there won’t be any problems with your default audio settings. That said, you should still check the in-game settings, just in case.
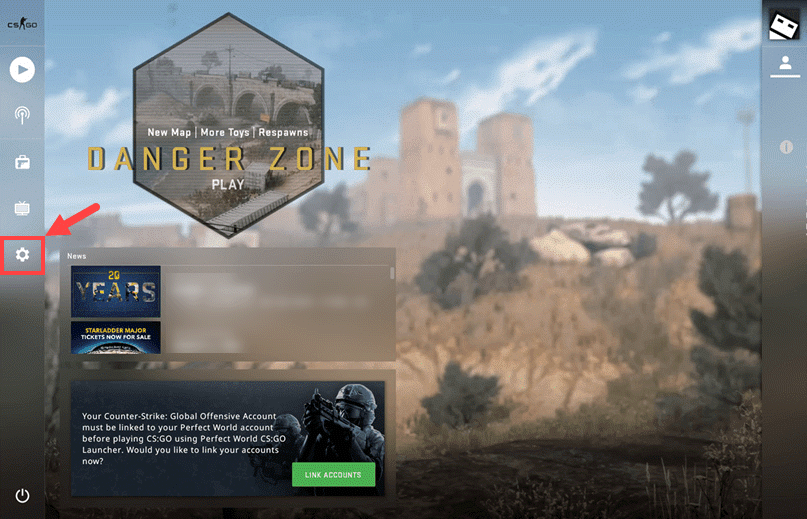
- Launch CS:GO and click the gear icon in the left pane.
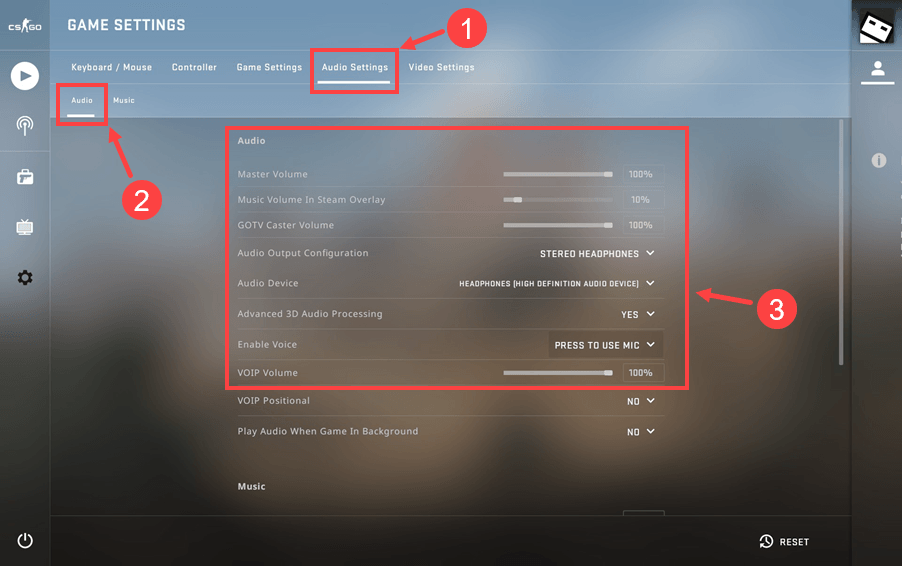
- Go to the Audio Settings tab and select Audio below. Then, pay attention to the related audio settings and make certain they are turned on or set to the correct state.
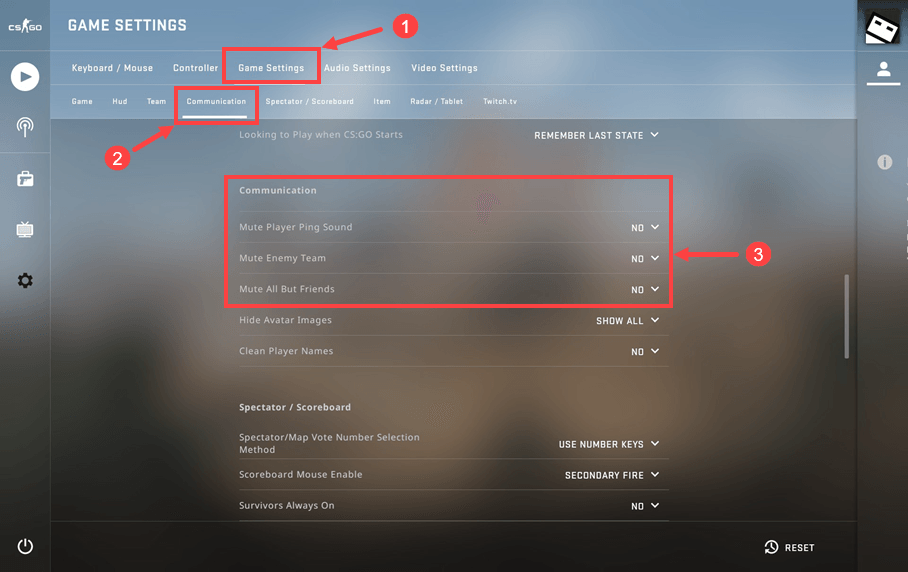
- Select Game Settings > Communication. Make sure you haven’t muted your friends or others in the game. (This is not necessarily related to your mic, so you may skip this step if you want.)
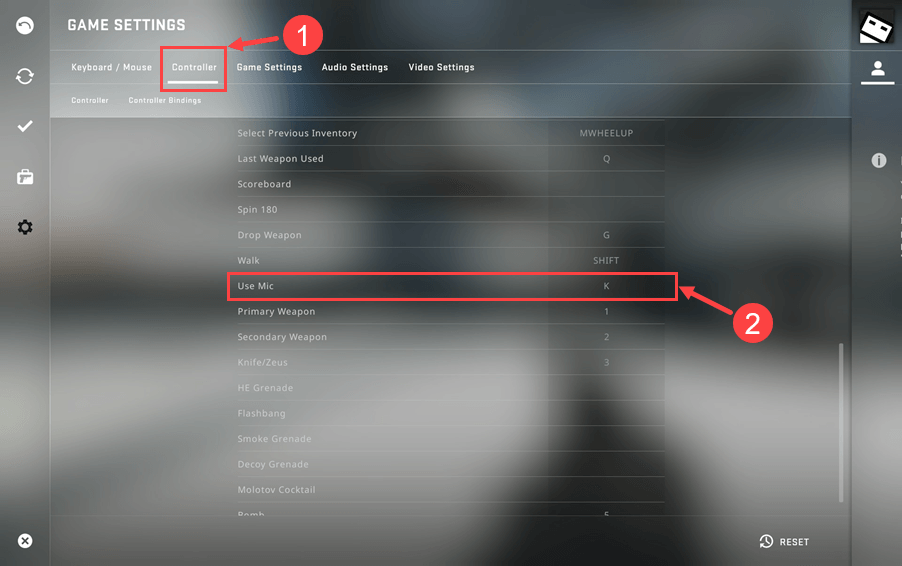
- Go to Controller. Below you’ll see the item – Use Mic. If there’s already a shortcut key assigned to it, then you don’t need to change anything; otherwise please assign a shortcut key to it. (The default key is K.)
When you’re all set, join a squad to see if you can use the mic properly. If not, move on to the next fix.
Fix 4: Update device drivers
Sometimes an outdated, corrupt or incompatible driver may trigger the mic-not-working issue. If that’s the root cause, you should try to update not only the audio drivers but also drivers for other motherboard devices like chipsets.
If you don’t have the time, patience, or computer skills to update the graphics card driver manually, you can do it automatically with Driver Easy.
Driver Easy will automatically recognize your system and find the correct drivers for it. You don’t need to know exactly what system your computer is running, you don’t need to risk downloading and installing the wrong driver, and you don’t need to worry about making a mistake when installing. Driver Easy takes care of it all.
- Download and install Driver Easy.
- Run Driver Easy and click the Scan Now button. Driver Easy will then scan your computer and detect any problem drivers.

- Click Update All to automatically download and install the correct version of all the drivers that are missing or out of date on your system.
(This requires the Pro version which comes with full support and a 30-day money-back guarantee. You’ll be prompted to upgrade when you click Update All. If you’re not ready to buy the Pro version, Driver Easy offers a 7-day free trial which includes access to all the Pro features such as high-speed download and one-click install. You won’t be charged anything until your 7-day trial has ended.)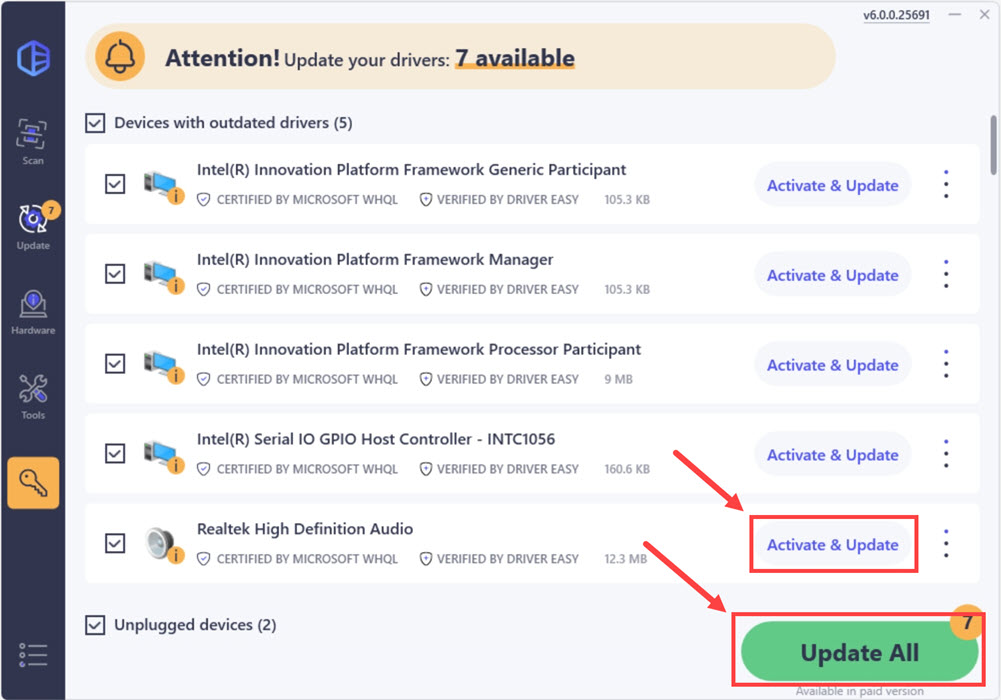
- Restart your computer for the changes to take effect.
Does this fix solve your mic-not-working issue? Hopefully it does; if not, you may give the next fix a whirl.
Fix 5: Verify integrity of game cache files
This is a quick fix for most problems occurring in Steam games, so it not only applies to CS:GO but also to other games when necessary. Here are the steps that help you verify the integrity of your game cache files:
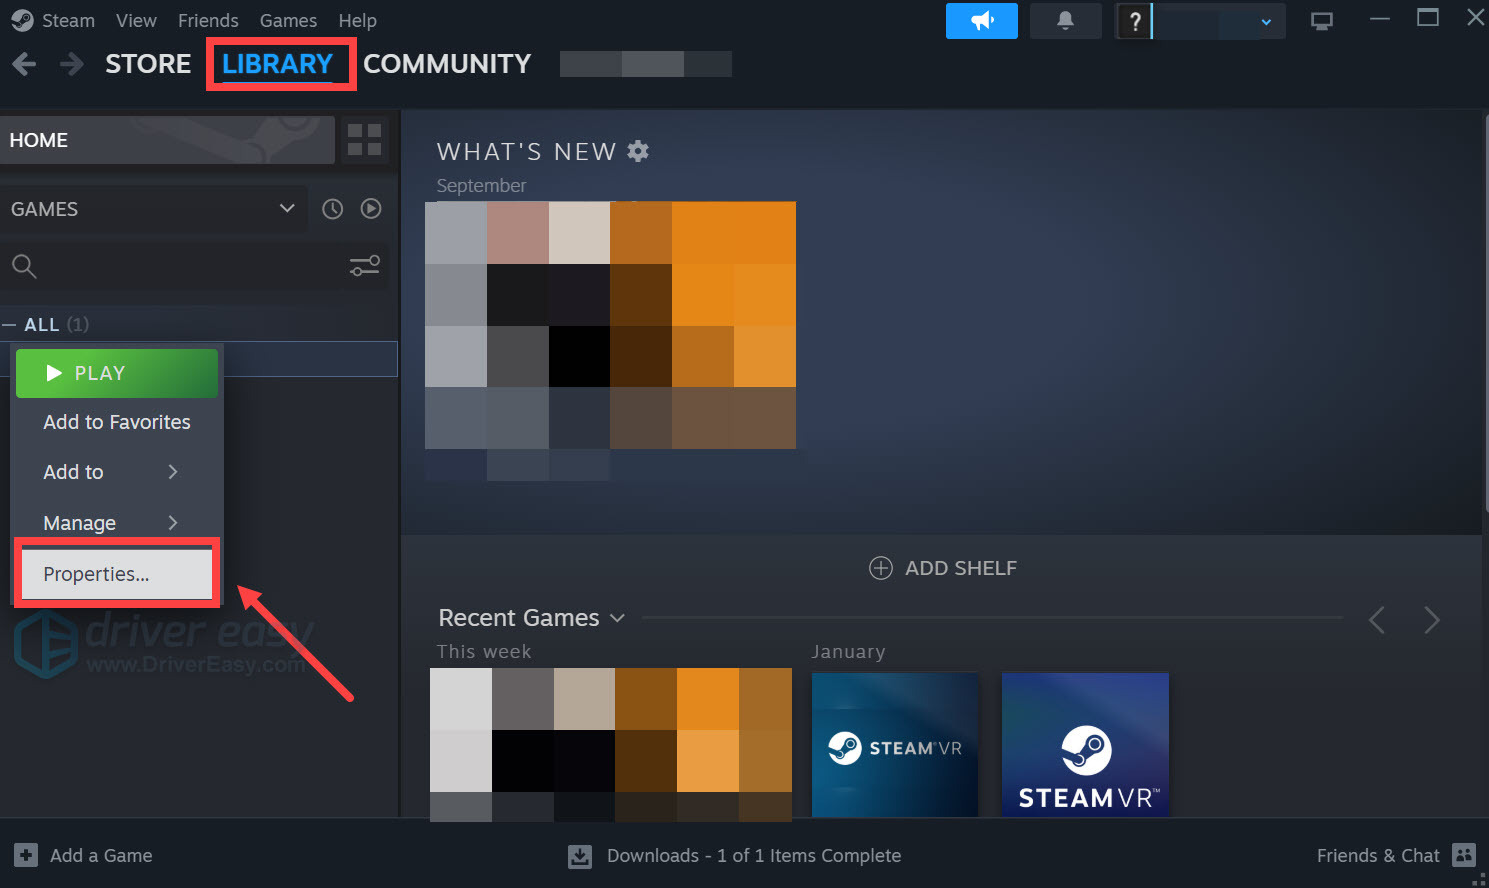
- Launch Steam.
- In the LIBRARY, right-click on your game and select Properties from the drop-down menu.
- Select the Installed Files tab and click on the Verified integrity of game files button.
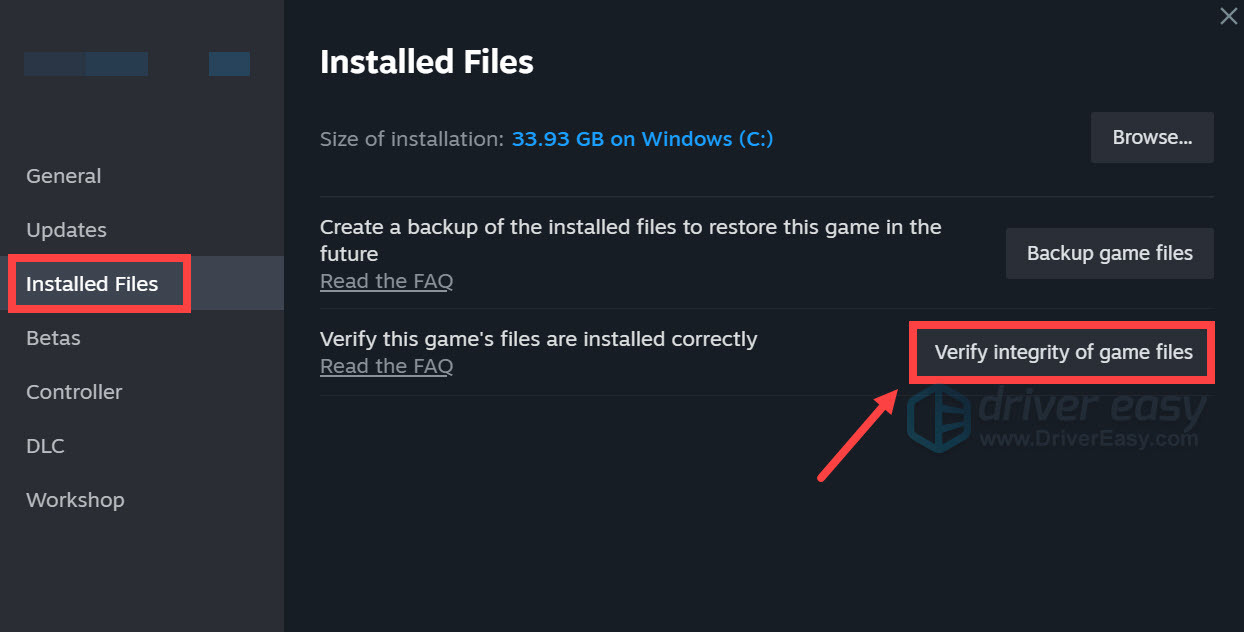
- Steam will verify the game’s files – this process may take several minutes.
Once you verify that all the cache files are in normal state, please launch CS:GO and check if your mic is working properly this time. In case the problem persists, you should move on to the next fix.
Fix 6: Restart the Windows Audio service
Chances are your Windows Audio service is running into glitches that prevent the mic from working normally. In this case you should restart the service and see if that gets your mic back on track.
- On your keyboard, press the Windows logo key
 and R at the same time to invoke the Run box. Type services.msc and click OK.
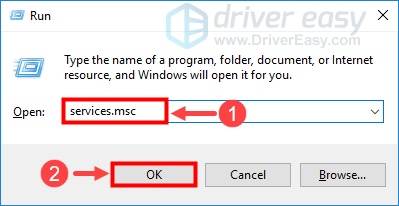
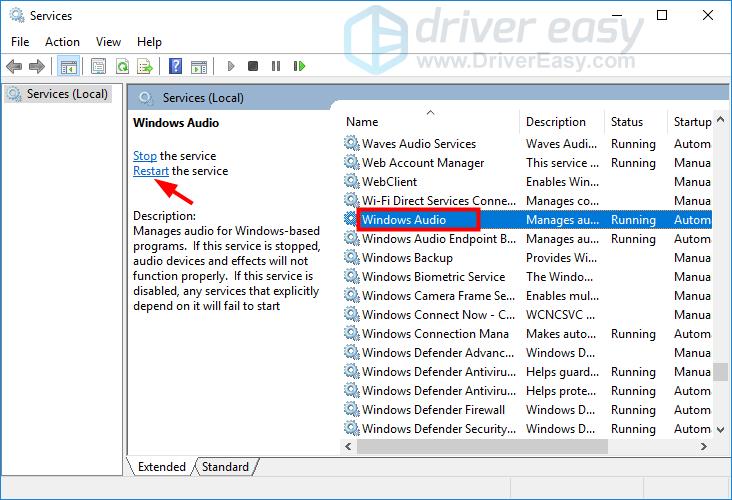
- In the pop-up window, scroll through the list of services to locate Windows Audio. Click to highlight this item and click Restart in the left pane.
- Wait for the process to complete and then exit the window.
If this fix didn’t help, you might try out the next one.
Fix 7: Check Privacy settings
There’s a possibility that your privacy settings related to the microphone has been reset after a Windows update or other events. If that’s the case, CS:GO might be forbidden to access your mic. To modify the privacy settings, you should perform the following procedure:
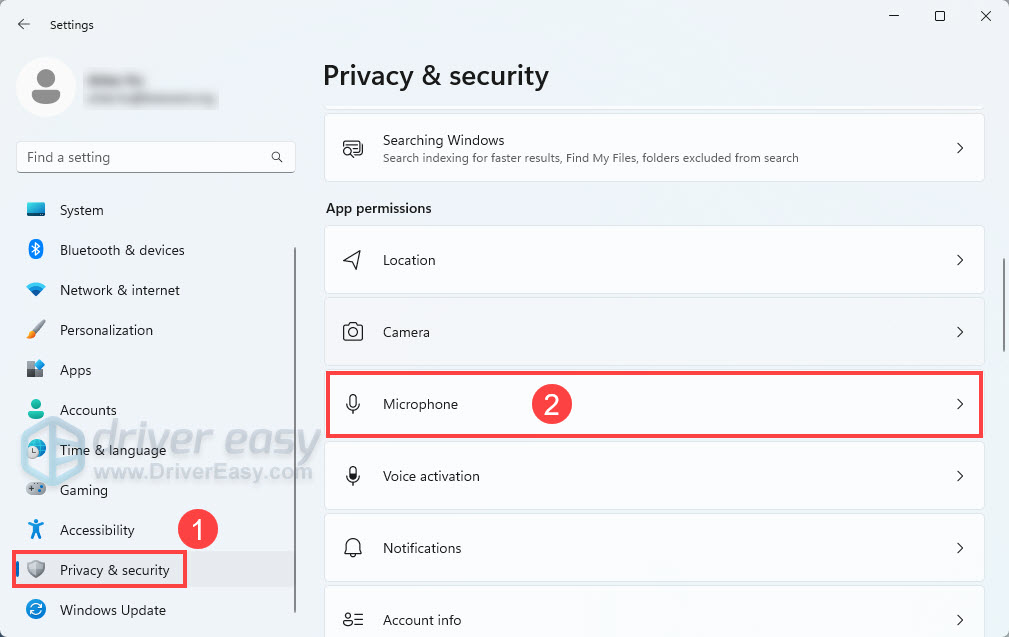
- On your keyboard, press the Windows Logo key and I at the same time to open the Settings window. Then, select Privacy and Microphone.
- Check if the Microphone access button is Off. If so, simply turn it On.
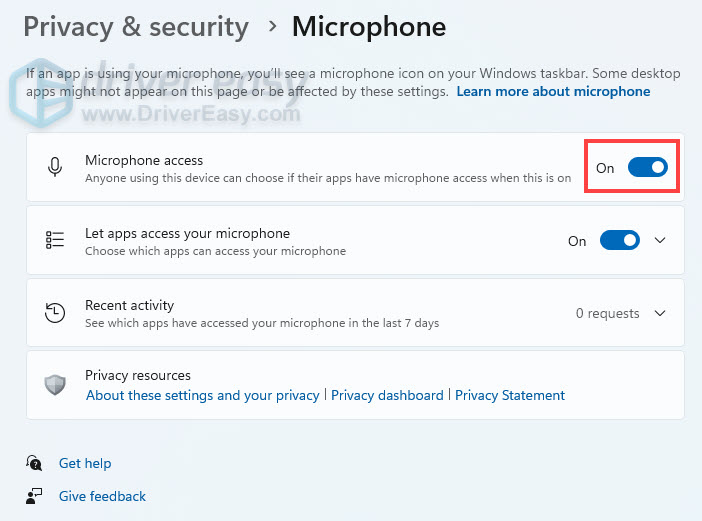
- Below you’ll see another toggle for Let apps access your microphone. Also turn it on if it’s been set to Off.
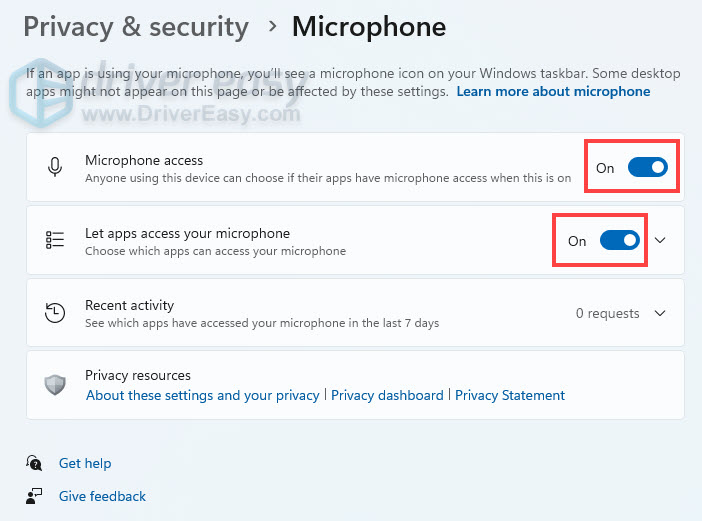
- Scroll down and head to the part of Choose which apps can access your microphone. You won’t see Steam or CS:GO there but you can toggle on the apps related to your audio output. For instance, if you use Skype to communicate in games, make sure you turn its toggle on.
After making these tweaks, check to see if your mic goes back to normal in CS:GO. If not, there’s still one last fix you may try.
Fix 8: Enter ‘voice_enable 1’
You can use the command-line tool in CS:GO to enable the mic. Here’s how:
- Launch CS:GO. In the left pane, click the gear icon to open the Settings window. Then go to the Game Settings > Game tab. Scroll through the list below to locate Enable Developer Console (~) and select Yes.
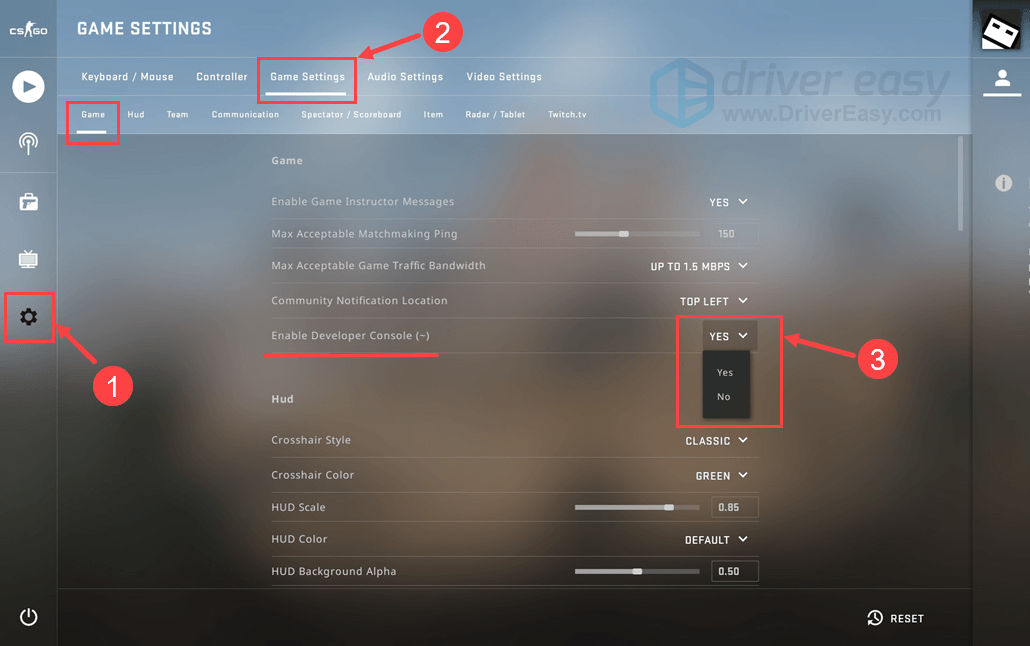
- Exit the Settings window. Press the ~ key on your keyboard (the one above Tab) to invoke the command-line window in CS:GO.
- Type voice_enable 1 and click Submit.

Test your mic in the game and see if it works properly now.
Fix 9: Repair corrupted system files
Missing, corrupt, or damaged system files may be the culprit for this CSGO mic not working error. To eliminate this issue as a possible cause, you can try the fix below to repair possible system file issues.
System File Checker (SFC) is a handy feature in Windows that helps scan your system files and repair missing or corrupted system files(including those related to BSOD). To run the SFC scan:
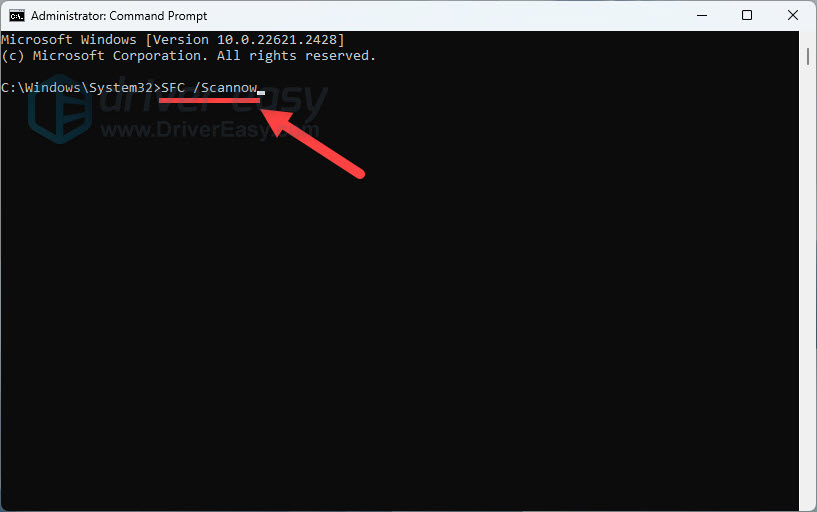
- On your keyboard, press the Windows Logo key
 , type in command prompt, and select Run as administrator. (If Windows prompts for permission, click OK to continue.)
- Type in SFC /Scannow, and then press Enter.
- It’ll take some time for the SFC to repair the corrupted system files if it detects any.
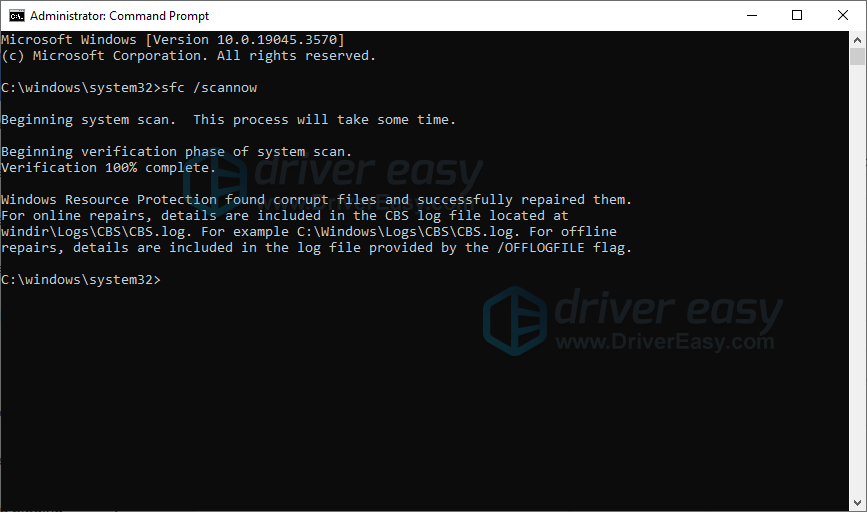
- When the process is completed, reboot your computer and test if the issue still exists.
It’ll take some time for the SFC to replace the corrupted system files, so please be patient.
Hopefully this post helped resolve your mic-not-working issue. Please feel free to leave a comment below if you have any follow-up questions or ideas. Thanks for reading!
