


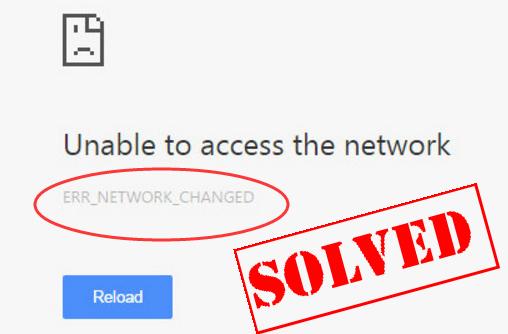
You open Google Chrome, and want to search something interesting or tips. Oops, Chrome doesn’t work as usual. Instead, you’re seeing this error saying ERR_NETWORK_CHANGED. Rest assured, you’re not alone. Many chrome users are reporting it. More importantly, the good news is you can fix it.
How do I Fix ERR_NETWORK_CHANGED?
Here are 3 solutions you can try to fix this problem. You may not have to try them all. Just work your way down the list until you find the one that works.
Solution 1: Reset your IP/TCP
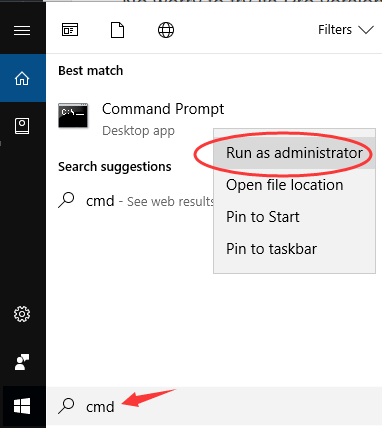
- Enter cmd in the search box from the Start menu.
- Right-click on Command Prompt from the top of result and click Run as administrator.
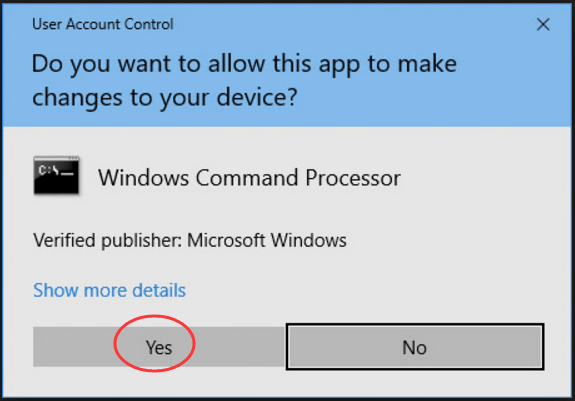
- Click Yes when prompted by User Account Control.
- Type the following commands in the open window and press Enter after each to run them one by one. Then find the network interface your computer’re using and its DNS address. netsh interface ip show config
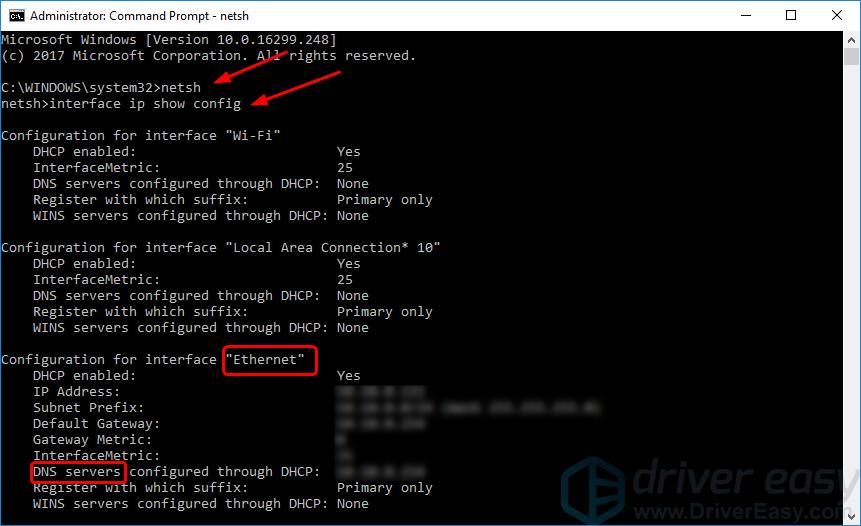
- Type interface ip set dns “your network interface name” static “DNS address” and Press Enter. [Note: Replace “your network interface name” and “DNS address” according your own information.]
For example, my computer are using the network interface “Ethernet”, so I type: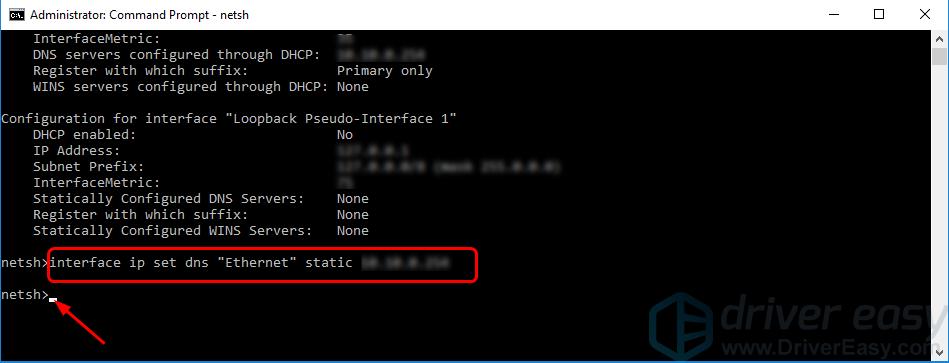
- After a several seconds, you should then see netsh> appearing on the next line. Then type the next following command and press Enter. netsh winsock reset
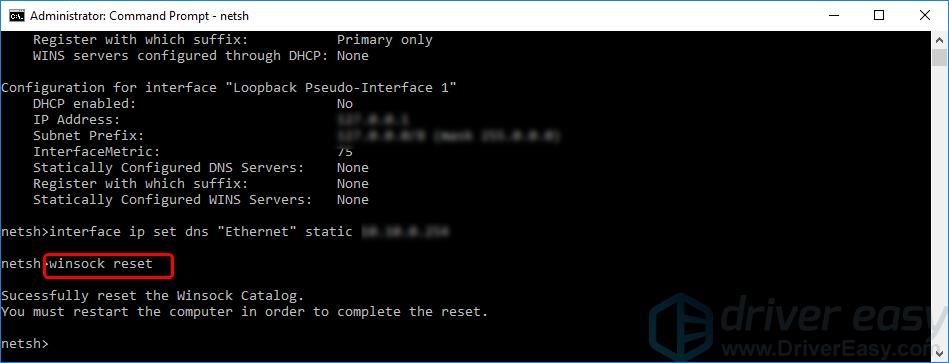
- Restart your computer and check if the error still exists.
Solution 2: Reinstall your network adapter software
Reinstall your network adapter software Manually
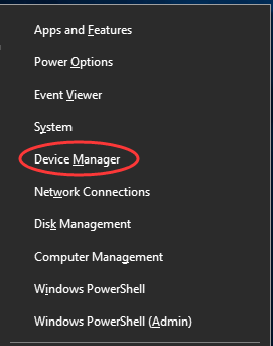
- On your keyboard, press the Windows logo key + X key at the same time to invoke the quick-access menu.
- Click Device Manager.
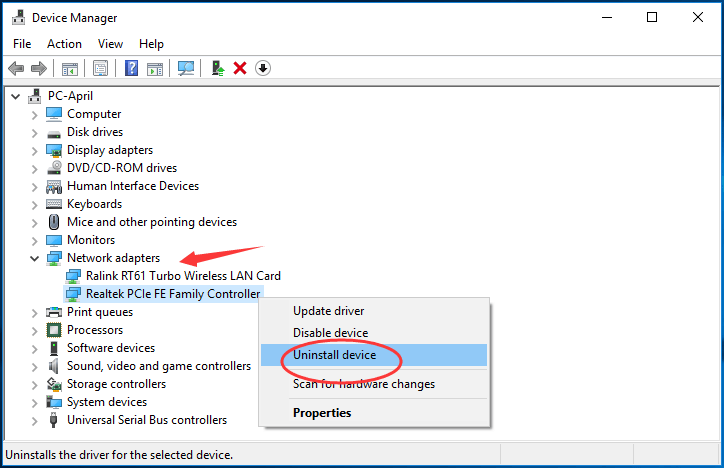
- Double-click Network adapters. Then right-click on your network adapter software and click Uninstall device.
- Restart your Windows 10 and Microsoft might reinstall the driver for you.
Reinstall your network adapter software Automatically
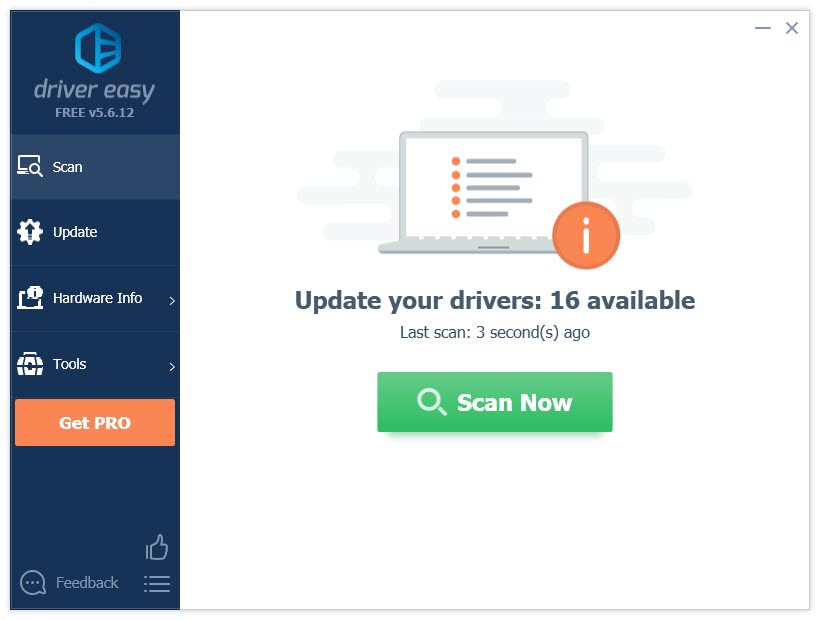
If your Windows 10 fails to reinstall the driver, download the latest driver from your network adapter manufacturer’s website. Or if you’re not confident playing around with driver manually, you can do it automatically with Driver Easy.
Driver Easy will automatically recognize your system and find the correct drivers for it. You don’t need to know exactly what system your computer is running, you don’t need to risk downloading and installing the wrong driver, and you don’t need to worry about making a mistake when installing. You can update your drivers automatically with either the FREE or the Pro version of Driver Easy. But with the Pro version it takes just 2 clicks (and you get full support and a 30-day money back guarantee):
- Download and install Driver Easy.
- Run Driver Easy and click the Scan Now button. Driver Easy will then scan your computer and detect any problem drivers.
- Click the Update button next to a flagged network adapter driver to automatically download he correct version of this driver, then you can manually install it. (you can do this with the FREE version). Or click Update All to automatically download and install the correct version of all the drivers that are missing or out of date on your system (this requires the Pro version – you’ll be prompted to upgrade when you click Update All).
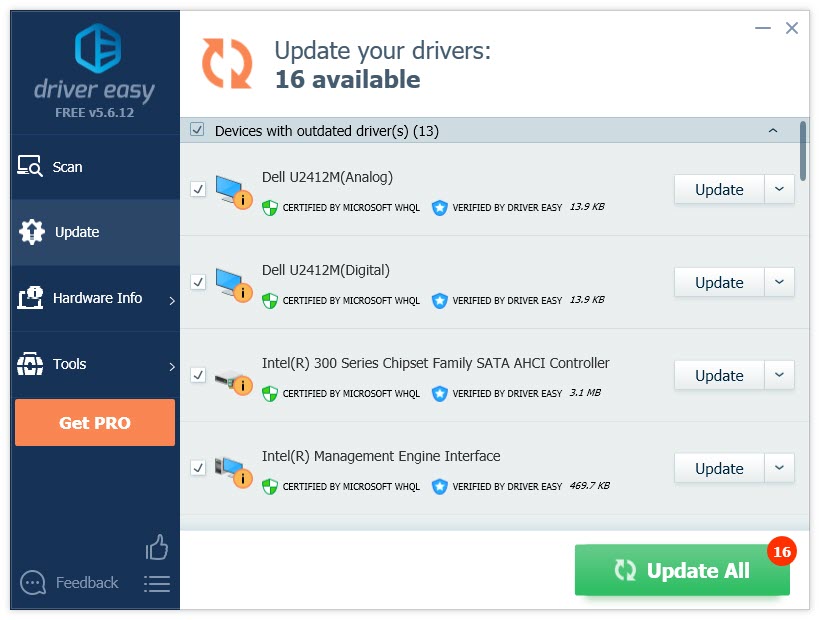
Note: Driver Easy requires network connection to update drivers. If you cannot access the Internet on your whole Windows, let the Offline Scan feature of Driver Easy help you.
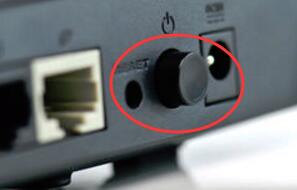
Solution 3: Restart your modem or router
If unluckily neither solution 1 nor 2 helps you, try to restart your modem or router to fix the error. Press the power button of your modem or router to power off, then wait for a while and press the power button again to start it again.
Hopefully this article helps you fix the problem. Feel free to comment below with your own experiences.