


Game crashing issues can occur for a variety of reasons, such as a faulty graphics driver, software conflicts, improper game settings, low RAM, etc. If you’re experiencing the Garry’s Mod(GMod) crashing issue on your PC, before contacting the game’s developer, try the following solutions first.
Fixes to try:
You may not have to try them all. Just work your way down the list until you find the one that works.
- Check your PC specs
- Restart your computer
- Update your graphics driver
- Verify the integrity of game files
- Change the launch option
- Disable automatic downloads from the server
- Reinstall Steam
- Reseat PC components
Fix 1: Check your PC specs
If your game crashes or freezes frequently, the first step is to verify your PC is above the minimum system requirements to run Garry’s Mod. If you’re below the recommended spec, try lowering your resolution and graphics and in-game video settings.
Here are the minimum requirements to play GMod:
| OS: | Windows® 10 |
| Processor: | 2 GHz Processor or better |
| Memory: | 4 GB RAM |
| Graphics: | 1GB dedicated VRAM or better |
| DirectX: | Version 9.0c |
| Storage: | 5 GB available space |
Here are the recommended specs to play GMod:
| OS: | Windows® 10/11 |
| Processor: | 2.5 GHz Processor or better |
| Memory: | 8 GB RAM |
| Graphics: | 4GB dedicated VRAM or better |
| DirectX: | Version 9.0c |
| Storage: | 25 GB available space |
Follow the instructions below to view your computer hardware information:
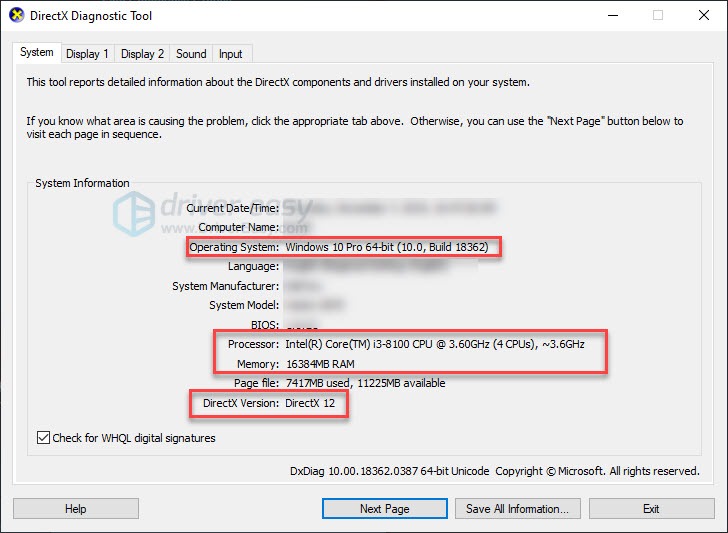
1) On your keyboard, press the Windows logo key + R to open the Run box. Type dxdiag and hit Enter.
2) Check your operating system, processor, memory and DirectX Version.
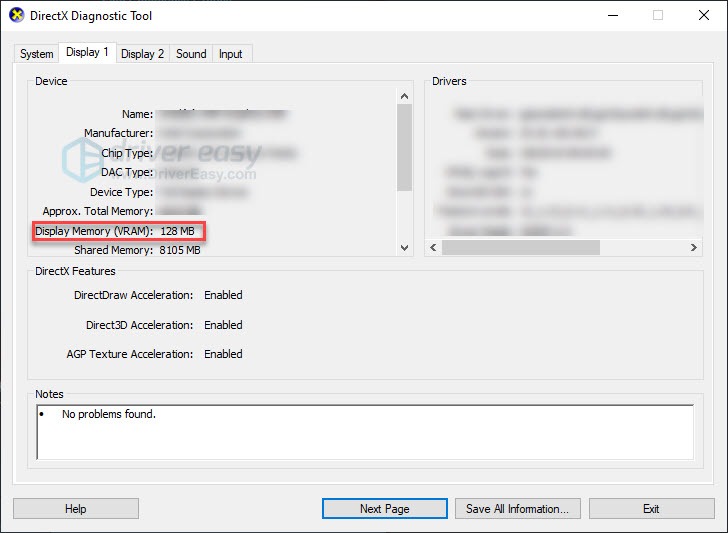
3) Check your Display Memory here.
Make sure your computer meets the requirements, then read on and try the fix, below.
Fix 2: Restart your computer
If you’re running multiple programs at the same time, hogging your system’s resources, that could cause your game to crash. In this case, try restarting your computer to end unwanted programs completely, then relaunch your game.
If your problem still exists after the reboot, check Fix 3, below.
Fix 3: Update your graphics driver
Game issues commonly occur when your graphics driver is corrupted or outdated. To see if that’s the problem for you, try updating your graphics driver. There are 2 ways you can do this:
Option 1 – Manually– You’ll need some computer skills and patience to update your drivers this way, because you need to find exactly the right driver online, download it and install it step by step.
OR
Option 2 – Automatically (Recommended)– This is the quickest and easiest option. It’s all done with just a couple of mouse clicks – easy even if you’re a computer newbie.
Option 1 – Download and install the driver manually
The manufacturer of your graphics card keeps updating drivers. To get them, you need to go to the manufacturer support website, find the driver corresponding with your specific flavor of Windows version (for example, Windows 32 bit) and download the driver manually.
Once you’ve downloaded the correct drivers for your system, double-click on the downloaded file and follow the on-screen instructions to install the driver.
Option 2 – Automatically update your graphics driver
If you don’t have the time, patience or computer skills to update your graphics driver manually, you can do it automatically with Driver Easy.
Driver Easy will automatically recognize your system and find the correct drivers for it. You don’t need to know exactly what system your computer is running, you don’t need to risk downloading and installing the wrong driver, and you don’t need to worry about making a mistake when installing.
1) Download and install Driver Easy.
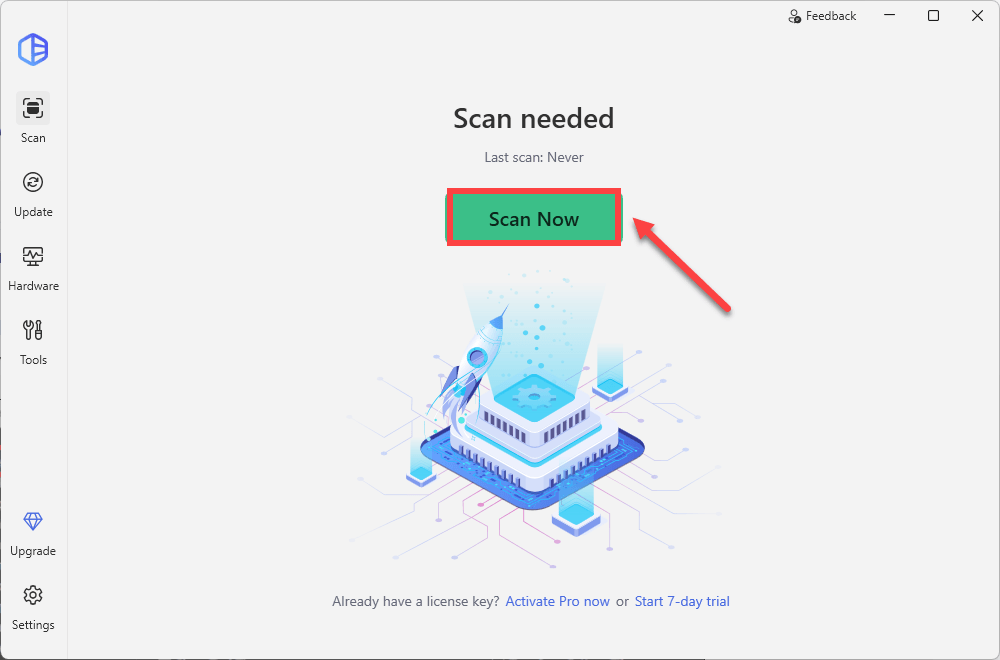
2) Run Driver Easy and click the Scan Now button. Driver Easy will then scan your computer and detect any problem drivers.
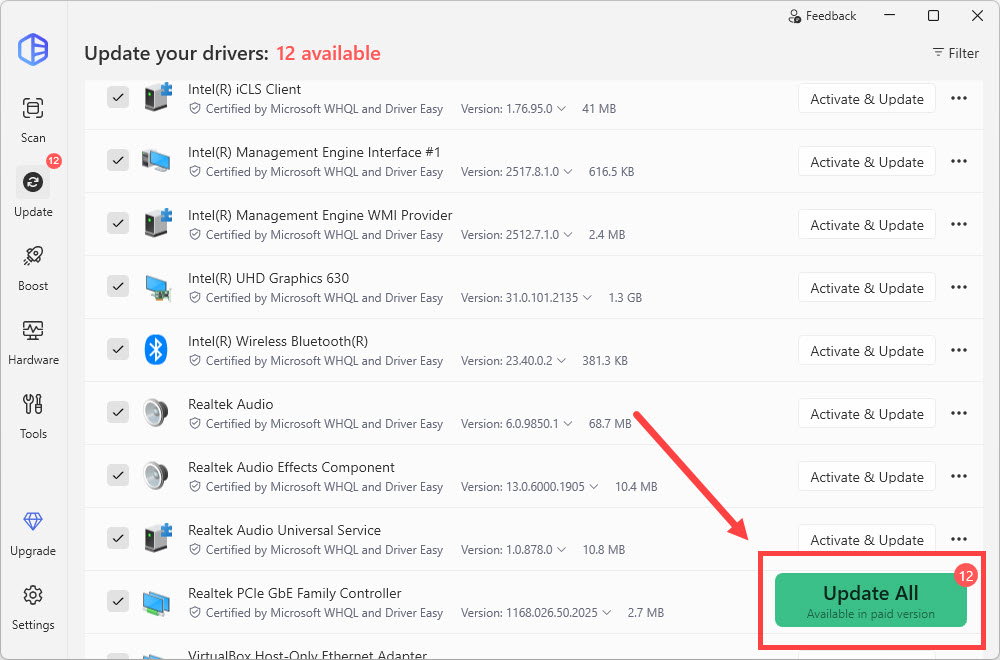
3) Click Update All to automatically download and install the correct version of all the drivers that are missing or out of date on your system.
Fix 4: Verify the integrity of your game files
Damaged or missing game files might also cause your game to fail. If you’re running the game on Steam, try verifying the integrity of your game files. Here is how to do it:
1) Run Steam.
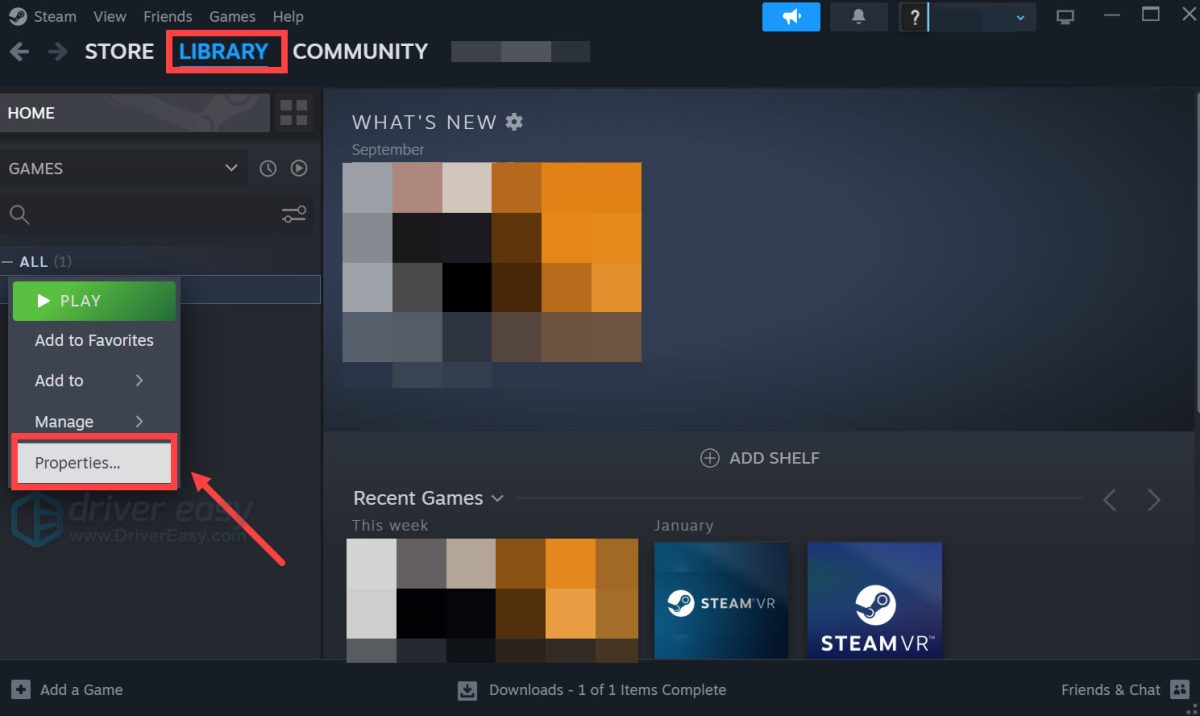
2) Click LIBRARY.

3) Right-click Garry’s Mod and select Properties.
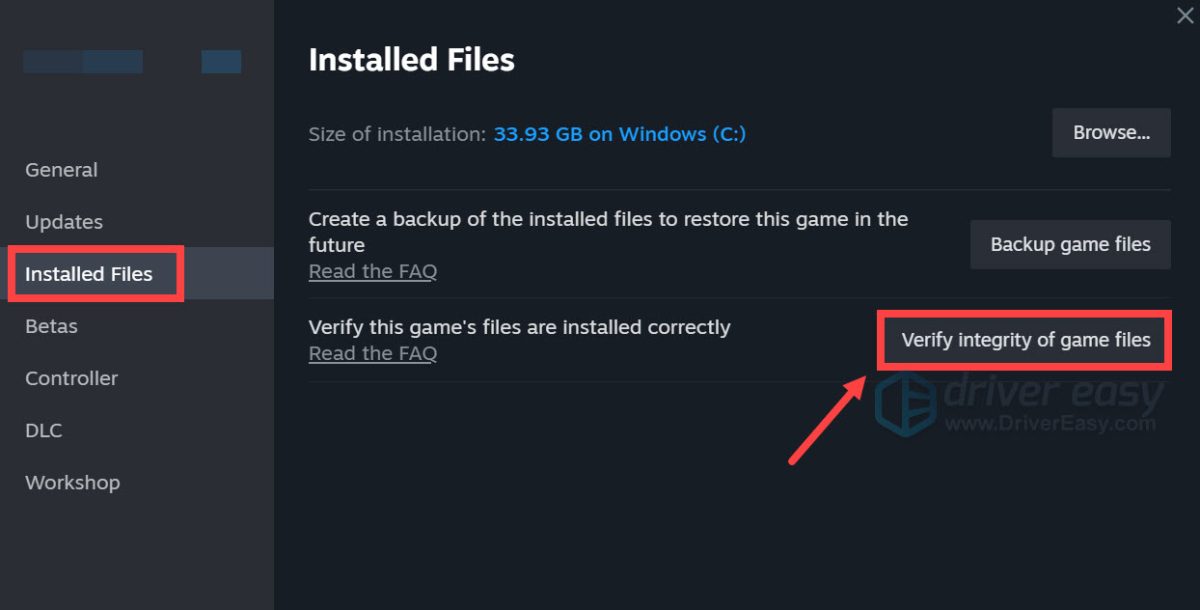
4) Click the LOCAL FILES tab, then click VERIFY INTEGRITY OF GAME FILES.
5) Relaunch GMod.
If the crashing issue continues to occur, then go ahead with the fix below.
Fix 5: Change the launch option
Many players report that running the game with -dxlevel 85 -console -windowed -noborder launch option fixed the crashing issue. Follow the instructions below to see how to do it:
1) Run Steam.
2) Click LIBRARY.
3) Right-click Garry’s Mod and select Properties.
4) Click SET LAUNCH OPTIONS.
5) Remove any launch options currently shown. Type -dxlevel 85 -console -windowed -noborder, then click OK.
Relaunch your game to see if this worked for you. If it didn’t fix your issue, move on to the fix below.
Fix 6: Disable automatic downloads from the server
If you enable the automatic downloads of custom content from game servers, you’re likely to experience this issue when your Internet connection is bad. (This is because the downloading process can hog your Internet speed, thus crashing your game. )
Follow the instructions below to stop the automatic downloads:
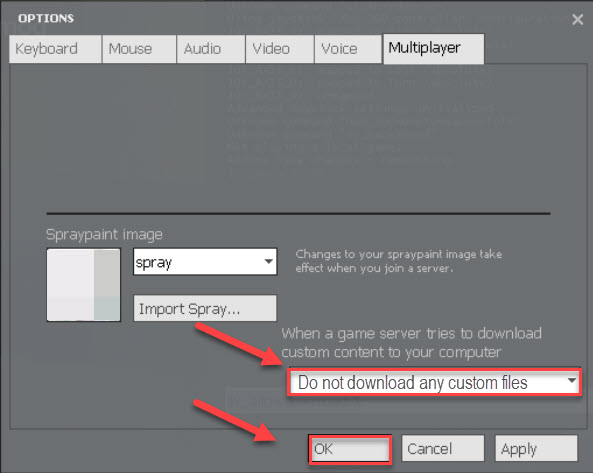
1) Run GMod.
2) Navigate to Option, click the Multiplayer tab.
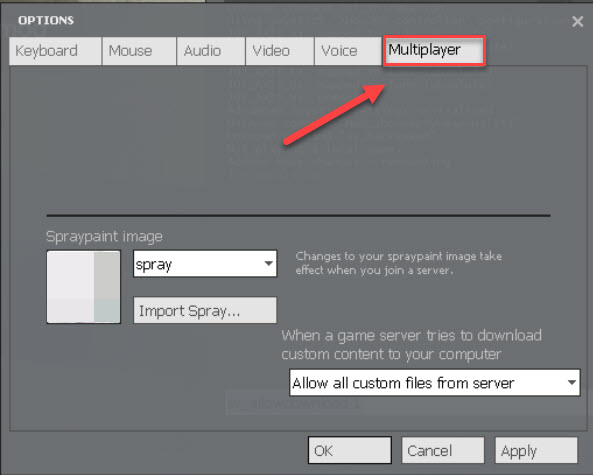
3) Click the list box under When a game server tries to download custom content to your computer, and select Do not download any custom files. Then click OK.
Relaunch your game to check if this has resolved your issue. If not, try the fix, below.
Fix 7: Reinstall Steam
If none of the fixes above worked for you, reinstalling Steam is very likely the solution to your issue. Follow the instructions below:
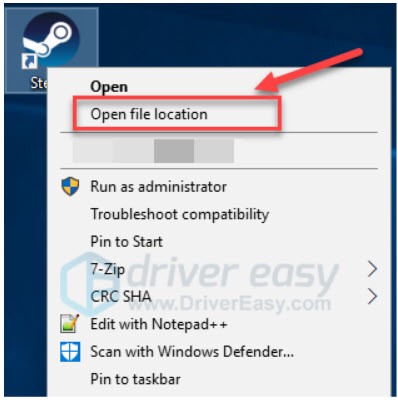
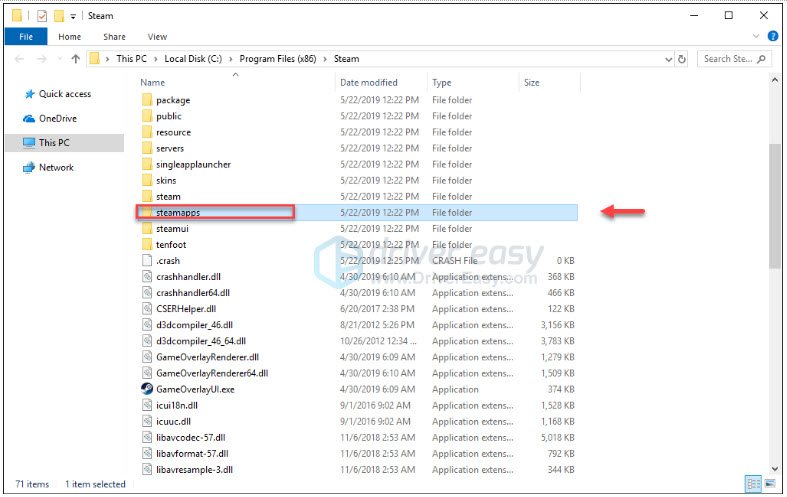
1) Right-click the Steam icon on your desktop and select Open file location.
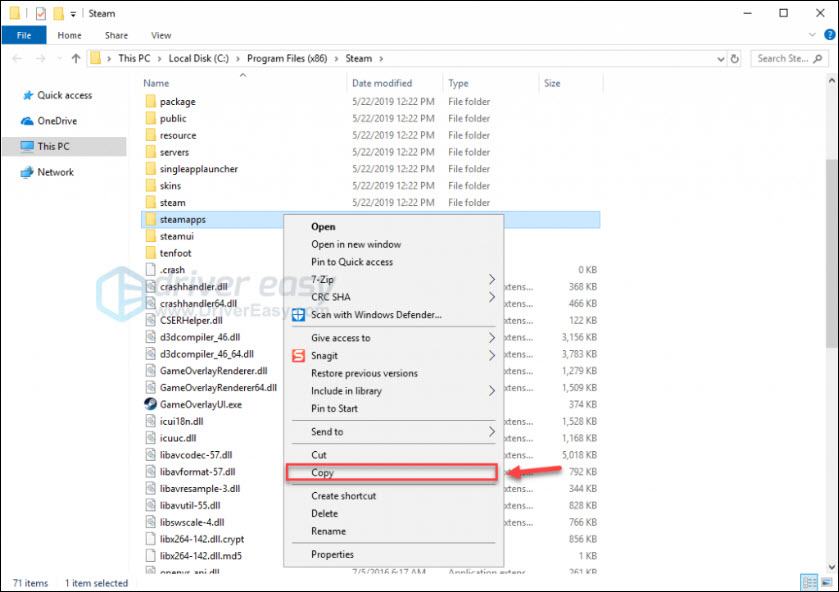
2) Right-click the steamapps folder and select Copy. Then, place the copy in another location to back it up.
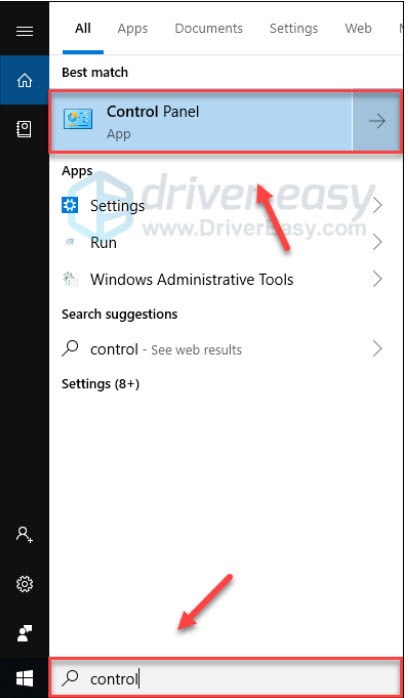
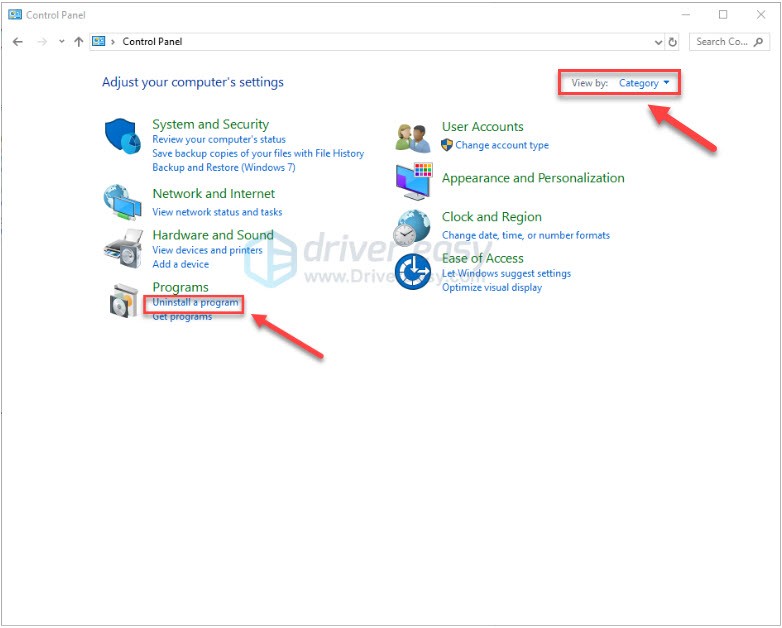
3) On your keyboard, press the Windows logo key and type control. Then, click Control Panel.
4) Under View by, select Category, then select Uninstall a program.
5) Right-click Steam, and then click Uninstall.
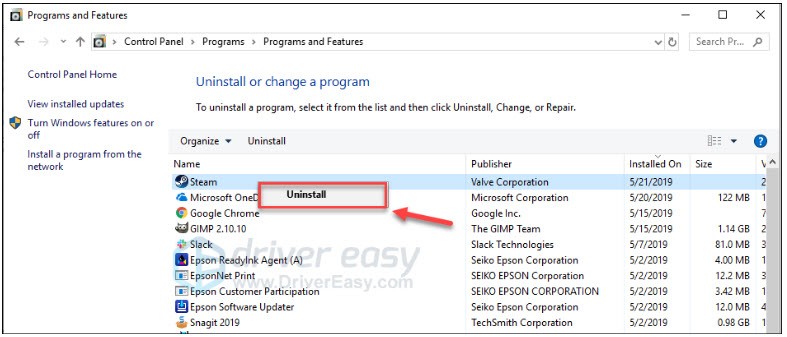
6) Follow the on-screen instructions to uninstall Steam.
7) Download and install Steam.
8) Right-click the Steam icon and select Open file location.

9) Move the backup steamapps folder you create before to your current directory location.
10) Relaunch Steam and your game.
Fix 8: Reseat PC components
Try this for a Desktop PC if software-based solutions don’t work at all or only temporarily fix the issue.
* For computers with recently installed components – a new component may not have been seated properly when installed.
* For computers with no recent changes, vibration and/or heating and cooling can components to shift in their sockets over a period of months or years. Contacts can also get dirty. You may not find any obviously loose components or filthy contacts but even a small misalignment or a little bit of contamination can cause issues.
Generic steps are provided below. If you’ve done this sort of thing before, that should be sufficient. If not, review steps below and find some good videos or how-to articles on disassembling PCs, grounding yourself, removing specific components, and cleaning contacts – there are a lot of these available to suit any level of experience.
Note that static electricity discharges can DESTROY some of the components inside your PC – take care when working inside your PC. Search the internet for tips on grounding yourself before you open the case and frequently thereafter. Proceed at your own risk.
1. Unplug your PC from the power source.
2. Unplug any hard-wired peripherals (keyboards, mice, etc.) from the PC.
3. Find a flat surface where you can work and set the PC down.
4. Verify that you have unplugged the PC from its power source.
5. Open the PC case – this may require a Phillips head screwdriver.
6. Lay the case down on its side so that you have access to the motherboard.
7. Visually inspect RAM sticks and any add-on cards installed in the motherboards slots (the graphics card and the sound card would be typical). Look for any wires that might interfere or get damaged while removing a component – a wire that might. If you find any, take a picture that clearly shows how each wire is connected and then disconnect any wires needed to gain clear access to RAM and add-on cards (one end only if possible).
8. RAM sticks.
a. Ground yourself.
b. Remove RAM stick and clean contacts with an eraser.
c. Repeat a & b for each RAM stick.
d. Ground yourself.
e. Reseat RAM stick.
f. Repeat d and e for each RAM stick.
9. Add-on Cards (Graphics Sound, etc.)
a. Assuming you using an add-on graphics card.
b. Ground yourself.
c. If the card is secured to the back of the case with a screw, remove the screw.
d. Double-check for any additional wires – take pictures and disconnect (one end only for preference) as needed.
e. Ground yourself.
f. Remove and clean contacts with an eraser.
g. Reseat the card.
h. Re-install screw. If there wasn’t a screw originally and there is a hole in the back of the case matching a hole on the card’s bracket, seriously consider installing a screw – it will help keep the card in place.
10. Reconnect any wires that you had to disconnect in order to gain clear access to all components.
11. Close up your PC, reconnect to the power source, reconnect all peripherals and start it back up.
12. Start GMod up and see if it works as expected. If it works, make a note somewhere where you’ll see it if something like this happens again. It will likely be a long time before it does and you’ll have forgotten all about this by that time.
Hopefully, you’re able to play Garry’s Mod now. If you have any questions or suggestions, please feel free to leave a comment below.