


You press the print button on your HP printer but it only sends out a completely blank sheet of paper? This is indeed very annoying, and you’re not alone. Many HP users are reporting it. But before you head for the printer repair shop, try the solutions here.
Fixes to try:
You may not have to try them all; just work your way down the list until you find the one that does the trick for you.
Fix 1: Check your ink cartridges
If your printer keeps printing blank pages, you should verify your cartridges are working properly. Here is what you should check:
Check whether your ink cartridges are clogged.
Your printer won’t function properly when the ink cartridges are blocked or clogged. If that’s the core issue, try cleaning your ink cartridges from the printer control panel or clean it manually.
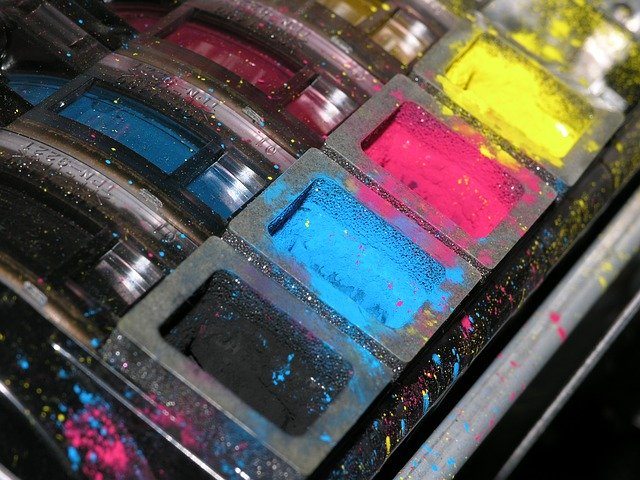
Check the ink levels on your printer.
Low or empty cartridges can also cause the printer to print blank pages. So, check the ink/toner levels on your printer and replace cartridges if necessary.
Reinstall your cartridges.
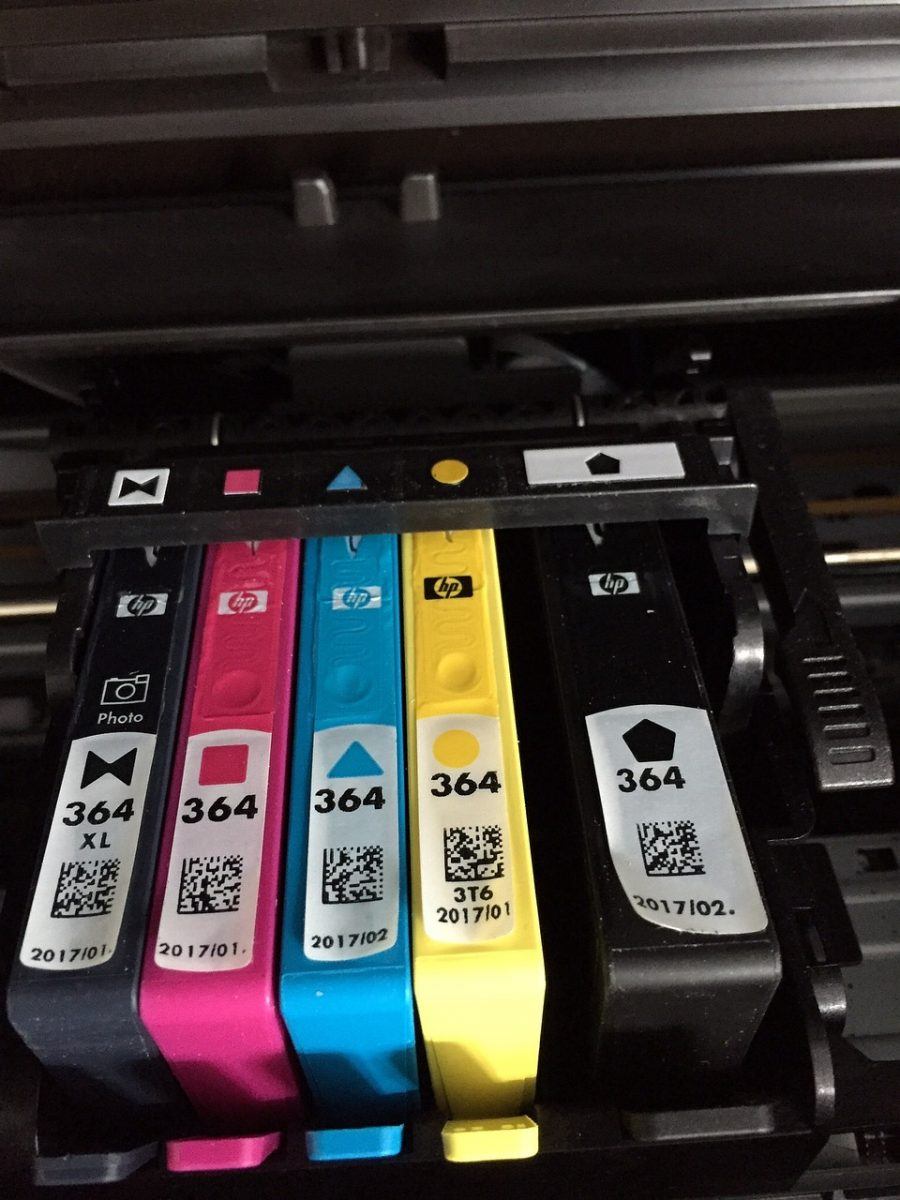
Printer issues might occur when your cartridges are defective or when the connection between cartridges and your printer is weak.
Remove your cartridges to see if any cartridges are defective. If you find any damaged cartridges, replace it. If all your cartridges are in good condition, reinstall your cartridges.
Make sure your cartridges are fine, then try printing a page. If your problem still exists, then go ahead with the fix below.
Fix 2: Update the printer driver
Driver, or device driver, is a program that makes your computer and hardware attached work together. If the driver hasn’t been properly installed on your computer, your printer won’t fully function, and issues like blank page printing are likely to occur.
So updating the driver should always be your go-to option when something goes wrong with your HP printer. There are two ways you can get the right driver:
- Option 1 – Manually update your printer driver
- Option 2 – Automatically update the driver (Recommended)
Option 1 – Download and install the driver manually
HP keeps updating printer drivers. To get the latest driver for your printer, go to the HP support website and find the driver corresponding with your specific flavor of Windows version (for example, Windows 32 bit) and download the driver manually.
Once you’ve downloaded the correct drivers for your system, double-click on the downloaded file and follow the on-screen instructions to install the driver.
Option 2 – Automatically install the HP printer driver
If you don’t have the time, patience or computer skills to update your printer driver manually, you can do it automatically with Driver Easy.
Driver Easy will automatically recognize your system and find the correct drivers for it. You don’t need to know exactly what system your computer is running, you don’t need to risk downloading and installing the wrong driver, and you don’t need to worry about making a mistake when installing. You can scan for missing or outdated drivers for free, and to automatically update them you’ll need to subscribe to the Pro version, which now offers a 7-day free trial so you don’t need to decide right away.
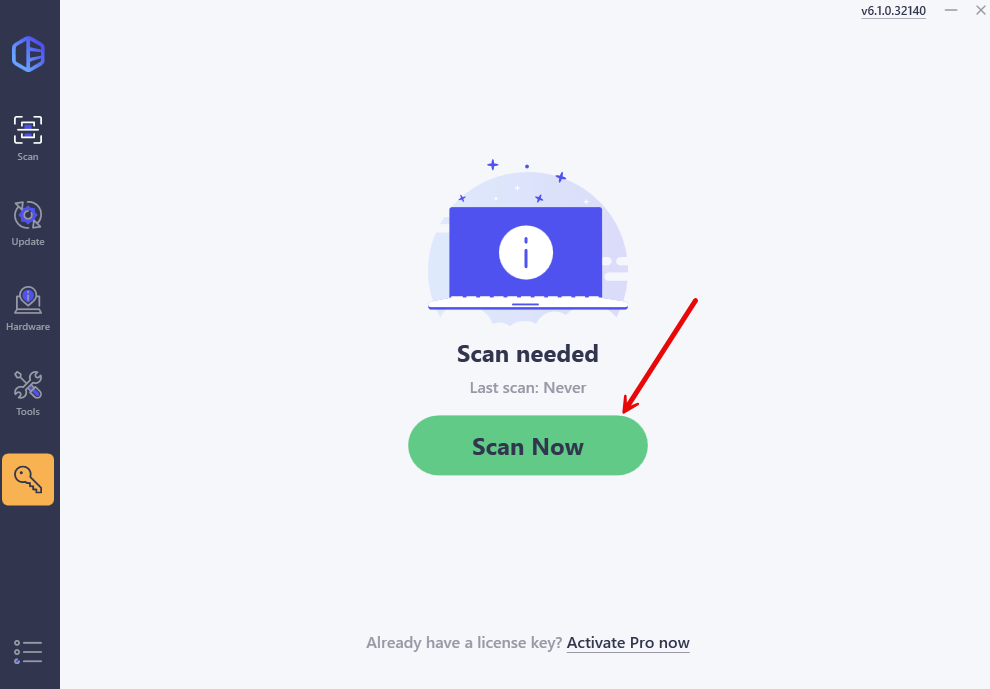
1) Download and install Driver Easy.
2) Run Driver Easy and click the Scan Now button. Driver Easy will then scan your computer and detect any problem drivers.
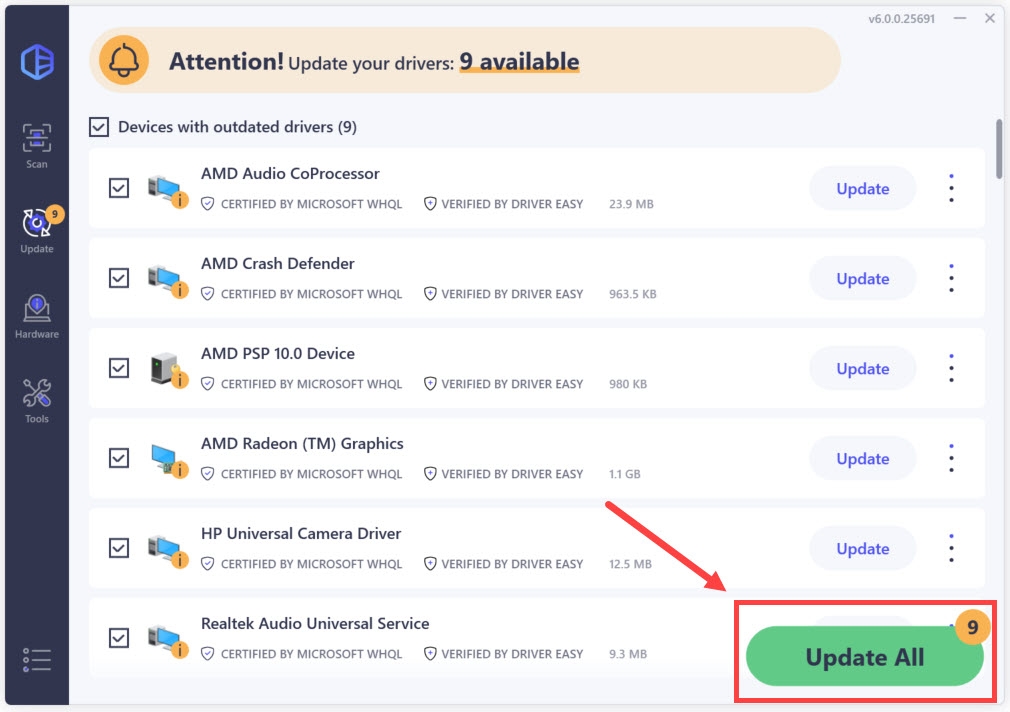
3) Click Update All to fix all outdated or missing PC drivers. (This requires the Pro version which comes with full support and a 30-day money back guarantee. You’ll be prompted to upgrade when you click Update All.)
4) Check to see if your printer works now.
If your issue persists, then move on and try the fix below.
Fix 3: Run the Windows troubleshooter
The printer troubleshooter is a Microsoft built-in utility that can detect and fix common printer issues automatically.
So ,when your printer isn’t working correctly, try using the tool to see if it helps. Here is how:
If you’re on Windows 7 or 8…
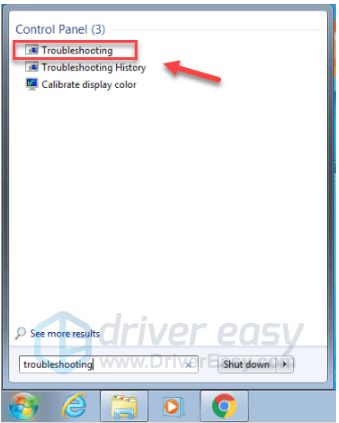
1) On your keyboard, press the Windows logo key, and then type troubleshooting.
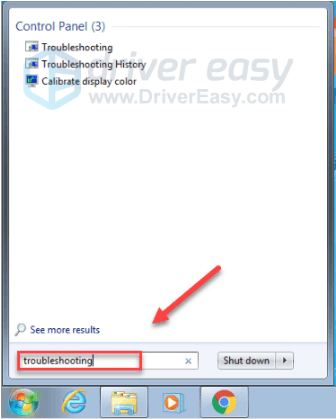
2) Select Troubleshooting.
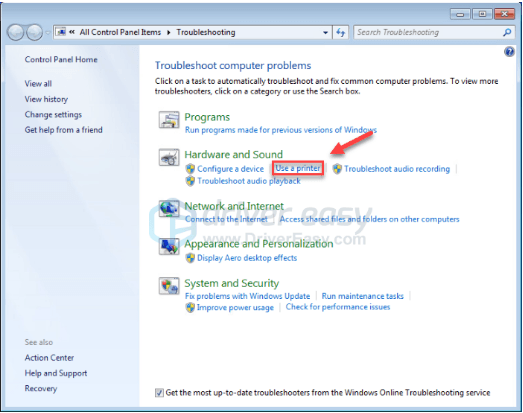
3) Click Use a printer.
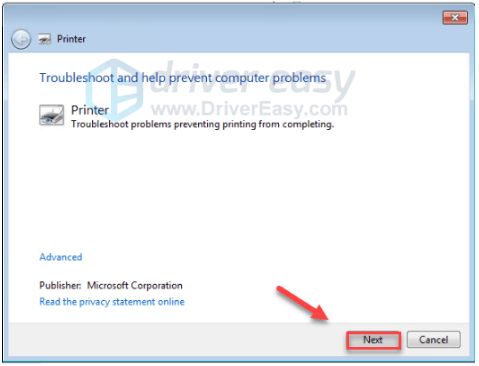
4) Click Next.
5) When the troubleshooting is complete, try printing a page to see if your printer works correctly.
If your printer still can’t print or no printer issues are identified, try fix 3.
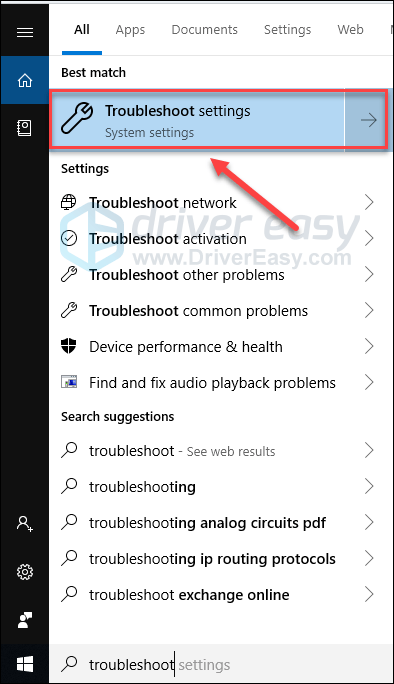
If you’re on Windows 10…
1) On your keyboard, press the Windows logo key and type troubleshooting.
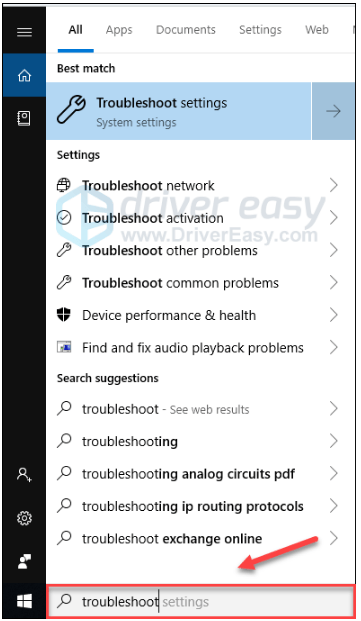
2) Select Troubleshooting settings.
3) Click Printer, and then click Run the troubleshooter
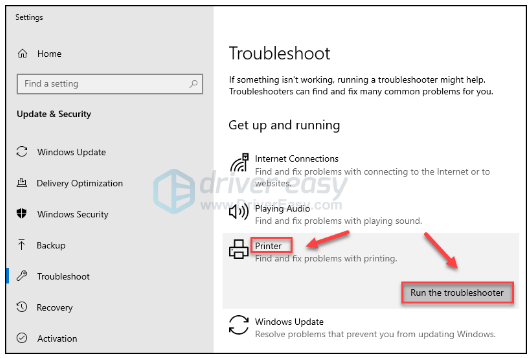
4) Wait for the troubleshooting process to be complete, then try printing a page.
If this didn’t work for you, read on and check the fix below.
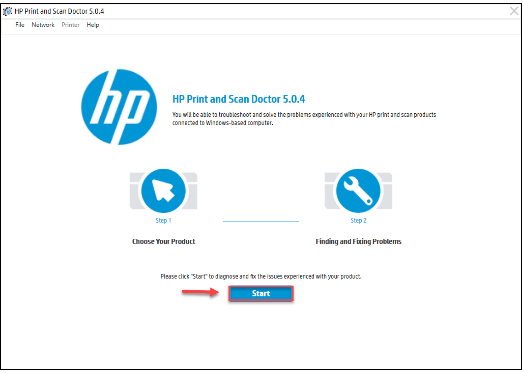
Fix 4: Download and run HP Print and Scan Doctor
HP Print and Scan Doctor is a free tool that you can use to find the root cause of your printer problem. You can use the tool to troubleshoot your misbehaving HP printer. Follow the instructions below:
1) Download the HP Print and Scan Doctor from the HP support website.
2) Open the downloaded file and follow the on-screen instructions to install the HP Print and Scan Doctor.
3) Run your HP Print and Scan Doctor.
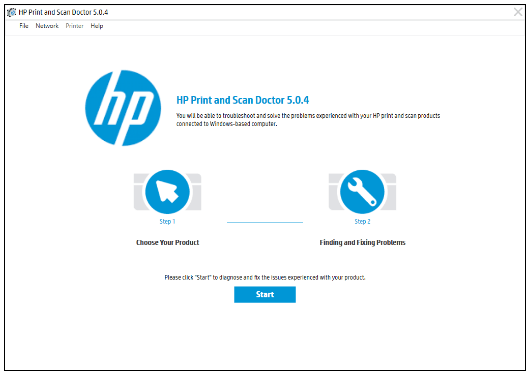
4 ) Click Start and follow the on-screen instructions to resolve your printer problem.
If your problem persists, don’t worry. There is 1 more fix to try.
Fix 5: Configure Printer Spooler service
The blank-page printing issue occurs when the Printer Spooler files on your PC is damaged or missing. Try restoring your Printer Spooler service files to see if that’s the problem for you. Here is how:
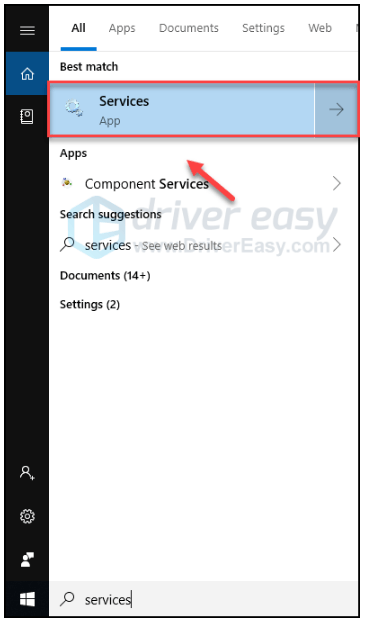
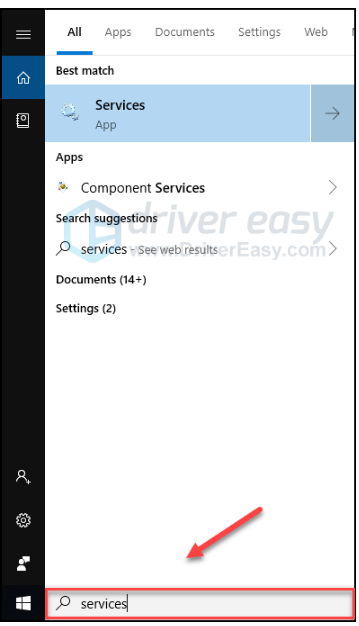
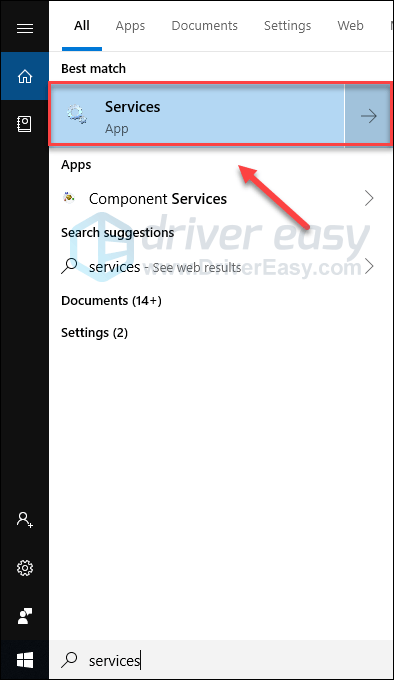
1) On your keyboard, press the Windows logo key and type services.
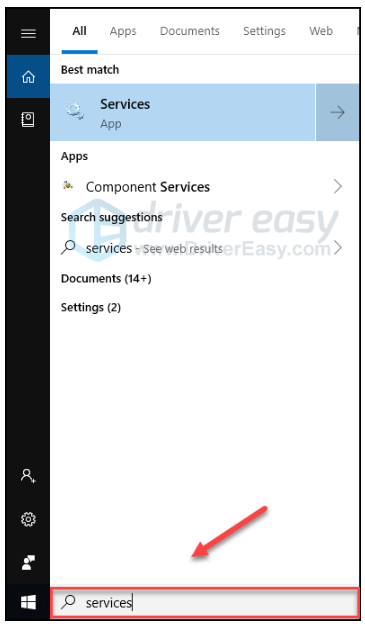
2) Select Services.
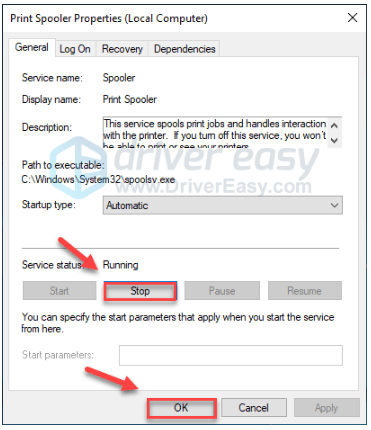
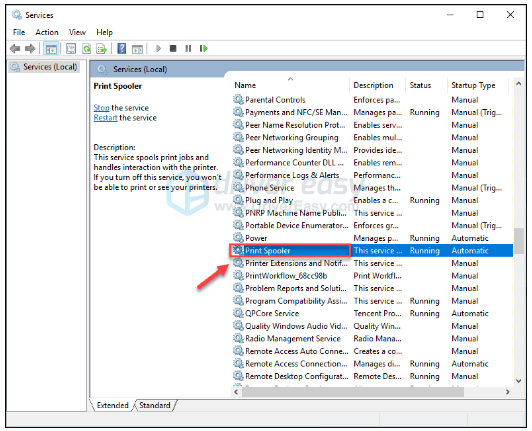
3) Double-click Printer Spooler.
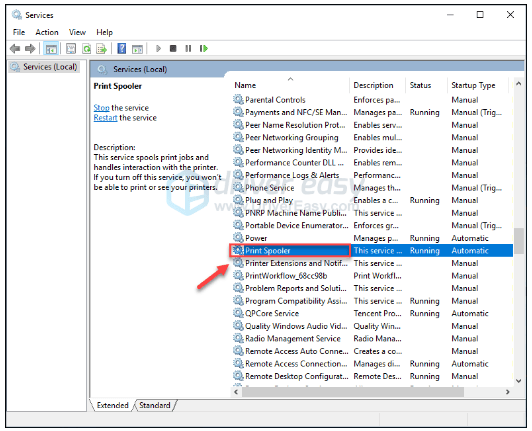
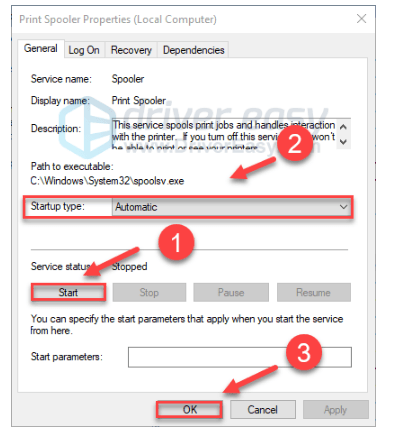
4) Click Stop, and then click OK.
5) Open Windows File Explorer (on your keyboard, press the Windows logo key and E at the same time).
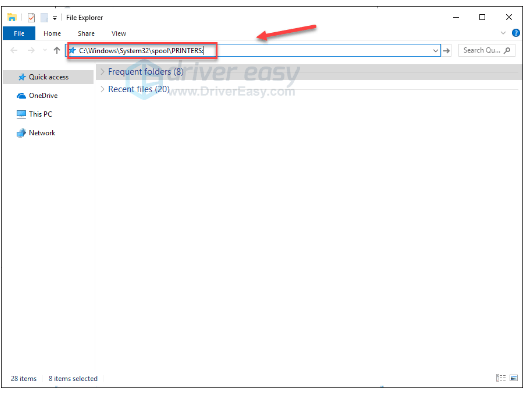
6) Go to C:\Windows\System32\spool\PRINTERS:
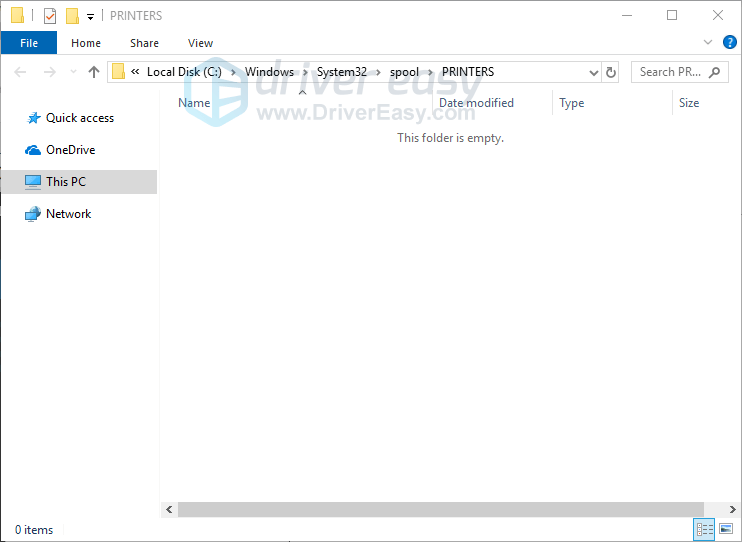
7) Delete all files in this folder.
8) On your keyboard, press the Windows logo key and type services.
9) Select Services.
10) Double-click Printer Spooler
11) Click Start. Then, make sure the Startup type is set to Automatic and click OK.
12) Try printing a page to test your issue.
Hopefully, your printer is able to work properly now. If this post didn’t resolve your issue, you might want to bring your printer to a repair store and seek professional help.
Feel free to leave a comment below if you have any questions and suggestions.