


Are you looking for the latest drivers for your Targus Displaylink devices? If so, then you’ve come into the right place. This post will show you how to download and update your Targus DisplayLink drivers step by step.
What are Targus DisplayLink drivers?
To answer this question, we must explain each of the three words separately. Targus is a manufacturer of computer-related products from laptop bags to universal docking stations while DisplayLink is a chip and software company whose technology is used in many products. And a driver, to put it simply, is an invisible bridge that connects hardware and software. Without drivers, most of your hardware devices cannot run properly.
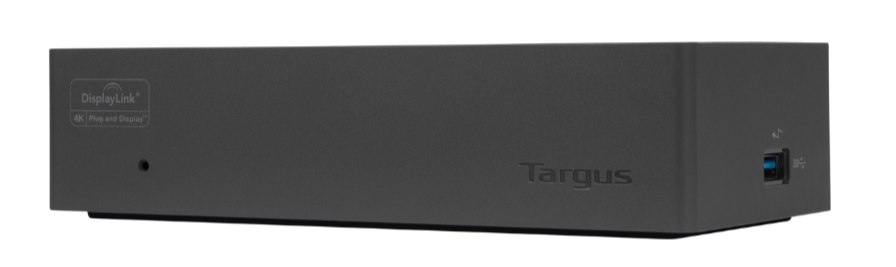
Honestly speaking, there’s no such thing as “Targus DisplayLink driver”, but there are certain drivers designed for a Targus device (such as a docking station) that adopts the DisplayLink technology. For example, Targus Dock 190 is one of the featured products using the DisplayLink technology.
How can I update my Targus DisplayLink drivers?
If you’re using a Targus device which adopts the DisplayLink technology, please keep in mind that updating your drivers in time can ensure the stability of your device and prevent lots of problems from happening. Generally there’re two ways you can update your drivers:
Option 1 – Automatically (Recommended): This is the quickest and easiest option. It’s all done with just a couple of mouse clicks – easy even you’re a computer newbie.
OR
Option 2 – Manually: You’ll need some computer skills and patience to update your driver this way, because you need to find exactly the right driver online, download it and install it step by step.
Option 1: Automatically update your Targus DisplayLink driver (Recommended)
If you don’t have the time, patience, or computer skills to update your Targus DisplayLink driver manually, you can do it automatically with Driver Easy.
Driver Easy will automatically recognize your system and find the correct drivers for it. You don’t need to know exactly what system your computer is running, you don’t need to risk downloading and installing the wrong driver, and you don’t need to worry about making a mistake when installing. Driver Easy takes care of everything.
You can update your drivers automatically with either the FREE or the Pro version of Driver Easy. But with the Pro version it takes just 2 clicks.
- Download and install Driver Easy.
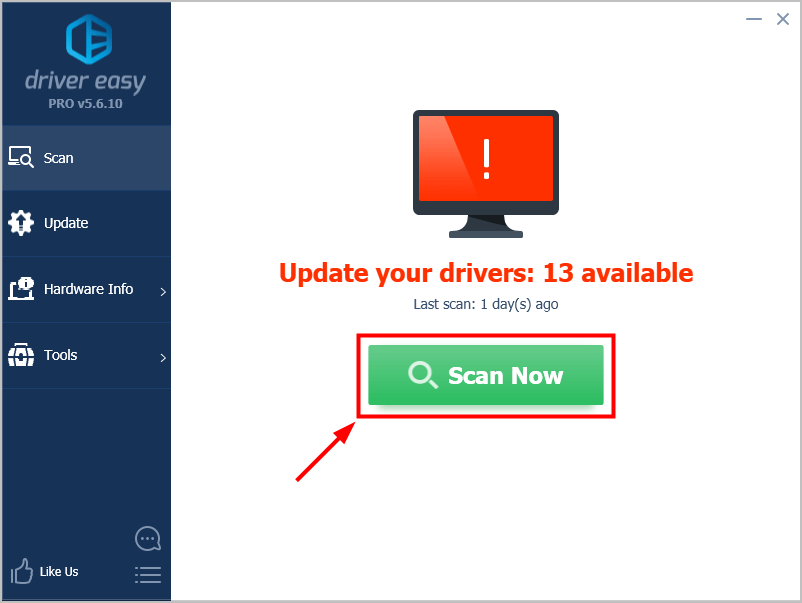
- Run Driver Easy and click the Scan Now button. Driver Easy will then scan your computer and detect any problem drivers.
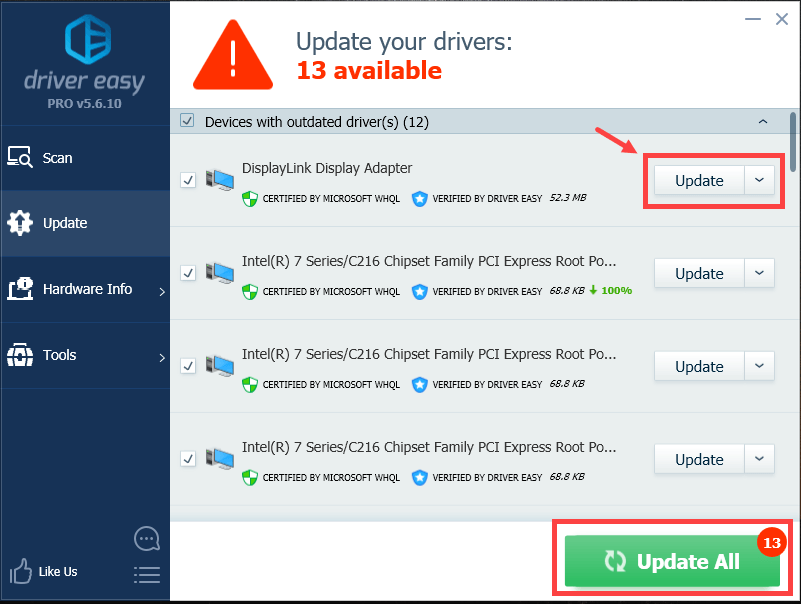
- Click Update All to automatically download and install the correct version of all the drivers that are missing or out of date on your system (this requires the Pro version – you’ll be prompted to upgrade when you click Update All). Or if you just want to update the Targus DisplayLink driver for now, hit the Update button next to it.
Note: you can do it for free if you like, but it’s partly manual.
Option 2: Manually update your Targus DisplayLink driver
If you feel like updating your Targus DisplayLink driver manually, here’s the simple and useful guide for you.
- Find your way to the official website of Targus.
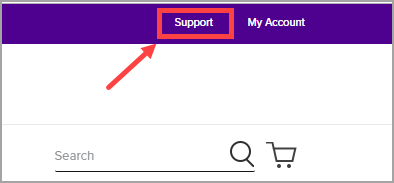
- In the top right of this web page, click Support.
- Select Drivers & Manuals.

- Type the model name or serial number of your Targus product into the search box to locate the corresponding drivers.
 Alternatively, you may select Category and then Product to look for the drivers of your product.
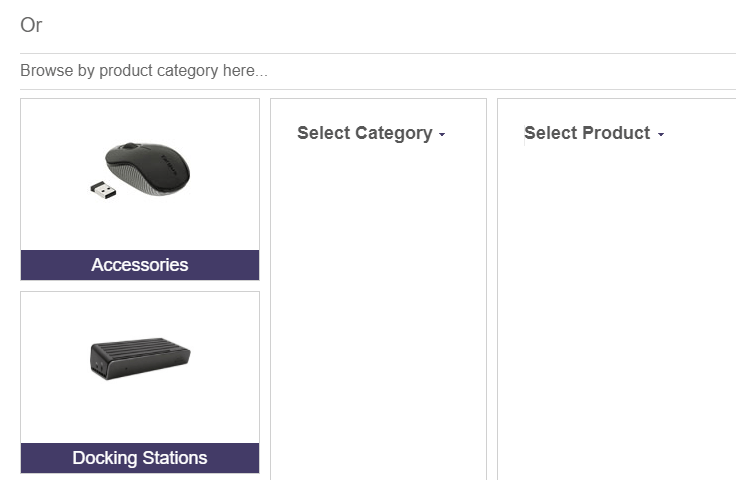
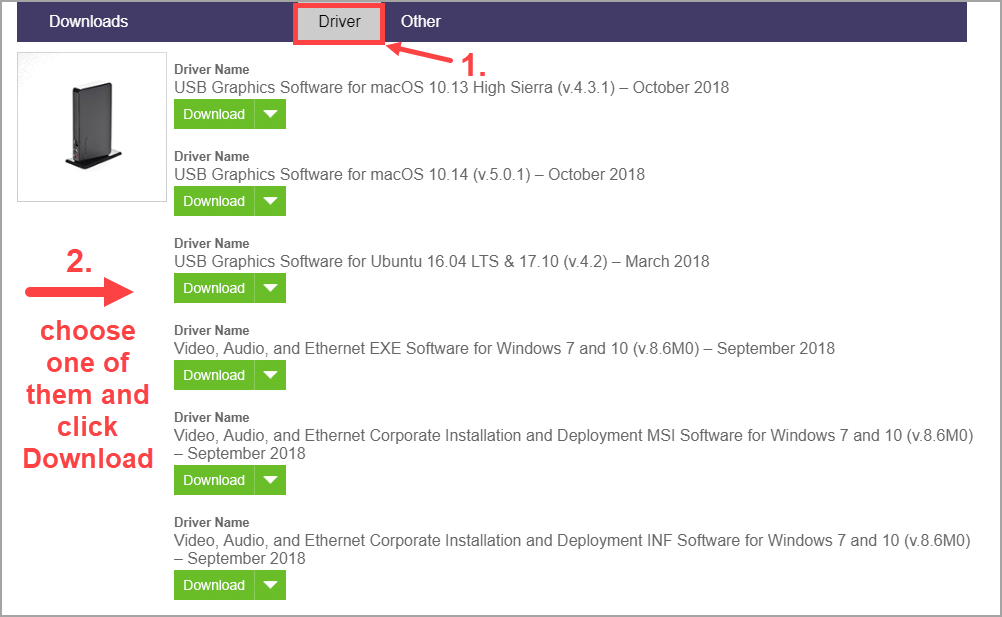
- After locating the corresponding driver for your product, click on the Download button below.
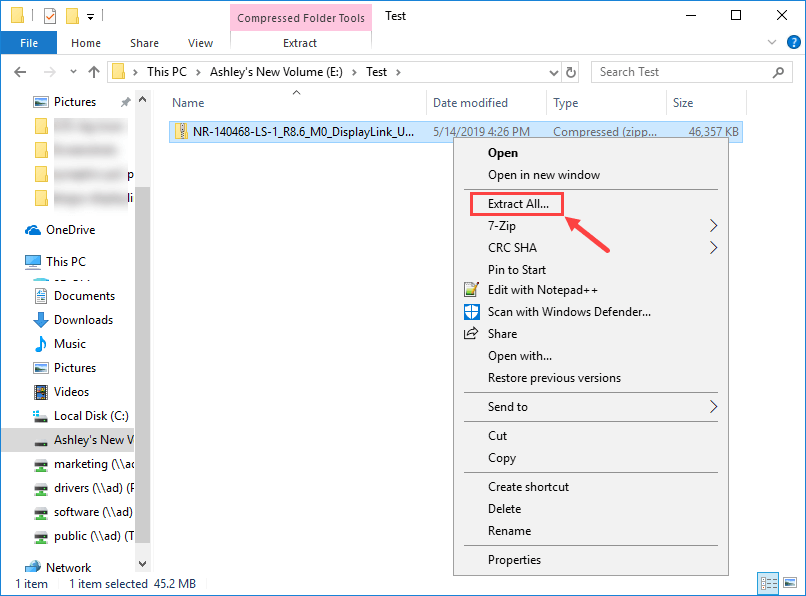
- Right-click on the file (with a ZIP extension) you’ve just downloaded to open the context menu. Then click Extract All….
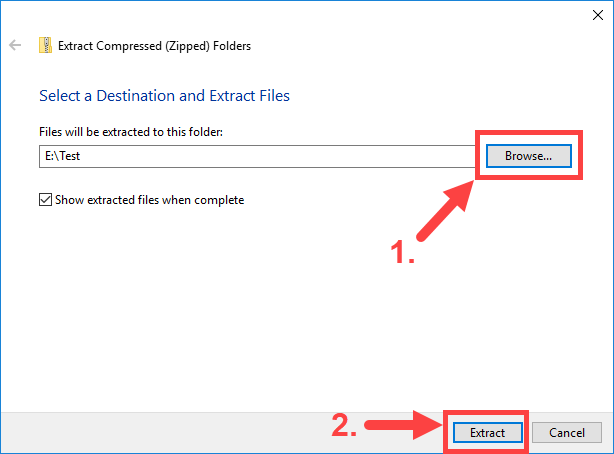
- In the pop-up window, click Browse… and choose a destination folder where you want to decompress the file. Then, click Extract.
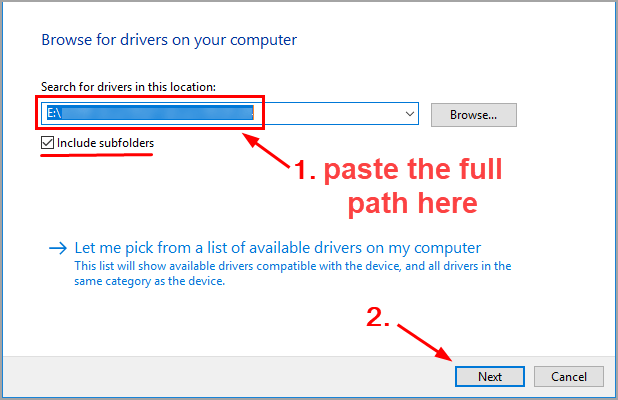
- Wait till the decompression process finishes. Then copy the full path of the destination folder. (The path will be different depending on your choice in the last step. )

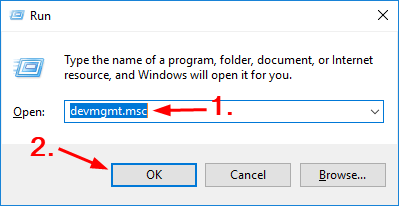
- On your keyboard, press the Windows Logo Key and R at the same time to open the Run box. Type devmgmt.msc and click OK.
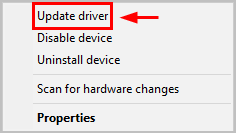
- In the Device Manager window, locate your Targus device and then right-click on it to open the context menu. Select Update driver.
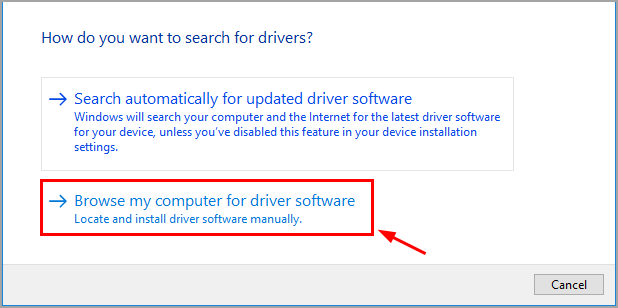
- If prompted, click Browse my computer for driver software.
- Paste the full path copied in Step 8 onto the address bar. Remember to check the Include subfolders box. Then hit the Next button.
- Now Windows will search for the driver and install it automatically. When everything’s done, click Finish. Then restart your computer for the changes to take effect even if you’re not asked to.
Hopefully you find this article useful. If you have any problems or suggestions, please feel free to leave a comment below. Thanks for reading!