


Nowadays, the internet has become an essential part of our daily lives. If you can’t access the internet, that can be really frustrating. But this is what’s plaguing some Virgin Media users. Their WiFi is not working as expected. Or their devices are connected to the WiFi, but there is no internet access. If you happen to be one of them, don’t worry. Before calling out the technician, you can try to figure out what happened and how you can fix it.
Causes for this issue
Below are some of the common reasons why your Virgin Media is not working:
Service outages: an issue related to the Internet Service Provider
Outdated hardware or firmware
Antivirus software blocking internet access
Outdated network driver
DNS cache glitches
Now having an idea of what causes the issue, you can try the methods below in an attempt to fix it.
How to fix Virgin Media WiFi no Internet access but connected
- Check Virgin Media service status
- Restart your hub and device
- Turn off your antivirus software
- Run the internet troubleshooter
- Clear your DNS cache
- Perform a network reset
- Update your network driver
1. Check Virgin Media service status
Before getting started with your troubleshooting, you should check if there is a service outage in your area. Simply head to Virgin Media’s status page and enter your postcode. If there are any known issues about connectivity in your region, there’s nothing you can do but wait. However, if there are no reports on the service outages, you need to perform the troubleshooting steps below.
2. Restart your hub and device
One of the simple yet effective methods to fix the issue you’re having is restarting your Virgin Media hub. You’ll most likely find that this can improve your connection.
To do so, simply turn off your Virgin Media hub for at least 30 seconds. Then turn the power back on to allow it to start up again.
After you’ve done these, restart your computer. When it boots up, try to connect your computer to WiFi and then open your browser to check if you have internet access.
If a simple restart doesn’t do the trick, try the next fix below.
3. Turn off your antivirus software
If you have any antivirus software installed on your computer, try to turn it off. In some cases, your antivirus software may block your internet connection. When this occurs, your device would not be able to connect to your WiFi.
To confirm this, go to the Settings of your AntiVirus software and turn it off. Afterwards, open your browser and see if that fixes your issue. If you still can’t access the internet, try the next fix below.
4. Run the internet troubleshooter
Before diving into any advanced settings, try to use Windows troubleshooter to help you identify and fix your connection issue. Below are the steps you can follow.
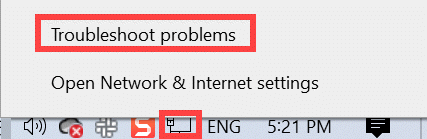
- In the task tray, right-click on the network icon and select Troubleshoot problems.
Then Windows will try to automatically solve your internet issue. If it can’t identify or fix your issue, proceed to the next fix.
5. Clear your DNS cache
DNS cache provides you with a digital log of all the past websites you have accessed. But it may also interfere with your WiFi connection. In this case, you’ll need to delete the cache by following the instructions below.
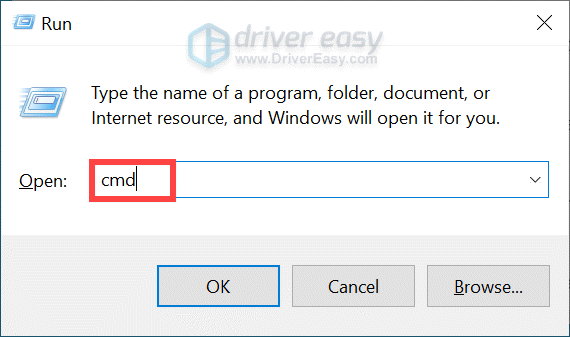
- On your keyboard, press the Windows logo + R keys simultaneously to open the Command Prompt.
- Type or paste cmd and hit Enter.
- Now enter the following command ipconfig/flushdns. Then hit Enter.

When it successfully helps you flush the DNS cache, close the Command Prompt window. If your problem persists, move on to the next fix.
6. Perform a network reset
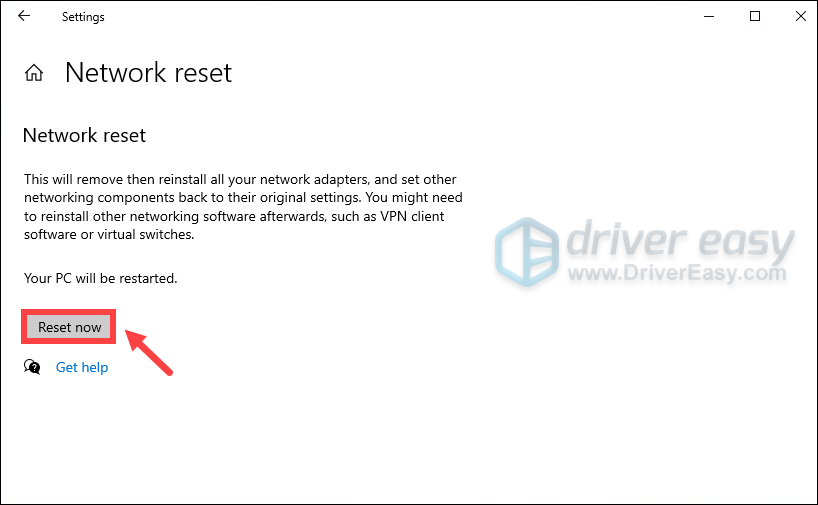
A network reset is a process of setting your networking components back to their original settings, which is useful for troubleshooting various networking issues. But this will remove all saved networks and network passwords. Therefore, you’ll need to enter the password again.
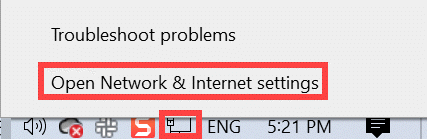
- In the bottom right corner of your desktop, right-click on the network icon and select Open Network & Internet settings.
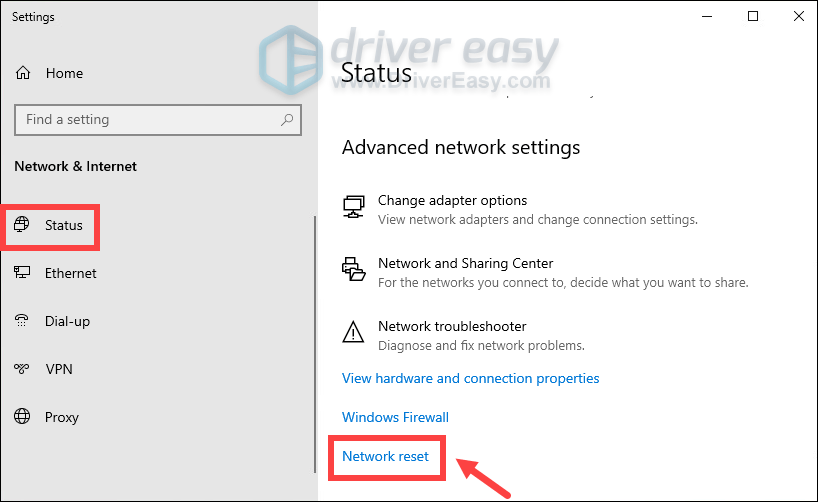
- In the Status tab, scroll down until you find the Network reset button. Make sure you click on it.
- Click Reset now.
7. Update your network driver
If a network reset doesn’t help, it’s high time you check if you’re using an outdated network driver. This is pretty important as outdated drivers can cause noticeable performance issues. If you can’t remember when was the last time you updated your network driver, definitely do it right now.
To update your network adapter driver, you can either do it manually via the Device Manager or head to the manufacturer’s driver download page to download and install the exact driver for your system. This requires a certain level of computer knowledge and can be a headache if you aren’t tech-savvy.
OR
You can do it with Driver Easy, an automatic driver updater tool. With Driver Easy, you don’t need to waste your time hunting for driver updates as it will take care of the busy work for you.
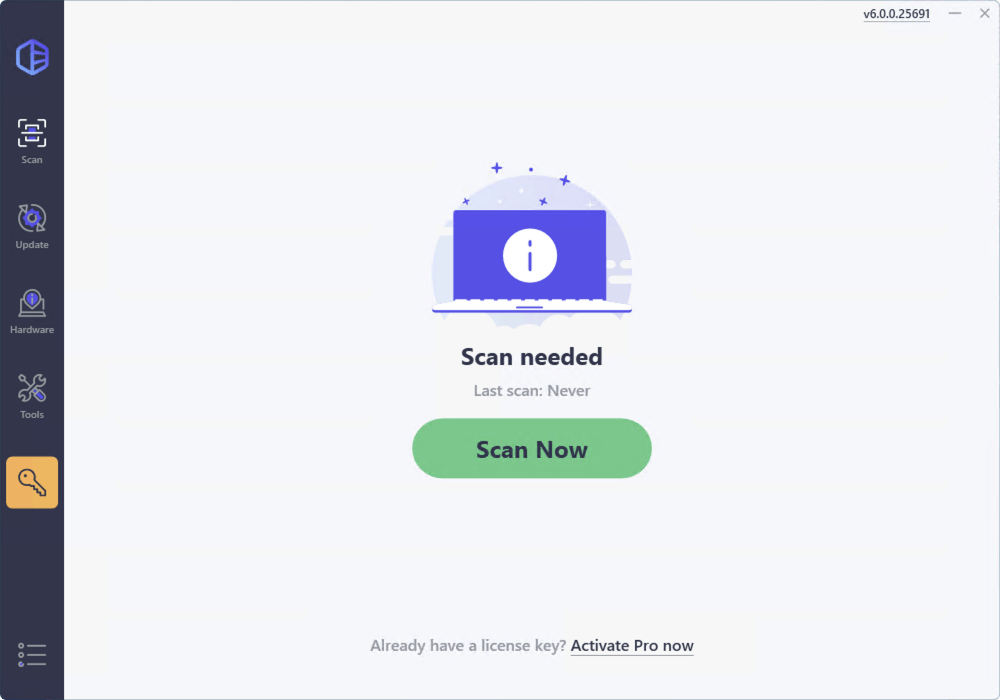
- Download and install Driver Easy.
- Just click Scan Now, and Driver Easy will scan your computer and detect any devices with missing or outdated drivers.
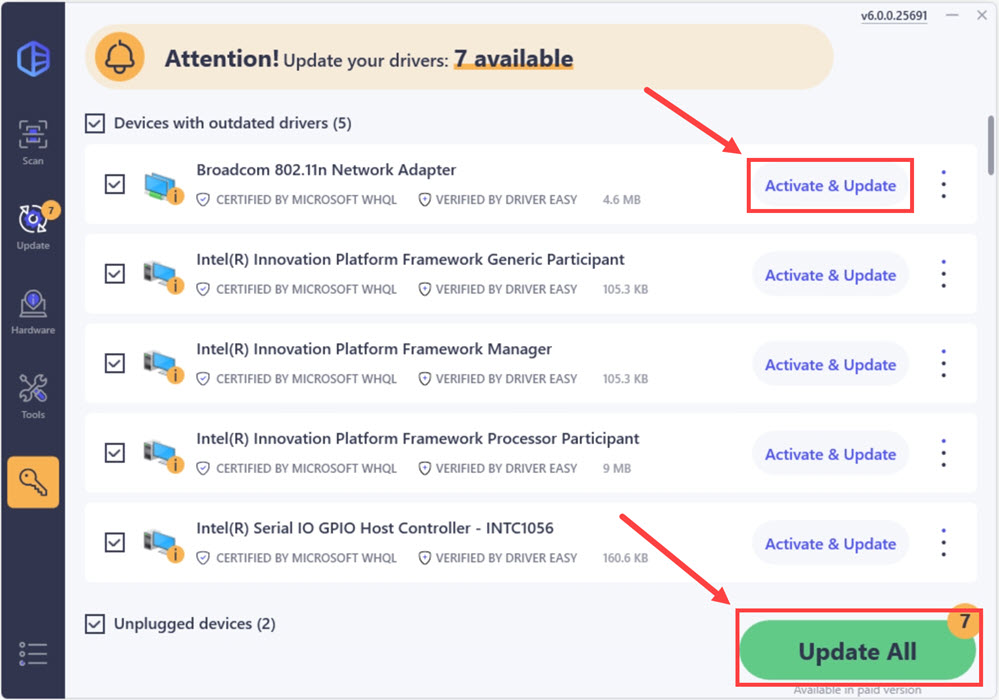
- Click the Activate & Update button next to any flagged device or click Update All to update all the outdated drivers. You can sign up for the free trial to update drivers with no upfront cost.
That’s it – the complete guide on how you can fix Virgin Media WiFi not working issue. If you still can’t locate the problem, try to reach out to an IT specialist through a live chat. JustAnswer is such a 24/7 live support platform where you’ll get your answer in minutes. Instead of checking for multiple tutorials, you just need to specify the issue you’re having and follow the personalized instructions from the experts.

Additionally, you can ask any questions on this platform. They will guide you through every detail step until you get your problem solved.