


Compared to the first game, The Division 2 presents a much stronger campaign experience. But players would still wish to maximize FPS and hopefully get rid of any performance issues to smooth the gameplay. This is definitely achievable. In this tutorial, we’ll show you how to boost FPS and fix the stuttering issues on The Division 2.
Try these fixes
You may not need to try them all; simply work your way down the list until you find the one that works.
- Close unnecessary programs
- Disable Windows 10 Game Mode
- Disable overlays
- Update your graphics driver
- Set the game’s priority to high
- Optimize in-game settings
1. Close unnecessary programs
Programs such as Google Chrome and Adobe apps are resource-heavy and will most likely drain your system. If you have many programs running in the background when playing The Division 2, issues such as the game stutters and framerate drops can occur. To prevent these issues from happening, you’re supposed to disable those programs running in the background:
1) On your keyboard, press the Windows logo key and R at the same time to invoke the Run box.
2) Type taskmgr, then press Enter on your keyboard.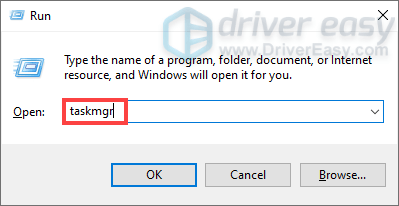
3) Under the Processes tab, right-click on the programs that you don’t necessarily use when playing The Division 2 and select End task.

Also, too many startup apps can be a drag on your computer’s performance. In this case, you can prevent some apps from automatically starting when you sign into Windows:
1) Select the Startup tab. Right-click the apps that you want to stop from running automatically at startup and select Disable. 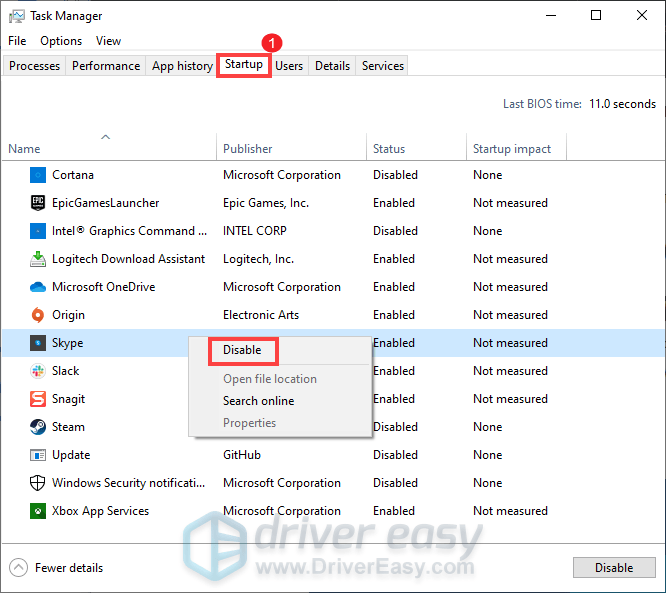
After you’ve done these, play The Division 2 and check if your game looks better.
2. Disable Game Mode
Game mode is a feature that focuses system resources on games when enabled. It was supposed to give you a performance boost. But there are some circumstances that you would experience performance loss. To get rid of it, you’re supposed to disable Windows Game Mode:
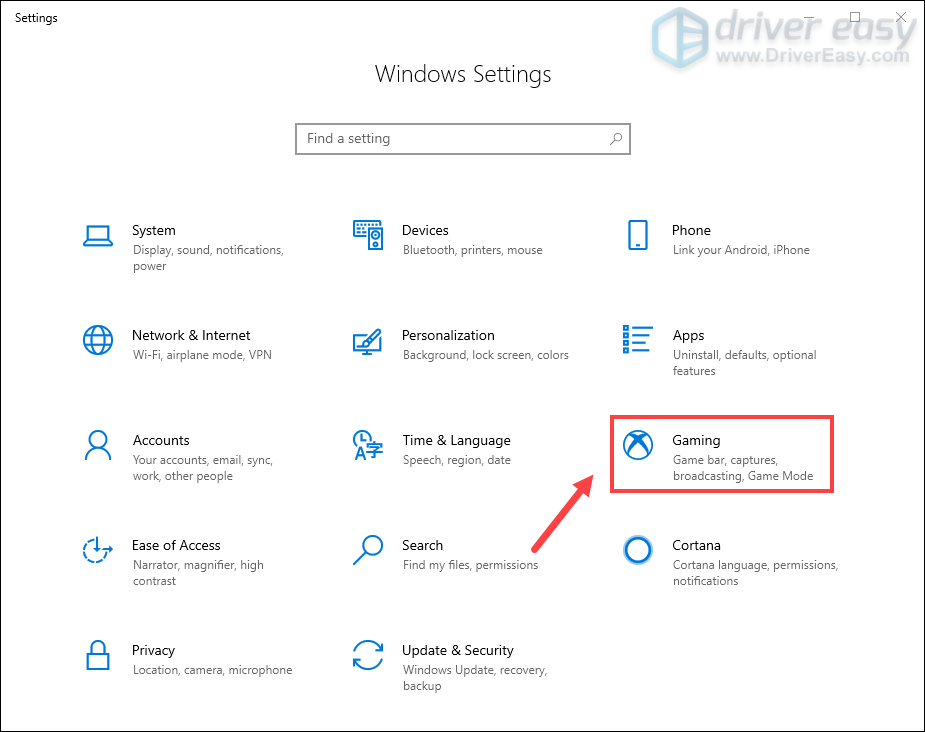
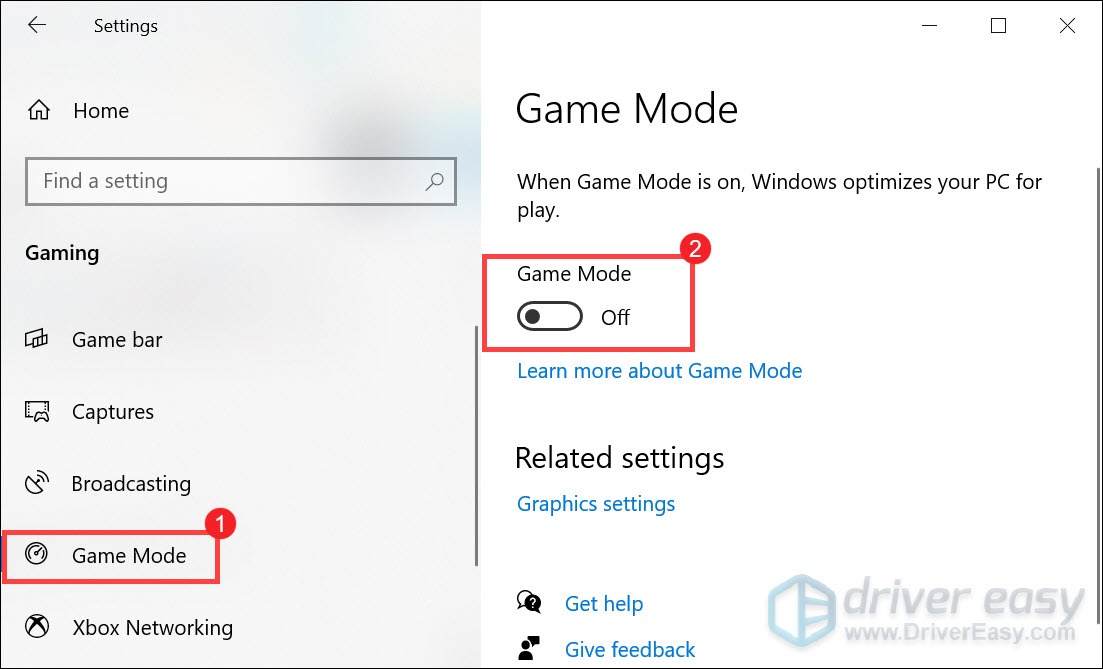
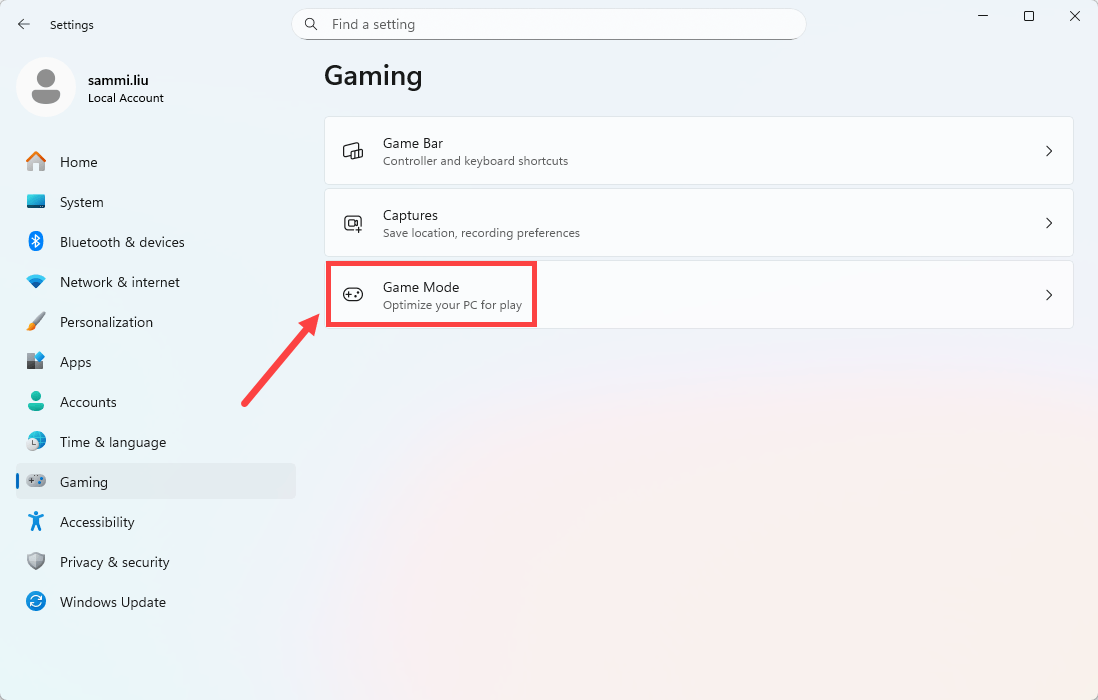
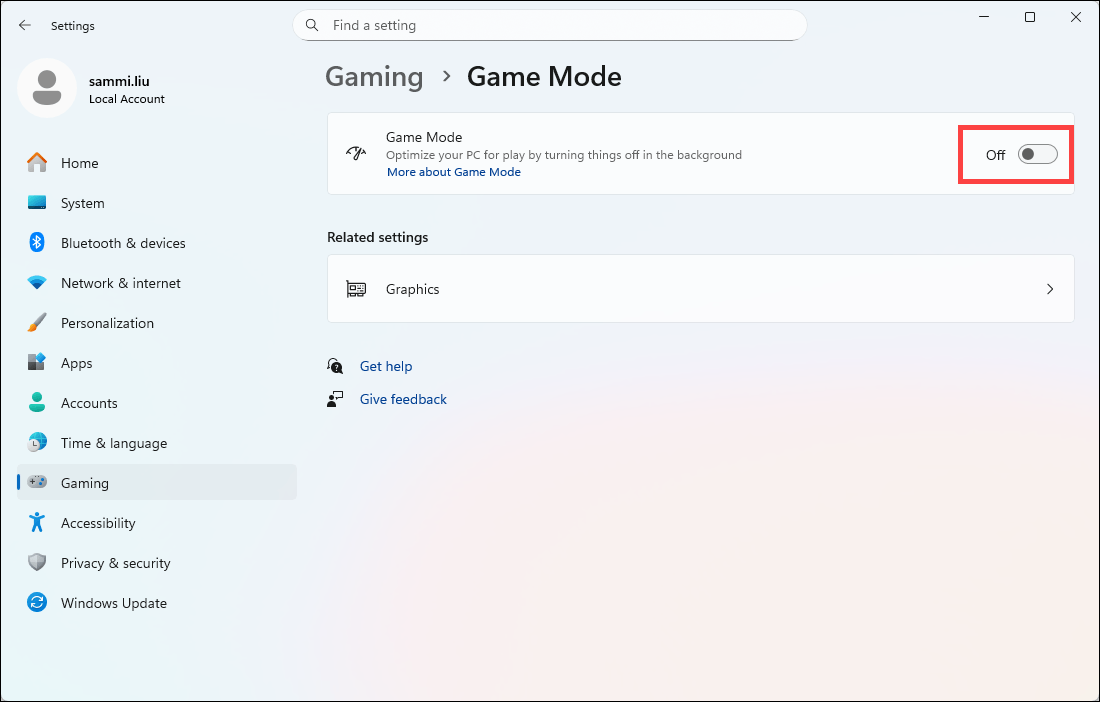
1) On your keyboard, press the Windows logo key and I to open Settings.
2) Click Gaming.
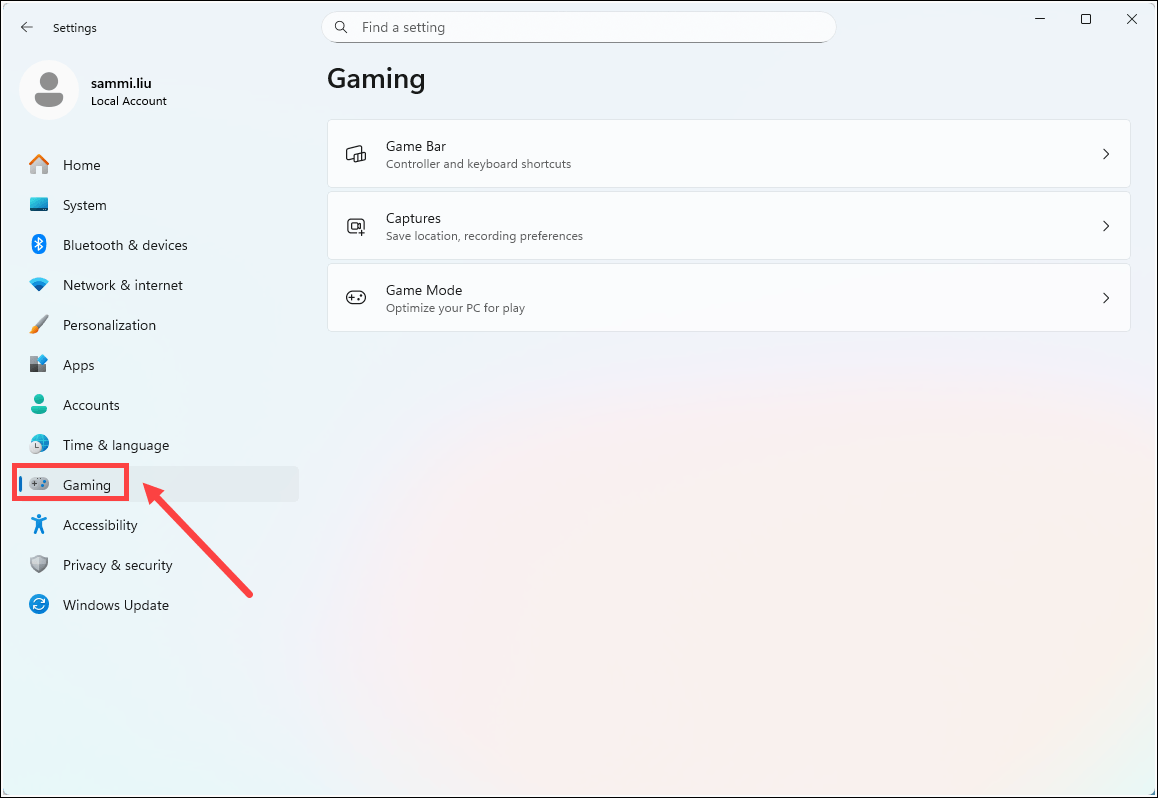
3) If you’re on Windows 10:
From the left sidebar, select Game Mode. Then toggle off Game Mode.
If you’re on Windows 11:
Click on Game Mode.
Toggle Off Game Mode.
After applying the changes, restart your PC and play The Division 2 to check if your issues persist. If disabling Windows Game Mode didn’t do the trick, proceed to the next fix.
3. Disable overlays
Overlay technology is commonly used in various programs. The Ubisoft Connect and GeForce Experience in-game overlays enable you to access GPU-accelerated video recording, screen-shot capture, broadcasting, and cooperative gameplay capabilities. But if you don’t really need to use these features, you can disable in-game overlays by following the instructions below:
To disable Ubisoft Connect overlay, take these steps:
1) Open your Ubisoft Connect. On the top left corner of your screen, click on the three lines to open the menu.
2) Select Settings.
3) Under the General tab, uncheck Enable in-game overlay for supported games.

To disable GeForce Experience Overlay, take these steps:
1) From the GeForce Experience app, click on the Settings icon located on the top right corner. ![]()
2) In the GENERAL tab, toggle off IN-GAME OVERLAY and exit. 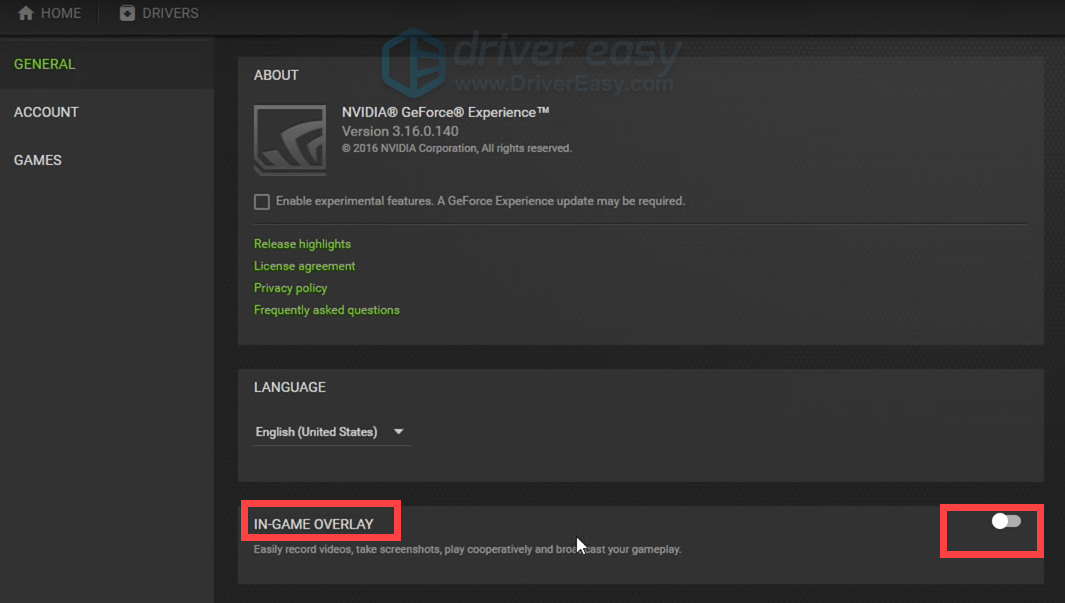
After disabling in-game overlays, launch The Division 2 to check if this mitigates your problems. If you’re still getting low framerate and experiencing constant stutters during gameplay, try the next fix below.
4. Update your graphics driver
Most video games are graphics-intensive. If you run into any performance issues such as low FPS and constant stutters during the gameplay, your outdated or faulty graphics driver can be the culprit. To pinpoint the root cause, you should try updating your graphics driver. This is essential as driver updates come with bug fixes and bring new features.
There are mainly two ways you can update your graphics driver: manually and automatically.
Option 1: Manually update your graphics driver
To update your graphics driver manually, you can go to the official website:
Then find the driver corresponding with your Windows version and download it manually. Once you’ve downloaded the correct driver for your system, double-click on the downloaded file and follow the on-screen instructions to install it.
Option 2: Automatically update your graphics driver (recommended)
If you are not familiar with computer hardware, and if you don’t have the time to update your graphics driver manually, you can, instead, do it automatically with Driver Easy. It’s a useful tool that automatically recognizes your system and finds the correct drivers for it. You don’t need to know exactly what system your computer is running or risk downloading and installing the wrong driver.
Here’s how to update drivers with Driver Easy:
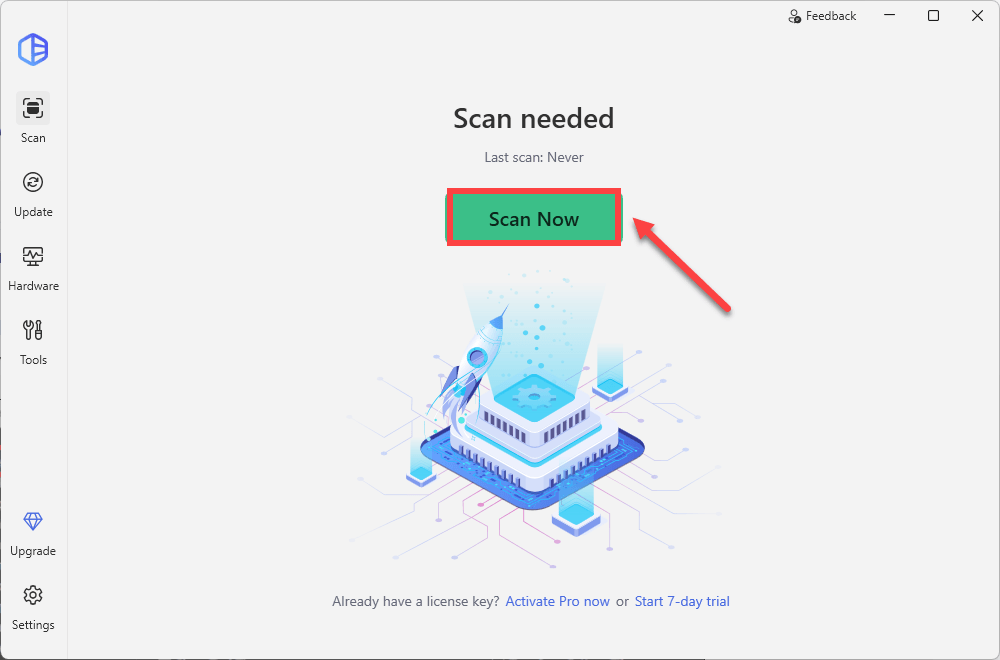
1) Download and install Driver Easy.
2) Run Driver Easy and click the Scan Now button. Driver Easy will then scan your computer and detect any problem drivers.
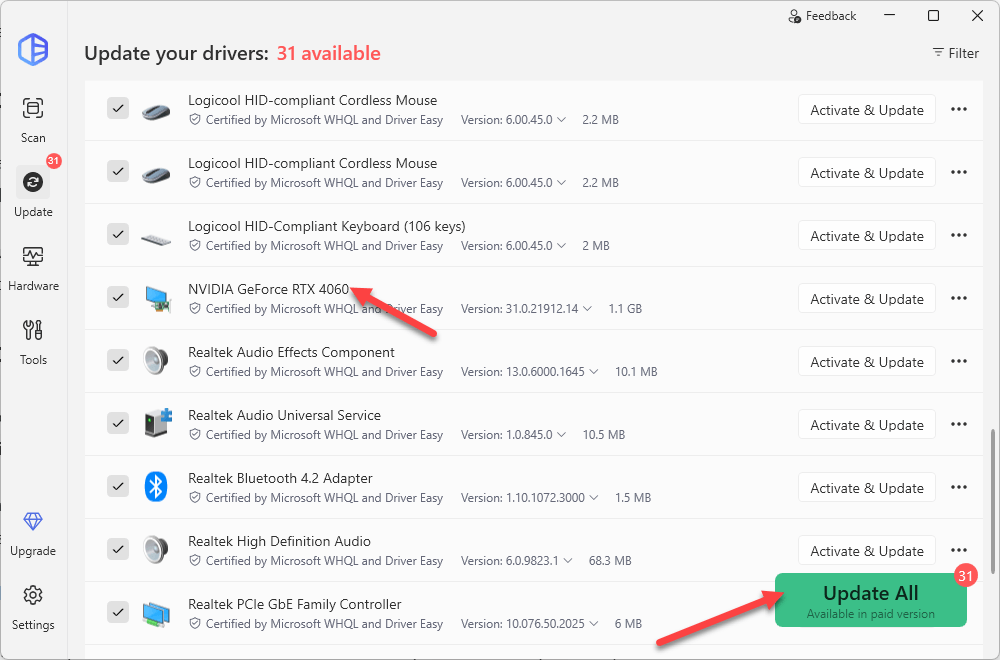
3) Click Update All to automatically download and install the correct version of all the drivers that are missing or out of date on your system.
(This requires the Pro version which comes with full support and a 30-day money-back guarantee. You’ll be prompted to upgrade when you click Update All. If you’re not ready to buy the Pro version, Driver Easy offers a 7-day free trial which includes access to all the Pro features such as high-speed download and one-click install. You won’t be charged anything until your 7-day trial has ended.)
After updating drivers, restart your computer and launch your game to check if the problem is solved. If not, then continue trying the fixes below.
5. Set the game’s priority to high
By default, every program runs on “normal” which means Windows handles the system resources automatically. But you can tell your computer that your game, The Division 2 should have a higher priority than others to make sure that it uses system resources first. This may give you a considerable framerate boost.
To set your game’s priority to high, you can take these steps:
1) On your keyboard, press the Window logo key + R at the same time to open the Run dialog box.
2) Type taskmgr and press Enter.
3) Under the Processes tab, find your game title. Right-click it and select Go to details and you’ll be directed to the Details tab. 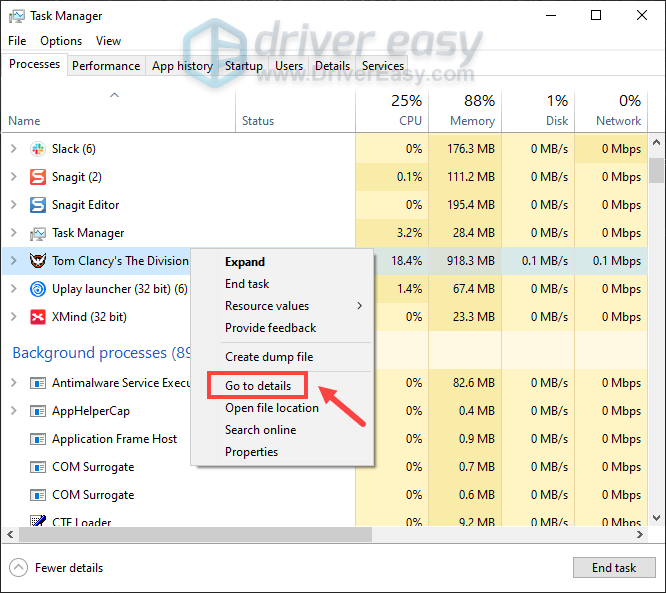
4) Your game should be highlighted. Make sure to right-click it and select Set priority > High. 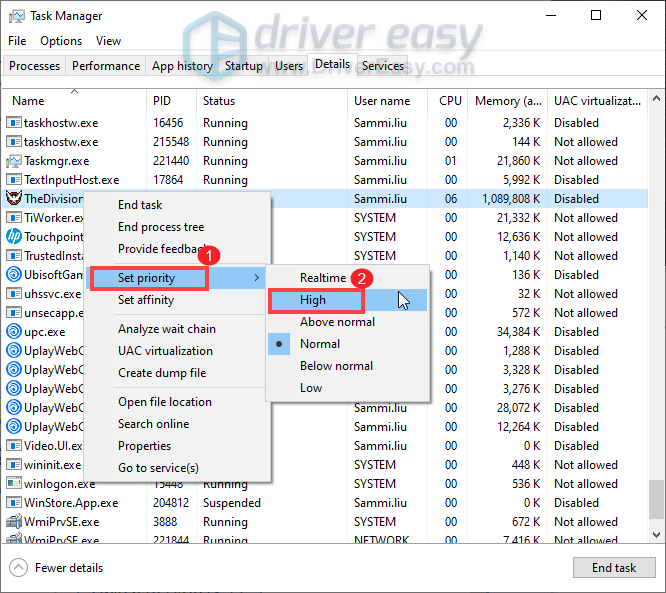
After applying the changes, launch The Division 2 and it should be running with high priority.
6. Optimize in-game settings
If the methods listed above didn’t help you get higher fps or fix the stuttering issues, we suggest you tweak the in-game settings:
1) Launch The Division 2 and then open Settings.
2) Select the Graphics tab. Then adjust the following items:
V-Sync Mode: Off
Frame Rate Limit: Off
Shadow Quality: Low
Spot Shadows: Low
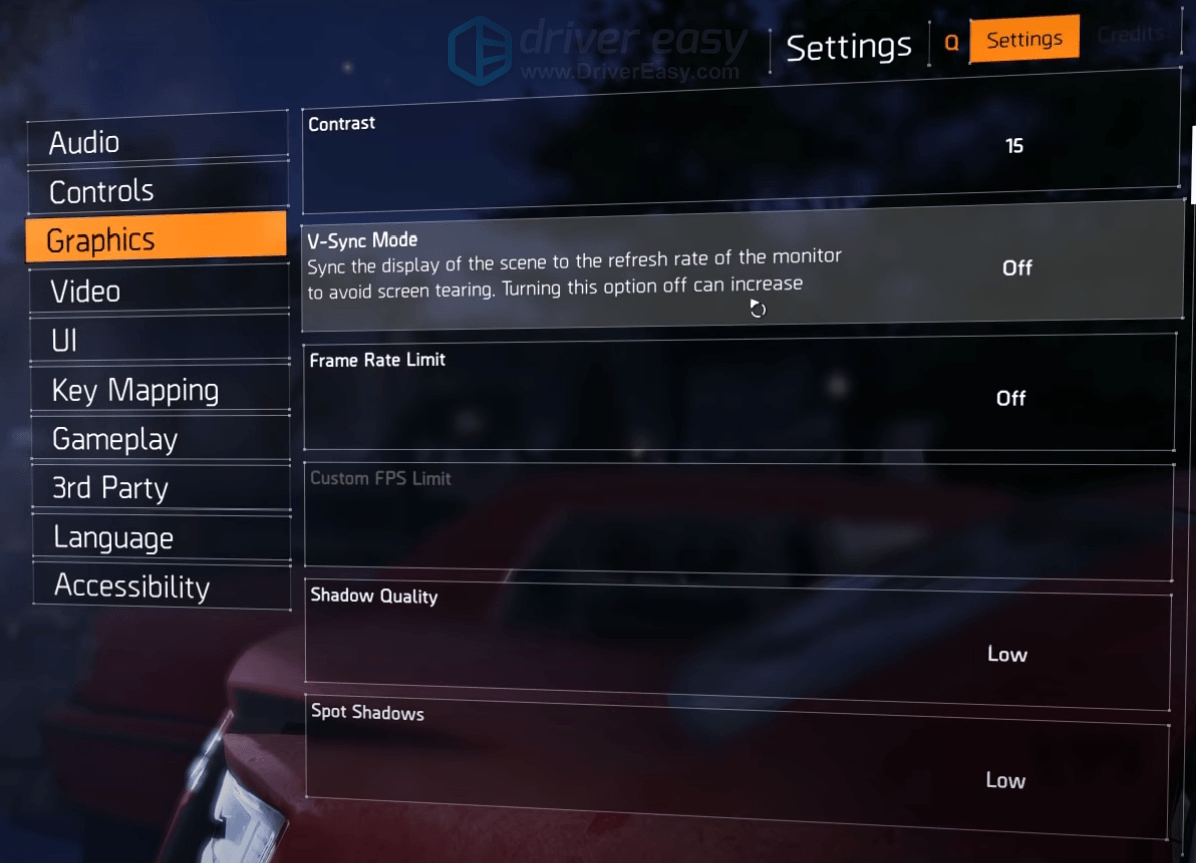
After applying the changes, play The Division 2 and you should be able to notice the difference.
Hopefully, this post helps you have a great gaming experience as expected. If you have any suggestions or questions, do not hesitate to drop us a line in the comment section below.