


No Internet access on your Windows 11? A lot of reasons can cause unidentified networks on computers. But don’t worry. Here we have 7 proven fixes for tackling this problem.
How to fix an unidentified network on Windows 11?
- Restart your devices
- Turn off airplane mode
- Update network driver
- Renew IP address
- Diagnose your network
- Change DNS server
- Disable antivirus temporarily
You don’t have to try them all. Just work your way down the list until you find the one that fixes the unidentified network problem for you.
Fix 1 Restart your devices
Rebooting usually gets your devices back to an unaffected and normal status. So you can try to restart your devices to check for any improvements.
Just simply unplug the computer, router, and modem from the power supply. Shut down your PC completely. Then wait for about 10 minutes to plug them back.
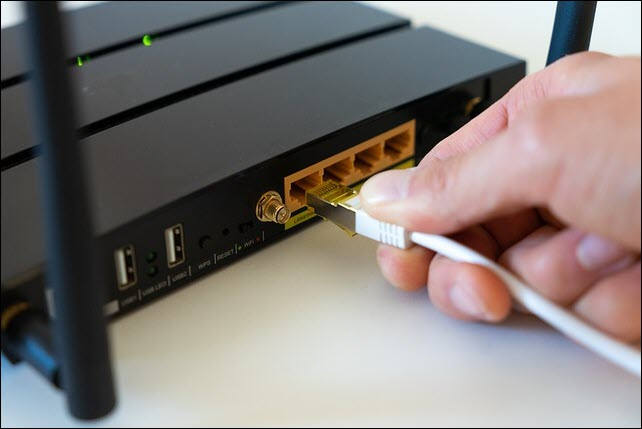
Make sure that your devices’ physical connection works well. And then reconnect the network to see if the unidentified network disappears.
Fix 2 Turn off airplane mode
Airplane mode or flight mode doesn’t allow users to access the Internet. Sometimes you may accidentally turn it on, to figure it out:
Click the Internet icon on the right-bottom corner. Turn off the airplane mode.

If your airplane mode is off or turning it off doesn’t help, move on to try the next fix.
Fix 3 Update network driver
The unidentified network may occur if you use the wrong network driver or it’s outdated. So you should update your network driver to see if it fixes your problem. You can do it without Internet access.
You can browse your manufacturer’s website to locate the correct driver and download it. But if you don’t have the time, patience, or skills to update the driver manually, you can do it automatically with Driver Easy.
Driver Easy will automatically recognize your system and find the correct drivers for it. You don’t need to know exactly what system your computer is running, you don’t need to be troubled by the wrong driver you would be downloading, and you don’t need to worry about making a mistake when installing.
You can update your drivers automatically with either the FREE or the Pro version of Driver Easy. But with the Pro version, it takes just 2 steps (and you get full support and a 30-day money-back guarantee).
For computers without Internet access
You will need another Internet-accessible computer to help you finish the update process.
- Download Driver Easy on the computer with the Internet. Copy and paste the downloaded .exe file to your computer.
- Install Driver Easy on both computers and run it.
- Follow the instruction in this article.
For computers with Internet access
- Download and install Driver Easy.
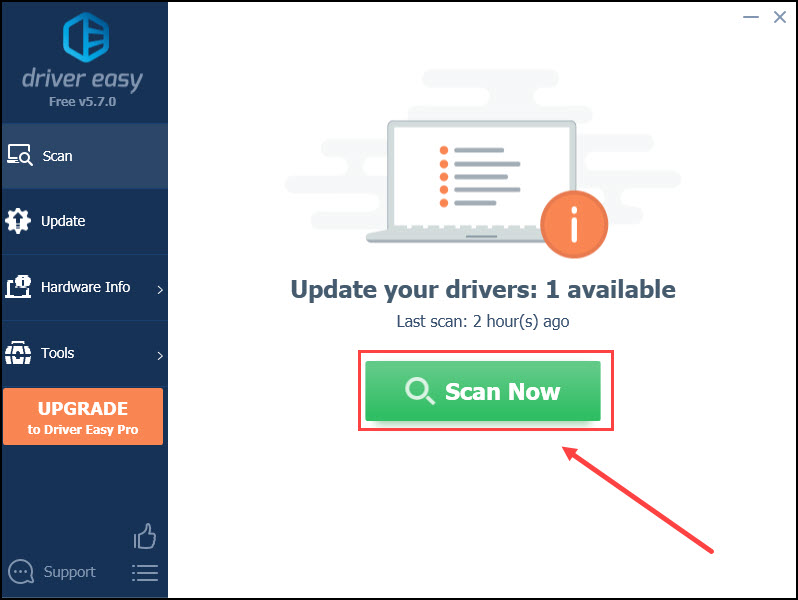
- Run Driver Easy and click the Scan Now button. Driver Easy will then scan your computer and detect any problem drivers.
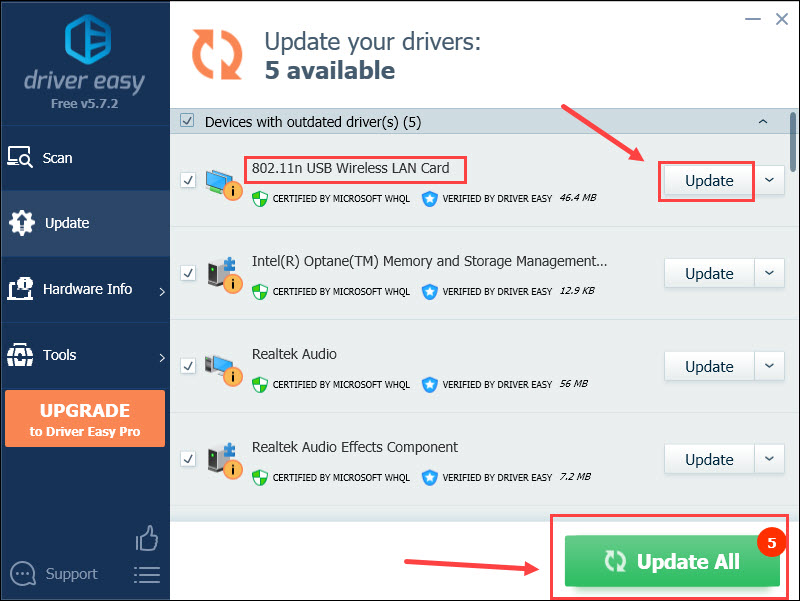
- Click Update All to automatically download and install the correct version of all the drivers that are missing or out of date on your system (this requires the Pro version – you’ll be prompted to upgrade when you click Update All).
You can do it for free if you like, but it’s partly manual.
Restart your computer to make changes apply. Reconnect your network to see if it works.
Fix 4 Renew IP address
Problematic IP addresses and DNS cache may cause an unidentified network on your computer. If your IP address is poorly configured, this method can help. To fix it:
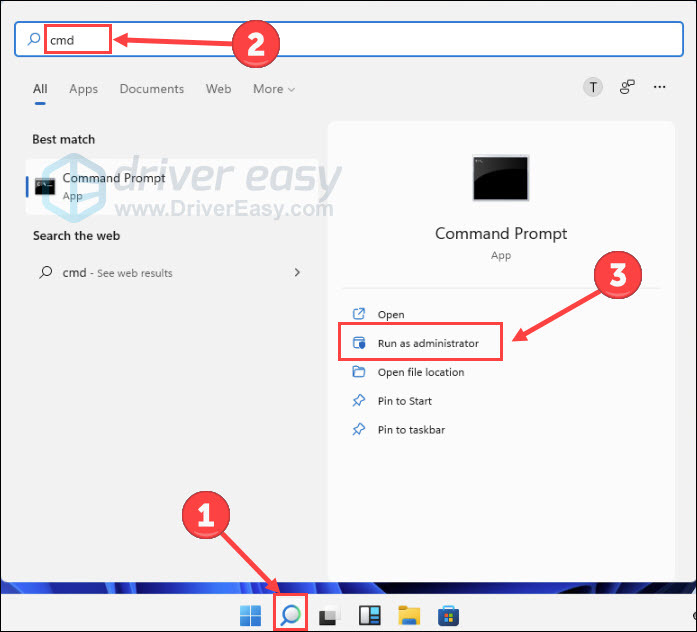
- Type cmd on the Windows search bar. Click Run as an administrator.
- Copy and paste the following commands. Hit Enter after each.
ipconfig /releaseipconfig /renewipconfig /flushdns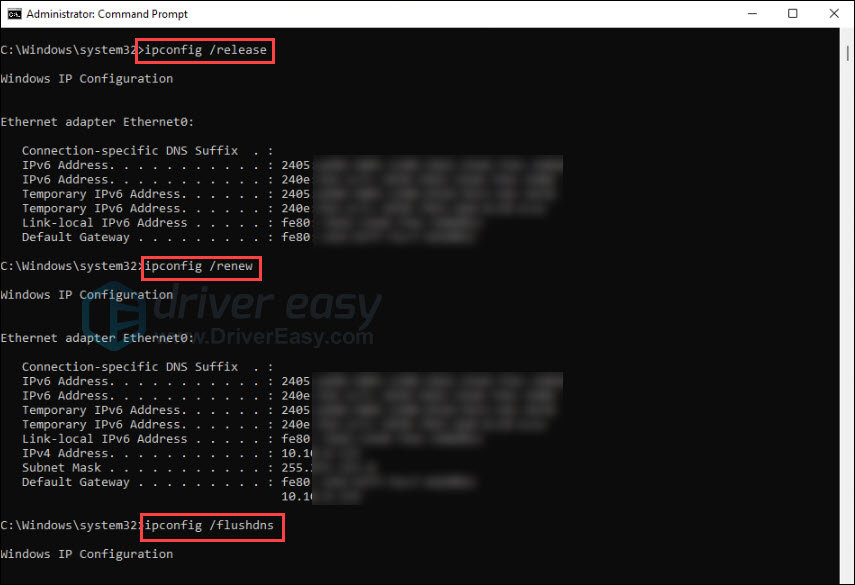
Try to connect the network again. If it fails to solve your problem, continue to try the next one.
Fix 5 Diagnose your network
Nowadays, most computers have built-in tools to scan and fix problems for you. If your computer has no Internet access, you can try to diagnose the network.
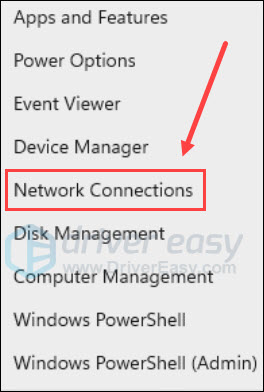
- Press the Windows logo key and X on the keyboard. And then click Network Connections.
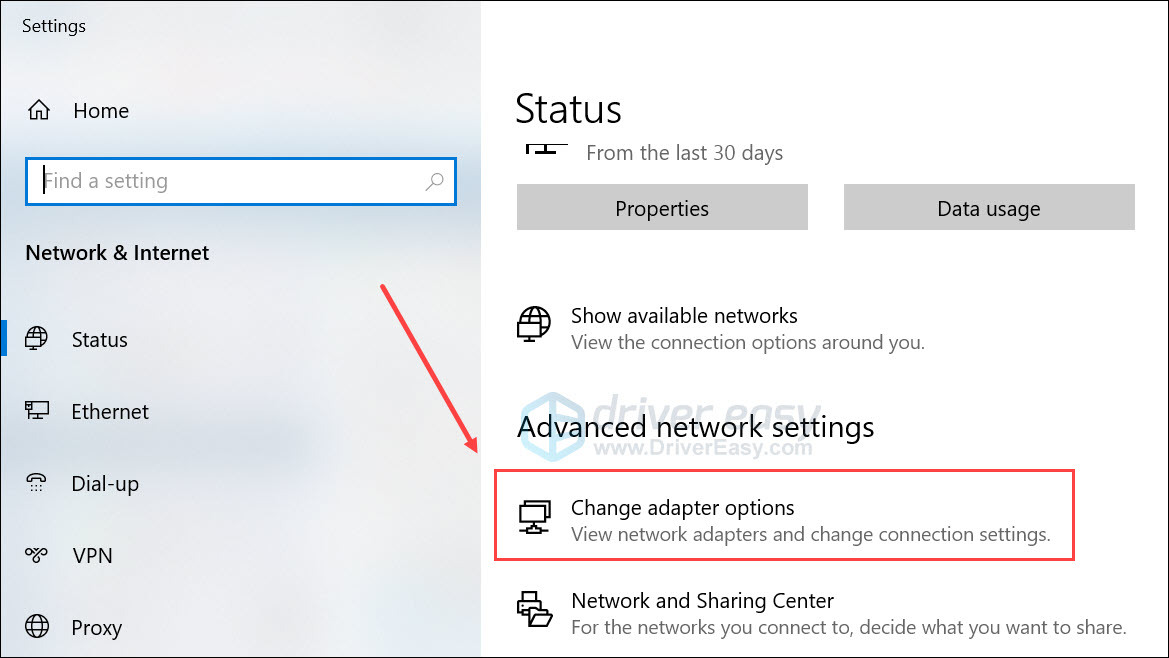
- Click Change adapter options.
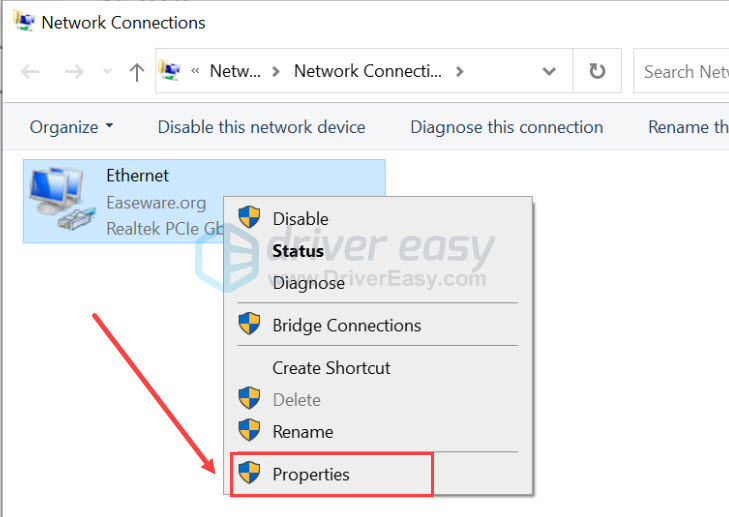
- Select your Internet and click Diagnose this connection.

Wait for the tools to diagnose the problem for you.
Besides, this move changes the network adapter from a static IP address to DHCP (Dynamic Host Configuration Protocol). DHCP allows hosts to obtain required TCP/IP configuration information from a DHCP server, which may also be helpful for the unidentified network woe.
Fix 6 Change DNS server
Generally, your Internet service provider chooses the DNS server automatically for you. But sometimes things may go wrong. A misconfigured DNS server can prevent your PC from connecting to the Internet. Therefore, you can try to change the DNS server manually.
- Press the Windows logo key and X on the keyboard. Click Network Connections.
- Click Change adapter options.
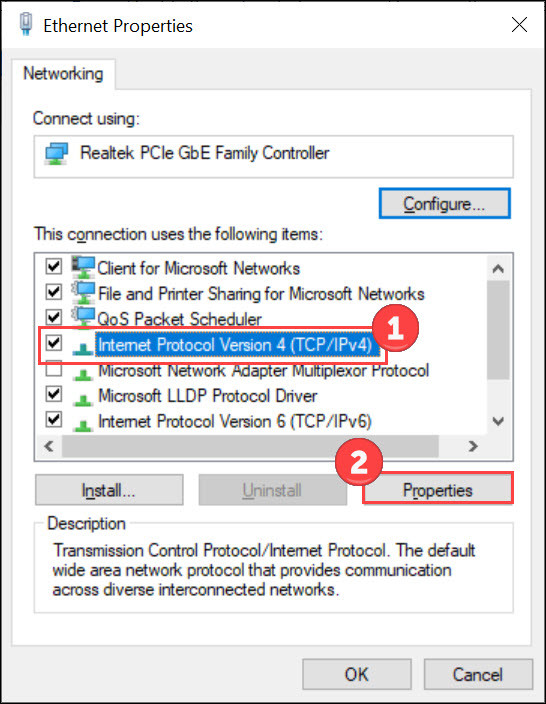
- Right-click your network and select Properties.
- Select Internet Protocol Version 4 (TCP/IPv4) and click Properties.
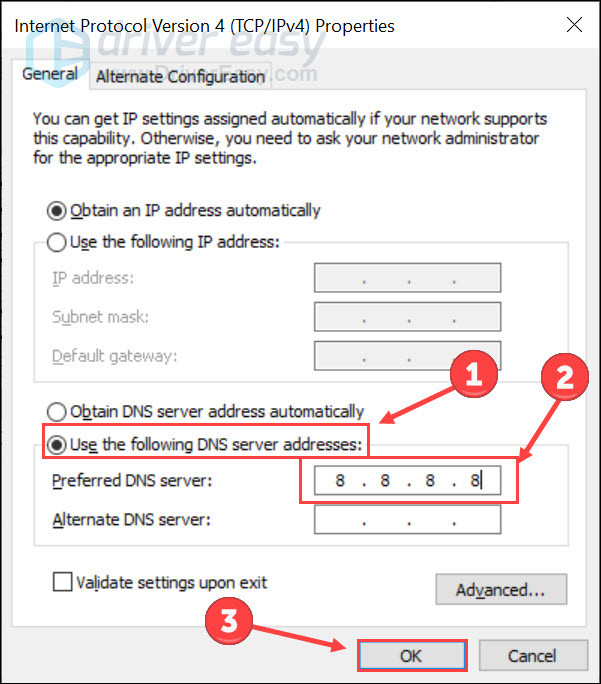
- Click Use the following DNS server addresses option. Then enter 8.8.8.8 or other public DNS server addresses (you can google it if you have a network). Click OK.
If you find it accessible to use the network, then you have solved this problem. If not, go ahead to try the next one.
Fix 7 Disable antivirus temporarily
Third-party antivirus protects your network connection all the time. It’s likely that they interfere with your setting and mess things up. To verify this issue, follow the steps below to disable your antivirus.
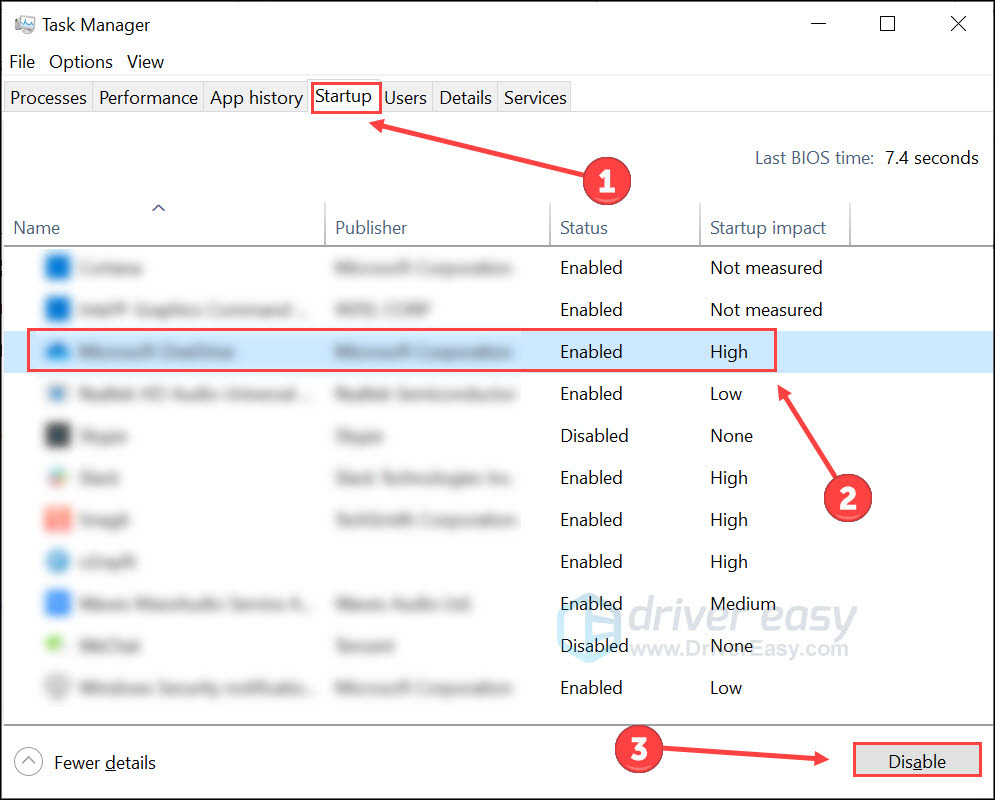
- Press Esc, Shift, and Ctrl on your keyboard to open Task manager.
- Select the Startup tab. Then select your antivirus and click Disable.
- Restart your computer and try the Internet connection again.
If you access the Internet successfully, replace your antivirus or consult their support team. If you want to undo the change, follow the steps above and click Enable rather than Disable.
That are all methods for solving the unidentified network problem in Windows 11. If you have any suggestions or questions, please don’t hesitate to leave a word below.