


If you have something important to do with the USB device connected to your Windows computer, but you keep getting the error saying USB device not recognized. This could be super frustrating. But you’re certainly not the only one. Luckily, you can remove the error message through the following solutions. Read on and see how.
Try these fixes:
Here are a few easy-to-apply methods that have helped other users resolve the USB device not recognized keeps popping up problem. You may not have to try them all; just work your way down the list until you find the one that works for you.
- Re-connect your USB device directly to your computer
- Run the Hardware and Devices troubleshooter
- Uninstall all your USB controller drivers
- Update your USB device and motherboard chipset drivers
- Disable the USB selective suspend feature
- Adjust your system settings
Method 1: Connect your USB device directly to your computer
If your USB device connected to your computer is misconfigured, the USB device not recognized error may keep popping up. The following simple steps could help you fix it:
- Unplug your USB device out of your computer.
- Restart your computer.
- Once your computer reboots into the Windows system, re-connect your USB device to your computer directly through the built-in USB port, that’s to say, please don’t use a USB hub to connect your USB device to your computer.
Check if the error disappears. If you don’t see the error pop up anymore, great! But if the error keeps still, proceed to try the following solutions…
Method 2: Run the built-in Hardware and Devices troubleshooter
The built-in Hardware and Devices troubleshooter can help you fix problems with devices connected to your computer. Run it to try to solve your USB device not recognized problem.
Here’s how you can do it:
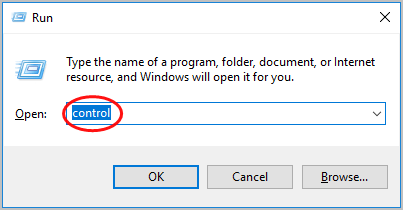
- On your keyboard, hold down the Windows logo key, then press R to bring up the Run box.
- Type control and press Enter.
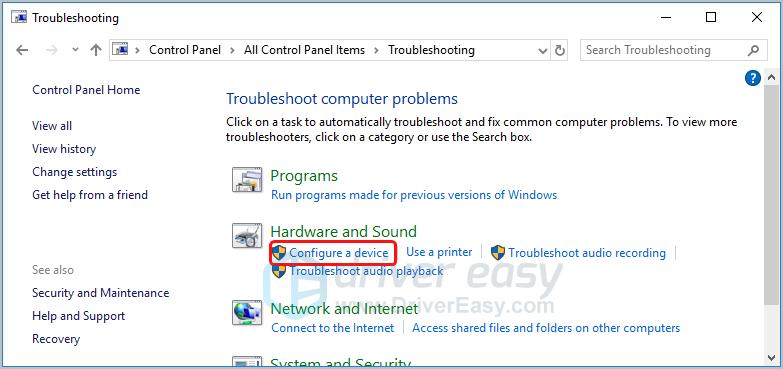
- Click Troubleshooting when View by Large icons are selected.
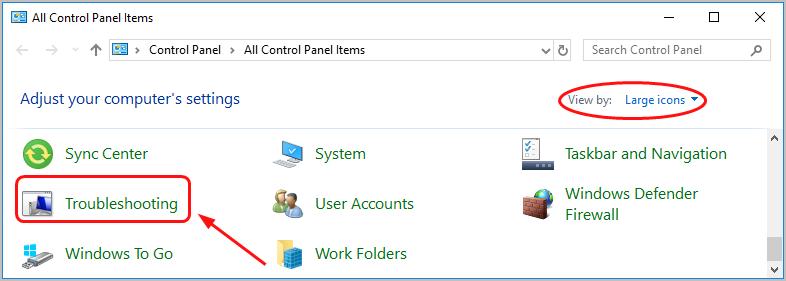
- Select Configure a device under the Hardware and sound section.
- Click Next.
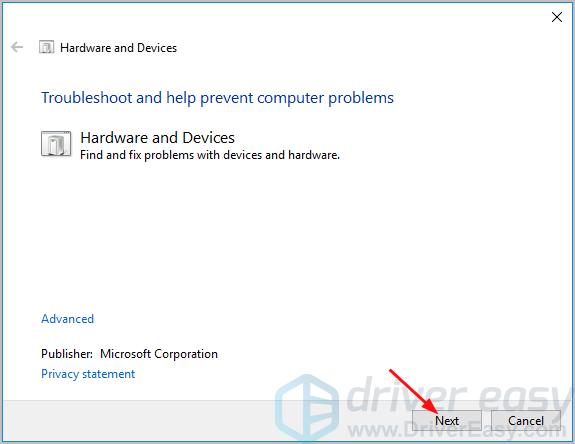
The troubleshooter would then be running automatically to detect and repair problems.
If you get rid of the error after running the troubleshooter, great! But if you’re prompted by the error again, don’t worry, you have something else to try…
Method 3: Uninstall and reinstall all your USB controller drivers
This problem could be also caused by your misconfigured USB controller drivers, uninstalling and reinstalling them could fix it.
See how to do it:
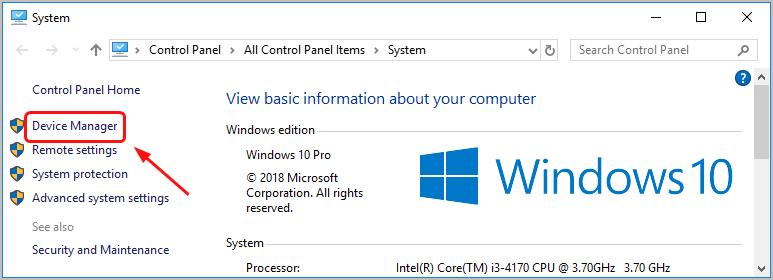
- On your keyboard, hold down the Windows logo key, then press Pause.
- Click Device Manager.
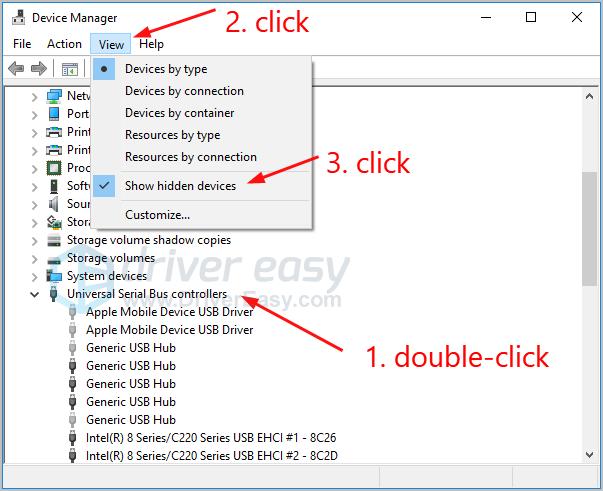
- Double-click Universal Serial Bus controllers. Proceed to click View, then select Show hidden devices.
- Right-click on your first USB controller driver under the Universal Serial Bus controllers section to select Uninstall device.
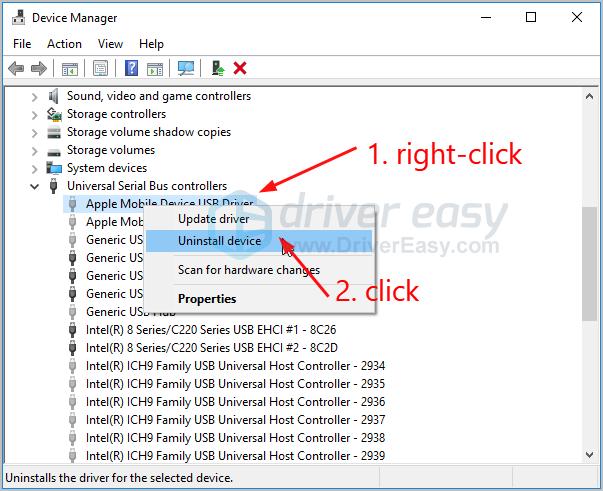
- Repeat the step 4 for all your other USB controllers drivers.
Once you uninstall all your USB controller drivers, restart your computer to let Windows reinstall the USB controller drivers automatically. Then check if the error still pops up.
Method 4: Update your USB device and motherboard chipset drivers
If your USB device and motherboard chipset drivers are outdated or corrupted, you might also keep getting the error. We highly recommend you update your USB device driver (if your USB device has the driver) and motherboard chipset driver to make your USB device work well.
There are two ways you can get the right driver for your USB device and motherboard chipset: manually or automatically.
Manual driver update – You can update your USB device and motherboard chipset drivers manually by going to the manufacturer’s website for both your USB device and motherboard and searching for the most recent correct drivers for them. Be sure to choose the only driver that is compatible with your variant of Windows system.
Automatic driver update – If you don’t have the time, patience or computer skills to update your USB device and motherboard chipset drivers manually, you can, instead, do it automatically with Driver Easy. Driver Easy will automatically recognize your system and find the correct driver for your devices, and your variant of Windows system, and it will download and install them correctly.
You can update your drivers automatically with either the 7 days free trial or the Pro version of Driver Easy. It takes just 2 clicks, and you get full support and a 30-day money-back guarantee with the Pro version:
- Download and install Driver Easy.
- Run Driver Easy and click the Scan Now button. Driver Easy will then scan your computer and detect any problem drivers.

- Click the Activate & Update button next to the flagged device to automatically download and install the correct version of this driver.
Or click Update All to automatically download and install the correct version of all the drivers that are missing or out of date on your system (You’ll need the Pro version for this – when you select Update All, you’ll get a prompt to upgrade. If you’re not prepared to purchase the Pro version yet, Driver Easy provides a 7-day trial at no cost, granting access to all Pro features like fast downloads and easy installation. No charges will occur until after your 7-day trial period ends.)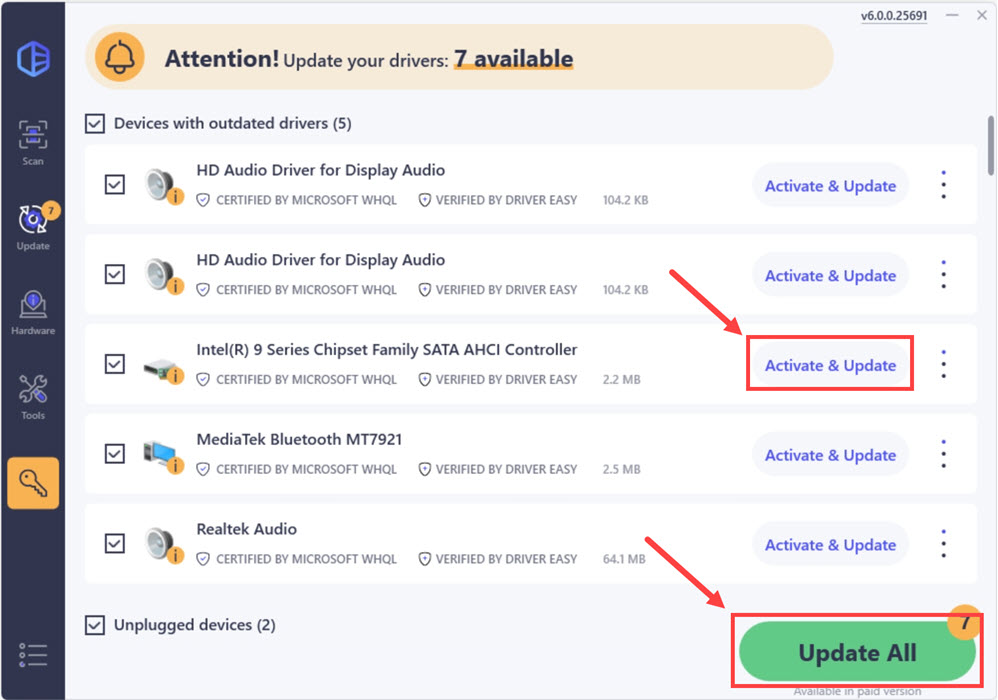
Restart your computer to see if the error disappears.
Method 5: Disable the USB selective suspend feature
The USB selective suspend feature helps conserve battery power which is useful in portable computers. But with it enabled, some problems sometimes might occur including your USB device not recognized problem. So disable the feature to try to solve your problem.
Here’s how you can disable the USB selective suspend feature:
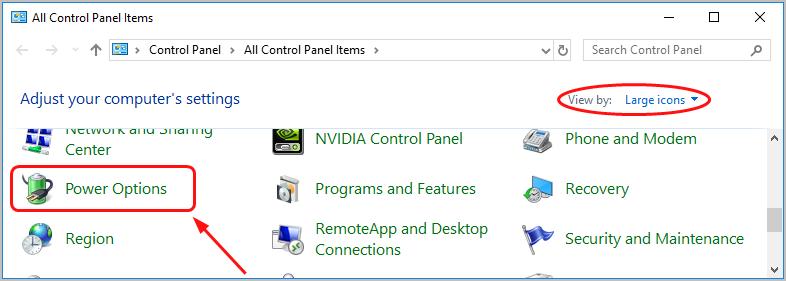
- On your keyboard, press the Windows logo key, then press R to bring up the Run box.
- Type control and press Enter.
- Click Power Options when View by Large icons are selected.
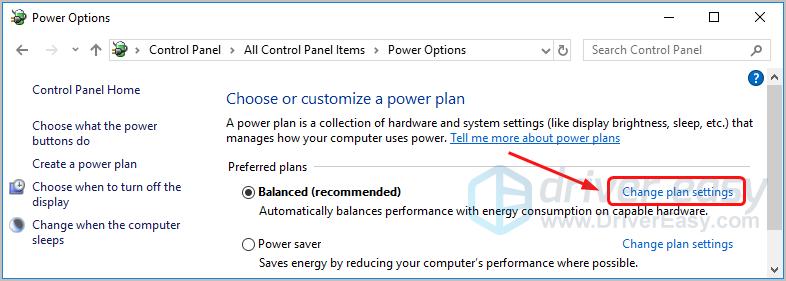
- Select Change plan settings of Balanced(recommended).
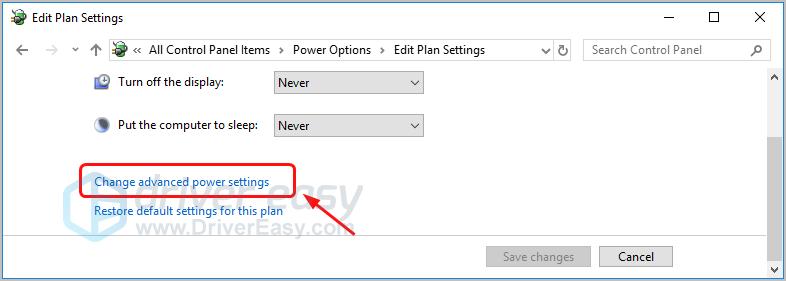
- Click Change advanced power settings.
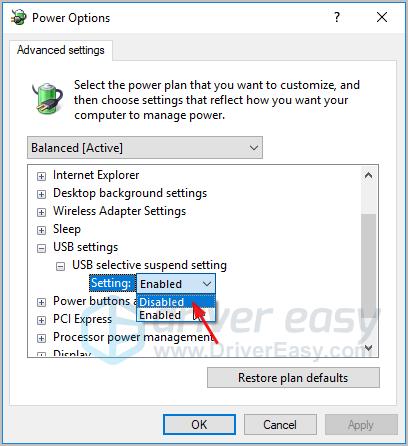
- Double-click USB settings > USB selective suspend setting.
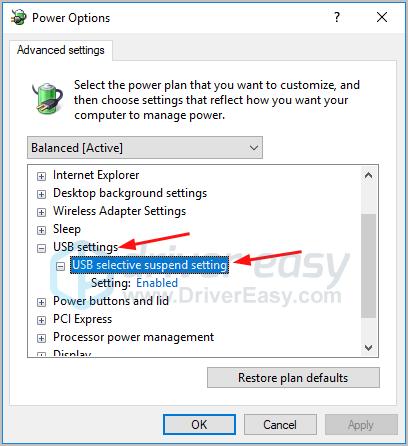
- Click Enabled, then select Disabled from the drop-down menu.
Note: If you’re on a laptop, there might be two Enable options to change, On battery and Plugged in.
Be sure to set both to Disabled.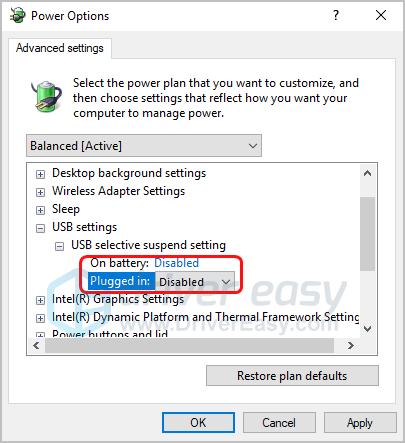
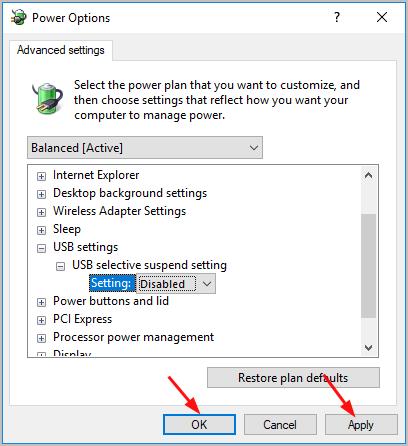
- Click Apply > OK to save your settings.
Check if the error disappears.
If till now, you don’t see the error message, congratulations! But if you’ve tried all the solutions above, you still see the annoying message, but your USB device works well, don’t give up hope, move on to the last solution here.
Method 6: Adjust your system settings
If your USB device works great without any problem, but the USB device not recognized message still keeps popping up, you can try adjusting your system settings.
See how to do it:
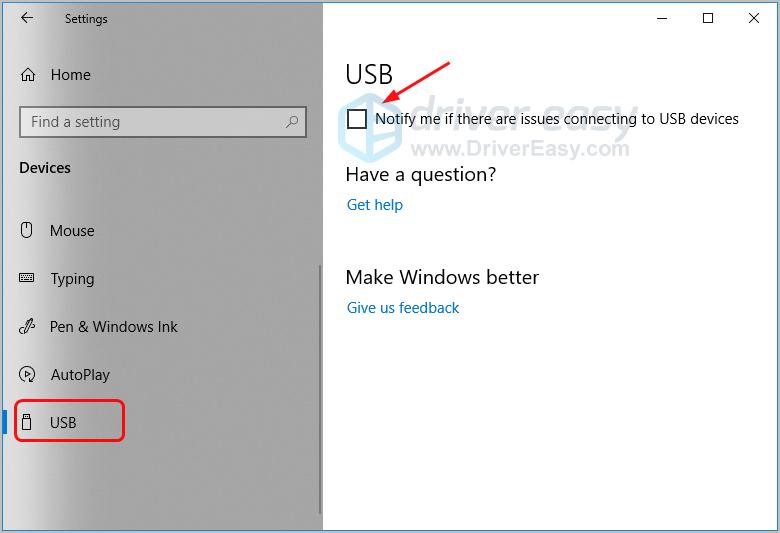
If you’re using Windows 10:
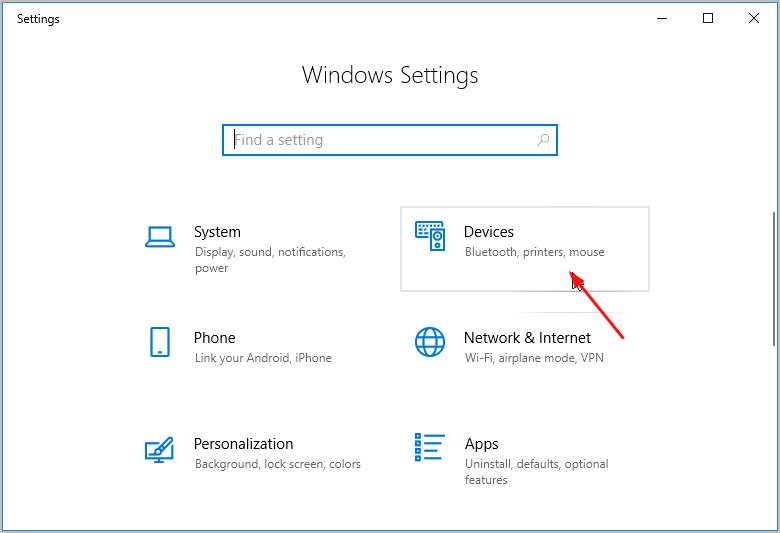
- On your keyboard, hold down the Windows logo key, then press I to bring up the Settings window.
- Click Devices.
- Select USB, then un-check Notify me if there are issues connecting to USB devices.
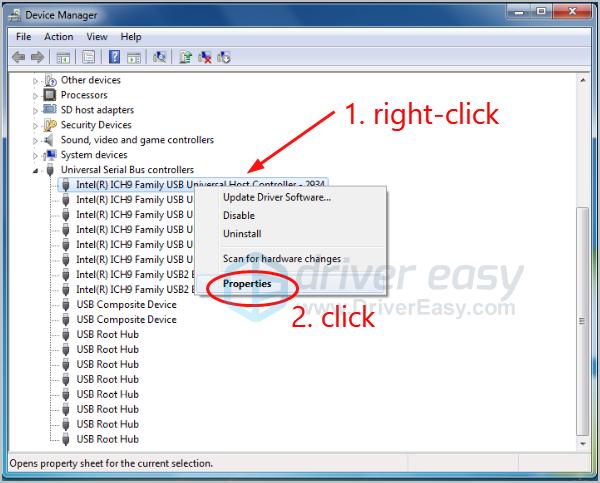
If you’re using Windows 7:
- On your keyboard, press the Windows logo key, then press Pause.
- Click Device Manager.
- Double-click Universal Serial Bus Controllers.
- Right-click on your first USB controller driver to select Properties.
- Click Advanced, then tick on Don’t tell me about USB errors. Click OK.
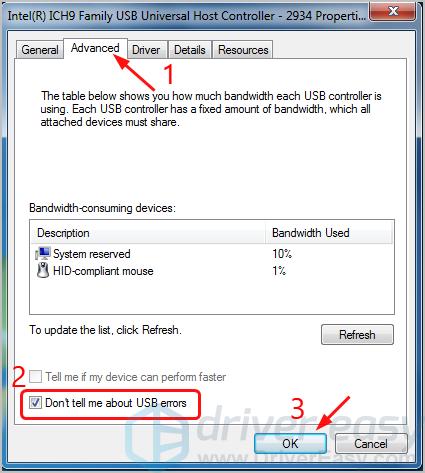
- Repeat Steps 4 & 5 for all your other USB controller drivers.
The USB device not recognized error message will not be shown any longer on your system.
That’s all there is to it. Hopefully it helps. Feel free to comment below with your own experiences.